Query parameters are used to pass data from the URL to the web server or browser. They are essential for customizing user experiences, filtering data, and tracking user actions.
Let’s learn how to easily get the query string parameters from a URL in a Next.js app.
Get URL query params in Next.js App Router client component
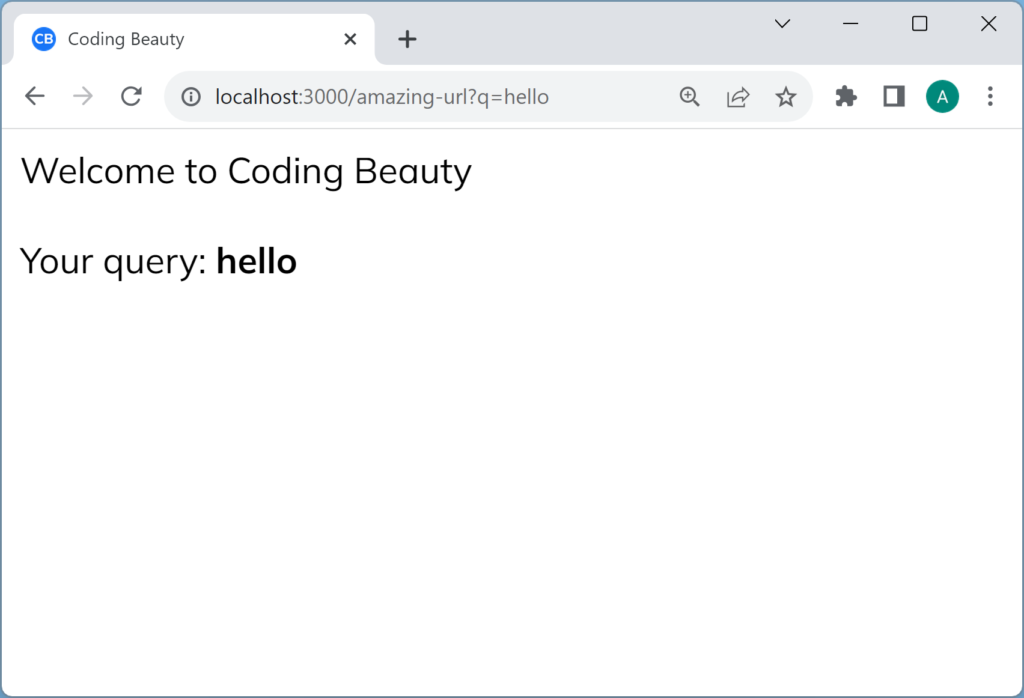
To get the URL query string parameters in the Next.js app directory, use the useSearchParams() hook from next/navigation.
app/amazing-url/page.tsxCopied!
'use client';

import { useSearchParams } from 'next/navigation';

export default function Home() {
  const searchParams = useSearchParams();

  const query = searchParams.get('q');

  return (
    <>
      Welcome to Coding Beauty
      <br />
      <br />
      Your query: <b>{query}</b>
    </>
  );
}
We need ‘use client’ to use useSearchParams()
Notice the 'use client' statement at the top.
It’s there because all components in the new app directory are server components by default, so we can’t use any client-side specific functionality like hooks and animations.
We’ll get an error if we try to do anything interactive with useSearchParams or other hooks like useEffect, because it’s a server environment.
Get URL query params in Next.js Pages Router component
To get the URL query string parameters in pages directory component, use the query property of the useRouter() hook, which comes from the next/router module:
pages/coding-tips.tsxCopied!
import Head from 'next/head';
import { useRouter } from 'next/router';

export default function Home() {
  const router = useRouter();
  const greeting = router.query.greeting;

  return (
    <>
      <Head>
        <title>Coding Tips | Coding Beauty</title>
        <meta name="description" content="Generated by create next app" />
        <meta name="viewport" content="width=device-width, initial-scale=1" />
        <link rel="icon" href="/favicon.icon" />
      </Head>
      <main>
        <h2>{greeting}</h2>
        <p>Appreciate the beauty of coding</p>
      </main>
    </>
  );
}
Get URL query params in Next.js middleware
To get the URL query string parameters in Next.js App or Pages Router middleware, use the request.nextUrl.searchParams property:
middleware.tsCopied!
import { NextResponse } from 'next/server';
import { NextRequest } from 'next/server';

export function middleware(request: NextRequest) {
  const continueUrl =
    request.nextUrl.searchParams.get('continue')!;
  return NextResponse.redirect(continueUrl);
}
Get URL query params in Next.js server component
To get the URL query params in a server component, se the URL as a header in middleware, then parse this URL in the server component to get the query string and parameters:
middleware.tsCopied!
import { NextResponse } from 'next/server';
import { NextRequest } from 'next/server';

export function middleware(request: NextRequest) {
  const reqHeaders = new Headers(request.headers);

  // toLowerCase() to avoid 404 due to Next.js case-sensitivity
  const url = request.url.toLowerCase();

  reqHeaders.set('x-url', url);

  return NextResponse.next({
    request: {
      headers: reqHeaders,
    },
  });
}
app/search/page.tsxCopied!
import { headers } from 'next/headers';

export default function Page() {
  const headerList = headers();
  const url = headerList.get('x-url')!;
  const query = new URL(url).searchParams.get('q');

  return (
    <>
      <h2>Welcome to Coding Beauty.</h2>
      <p>Your query: {query}</p>
    </>
  );
}
Get URL query params in getServerSideProps()
To get the URL query string params in the Pages Router getServerSideProps() function, use the context.query property:
Unsound null safety was a special Dart/Flutter feature where there are no static checks to ensure that we don’t access nullable variables – variables that may be null.
It allowed developers to migrate their codebase to the default null safety gradually without breaking existing code that depended on null-unsafe libraries.
But from version 3.0 upwards, Dart only supports code using sound null safety.
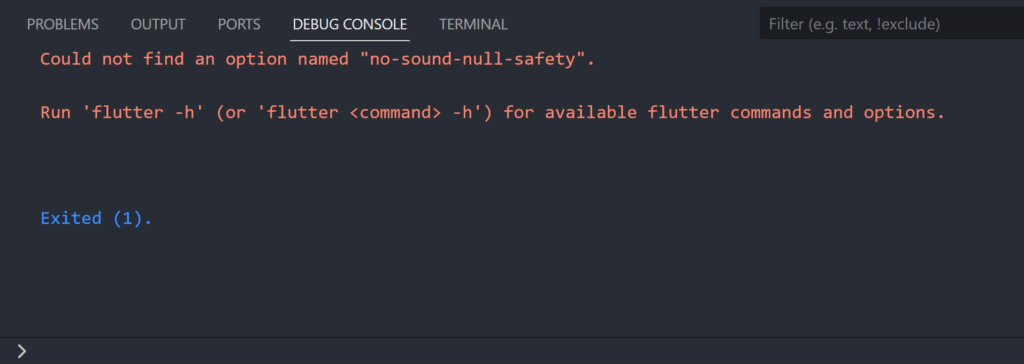
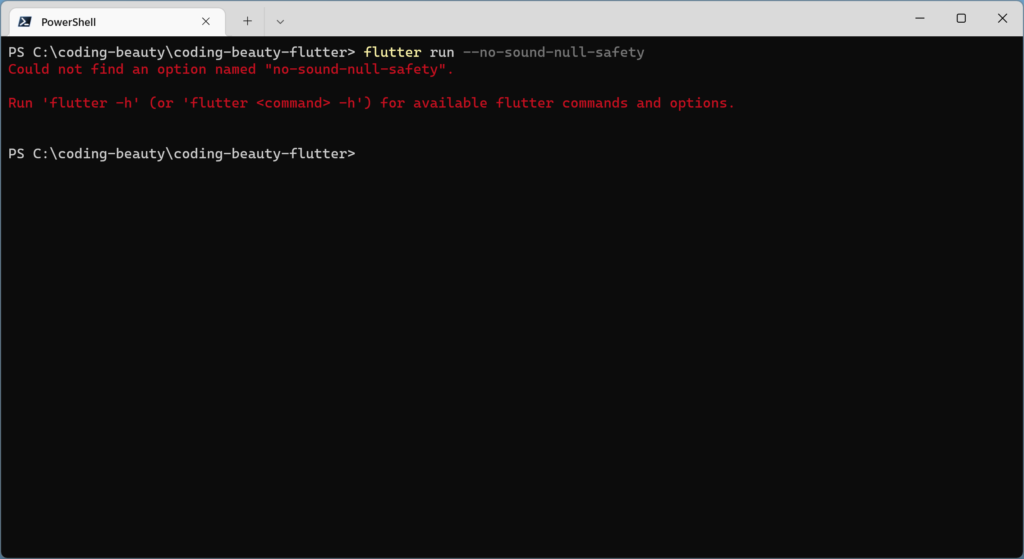
Fix “Could not find an option named no-sound-null-safety” (general)
To fix the “Could not find an option no-sound-null-safety” Flutter error, remove the --no-sound-null-safety option in your flutter run command.
Fix “Could not find an option named no-sound-null-safety” in VS Code
To fix the error in Visual Studio Code remove the --no-sound-null-safety option in the Dart: Flutter Additional Args setting.
You can use the Ctrl + , keyboard shortcut to quickly open the Settings page.
You can also install the package as a development dependency, which indicates that the package is only used for development, and won’t be needed by the app itself. Packages like nodemon and ts-node fit this category:
If it’s a third-party module, installing the type definitions from NPM should help. For example:
JavaScriptCopied!
npm i @types/express
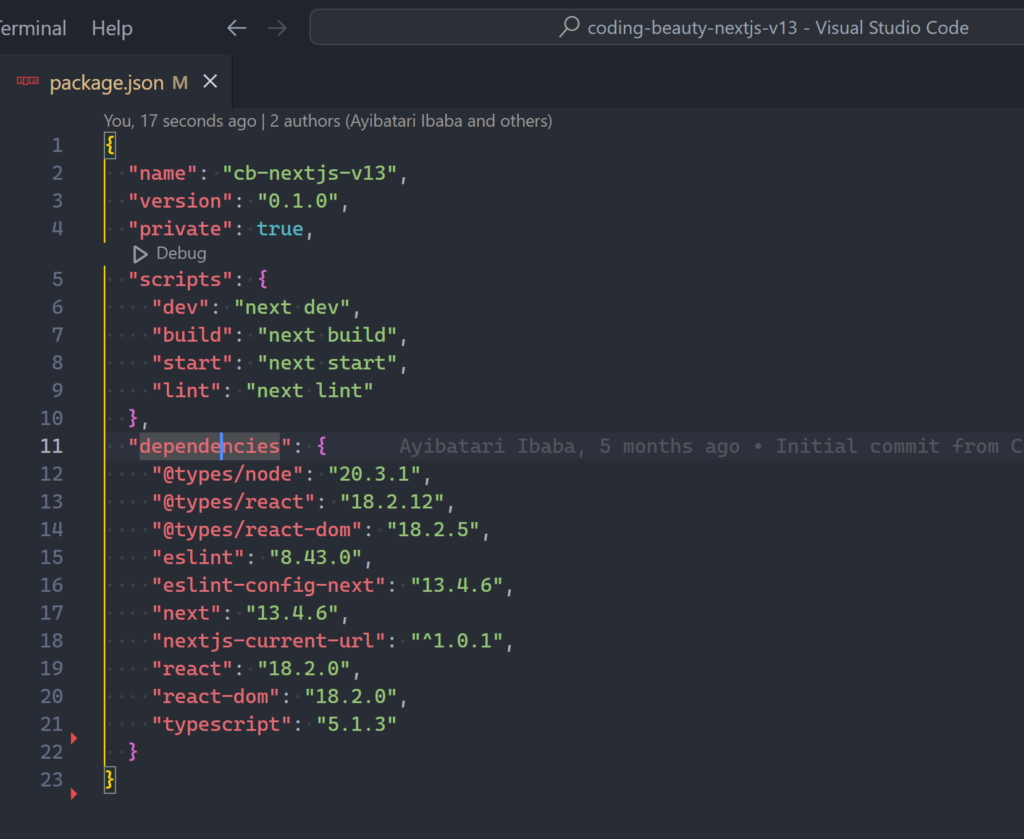
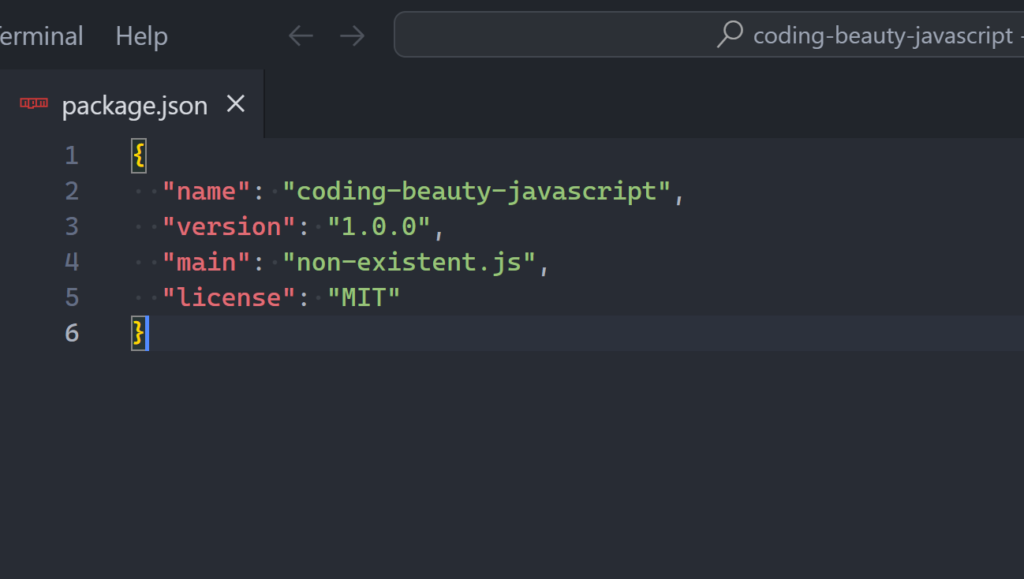
5. Ensure package.jsonmain file exists
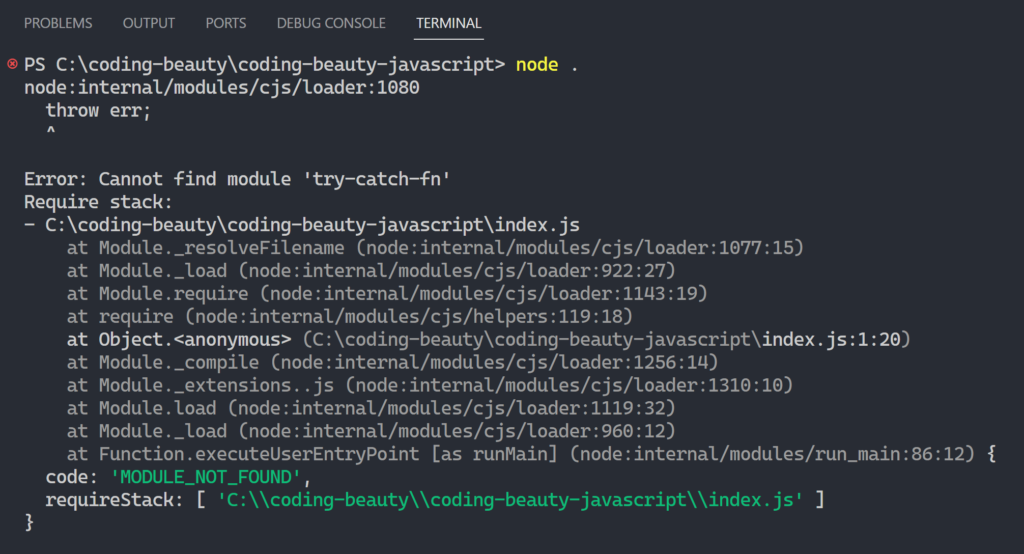
You may encounter the “Cannot find module” error in Node.js if the main field of your package.json file doesn’t exist.
6. npm link package
You can also try the npm link command on the package to fix the MODULE_NOT_FOUND error, for example:
ShellCopied!
npm link create-react-app

npm link webpack
npm link is a command that connects a globally installed package with a local project using a symbolic link.
It enables working on a package locally without publishing it to the npm registry or reinstalling it for every change. Executing npm link in the package directory establishes a symbolic link in the global node_modules directory, directing to the local package.
Afterwards, npm link <package-name> can be used in the project to link the global package with your local project.
7. Ensure correct NODE_PATH
In older Node.js versions, you may be able to fix the “Cannot find module” error by setting the NODE_PATH environment variable to correct node_modules installation folder.
NODE_PATH is a string of absolute paths separated by colons used by Node.js to locate modules when they can’t be found elsewhere.
It was initially created to enable the loading of modules from different paths when there was no defined module resolution algorithm.
And it’s still supported, but it’s not as important anymore since the we’ve established a convention for finding dependent modules in Node.js community.
To fix the “Command not found” error in a VS Code extension, make sure your extension registers the command under the contributed field in your package.json file:
2. Register command in package.jsonactivationEvents
To fix the “Command not found” error in a VS Code extension, make sure you’re added the command to the activationEvents array in your package.json file:
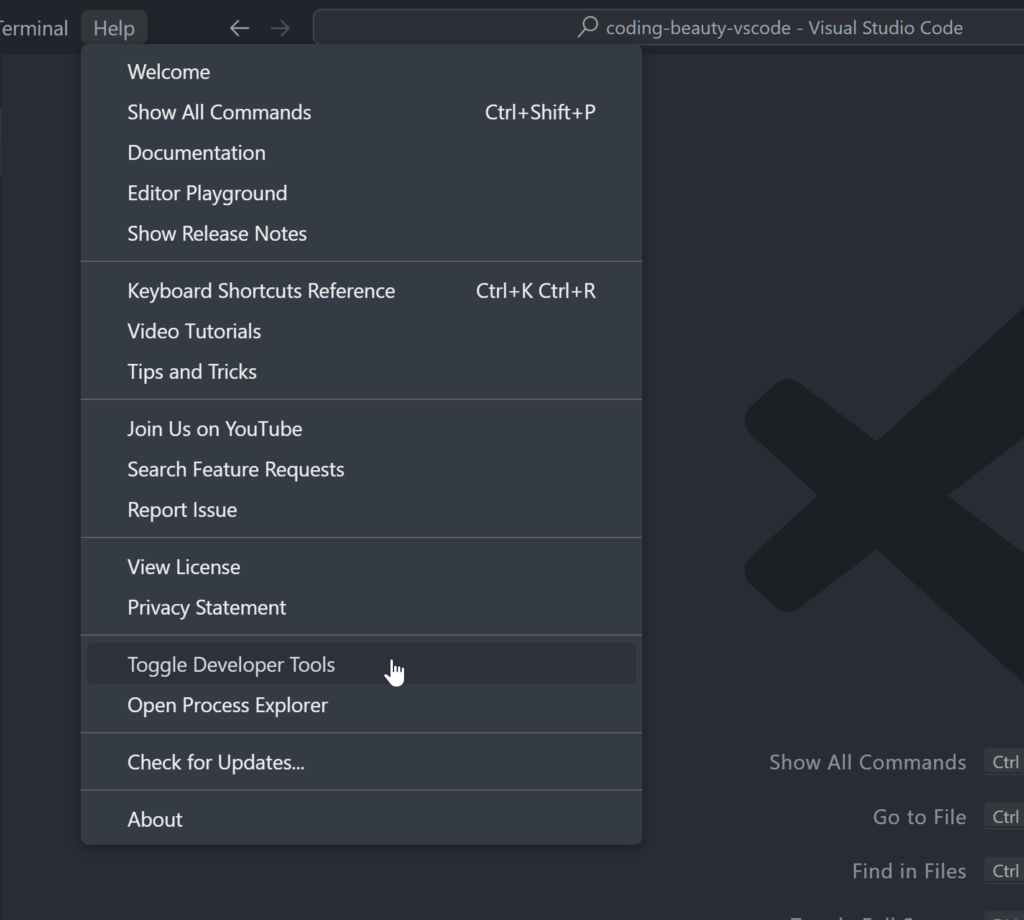
One common cause of “Command not found” error in a VS Code extension is an undetected JavaScript error. You may find such errors when you examine the VS Code console logs.
Head to the Help menu and select Toggle Developer Tools and inspect the console for potential errors.
4. Register command in extension.tsregisterCommand()
To fix the “Command not found” error in a VS Code extension, make sure you’re registered the command in extension.ts using vscode.commands.registerCommand():
JavaScriptCopied!
// ...

export async function activate(context: vscode.ExtensionContext) {
  // ...

  // commandAction is a callback function
  context.subscriptions.push(
    vscode.commands.registerCommand('command_name', commandAction)
  );

  // ...
}
5. Compile TypeScript source manually
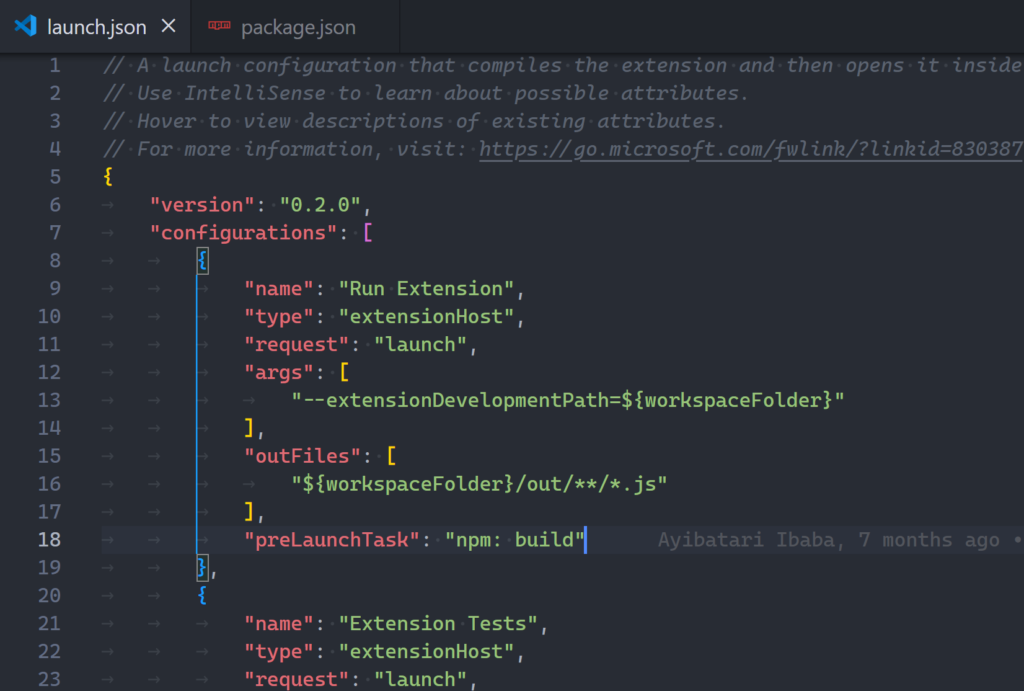
The “Command not found” error happens in a VS Code extension if the TypeScript source wasn’t compiled to the out folder before launch or build.
This typically indicates a problem with your VS Code debug configuration, for example, preLaunchTask may be missing from launch.json:
launch.json should have a preLaunchTask which builds the TypeScript files automatically.
Or there may be a problem with the build script in package.json.
To fix the “Command not found” error in an extension, update VS Code to a version higher that what is specified in the engines.vscode field of your package.json file.
Or, downgrade engines.vscode to a version equal to or lower than the VS Code version you’re using to run the extension.
The EAI_AGAIN error happens during an NPM, Yarn, or PNPM installation when the target server or DNS server doesn’t respond within a set time limit. This could happen due to network congestion, DNS server failures, or other connection issues.
Let’s explore some effective methods for quickly fixing the EAI_AGAIN error.
One simple and effective method can be to switch to a faster internet connection. Steer clear of activities that could consume additional data and leave less bandwidth for the package manager. This includes closing all unnecessary browser tabs and other data-consuming applications.
3. Retry command
Quite frequently, the EAI_AGAIN error can be temporary due to brief DNS server issues or network instability. Simply retrying the NPM/Yarn/PNPM command may solve the problem.
4. Clear package manager cache
In NPM and Yarn cache may also be a cause of the EAI_AGAIN error. Try retrying your command after clearing the cache with this command:
As with many other technical issues, sometimes a simple reboot of your computer or server can fix minor problems that may contribute to the error.
7. Disable VPN or proxy
Sometimes, using a VPN or proxy at the OS level makes your package manager have connection issues. In this case, try disabling your VPN or proxy and run the NPM/Yarn/PNPM command again.
8. Connect to another network
If you’re still facing the EAI_AGAIN error, switch to a completely different network. This can help bypass potential network-specific issues causing the error.
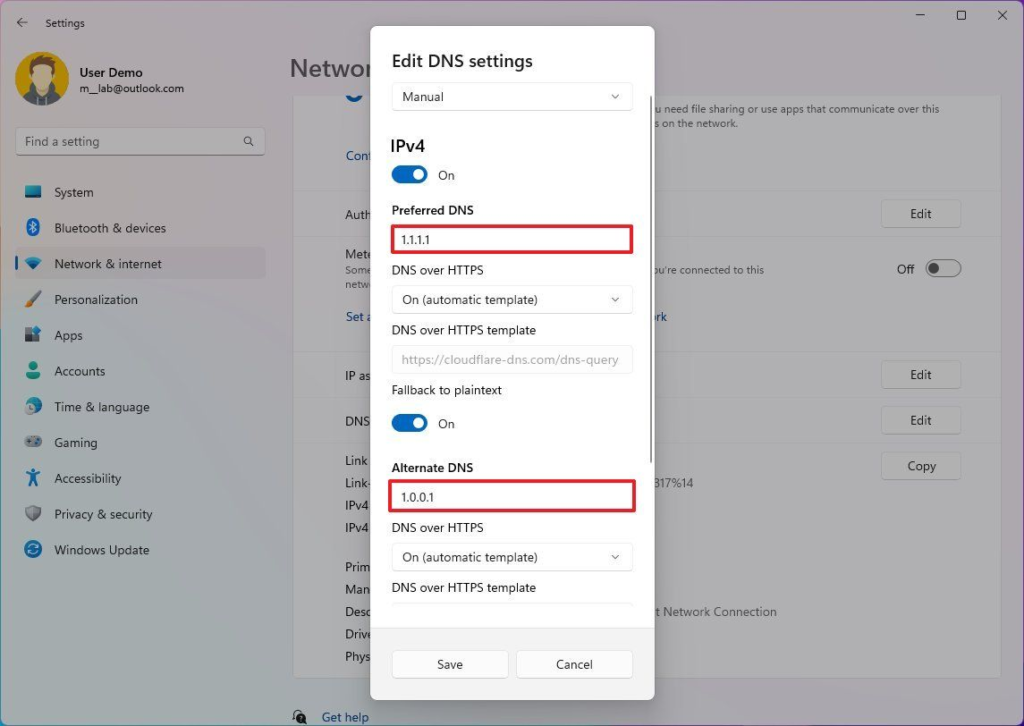
9. Flush DNS cache
Clearing your computer’s DNS cache can also help resolve DNS-related issues that may be causing the EAI_AGAIN error. On Windows, you can do this with ipconfig /flushdns. 4 Ways to Flush the DNS Cache to Fix Web Browsing Errors.
10. Release and renew IP address
Another plausible solution to the EAI_AGAIN error can be releasing and renewing your IP address. Your IP address is what connects your computer to your network, and sometimes a bad IP configuration could possibly cause network errors.
If the issue persists, try switching to a different NPM registry. For example, you can switch to the official NPM registry by running:
ShellCopied!
# NPM
npm config set registry https://registry.npmjs.org/

# Yarn Classic (v1)
yarn config set registry https://registry.npmjs.org/

# Yarn Berry (v2+)
yarn config set npmRegistryServer https://registry.npmjs.org/

# PNPM
pnpm config set registry https://registry.npmjs.org/
12. Temporarily disable antivirus or firewall
In some cases, security software like antivirus or firewall programs can interfere with network requests to NPM and cause the EAI_AGAIN error. Temporarily disable them and see if it resolves the issue.
13. Update package manager and Node.js
Make sure you are using the latest versions of Node.js and NPM, Yarn, or PNPM. You can update npm by running:
ShellCopied!
# NPM
npm i -g npm@latest

# Yarn
npm i -g yarn@latest

# PNPM
npm i -g pnpm@latest
14. Try again later
Finally, if none of the above works, it may be a temporary problem with the registry server – the only thing you can do in this case is to wait for a while and then retry. Patience can sometimes be the most effective solution.
The spread syntax (...) converts the set to an array for filter() to work.
The Set() constructor converts the result of filter() back to an Set.
Get symmetric difference between two sets
The method above only gives the elements in the second set that aren’t in the first.
JavaScriptCopied!
function getDifference(setA, setB) {
  return new Set(
    [...setA].filter((element) => !setB.has(element))
  );
}

const set1 = new Set([2, 4]);
const set2 = new Set([1, 2, 3, 4]);

// Every item in set1 is also in set2, but the sets are different
console.log(getDifference(set1, set2)); // {}
Sometimes you want this, especially if set2 is supposed to be a set1‘s subset.
But other times you may want to find the symmetric difference between the sets, regardless of which one comes first.
To do that, we simply merge the results of two getDifference() calls, each with the order of the Sets reversed.
JavaScriptCopied!
function getDifference(setA, setB) {
  return new Set(
    [...setA].filter((element) => !setB.has(element))
  );
}

function getSymmetricDifference(setA, setB) {
  return new Set([
    ...getDifference(setA, setB),
    ...getDifference(setB, setA),
  ]);
}

const set1 = new Set([2, 4]);
const set2 = new Set([1, 2, 3, 4]);

console.log(getSymmetricDifference(set1, set2)); // {1, 3}
console.log(getSymmetricDifference(set2, set1)); // {1, 3}
The “Cannot read property ‘classList’ of null” error happens in JavaScript when you try to access the classList property on an element that isn’t in the HTML DOM.
Let’s look at various ways to quickly fix this error.
Fix: Ensure correct selector
To fix the “Cannot read property ‘classList’ of null” error in JavaScript, ensure the correct selector accesses an existing HTML element.
HTMLCopied!
<div>Welcome to Coding Beauty</div>
<button class="btn-1">Be amazing</button>
Check for any mistakes in the selector symbols in the script. Check for any mistakes in the ID or class name in the HTML tag. Maybe you forgot to set that id or class attribute at all?
JavaScriptCopied!
// forgot the '.' symbol used for class selectors
const button = document.querySelector('btn-1');

console.log(button); // 👉️ undefined

// ❌ Uncaught TypeError: Cannot read properties of undefined (reading 'classList')
button.classList.add('active');
Fix: Ensure DOM load before .classList access
The “Cannot read property ‘classList’ of undefined” error also occurs when you try to access .classList on an element that the browser hasn’t added to the DOM yet.
Maybe because your <script> is in the <head> tag and executes before the element’s parsing:
HTMLCopied!
<!DOCTYPE html>
<html lang="en">
  <head>
    <title>Coding Beauty Tutorial</title>
    <!-- ❌ Script is run before button is declared -->
    <script src="index.js"></script>
  </head>
  <body>
    <div id="element">
      console.log('Easy answers to your coding questions and more...');
    </div>
  </body>
</html>
The script tag is placed in the <head> tag above where the div is declared, so index.js can’t access the div.
index.jsCopied!
const element = document.querySelector('.element');
console.log(element); // 👉️ undefined

// ❌ Uncaught TypeError: Cannot read properties of undefined (reading 'classList')
element.classList.add('highlight');
Solution: Move script to bottom
To fix the error in this case, move the script tag to the bottom of the body, after all the HTML elements have been declared.
HTMLCopied!
<!DOCTYPE html>
<html lang="en">
  <head>
    <title>Coding Beauty Tutorial</title>

  </head>
  <body>
    <div id="element">
      console.log('Easy answers to your coding questions and more...');
    </div>

    <!-- ❌ Script is run after element is added to the DOM -->
    <script src="index.js"></script>
  </body>
</html>
Now index.js will have access to the div and all the other HTML elements, because the browser would have rendered them by the time the script runs:
index.jsCopied!
const element = document.querySelector('.element');
console.log(element); // 👉️ undefined

// ✅ Works as expected
element.classList.add('highlight');
Solution: Access .classList in DOMContentLoaded event listener
Another way to fix the “cannot read property ‘addEventListener’ of null” error is to add a DOMContentLoaded event listener to the document and access the element in this listener.
HTMLCopied!
<!DOCTYPE html>
<html lang="en">
  <head>
    <title>Coding Beauty Tutorial</title>
    <!-- Script placed above accessed element -->
    <script src="index.js"></script>
  </head>
  <body>
    <div id="element">
      console.log('Coding is more than a means to an end...');
    </div>
  </body>
</html>
The DOMContentLoaded event fires when the browser fully parses the HTML, whether or not external resources like images and stylesheets have loaded.
So regardless of where we place the script, the code in the listener only runs after every element is active in the DOM.
index.jsCopied!
const element = document.querySelector('.element');
console.log(element); // 👉️ undefined

// ✅ Works as expected
element.classList.add('highlight');