
Setting the page title and meta description helps improve search engine visibility, increase click-through rates, and provide concise summaries of webpage content.
In this article, we’re going to learn how we easily set the page title and meta description in a Next.js project.
In this article
- Set static page title and meta description in Next.js App Router
- Set title and meta description dynamically in Next.js App Router
- Set page title and meta description in Next.js Pages Router (<= 12)
- Set page title and meta description dynamically in Next.js Pages Router (<= 12)
Set static page title and meta description in Next.js App Router
To set page title and meta description statically in Next.js 13’s app directory, create a Metadata object in a page.tsx file and export it:
import React from 'react';
import { Metadata } from 'next';

export const metadata: Metadata = {
  title: 'Coding Beauty',
  description:
    'codingbeautydev.com: Coding - the art, the science, and the passion.',
};

export default function Page() {
  return (
    <main>
      <h1>Welcome to Coding Beauty</h1>
    </main>
  );
}
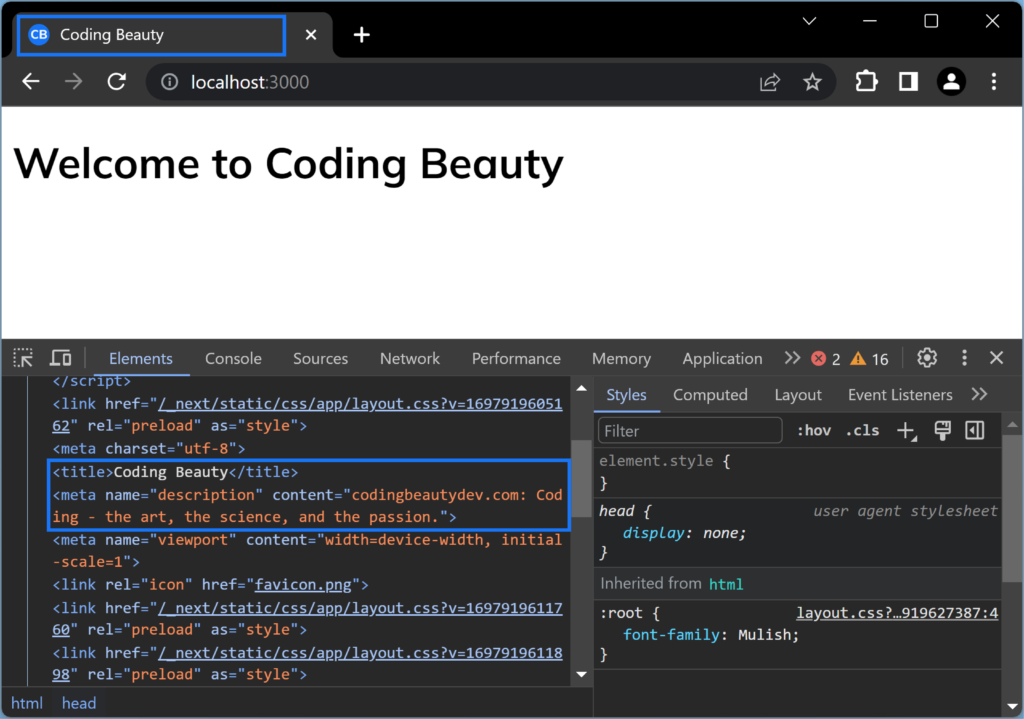
The tab will have this title, and the page will have a meta tag containing this description:
We can also do this in a layout.tsx to make every page using this layout have this title and meta description by default – if the page doesn’t have its own.
import { Metadata } from 'next';
import '@/styles/globals.css';

export const metadata: Metadata = {
  title: 'Coding Beauty',
  description: 'The official Coding Beauty home page.',
  icons: {
    icon: '/favicon.png',
  },
};

export default function RootLayout({
  children,
}: {
  children: React.ReactNode;
}) {
  return (
    <html lang="en">
      <body>{children}</body>
    </html>
  );
}
Set title and meta description dynamically in Next.js App Router
You can use the generateMetadata() function to set the page title and meta description using dynamic information we don’t know beforehand, like data from an API.
export function generateMetadata({ params }: Props): Promise<Metadata> {
  // fetch data with `params`

  // return a `Metadata` object
  return {
    title: post.name,
    description: post.description,
  }
}
Let’s look at a full example, where we fetch API data for a post in our hypothetical social media app, and we use generateMetadata() to set the page title and meta description for the page based on what we get from the endpoint URL.
import { Metadata } from 'next';

type Props = {
  params: { id: string };
};

export async function generateMetadata({
  params,
}: Props): Promise<Metadata> {
  const id = params.id;
  const url = `https://api.mysocialapp.com/posts/${id}`;

  const post = await fetch(url).then((res) => res.json());

  return {
    title: post.title,
    description: post.description,
  };
}

export default async function Page({ params }: Props) {
  const { id } = params;
  const url = `https://api.mysocialapp.com/posts/${id}`;

  // fetch again!
  // But don't worry, Next.js caches the `fetch()` calls
  const post = await fetch(url).then((res) => res.json());

  return (
    <>
      <h1>{post.title}</h1>
      <div>{post.content}</div>
    </>
  );
}
We fetch data from the same endpoint twice, one for the title and meta description, and another to display the title and other information to the actual users on the page.
Next.js caches the results of the fetch in generateMetadata() for use in Page to prevent multiple requests and avoid performance hits.
If you export a Metadata object and also have generateMetadata() function, Next.js will use generateMetadata()‘s return value.
Set page title and meta description in Next.js Pages Router (<= 12)
To set the page title and meta description in the Next.js pages directory, create a Head component, and place meta and title tags in it, like you would in vanilla HTML:
import Head from 'next/head';

export default function Home() {
  return (
    <>
      <Head>
        <title>Coding Beauty</title>
        <meta
          name="description"
          content="A brand all about coding passion and success"
        />
        <meta name="viewport" content="width=device-width, initial-scale=1" />
        <link rel="icon" href="/favicon.png" />
      </Head>
      <main>
        <h1>Welcome to Coding Beauty</h1>
      </main>
    </>
  );
}
We can also set the page title and meta description in your _app.tsx or _app.jsx file to make each page without a title or description use this as a default.
import '@/styles/globals.css';
import type { AppProps } from 'next/app';
import Head from 'next/head';

export default function App({ Component, pageProps }: AppProps) {
  return (
    <>
      <Head>
        <title>Coding Beauty</title>
        <meta
          name="description"
          content="A page on the Coding Beauty website"
        />
      </Head>
      <Component {...pageProps} />
    </>
  );
}
Set page title and meta description dynamically in Next.js Pages Router (<= 12)
You can also set the page title and meta description in the pages directory based on some data not known ahead of time.
For instance, to set the meta information based on API data, you’ll fetch the data in getServerSideProps and display it in the title and meta tags that are in the Head tag.
import { GetServerSideProps } from 'next';
import Head from 'next/head';

export const getServerSideProps: GetServerSideProps = async (context) => {
  const { params } = context;
  const { id } = params!;

  const result = await fetch(`api.mystore.com/books/${id}`);
  const { title, description, details } = await result.json();

  return {
    props: {
      title,
      description,
      details,
    },
  };
};

export default function Home(props: any) {
  const { title, description, details } = props;

  return (
    <>
      <Head>
        {/* 👇 set page title and meta description dynamically */}
        <title>{title}</title>
        <meta name="description" content={description} />

        <meta name="viewport" content="width=device-width, initial-scale=1" />
        <link rel="icon" href="/favicon.png" />
      </Head>
      <main>
        <h1>{title}</h1>
        <p>{details}</p>
      </main>
    </>
  );
}
11 Amazing New JavaScript Features in ES13
This guide will bring you up to speed with all the latest features added in ECMAScript 13. These powerful new features will modernize your JavaScript with shorter and more expressive code.