JavaScript has come a long way in the past 10 years with brand new feature upgrades in each one.
Still remember when we created classes like this?
JavaScriptCopied!
function Car(make, model) {
  this.make = make;
  this.model = model;
}

// And had to join strings like this
Car.prototype.drive = function() {
  console.log("Vroom! This " + this.make +
    " " + this.model + " is driving!");
};
Yeah, a lot has changed!
Let’s take a look at the 7 most significant features that arrived in ES10 (2019); and see the ones you missed.
1. Modularization on the fly: Dynamic imports
The ES10 year was the awesome year when import could now act as function, like require(). An async function.
Keeping imports at the top-level was no longer a must; We could now easily resolve the module’s name at compile time.
Loading modules optionally and only when absolutely needed for high-flying performance…
JavaScriptCopied!
async function asyncFunc() {
  if (condition) {
    const giganticModule = await import('./gigantic-module');
  }
}
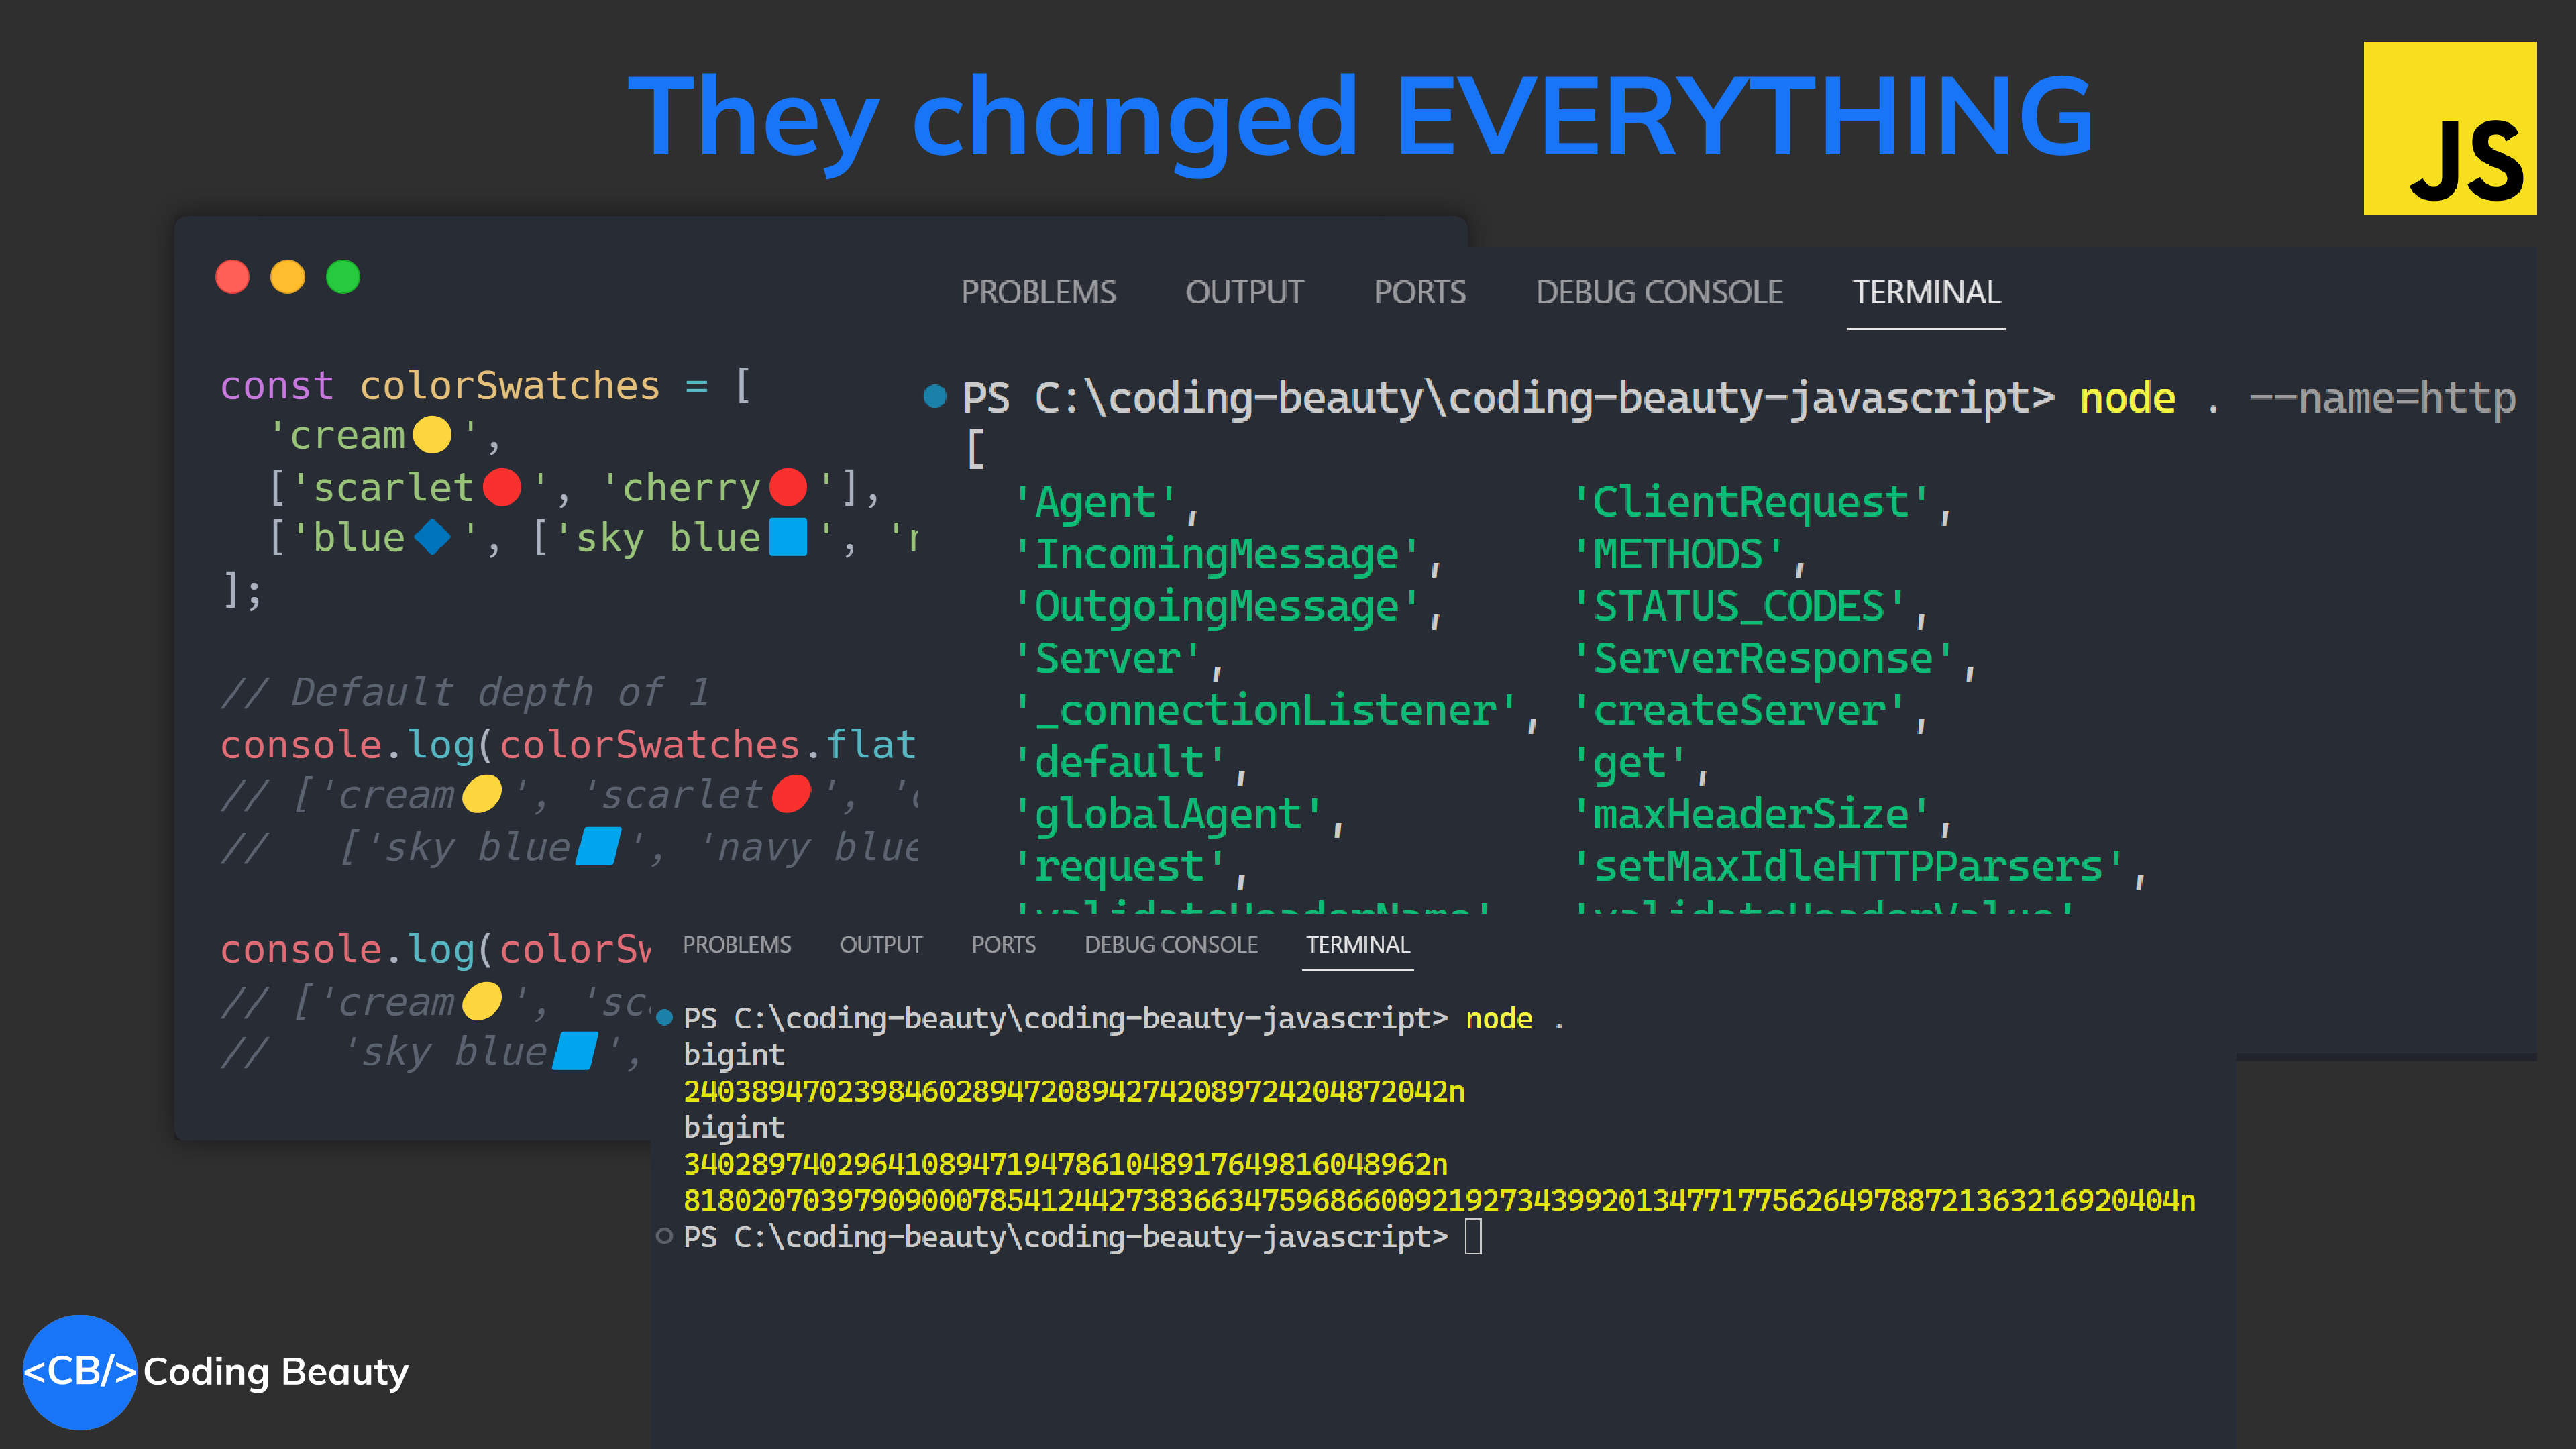
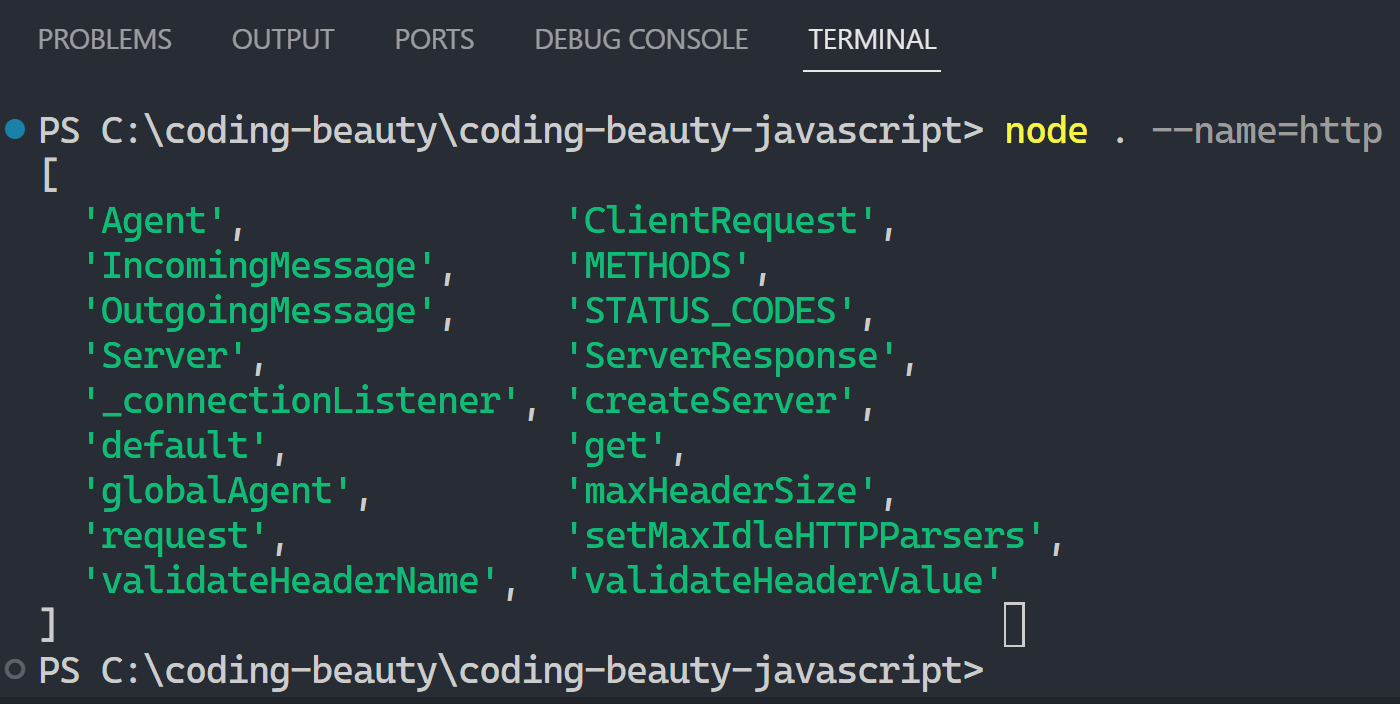
Loading modules based on user or variable input…
JavaScriptCopied!
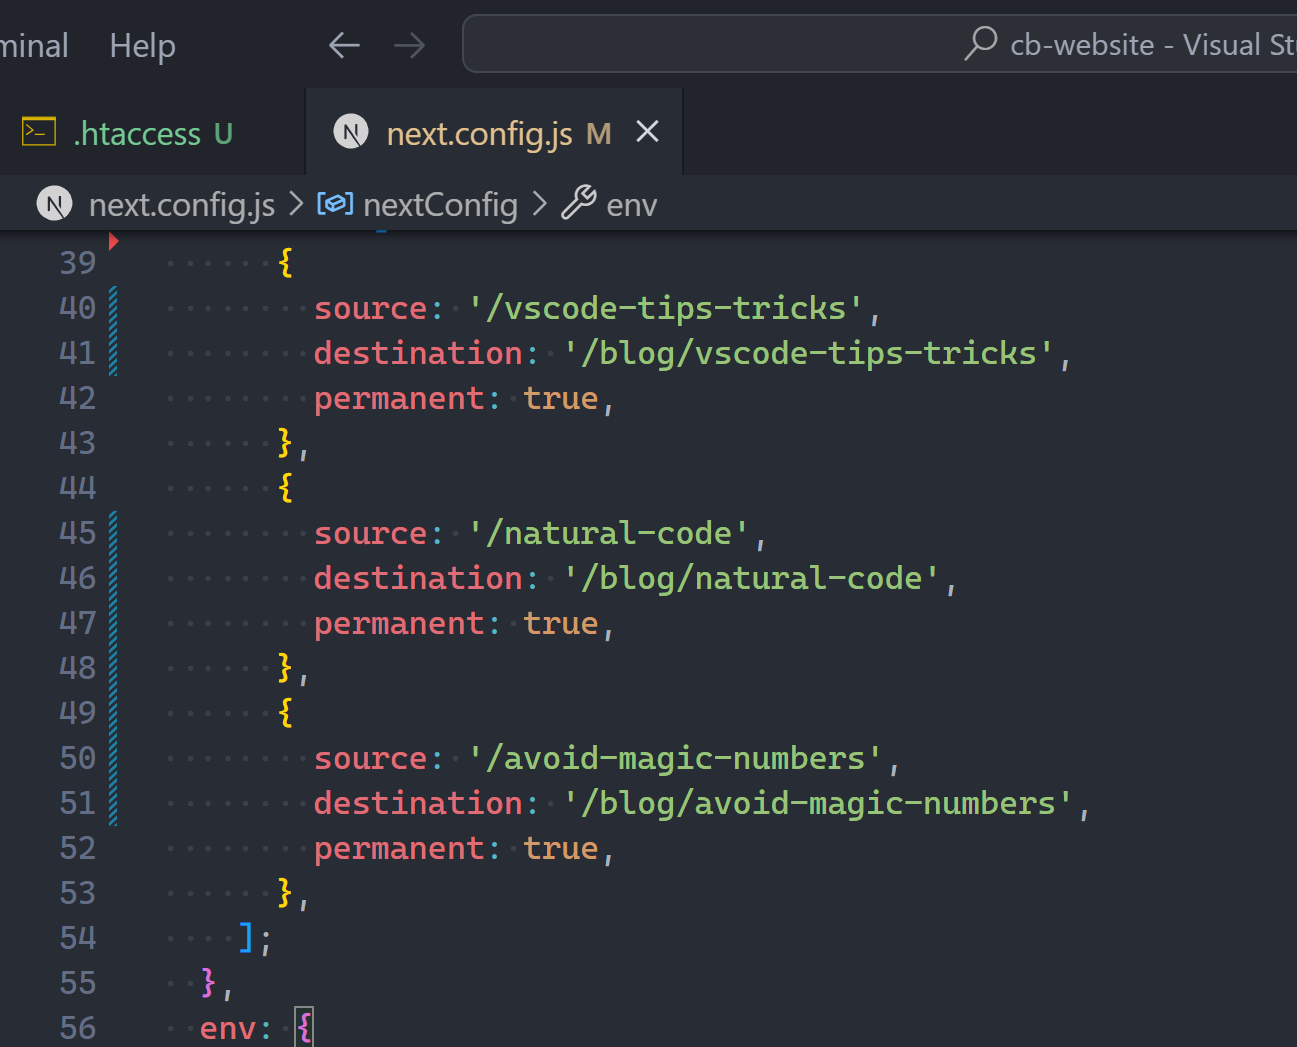
import minimist from 'minimist';

const argv = minimist(process.argv.slice(2));

viewModule(argv.name);

async function viewModule(name) {
  const module = await import(name);
  console.log(Object.keys(module));
}
It’s also great for using ES modules that no longer support require():
JavaScriptCopied!
// ❌ require() of ES modules is not supported
const chalk = require('chalk');
console.log(chalk.blue('Coding Beauty'));

(async () => {
  // ✅ Runs successfully
  const chalk = (await import('chalk')).default;
  console.log(chalk.blue('Coding Beauty'));
})();
2. Flattening the curve
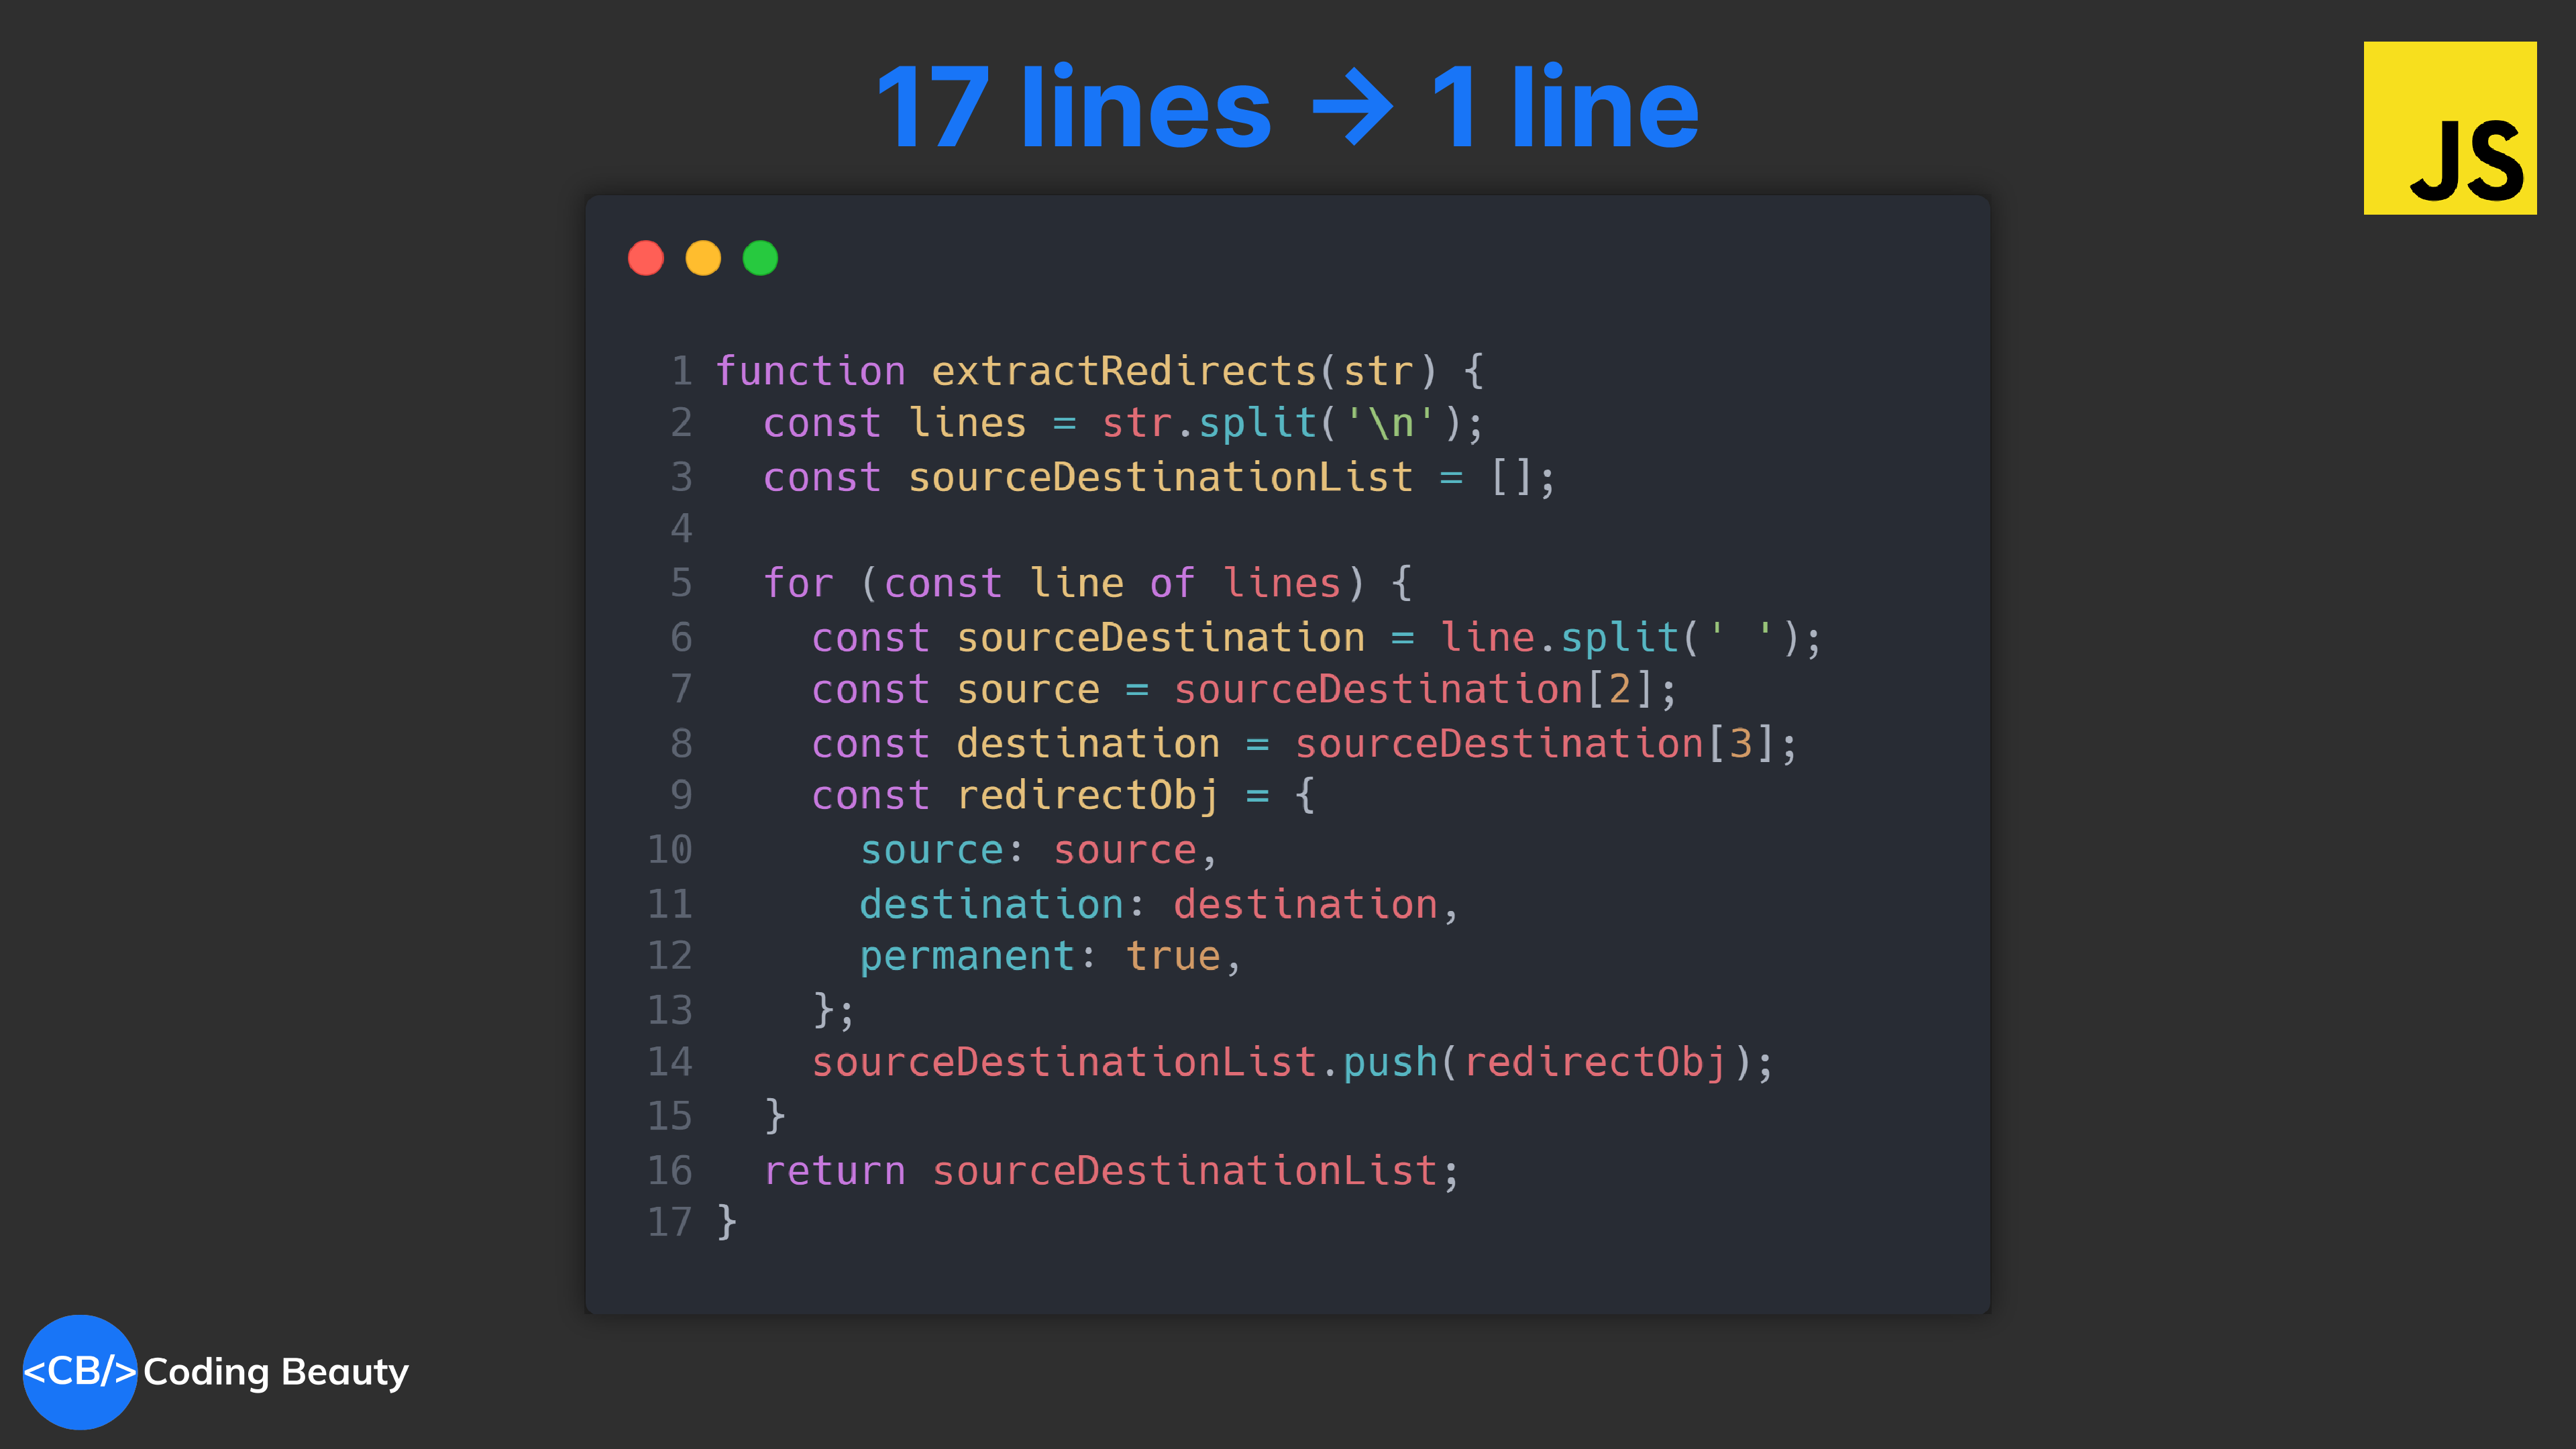
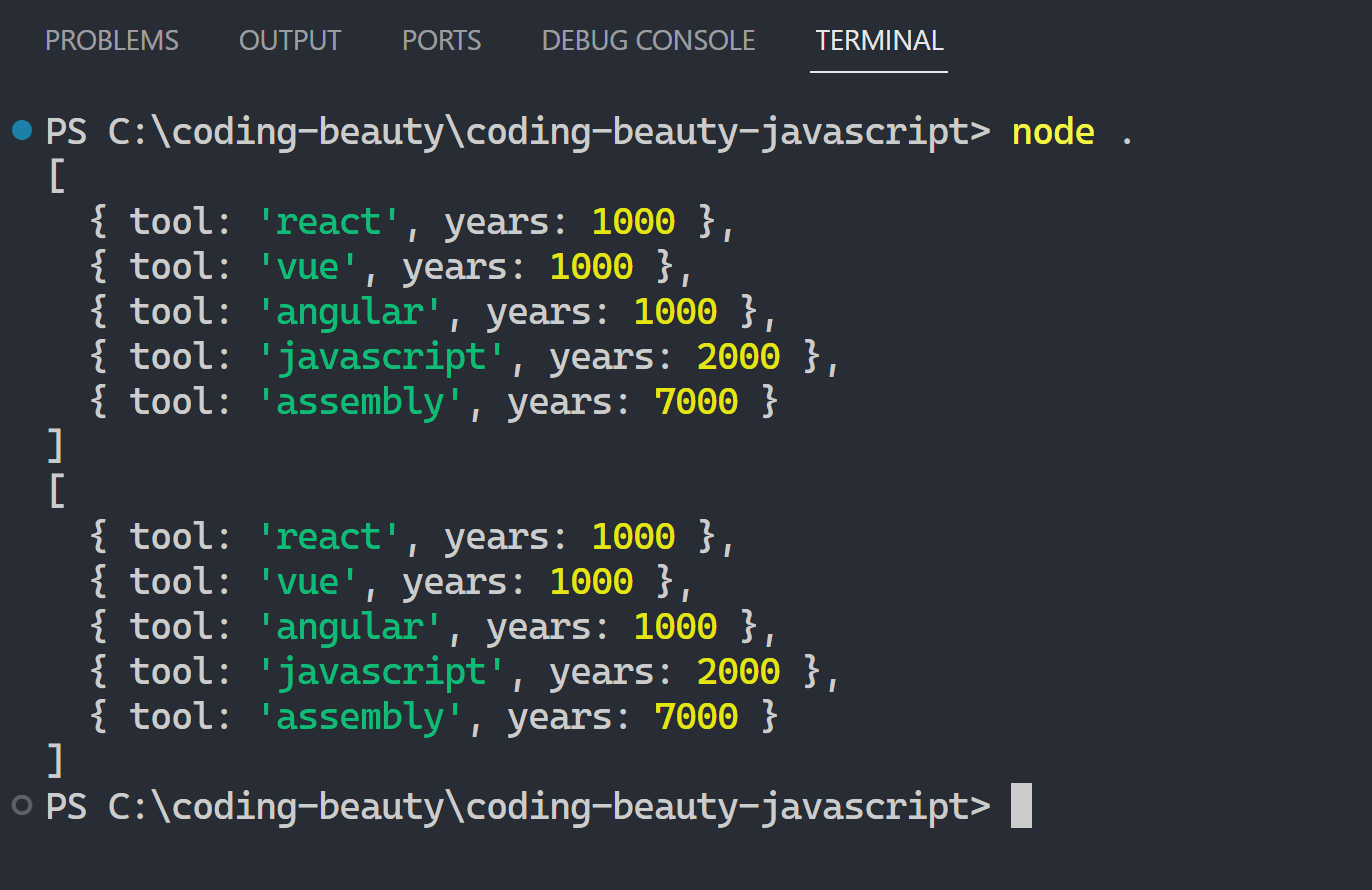
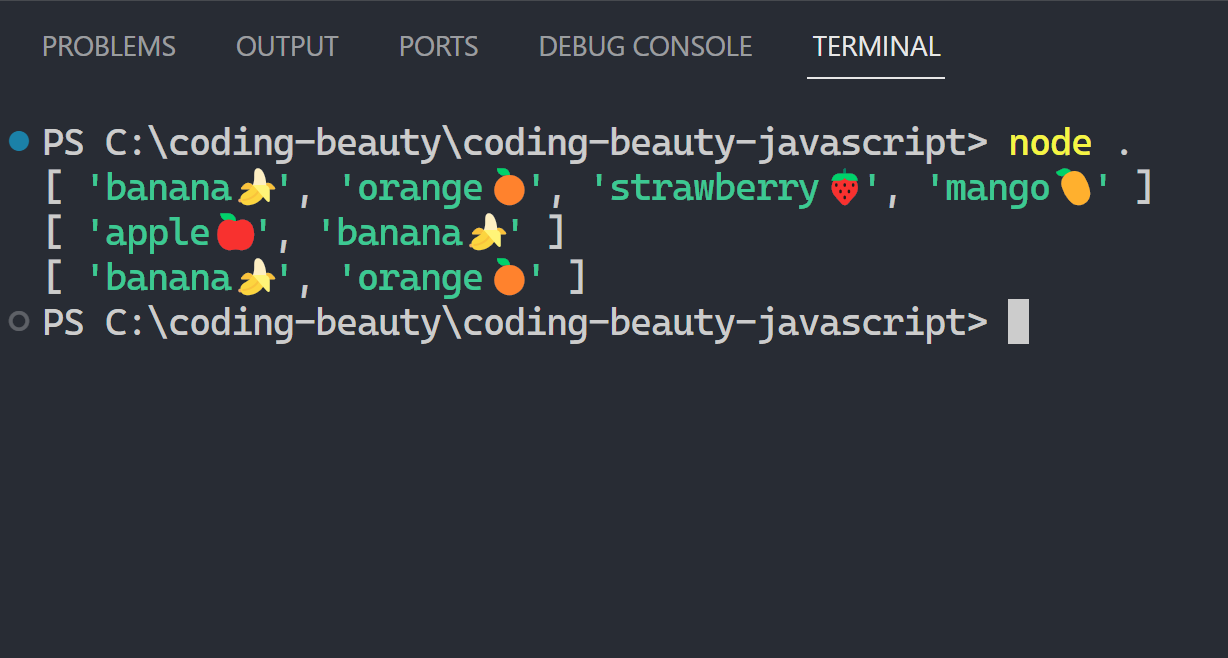
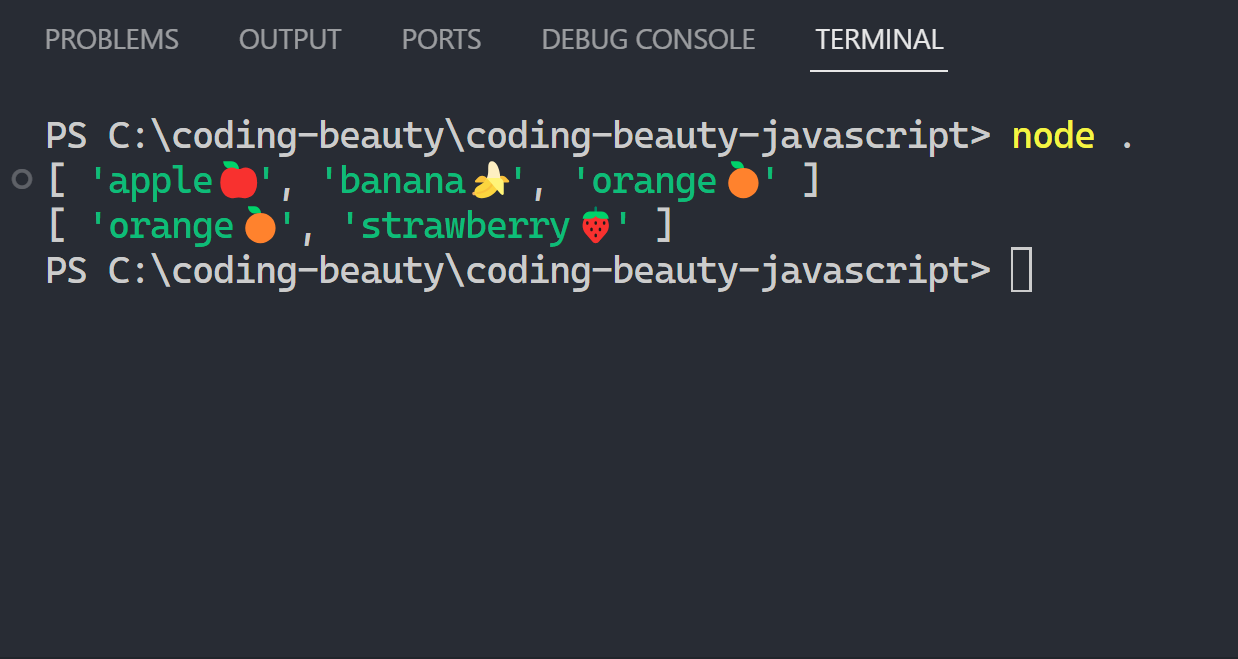
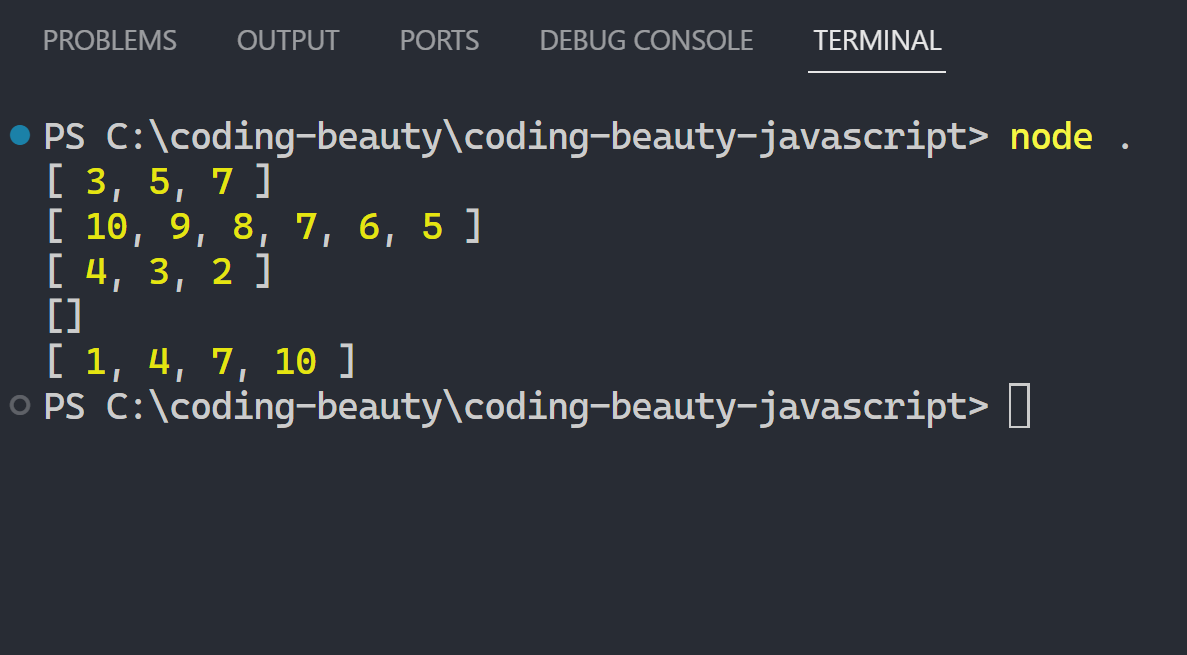
flat() and flatMap() gave much cleaner ways to easily flatten multidimensional arrays.
Eradicating the need for painful array-looping flattening code:
Yeah, and we didn’t even add any checks for wrong types and edge cases. And it goes without saying that I spent more than a few minutes debugging this…
And just imagine how it would be if we add multi-dimensional array support like in numpy:
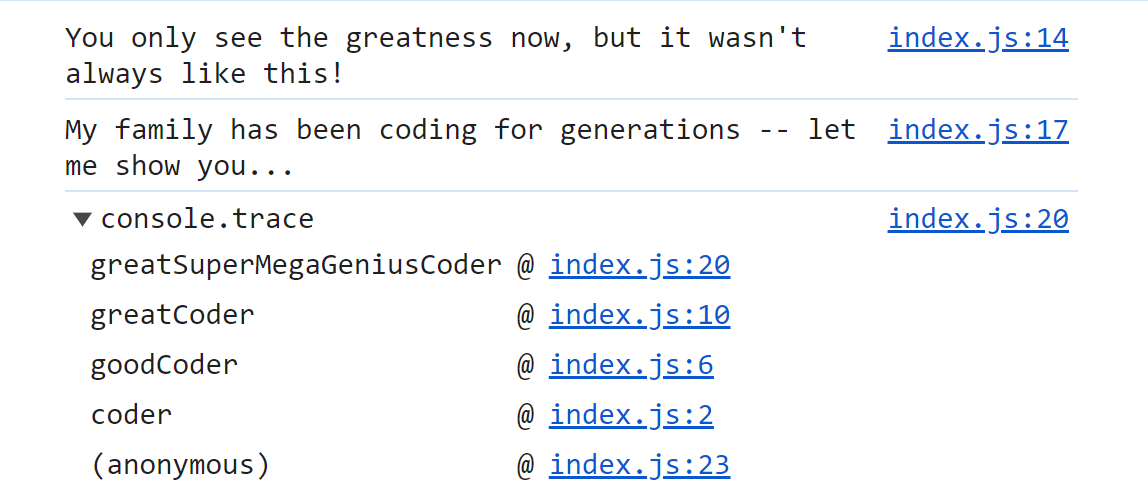
Where did we come from on the call stack? Let’s trace() our steps back!
Fantastic for debugging:
JavaScriptCopied!
function coder() {
  goodCoder();
}

function goodCoder() {
  greatCoder();
}

function greatCoder() {
  greatSuperMegaGeniusCoder();
}

function greatSuperMegaGeniusCoder() {
  console.log(
    "You only see the greatness now, but it wasn't always like this!"
  );
  console.log(
    'We\'ve been coding for generations -- let me show you...'
  );
  console.trace();
}

coder();
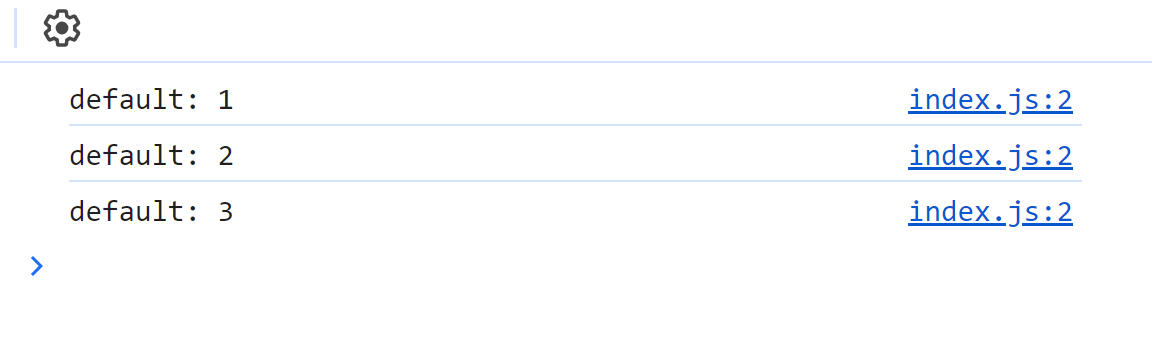
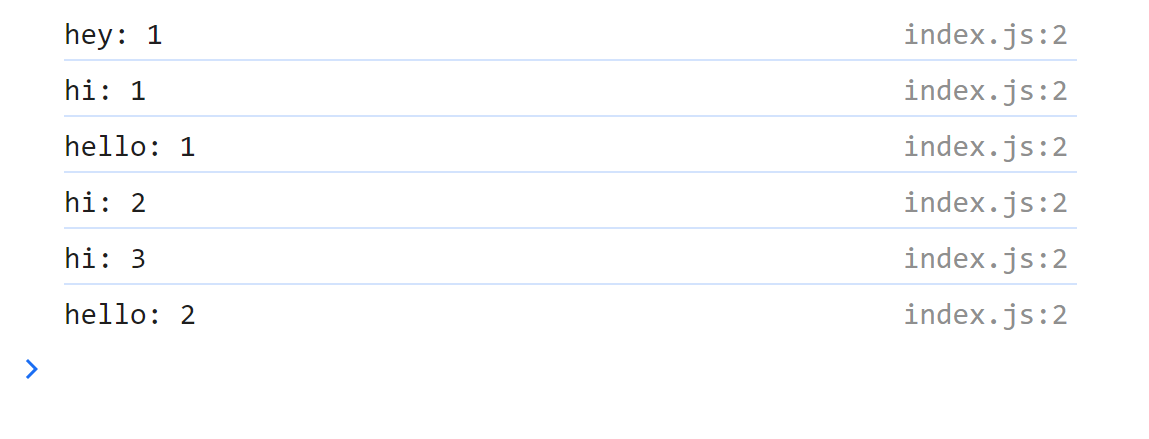
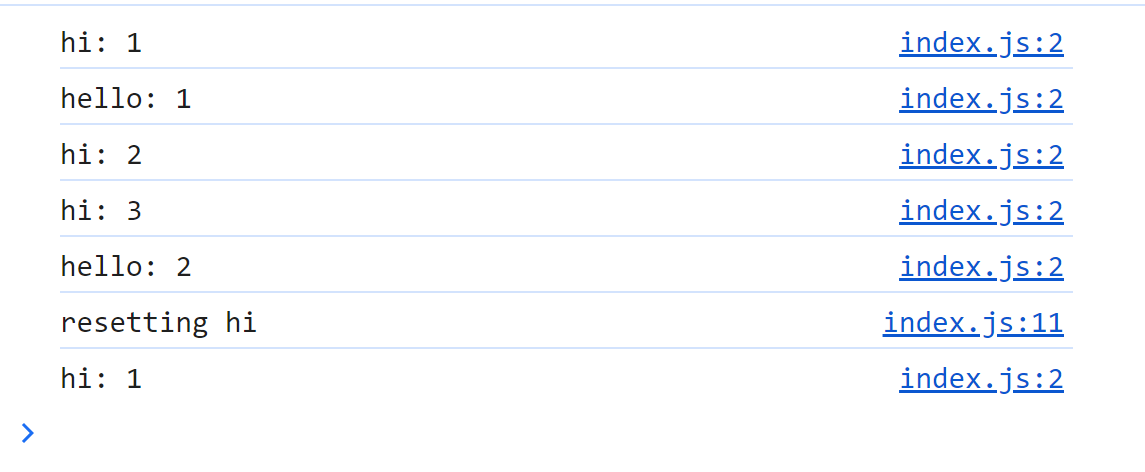
3. count()
console.count() logs the number of times that the current call to count() has been executed.
Too indirect and recursive a definition for me! You may need to see an example to really get it…
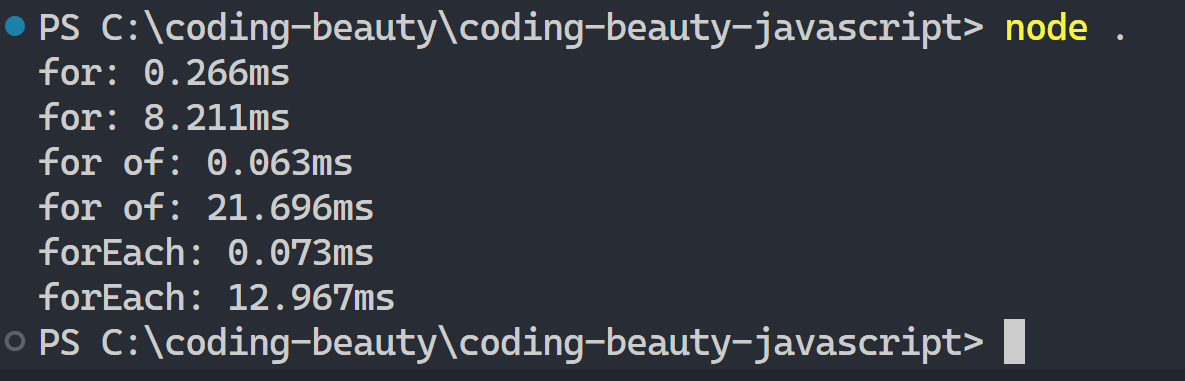
They work together to precisely measure how long a task takes.
57 microseconds, 11 seconds, 50 years? No problem.
time() – start the timer.
timeLog() – how far has it gone?
timeEnd() – stop the timer.
Let’s use them to compare the speed of all the famous JavaScript loop types.
JavaScriptCopied!
console.time('for');
for (let i; i < 1000; i++) {
  for (let i = 0; i < arr.length; i++);
}
console.timeLog('for');
for (let i; i < 1000000; i++) {
  for (let i = 0; i < arr.length; i++);
}
console.timeEnd('for');

const arr1000 = [...Array(1000)];
const arr1000000 = [...Array(1000000)];

console.time('for of');
for (const item of arr1000);
console.timeLog('for of');
for (const item of arr1000000);
console.timeEnd('for of');

console.time('forEach');
arr1000.forEach(() => {});
console.timeLog('forEach');
arr1000000.forEach(() => {});
console.timeEnd('forEach');
for starts out slow but it destroys the other as the list grows…
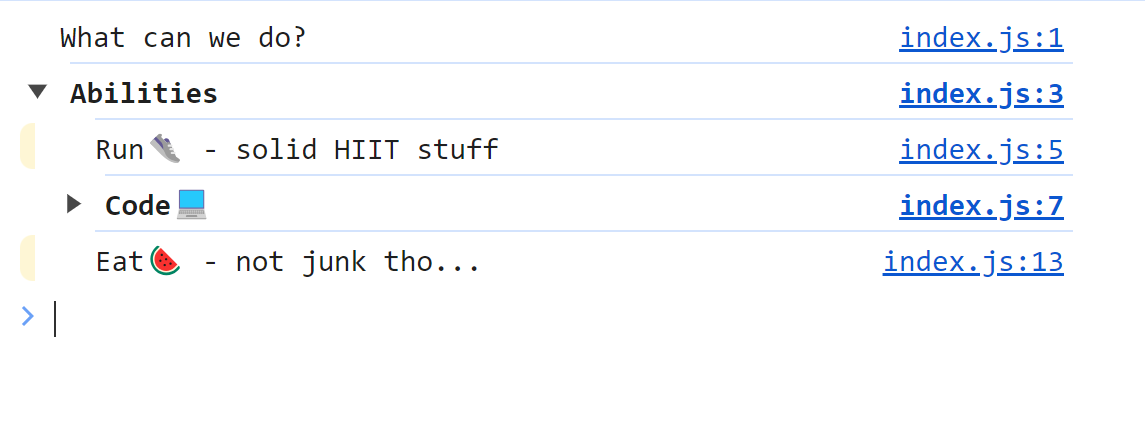
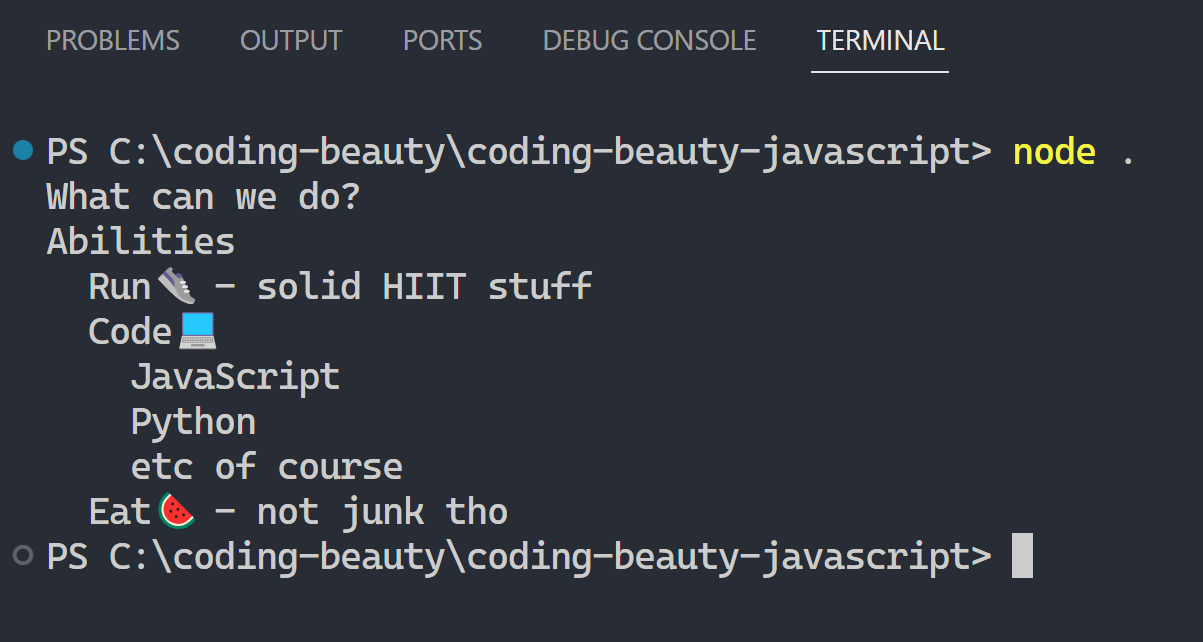
6. group() + groupCollapsed() + groupEnd()
Another great combo for grouping a bunch of console messages together; visually with indentation and functionally with a UI expander.
group() – adds 1 further grouping level.
groupCollapsed() – like group() but group starts out collapsed.
groupEnd() – go back to previous grouping level.
JavaScriptCopied!
console.log('What can we do?');

console.group('Abilities');

console.log('Run👟 - solid HIIT stuff');

console.groupCollapsed('Code💻');
console.log('JavaScript');
console.log('Python');
console.log('etc of course');
console.groupEnd();

console.log('Eat🍉 - not junk tho...');
Just indentation on Node – so groupCollapsed() has no use here.
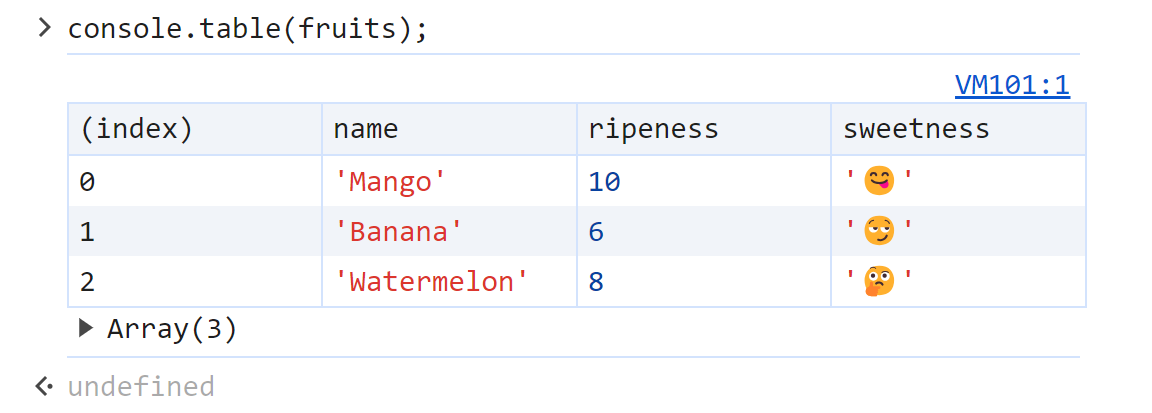
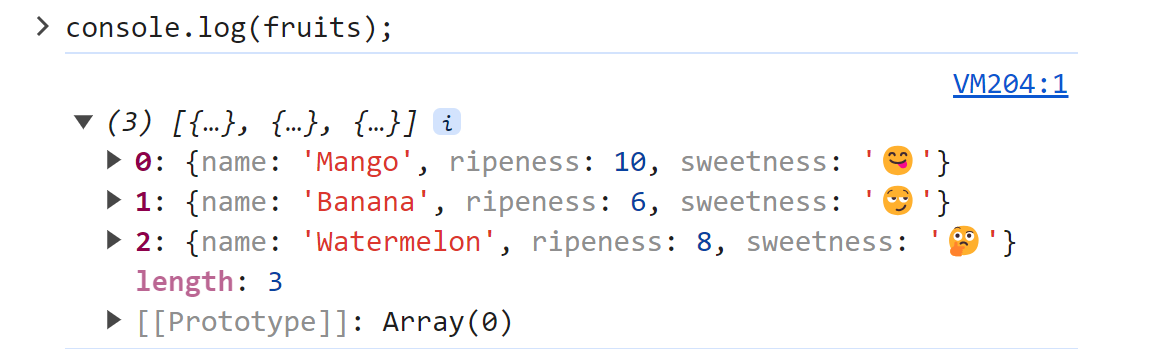
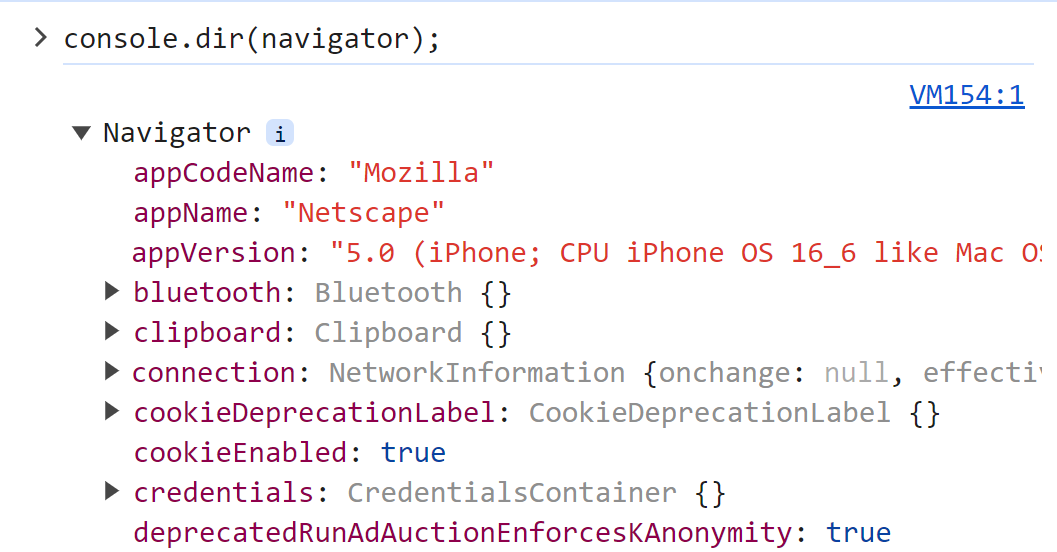
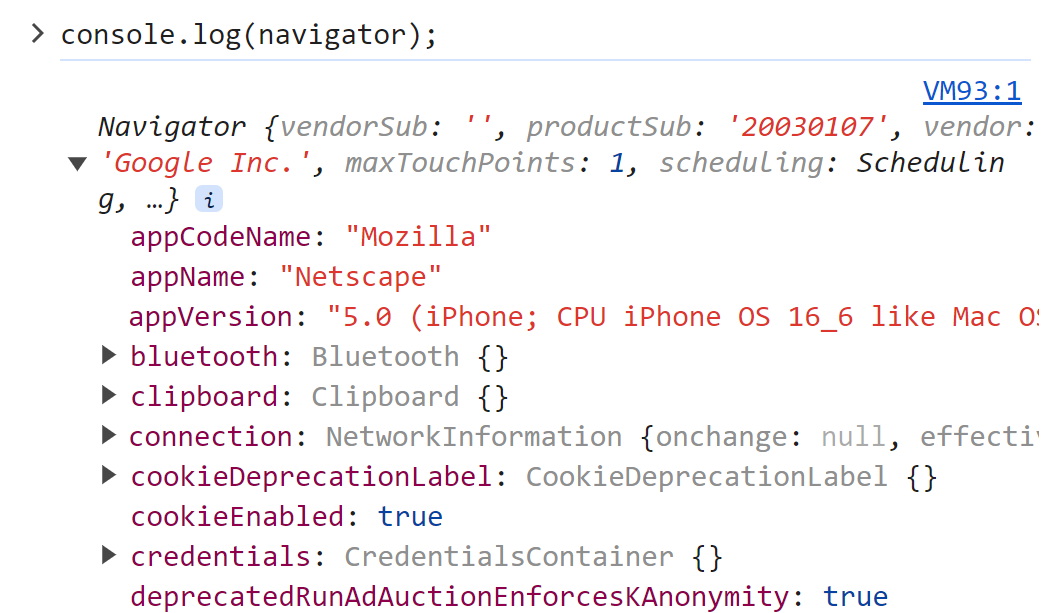
7. dir()
dir() is a genius way to inspect an object in the console and see ALL it’s properties and methods.
Actually just like console.log()? 🤔 But console.dir() is specially designed for this particular purpose.
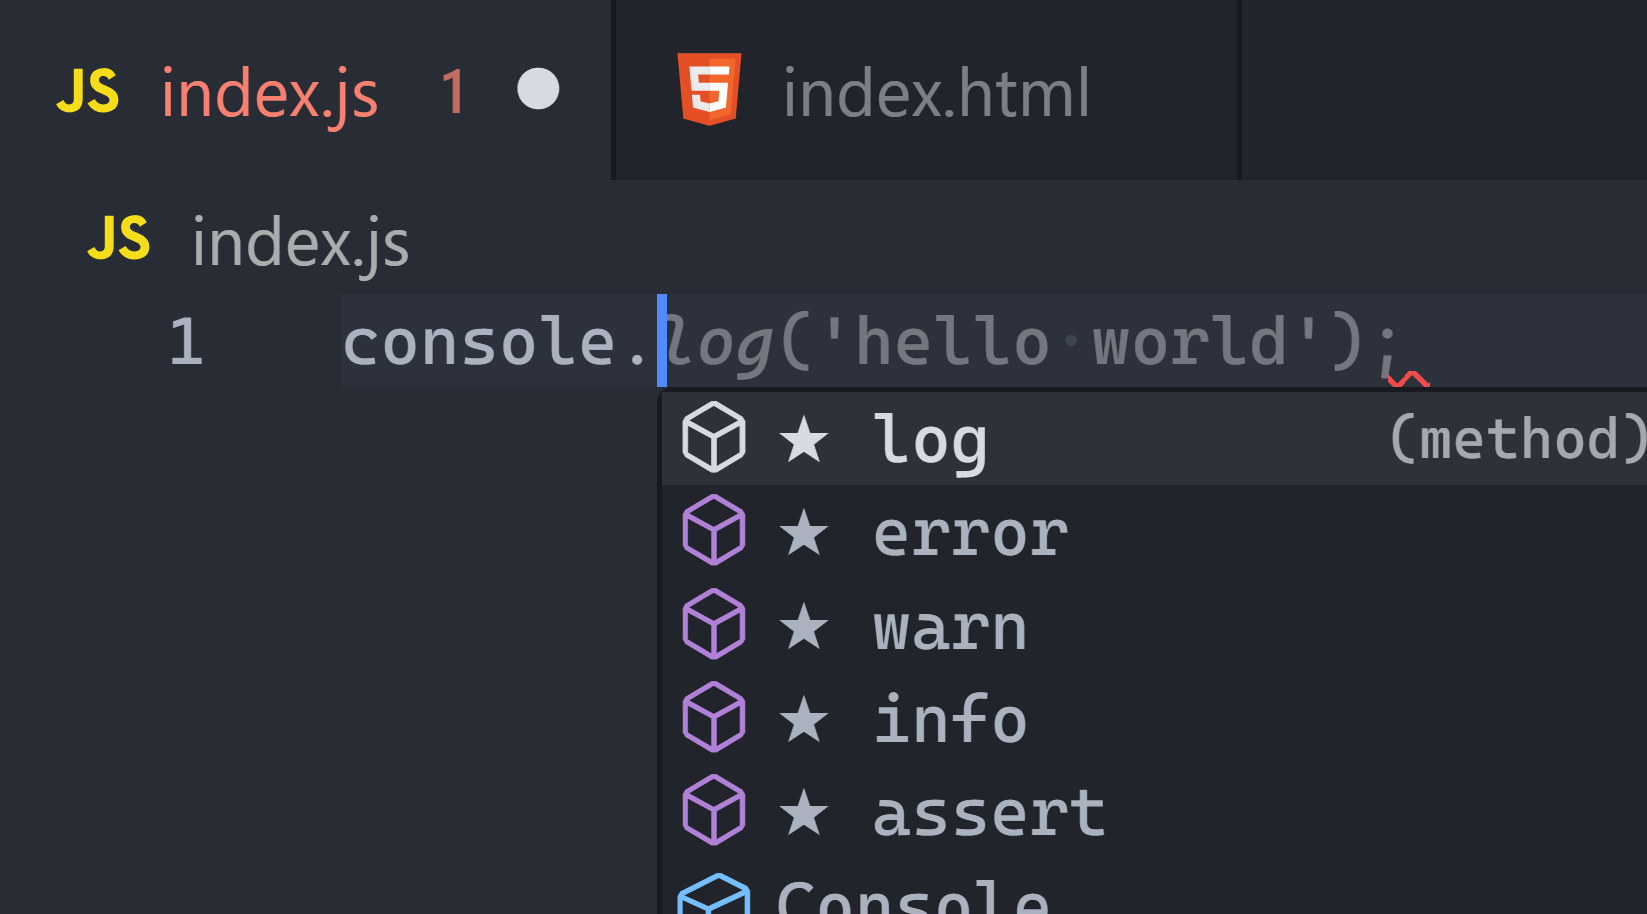
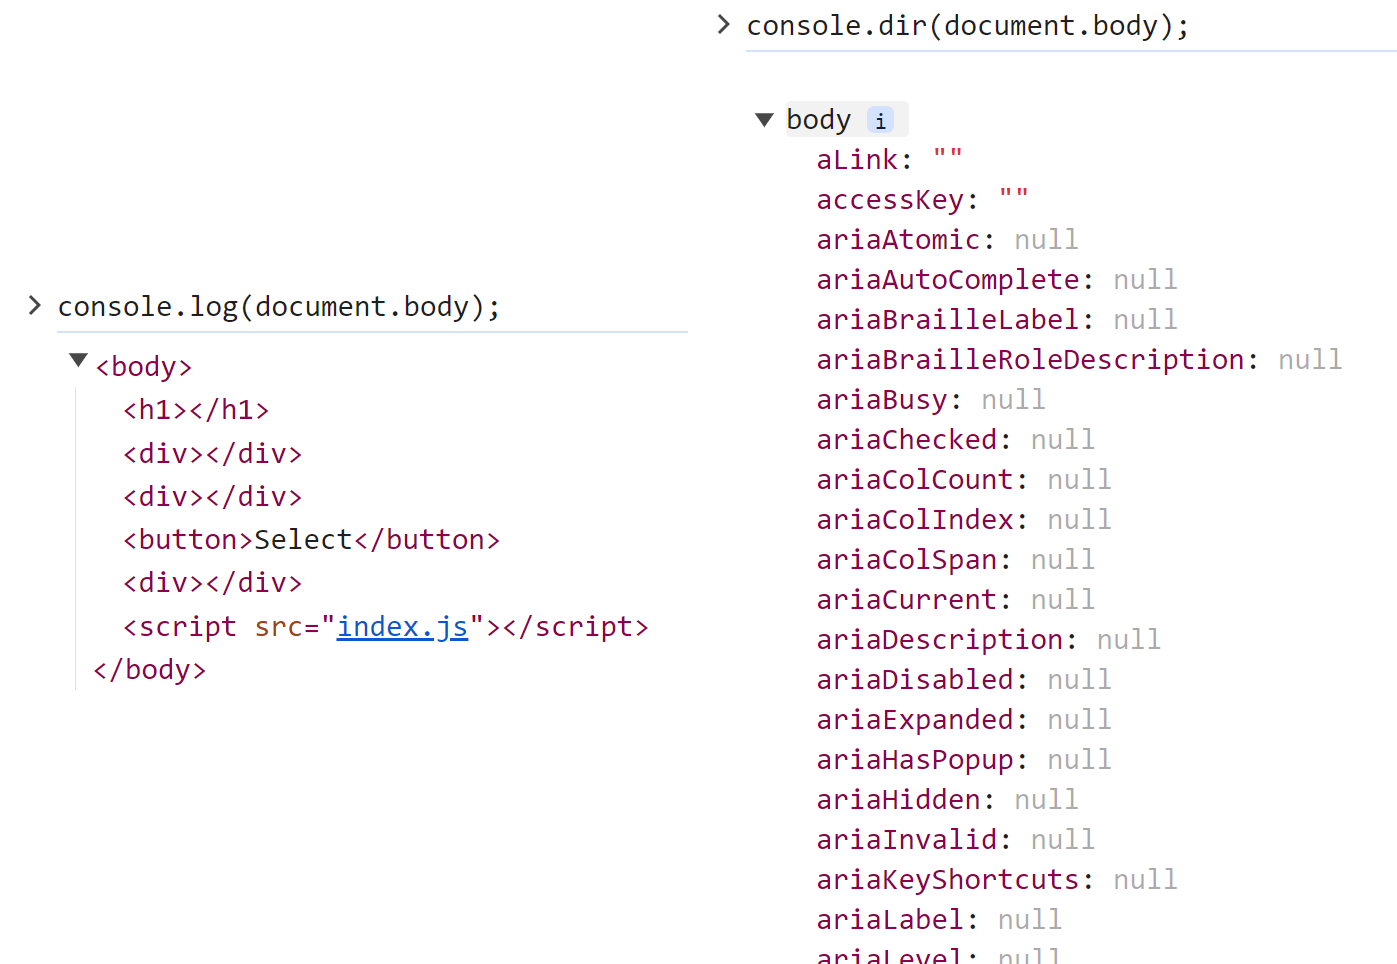
But watch what happens when you log() vs dir() HTML element objects:
log() shows it as a HTML tag hierarchy, but dir() shows it as an object with every single property it has and could ever dream of having.
Final thoughts
So they’re plenty of console methods apart from console.log(). Some of them spice things up in the console UI with better visualization; others are formidable tools for debugging and performance testing.
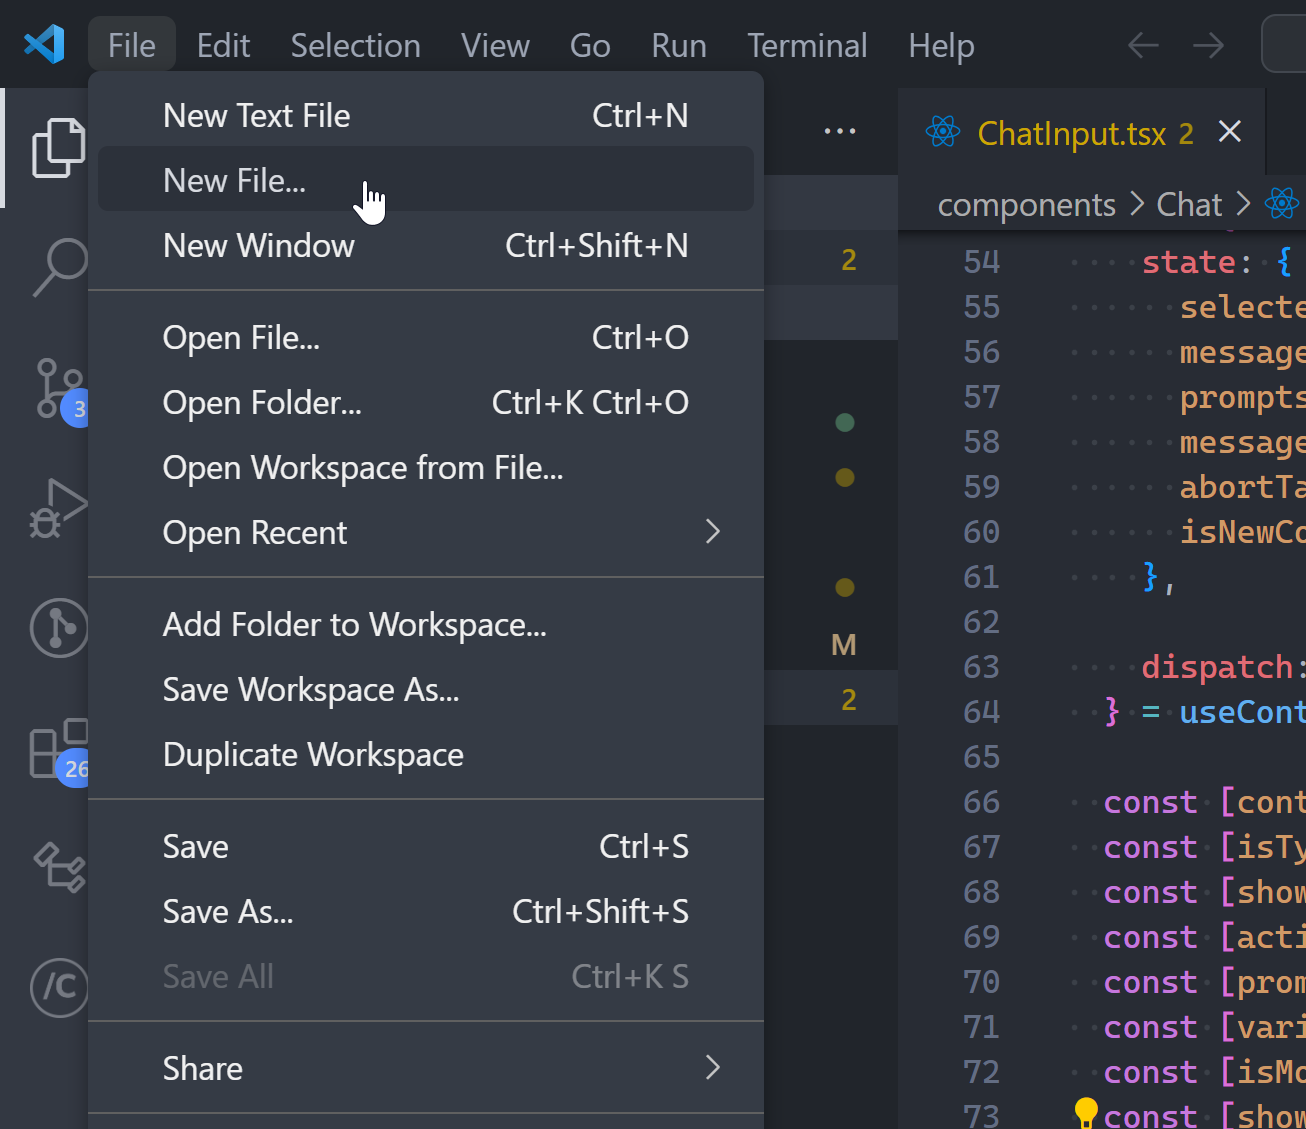
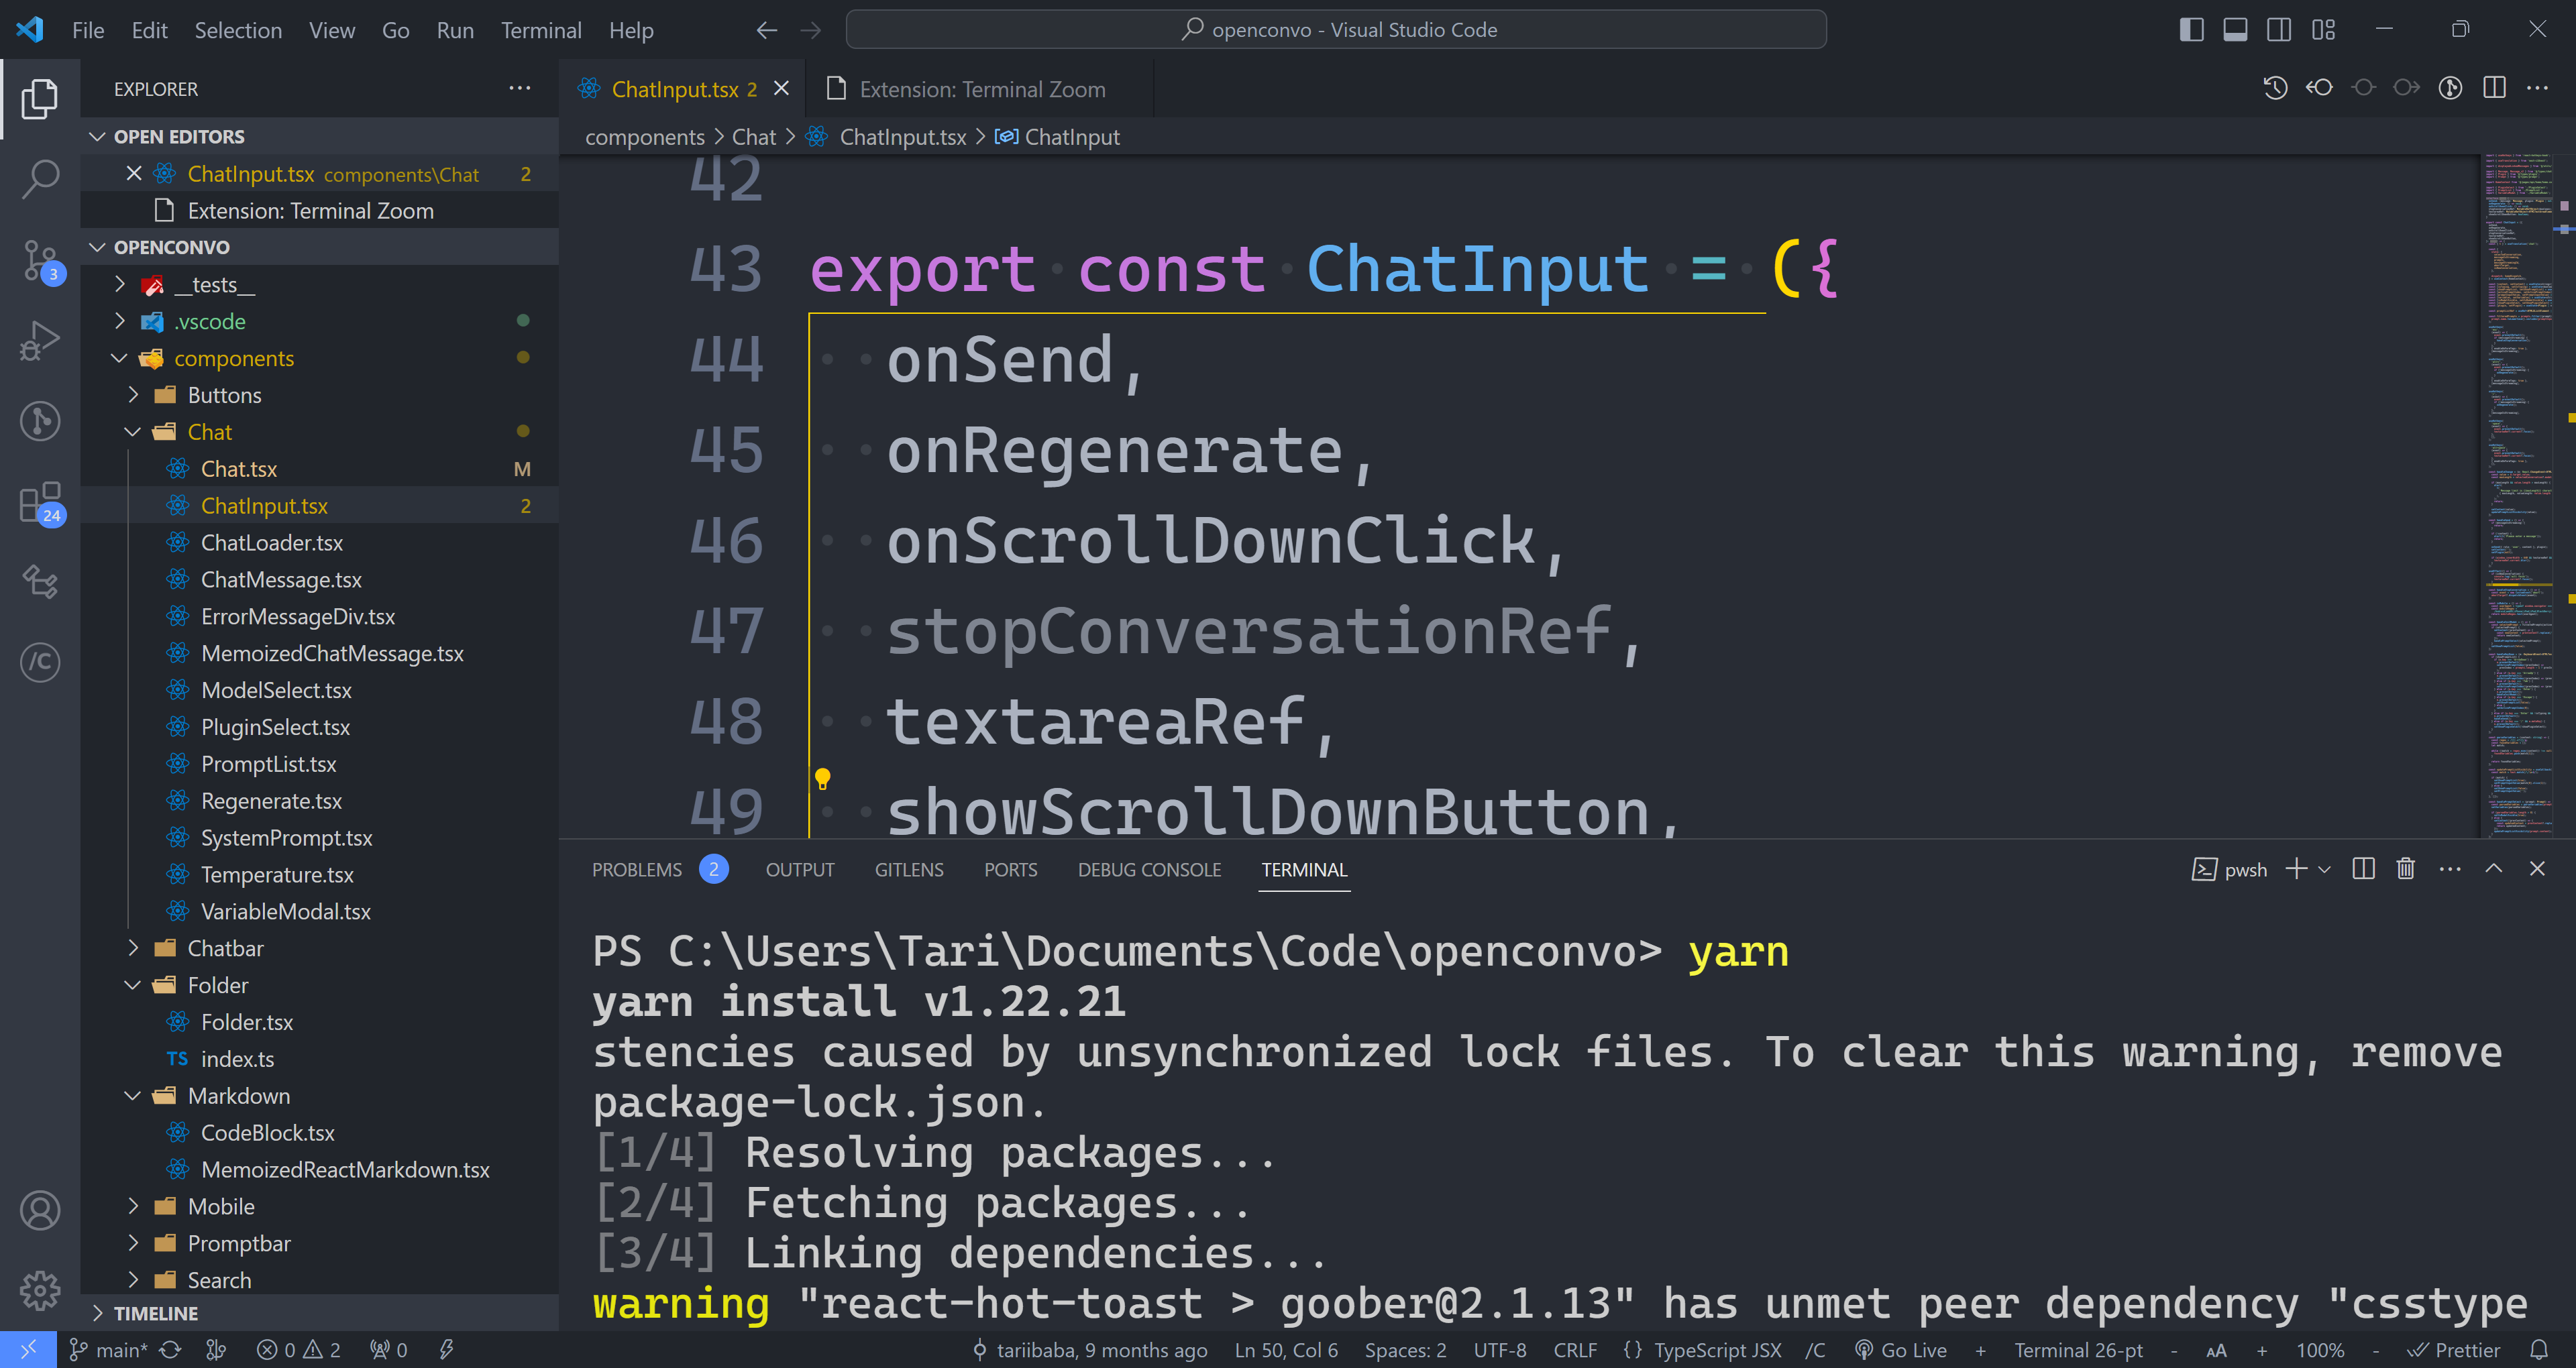
As expected VS Code has the basic zoom in & out in every text editor.
But they’re some hidden gems to quickly level up your zoom game once found.
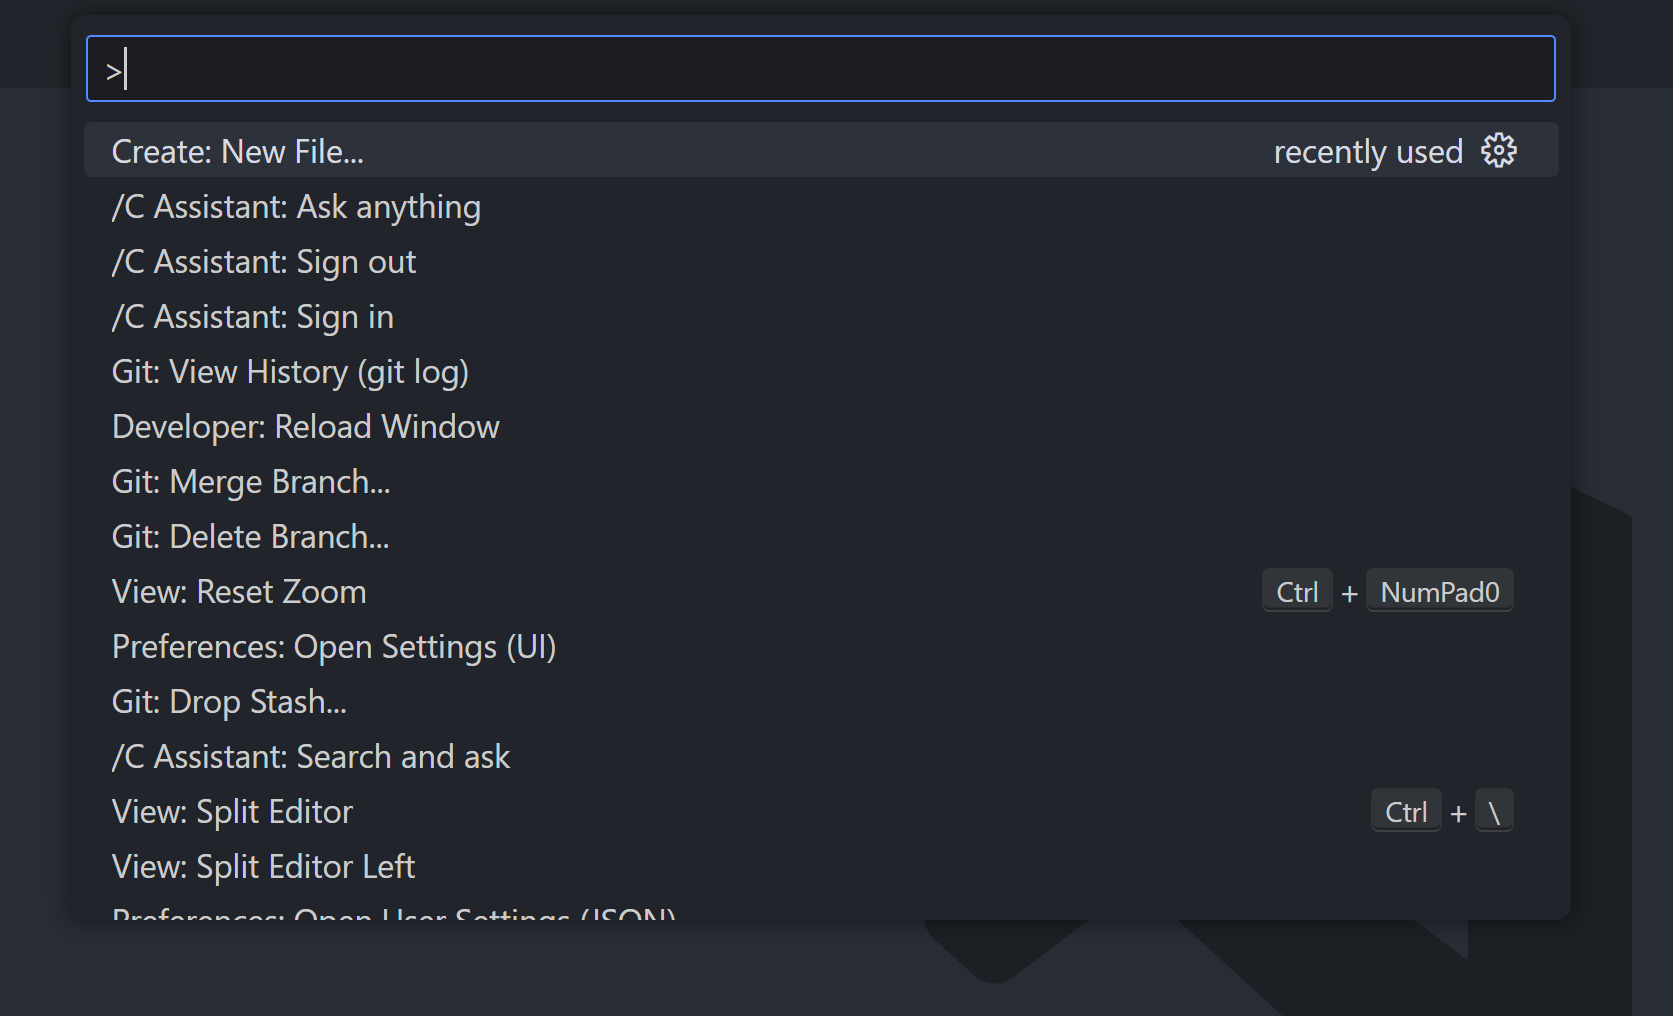
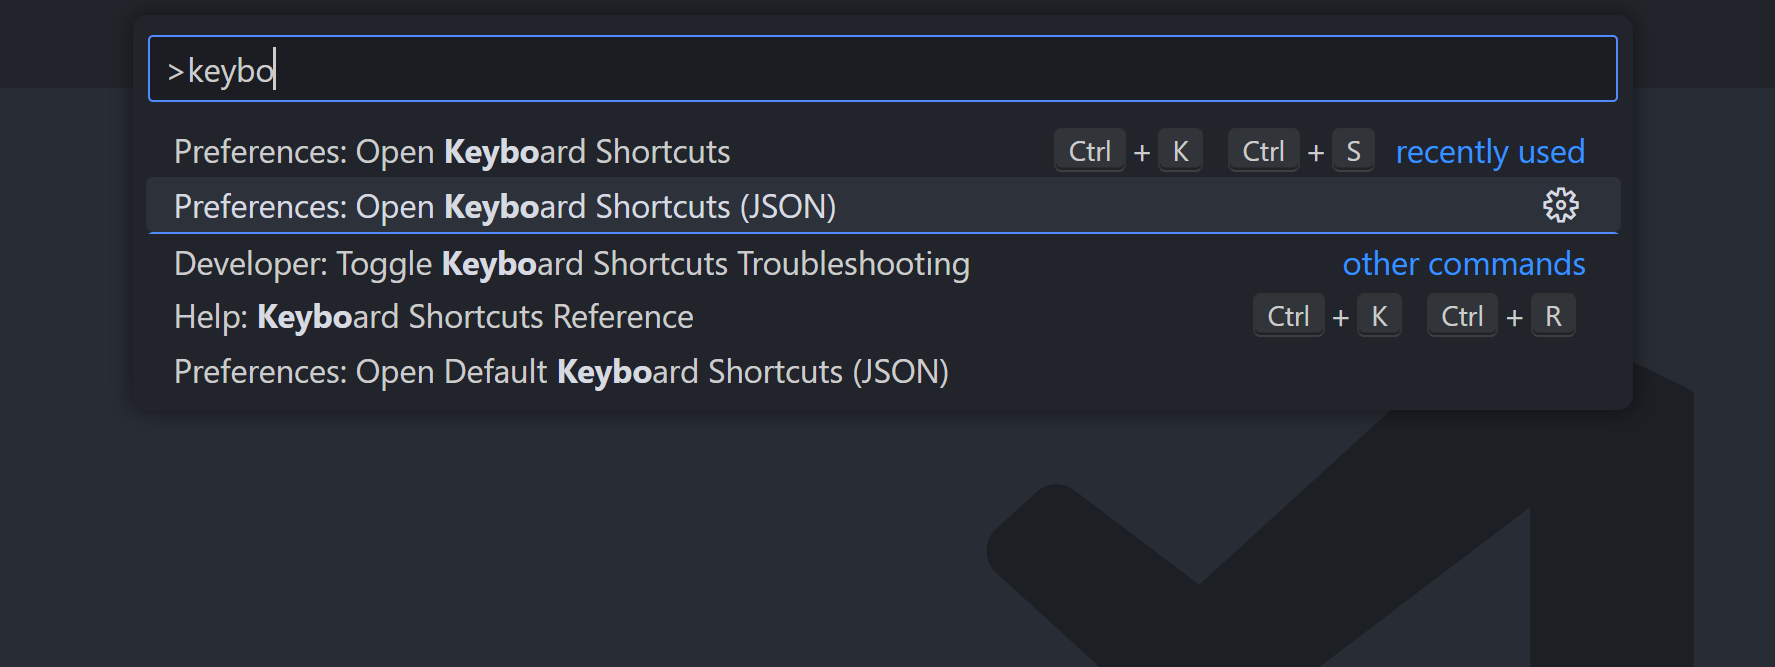
Dig into the command palette and you’ll find Font zooming – zooming just the code without the rest of the editor UI.
Pretty cool – did you know about this?
Zoom with scroll
Easily adjust zoom with Ctrl + mouse scroll:
After turning on the Editor: Mouse Wheel Zoom setting:
Powerful zoom extensions
The VS marketplace is packed full with powerful, capable extensions that boost various aspects of your workflow.
For zooming, there’s none better to start with than Zoom Bar:
The first thing you notice right away after install: the exact zoom level now shows up in the status bar:
+ and - buttons are obviously to zoom in and out.
Select the zoom percentage and this dialog appears:
Tons of pre-defined zoom options to choose from.
Just as you can see your exact zoom, you can also set it precisely with Input zoom:
Why not? 😏
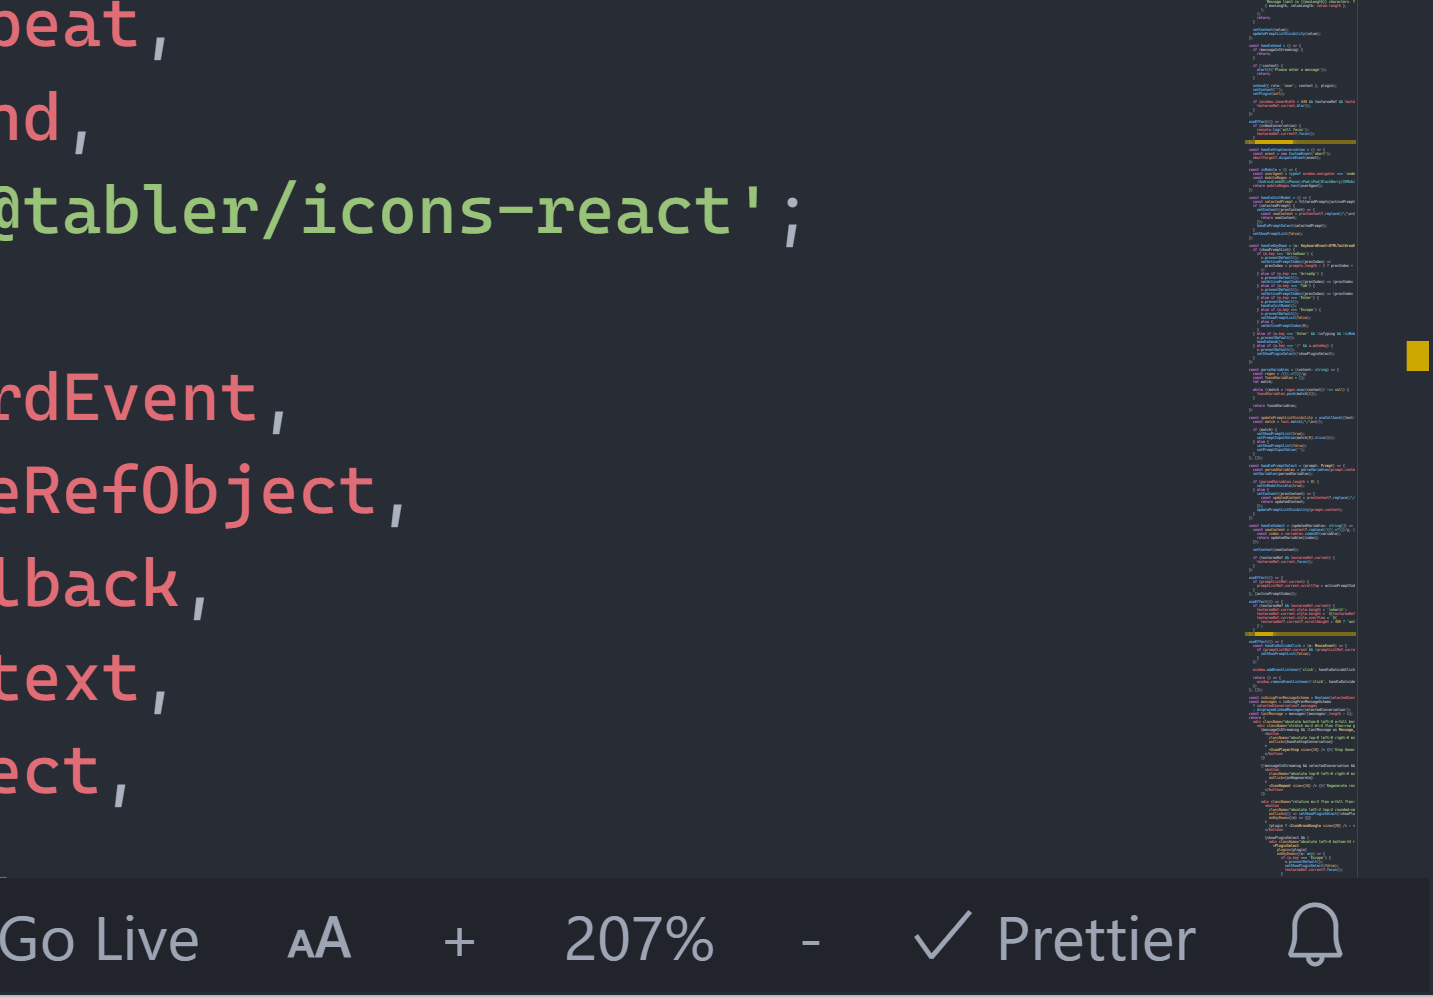
And what about zooming just the terminal font?
There’s an extension for that too:
At the bottom-right you can clearly see the displayed terminal font.
My status bar has gotten semi-painfully humongous now, but it’s clear how useful these upgrades are… They were always great for taking screenshots when I used a 768p PC.
An of course: laser-precise focus on specific lines, syntax, and details without straining your eyes. Or whatever other reason you need to zoom for.
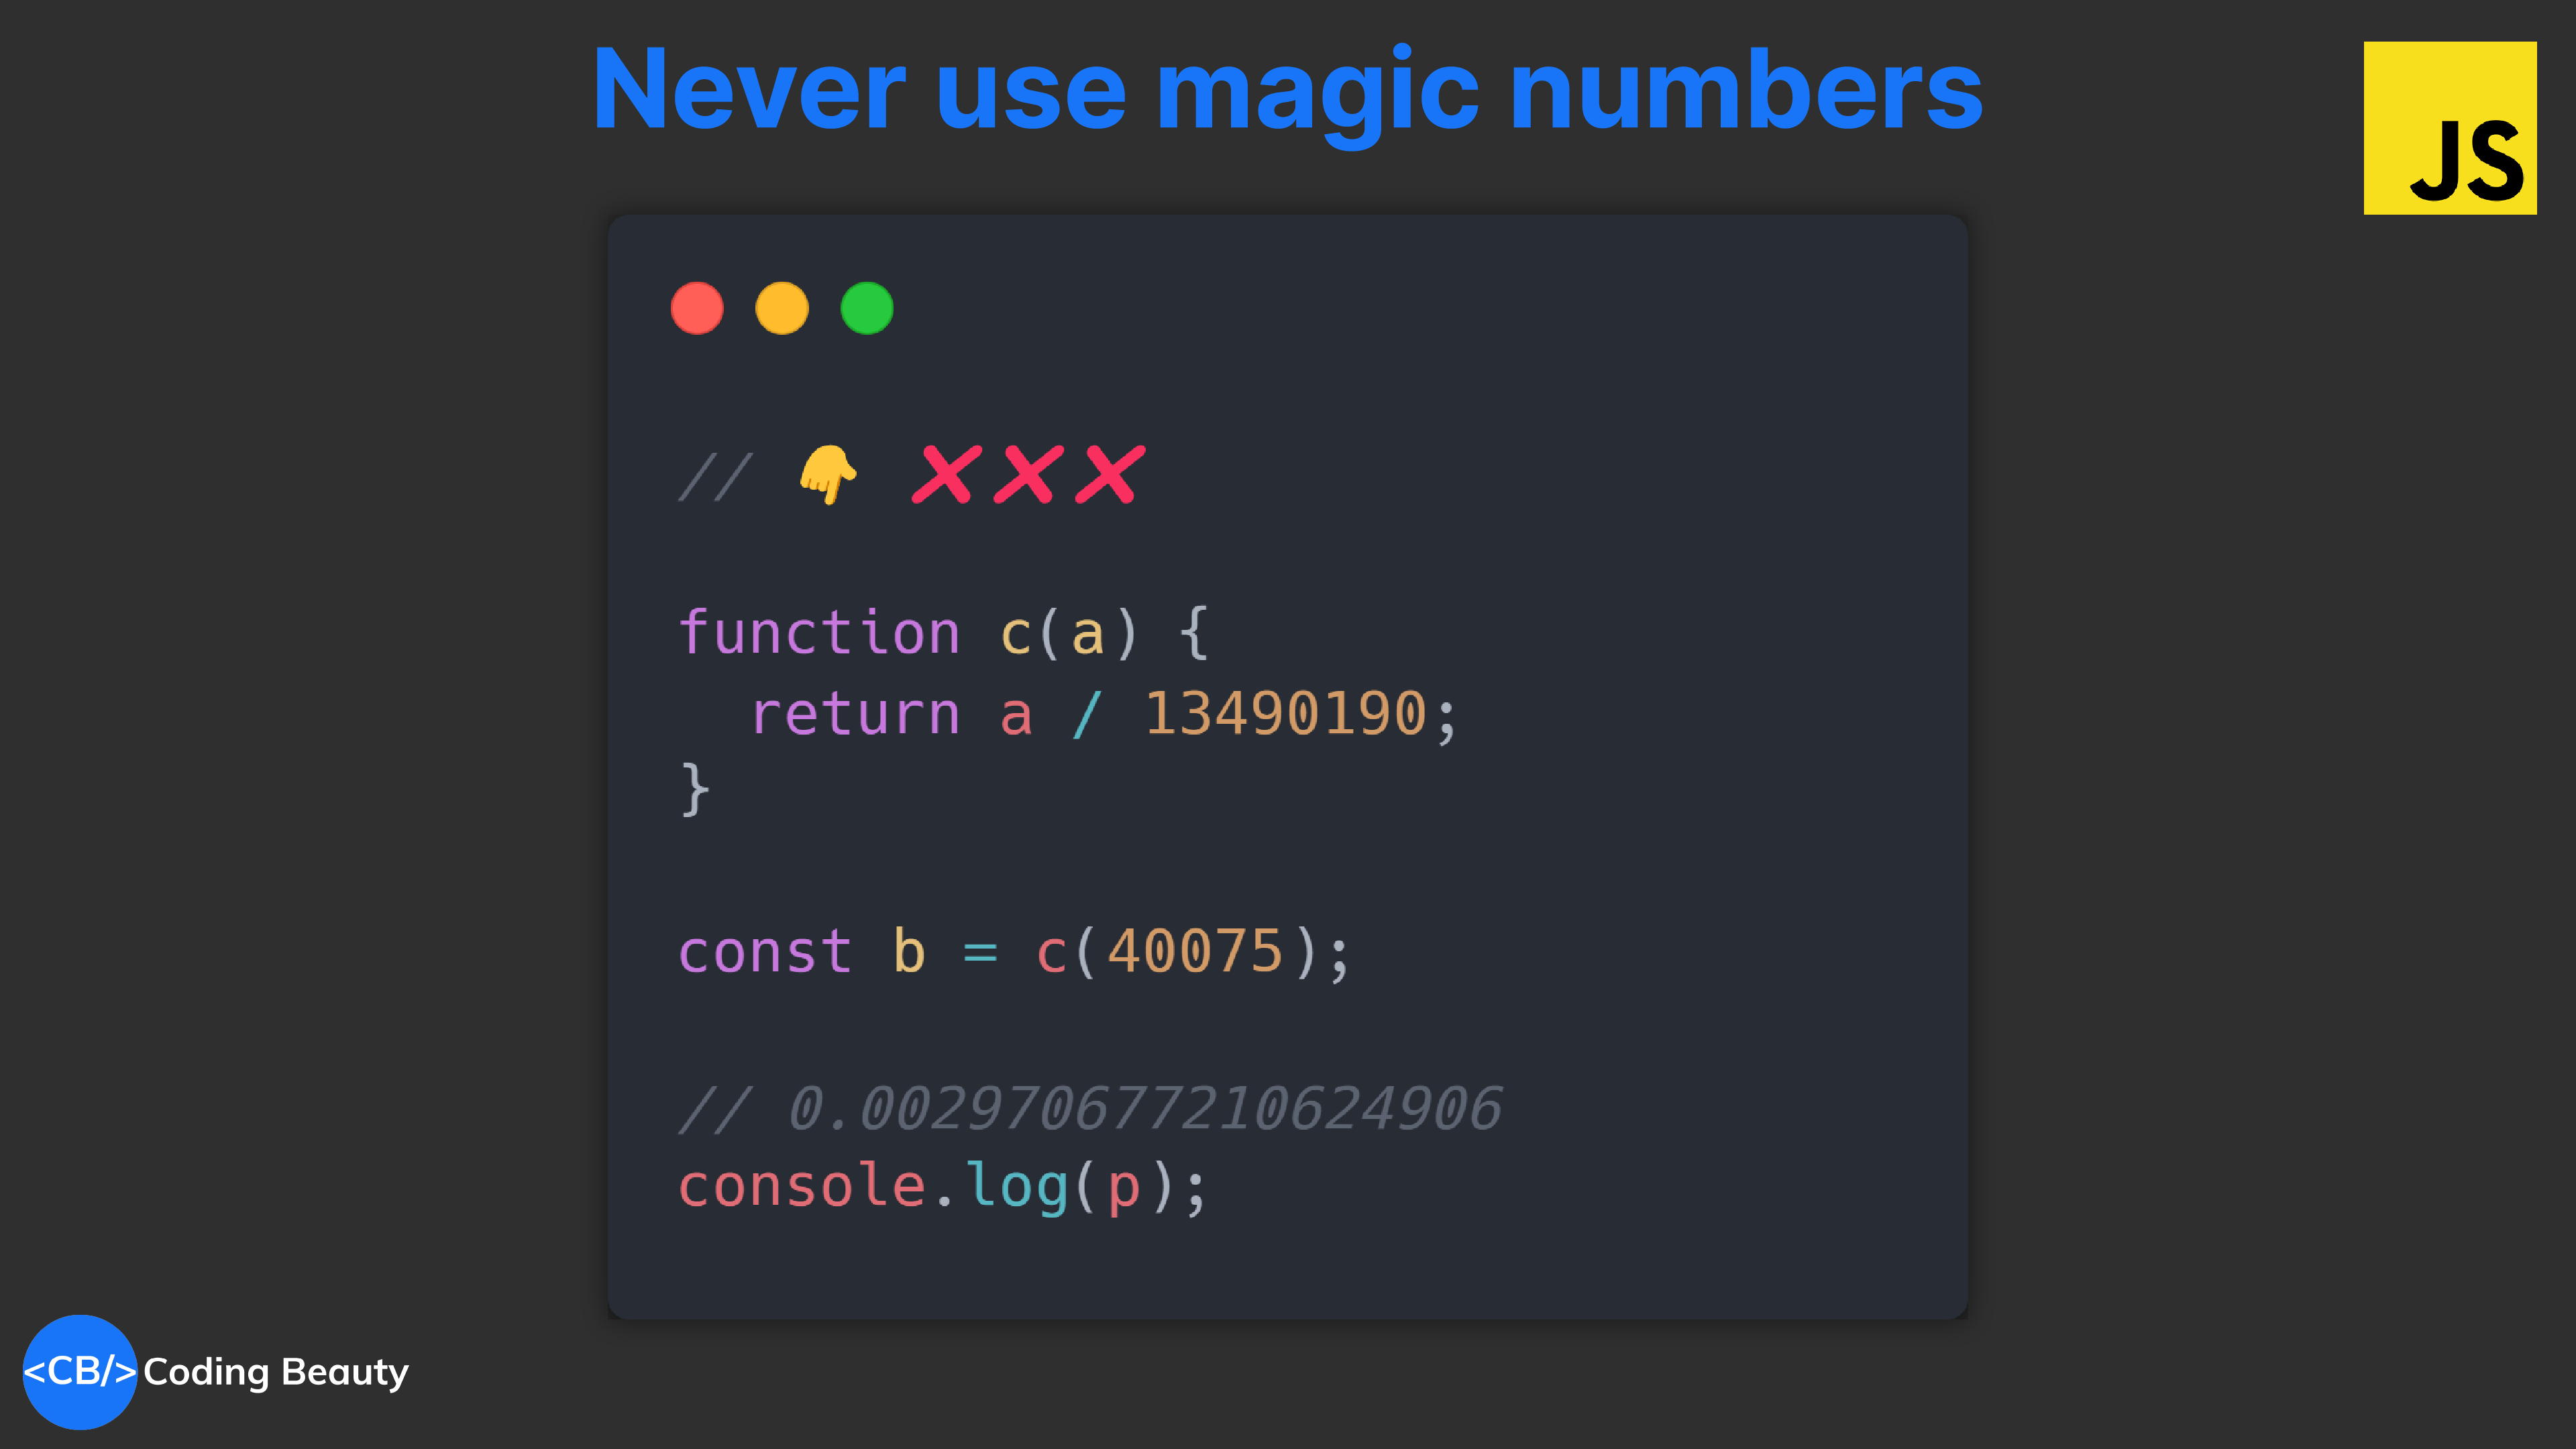
function c(a) {
  return a / 13490190;
}

const b = c(40075);

console.log(p); // 0.002970677210624906
All we see is a calculation. We have no idea what those numbers and variables mean in the bigger picture of the codebase.
It’s a mystery. It’s magic to everyone apart from the developer who wrote the code.
We can’t possibly make any contributions to this code; we’re stuck.
But what if our dev had looked beyond code that merely works and also focused on communicating the full story of the code?
At the very least they would have given those variables far more descriptive names to explain the context:
JavaScriptCopied!
function calculateSpeedstersTime(distance) {
  return distance / 13490190;
}

const time = calculateSpeedstersTime(40075);

console.log(time); // 0.002970677210624906
This small change vastly improves the code’s readability. Now you have a general idea of what’s going on.
But there are still mysteries we must solve.
It’ll still take us a little bit to realize 13490190 is speed — but how much speed?. And we know 40075 is a distance, but why 40075 of all the numbers?
For maximum readability we replace these magic numbers with variables with explanatory names
Now you understand every single thing this code does at a glance.
Understanding at a glance is always the goal.
Even with readable code…
Anyone can understand this TS code here; but there’s a serious issue that could easily lead us to hours-long bug hunting.
Can you spot it?
JavaScriptCopied!
class Person {
  state: string;
  name: string;

  greet() {
    console.log(`Hey I'm ${this.name}`);
  }

  eatFood() {
    if (this.state === 'tired') {
      this.state = 'fresh';
    }
  }

  exercise() {
    if (this.state === 'fresh') {
      this.state = 'tired';
    }
  }
}
Problem: We’re lousily checking the state for equality and assigning with magic strings again and again.
Repeating ourselves, and allow a mere typo to break this code in the future. And the bug won’t always be easy to spot like it would be in this tiny code.
That’s why we have union types; similar to enums in TypeScript and other languages.
JavaScriptCopied!
class Person {
  name: string;
  // ✅ Only 3 values, not infinite
  state: 'tired' | 'fresh' | 'sleepy';

  greet() {
    console.log(`Hey I'm ${this.name}`);
  }

  eatFood() {
    if (this.state === 'tired') {
      this.state = 'fresh';
    }
  }

  exercise() {
    // ✅ Typo: Error thrown
    if (this.state === 'fres') {
      this.state = 'tired';
    }
  }
}
Now 'tired' and 'fresh' are no longer random string literals. They’re now registered values of a pre-defined type.
And this is one of the powerful advantages TypeScript has over regular JS.
We even have this exact type of issue in a Dart codebase I’m part of. We’ve used the same magic strings like 10 times each.
But Dart only has enums and it’s not so easy to convert from magic strings to enums like we did here with union types. So we better refactor before it comes back to bite us!
The only thing that remains constant…
Keep using magic values and they keep spreading throughout the codebase across more and more files.
Replacing them is a chore.
JavaScriptCopied!
// email.js
export function sendEmail({ username }) {
  emailApi.send({
    title: `Hi ${username ?? 'User'}`,
    role: 'user'  // Union type value
  });
}

// user-info.jsx
export function UserInfo({ user }) {
  return (
    <div>
      <div>Name: {user.name ?? 'User'}</div>
      <div>Email: {user.email}</div>
    </div>
  );
}
What happens when you want to change the default user name to something else but you’ve got the 'User' magic string in over 15 files?
Even Find and Replace will be tricky because they could be other strings with the same value but no relation.
We can fix this issue by creating a separate global config file containing app-wide values like this:
JavaScriptCopied!
// app-values.js
export const DEFAULT_USERNAME = 'User'; // ✅ Only one place to change

// email.js
import { DEFAULT_USERNAME } from './app-values';
export function sendEmail({ username, role }) {
  emailApi.send({
    message: `Hi ${username ?? DEFAULT_USERNAME}`, // ✅
    role: role ?? 'user',
  });
}

// user-info.jsx
import { DEFAULT_USERNAME } from './app-values';
export default function UserInfo({ user }) {
  return (
    <div>
      <div>Name: {user.name ?? DEFAULT_USERNAME}</div> // ✅
      <div>Email: {user.email}</div>
    </div>
  );
}
Final thoughts
Banish magic numbers and strings from your JavaScript code for clarity, maintainability, and efficiency.
By adopting these practices you pave the way for code that is not only functional but also self-documenting, collaborative, and resilient in the face of change.
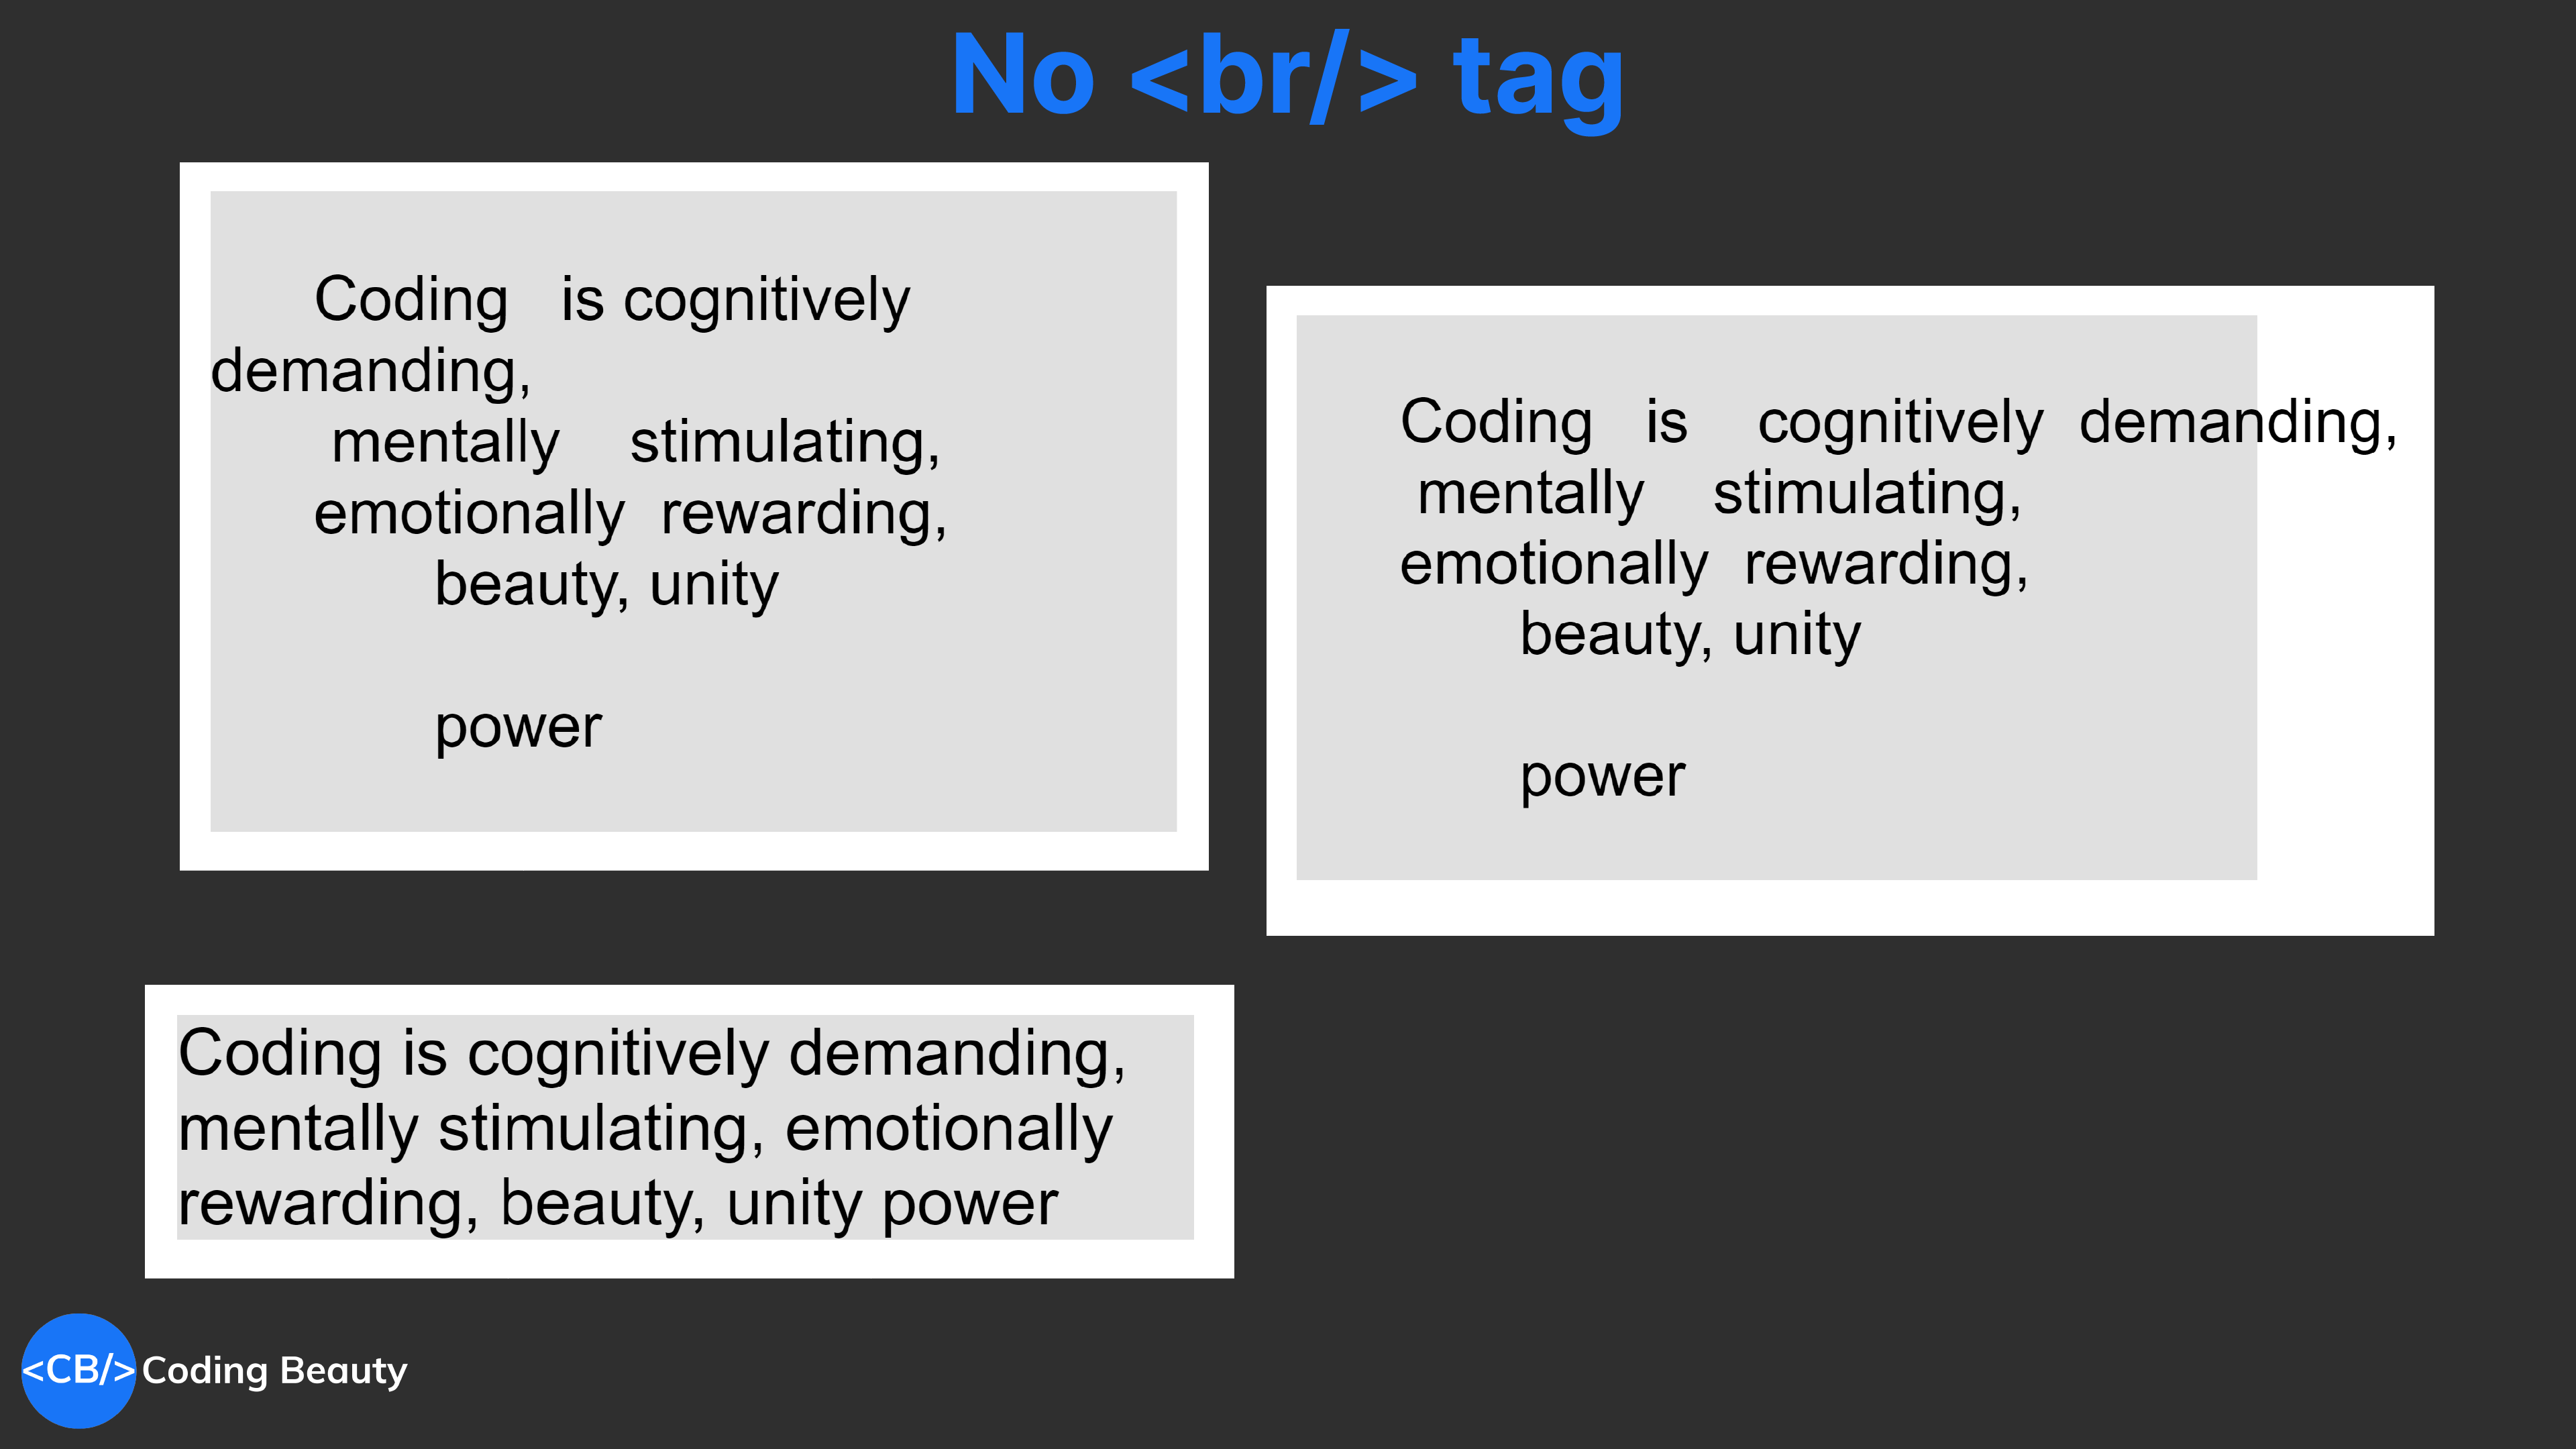
Like the previous two possible white-space values, pre-line works in the same way when you set the innerHTML or innerText property of the element to a string using JavaScript.
We often associate coding with logic, problem-solving, and cold, hard facts.
But what if we shifted our perspective and viewed code through the lens of unity, seeing it as a beautiful ecosystem woven from diverse threads of interconnected elements?
This shift can unlock new ways of understanding, crafting, and appreciating the art of programming.
Imagine a game of chess.
Each piece, while powerful in its own right, finds its true potential when working in harmony with the others. Knights flank, pawns push, and rooks guard, united in their pursuit of checkmate.
Yeah I never thought of that — maybe cause my rating is ~1200 🫠
There’s something grand majestic I’ve always found in seeing various components of a complex system working together towards a shared end.
Whether it’s a soccer team making a beautiful teamwork goal, or thousands of people in a business collaborating to launch a product to millions or billions of users.
It must be a echo of our aching desire to part of something bigger than ourselves; of something grand and greater.
In the same way code exists not as a collection of isolated lines, but as a symphony of components, each playing its part in the grand composition of the program.
Object-Oriented Programming (OOP) embodies this principle of unity; by encapsulating data and functionality within objects, OOP creates self-contained units that interact and collaborate.
It’s like dividing a song into sections for different instruments and audio layers, each contributing its unique voice while adhering to the overall flow and rhythm.
The rhythm, the vocals, the tune…
I love how this song’s chorus goes; there’s one audio layer at first, then gradually they all come together to form the complete song flow (which sounds nice btw).
Imagine a program built with OOP; each object, whether a player character in a game or a customer object in a shopping cart application, becomes a mini-world unto itself, yet seamlessly integrates with the larger system.
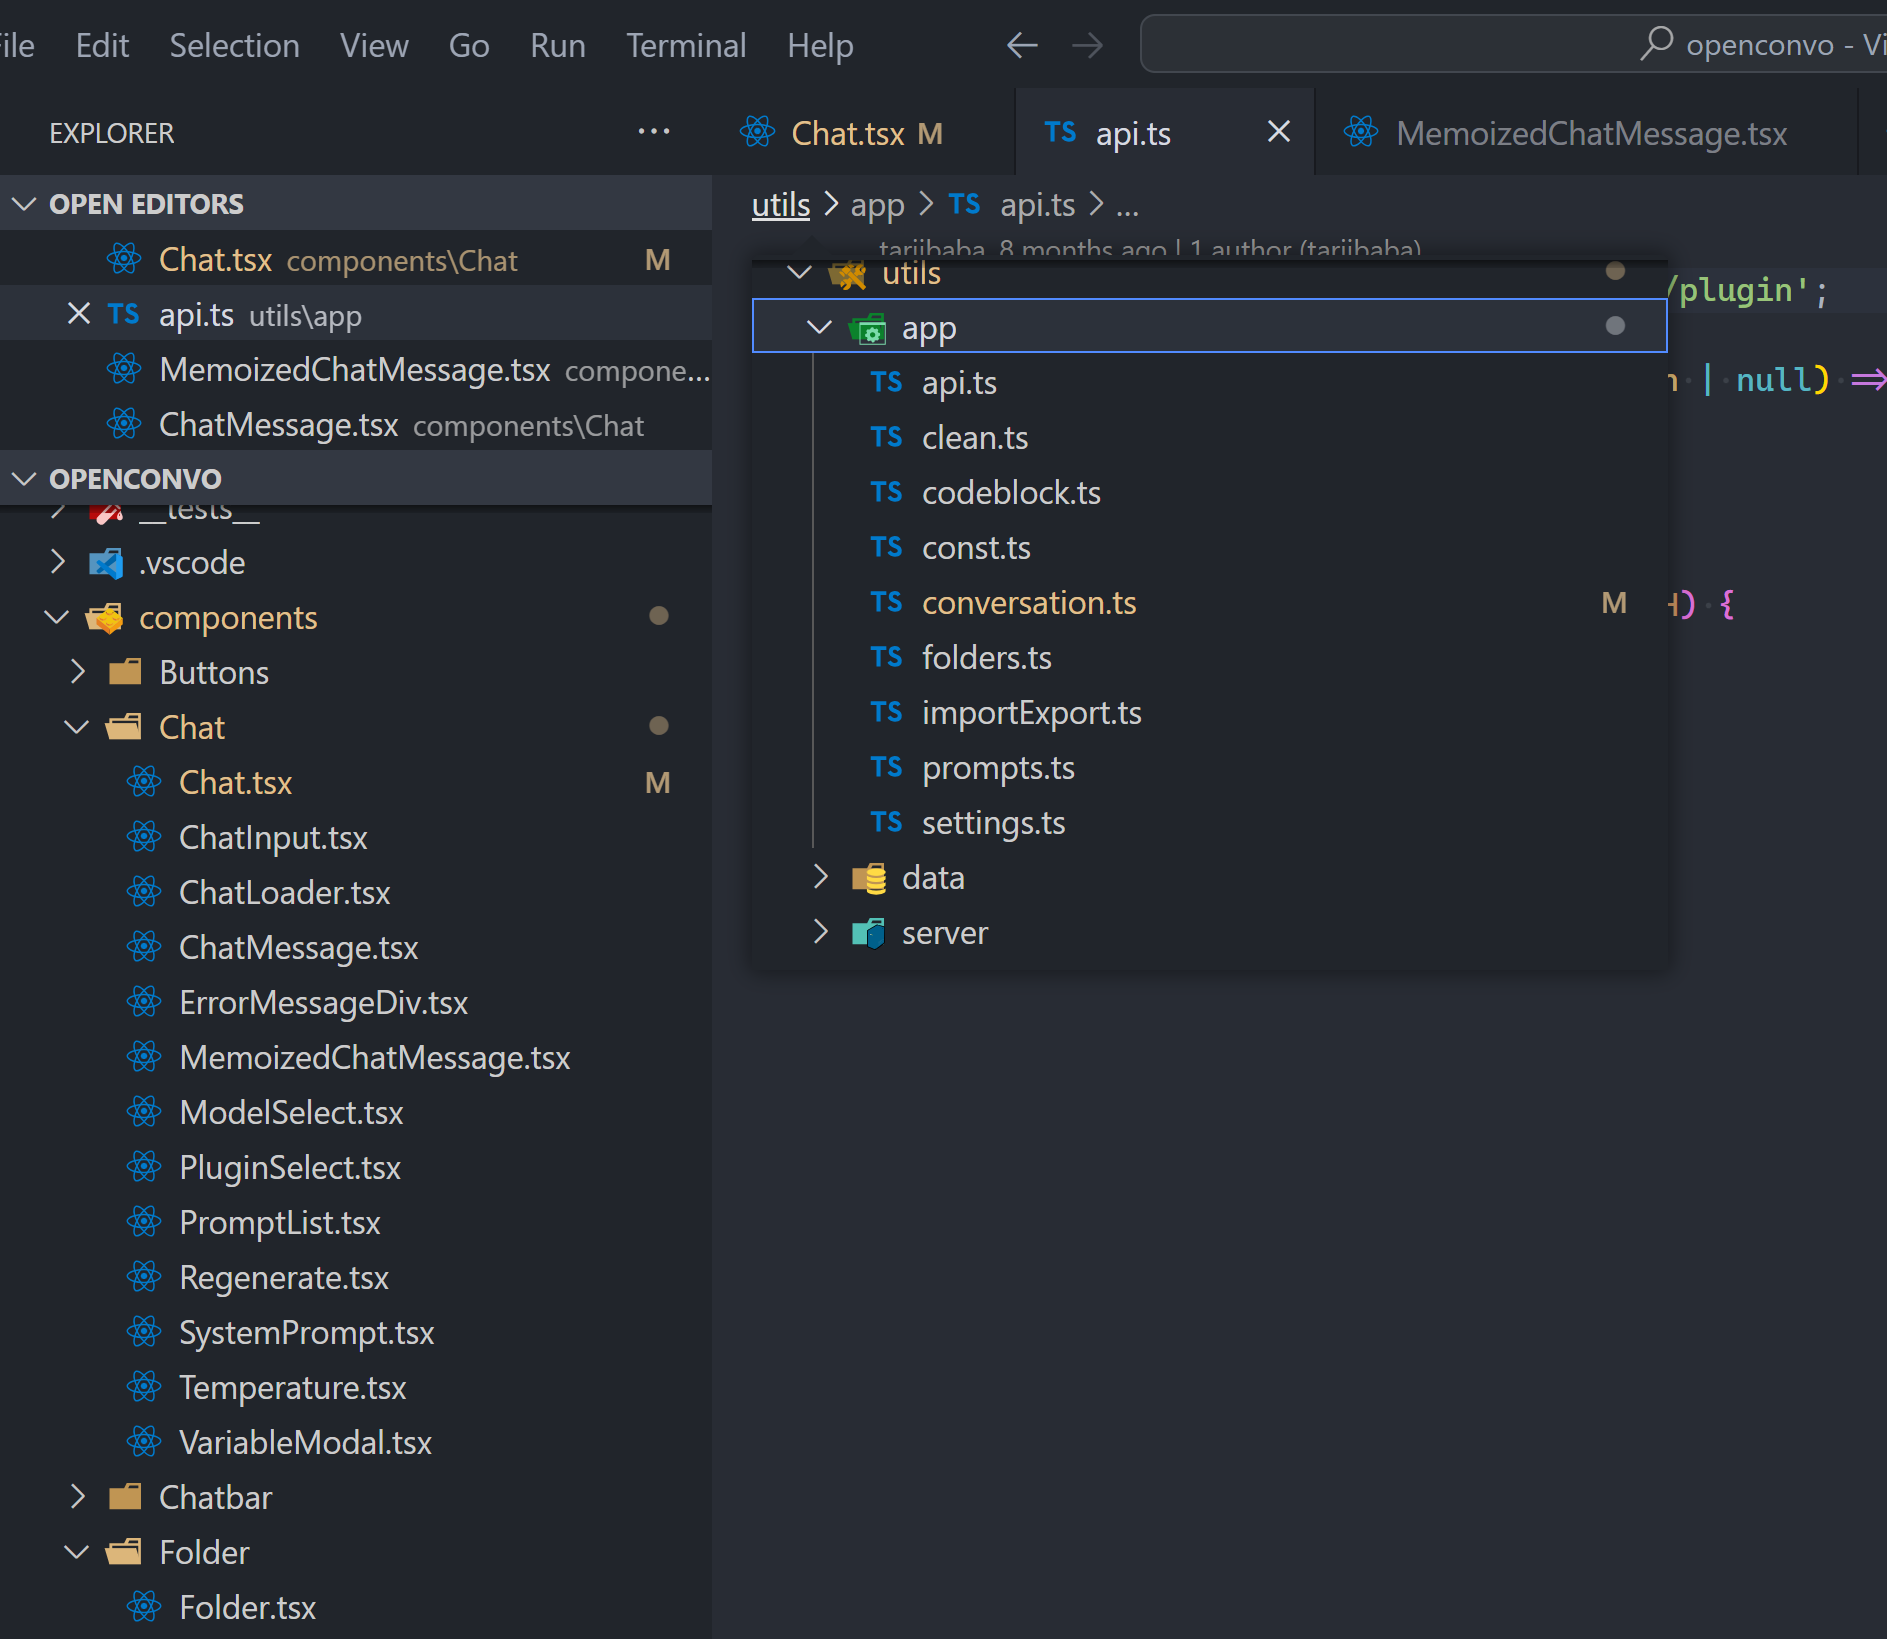
But unity extends beyond individual objects. Imagine breaking down a complex program into modular systems, each with its own well-defined purpose.
Every single file plays it’s unique, important role towards the common purpose.
Similar to the departments in a company each module focuses on a specific task like user authentication or data processing. These modules then communicate through APIs (Application Programming Interfaces), standardized languages that facilitate seamless collaboration.
Picture the API as a translator ensuring smooth communication between modules just like diplomats ensure cooperation between nations.
This modular approach not only fosters code organization but also promotes reusability and independent development, allowing different teams to contribute to the unified whole.
The concept of unity even shines through in the ever-evolving world of microservices. Imagine a monolithic application as a centralized factory, a single, atomic unit humming with activity.
As powerful as that may be it’ll be pretty tough to update or repair specific functionalities since they’re all tightly couple to one another. But for microservices we break the system into smaller + independent services like specialized stations in the factory.
Each service operates autonomously, yet communicates through standardized protocols, ensuring collaboration. This distributed architecture promotes agility, scalability, and resilience, fostering a unified system that easily adapts to our changing needs.
Seeing coding as unity doesn’t diminish the rigor of logic or the importance of problem-solving. Instead, it adds a layer of appreciation for the elegance and beauty that emerges when disparate elements become a cohesive whole.
Like a composer finding the perfect harmony between instruments, we strive for unity in algorithms, searching for the most efficient and unified approach to solve a problem. We craft elegant frameworks and reusable libraries promoting consistency and collaboration across projects.
This shift in perspective isn’t just about aesthetics; it has practical implications.
By understanding the connections between components, coders can debug more effectively, anticipate unintended consequences, and write code that is easier to maintain and adapt. It fosters a collaborative spirit, where individual contributions become building blocks for a unified system.
Remember, unity doesn’t imply uniformity. Just like a diverse ecosystem thrives on interconnectedness while celebrating individual species, code benefits from variety within unity.
Different programming paradigms, languages, and libraries enrich the landscape, offering solutions tailored to specific problems. The key lies in understanding the underlying principles of unity and applying them creatively to bring the best out of each unique element.
So, the next time you open your code editor, remember the power of unity. See your code not as a jumble of lines, but as a symphony waiting to be composed.
By appreciating the connections and collaborations within your program, you’ll not only write better code, but also unlock a deeper understanding and appreciation for the art of programming.
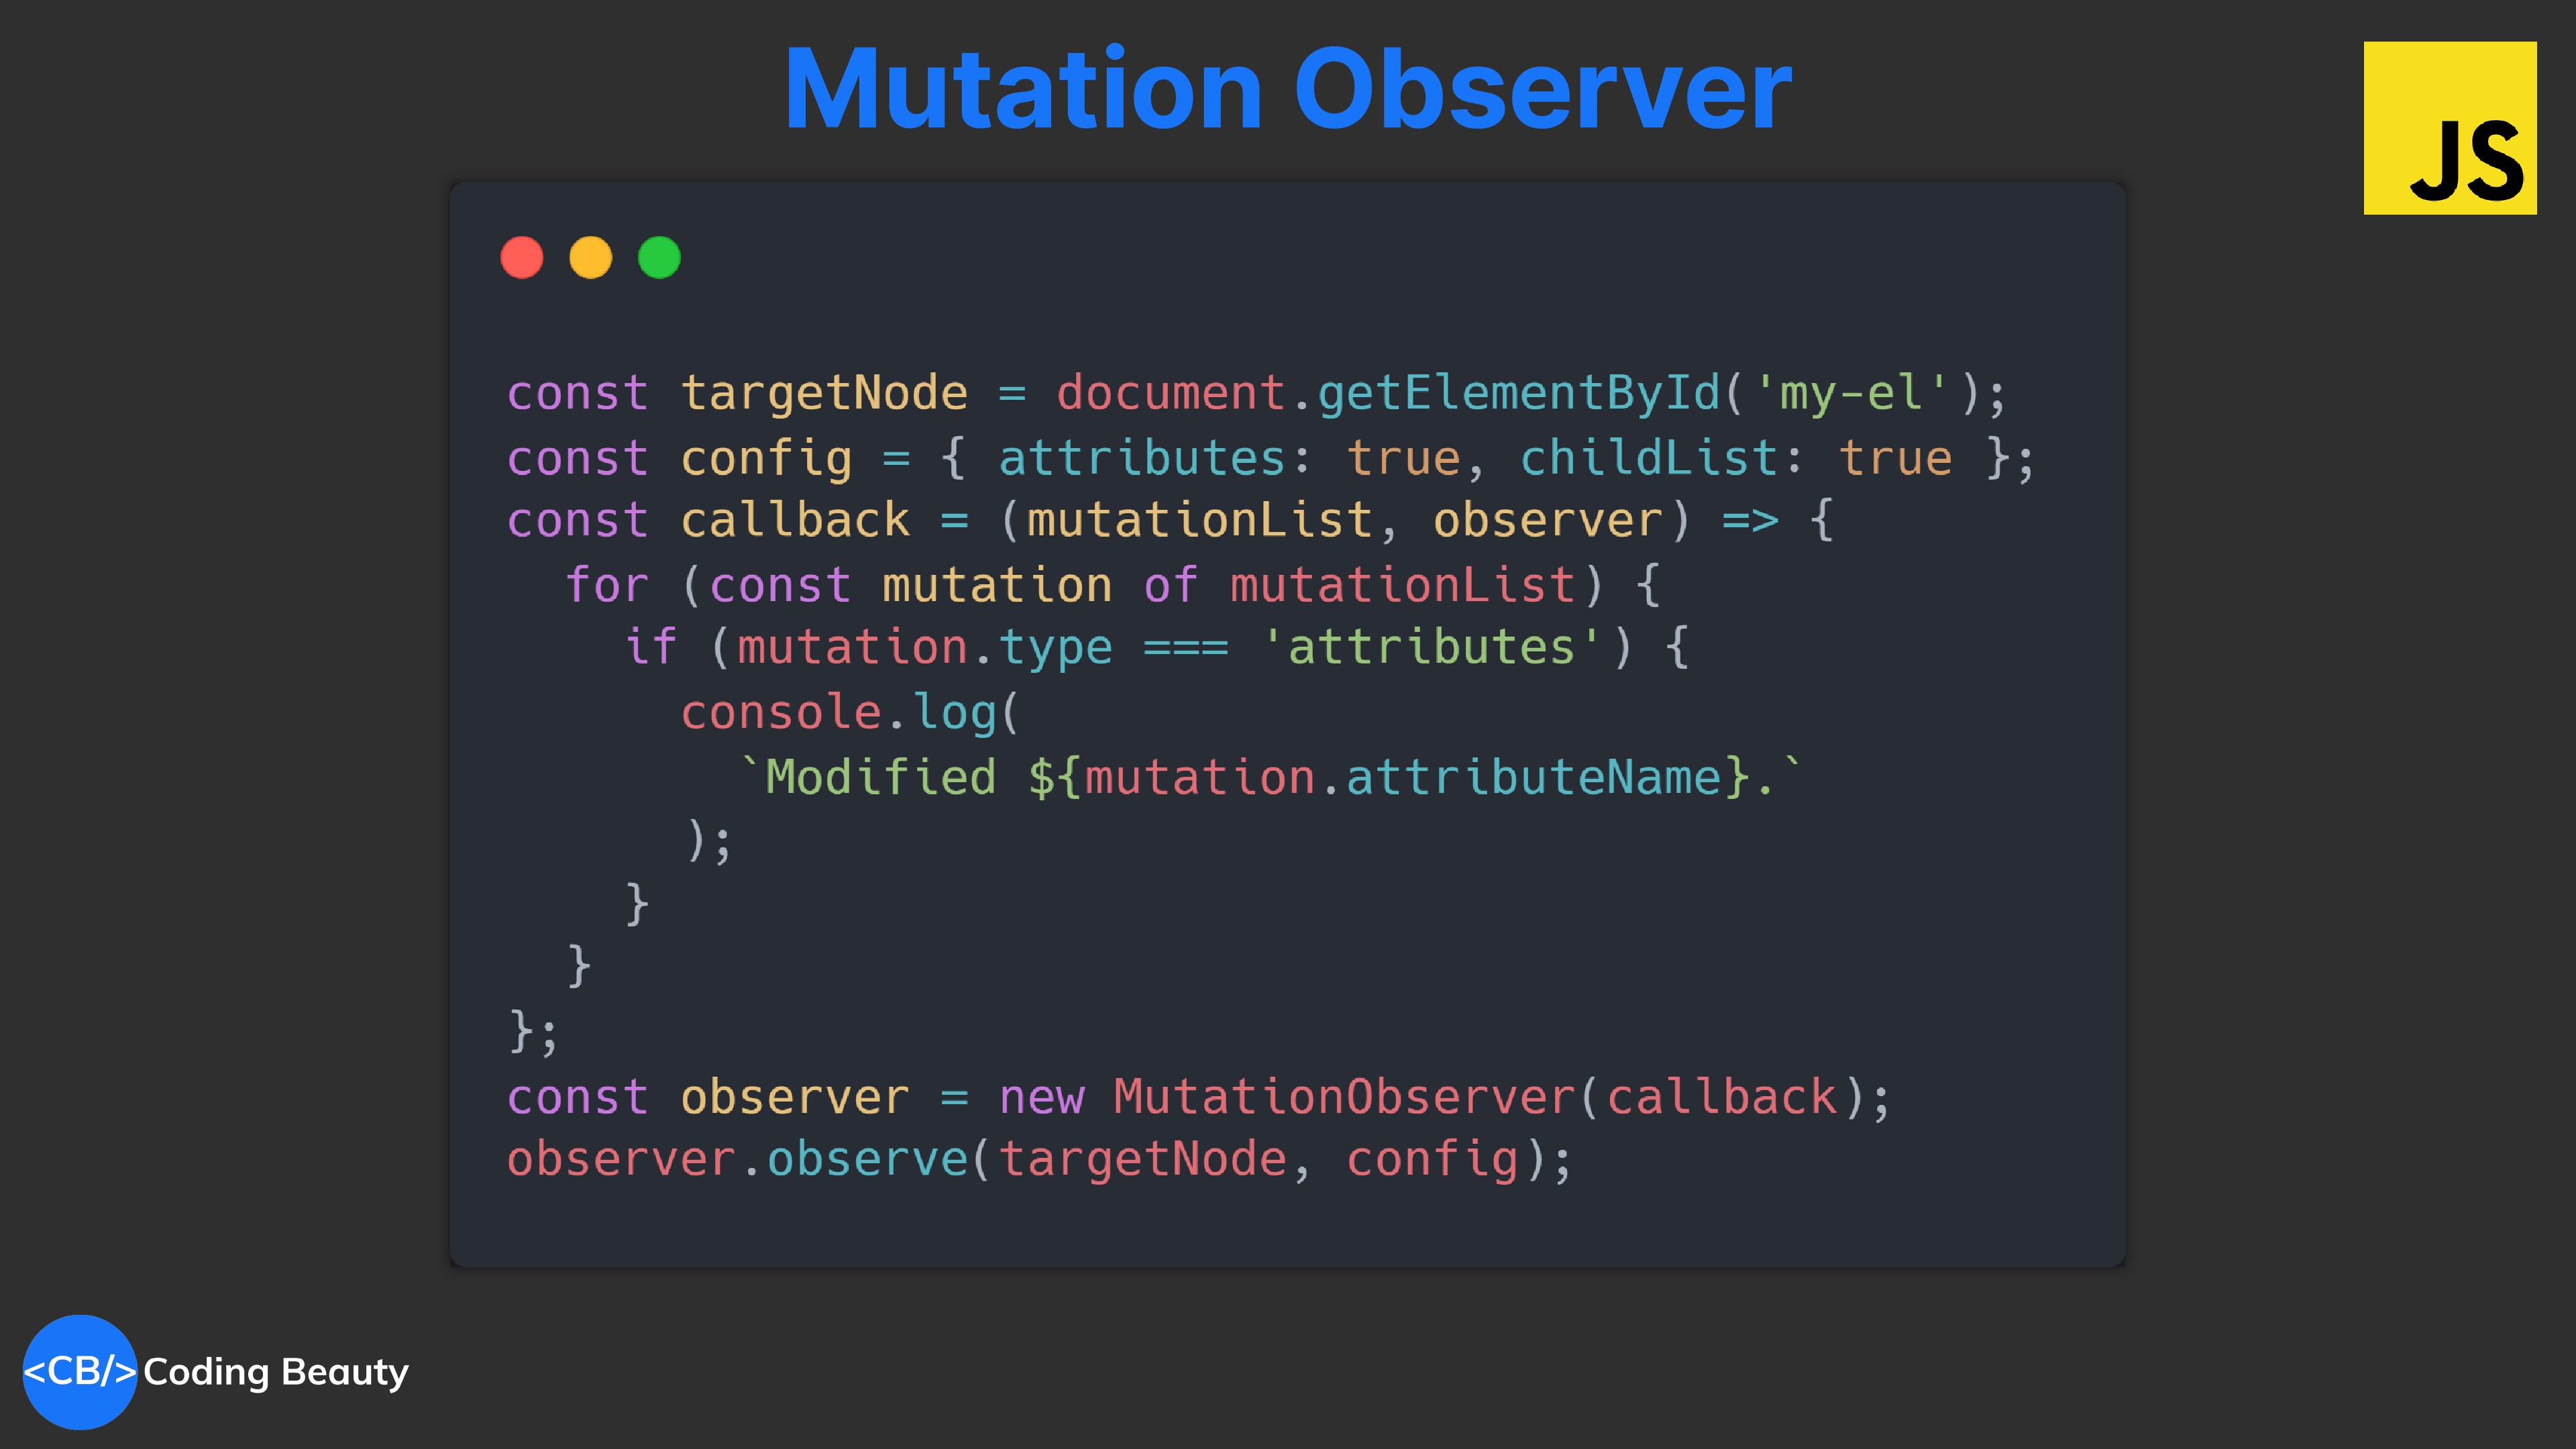
An underrated API for watching for changes in the DOM: “child added”, “attribute changed”, and more.
JavaScriptCopied!
// Node/element to be observed for mutations
const targetNode = document.getElementById('my-el');

// Options for the observer (which mutations to observe)
const config = { attributes: true, childList: true, subtree: true };

// Callback function to execute when mutations are observed
const callback = (mutationList, observer) => {
  for (const mutation of mutationList) {
    if (mutation.type === 'childList') {
      console.log('A child node has been added or removed.');
    } else if (mutation.type === 'attributes') {
      console.log(
        `The ${mutation.attributeName} attribute was modified.`
      );
    }
  }
};

// Create an observer instance linked to the callback function
const observer = new MutationObserver(callback);

// Start observing the target node for configured mutations
observer.observe(targetNode, config);

// Later, you can stop observing
observer.disconnect();
I see a bunch of people online curious to know the point of this API in the real-world.
In this post I’ll show you how I used it to easily shut-up this annoying script carrying out unwanted activities on the page.
And you’ll see how sleek and polish the UI elements became after this.
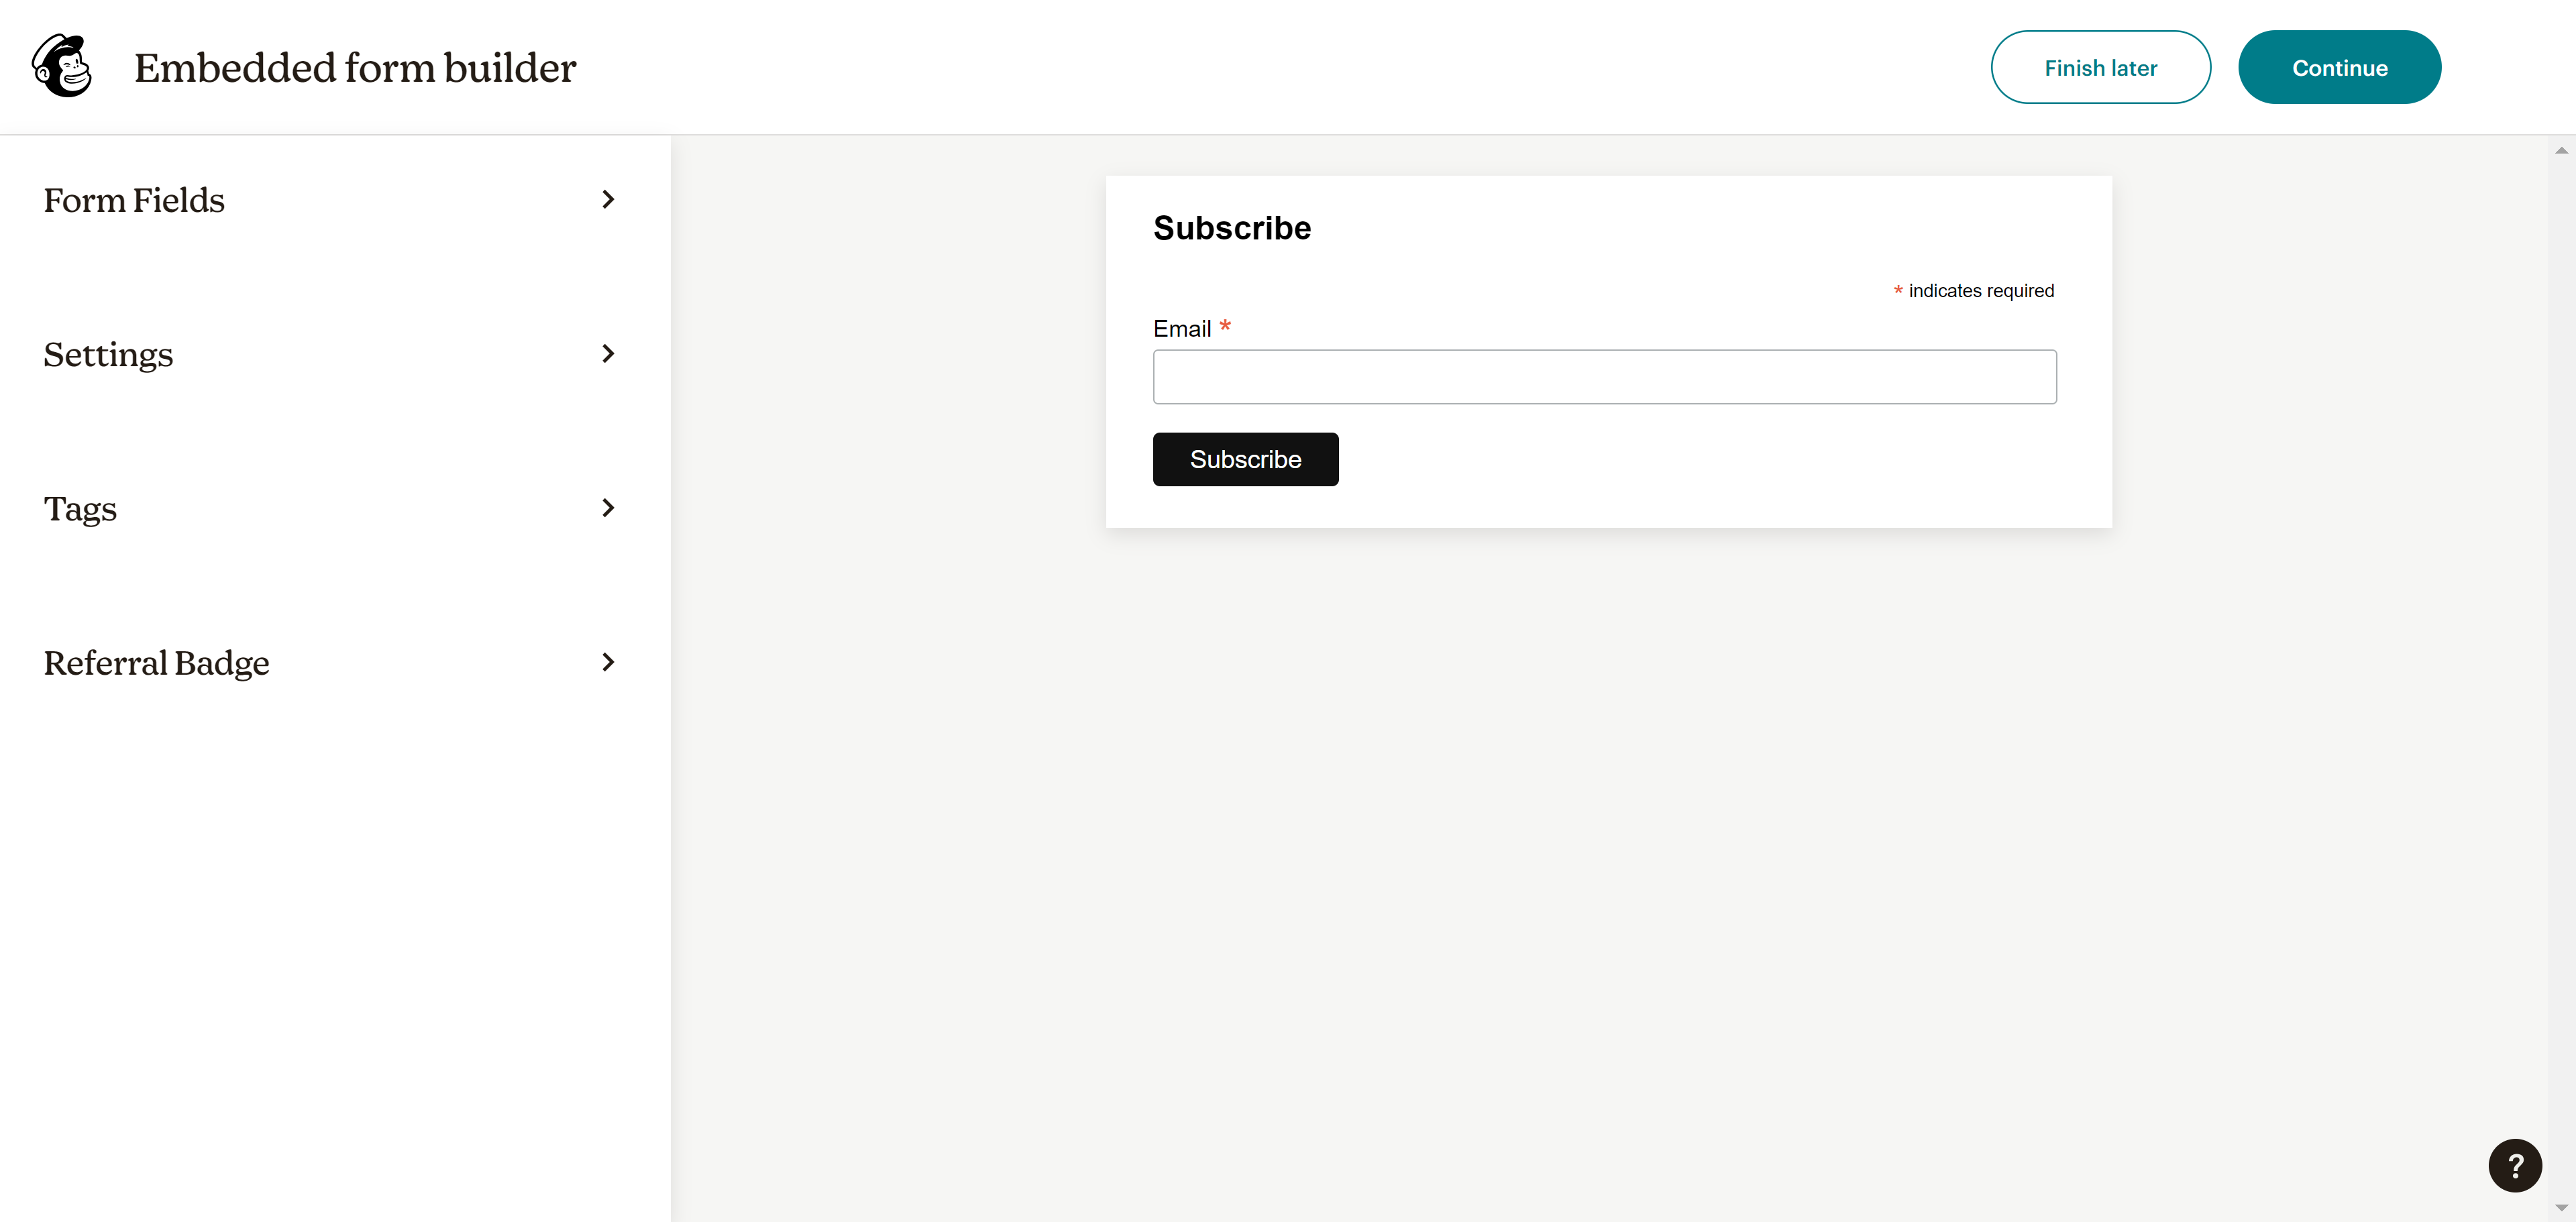
The 3rd party script
It came from Mailchimp – a service for managing email lists.
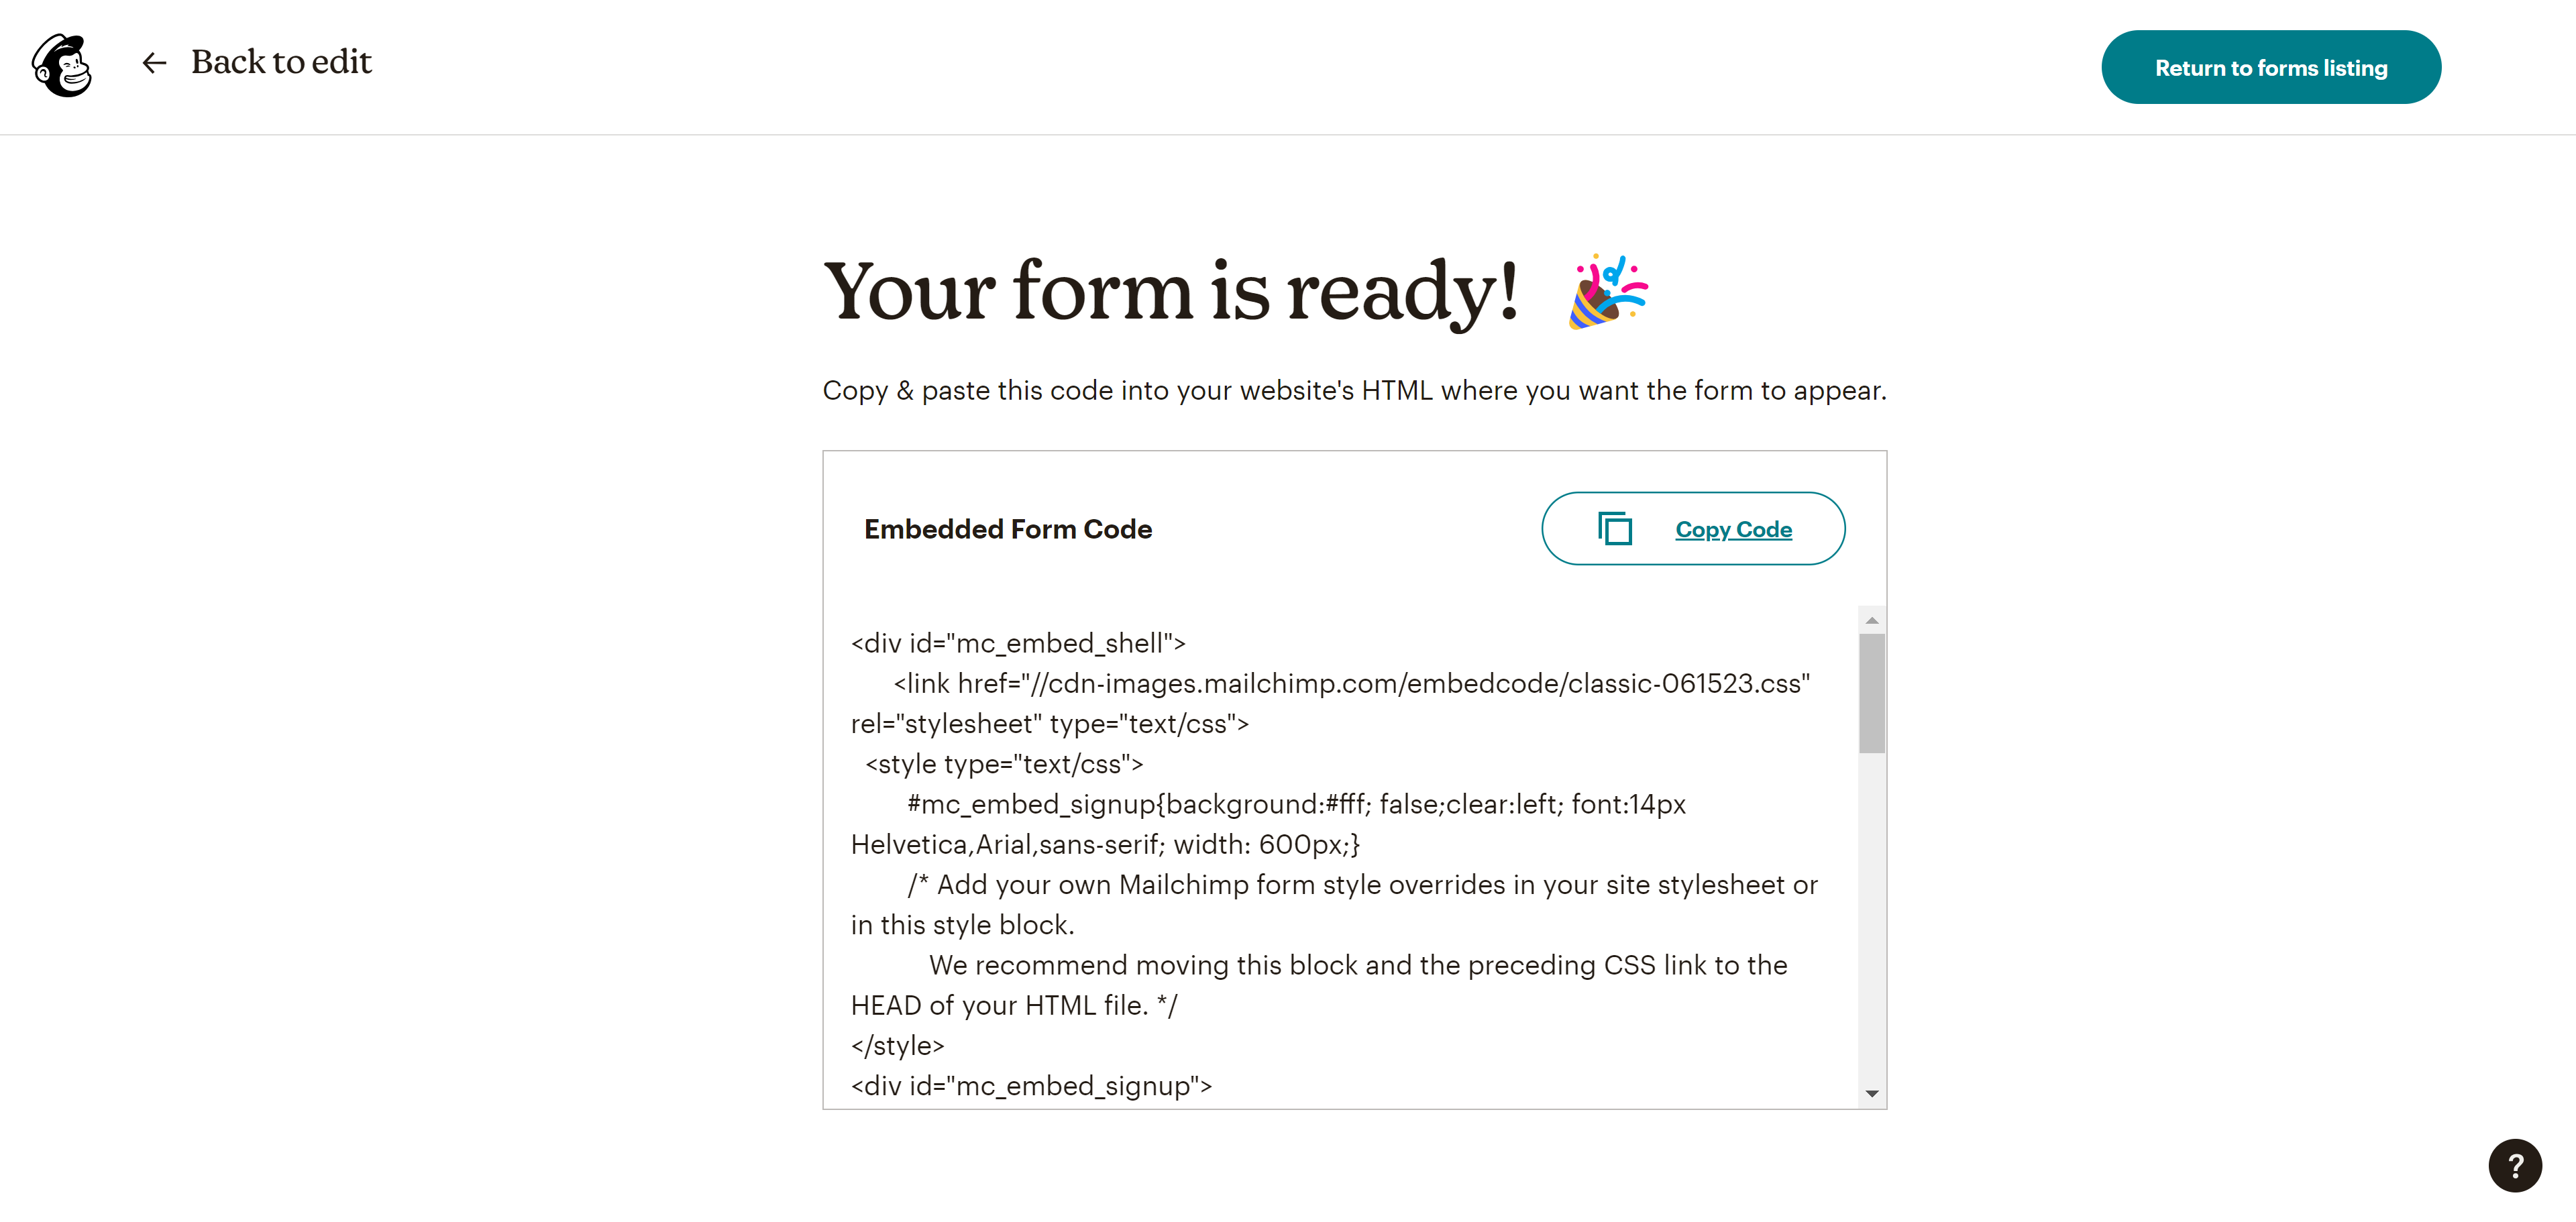
Mailchimp provides embedded forms to easily collect sign-ups to your list.
These forms are HTML code embedded in your webpage without any additional configuration.
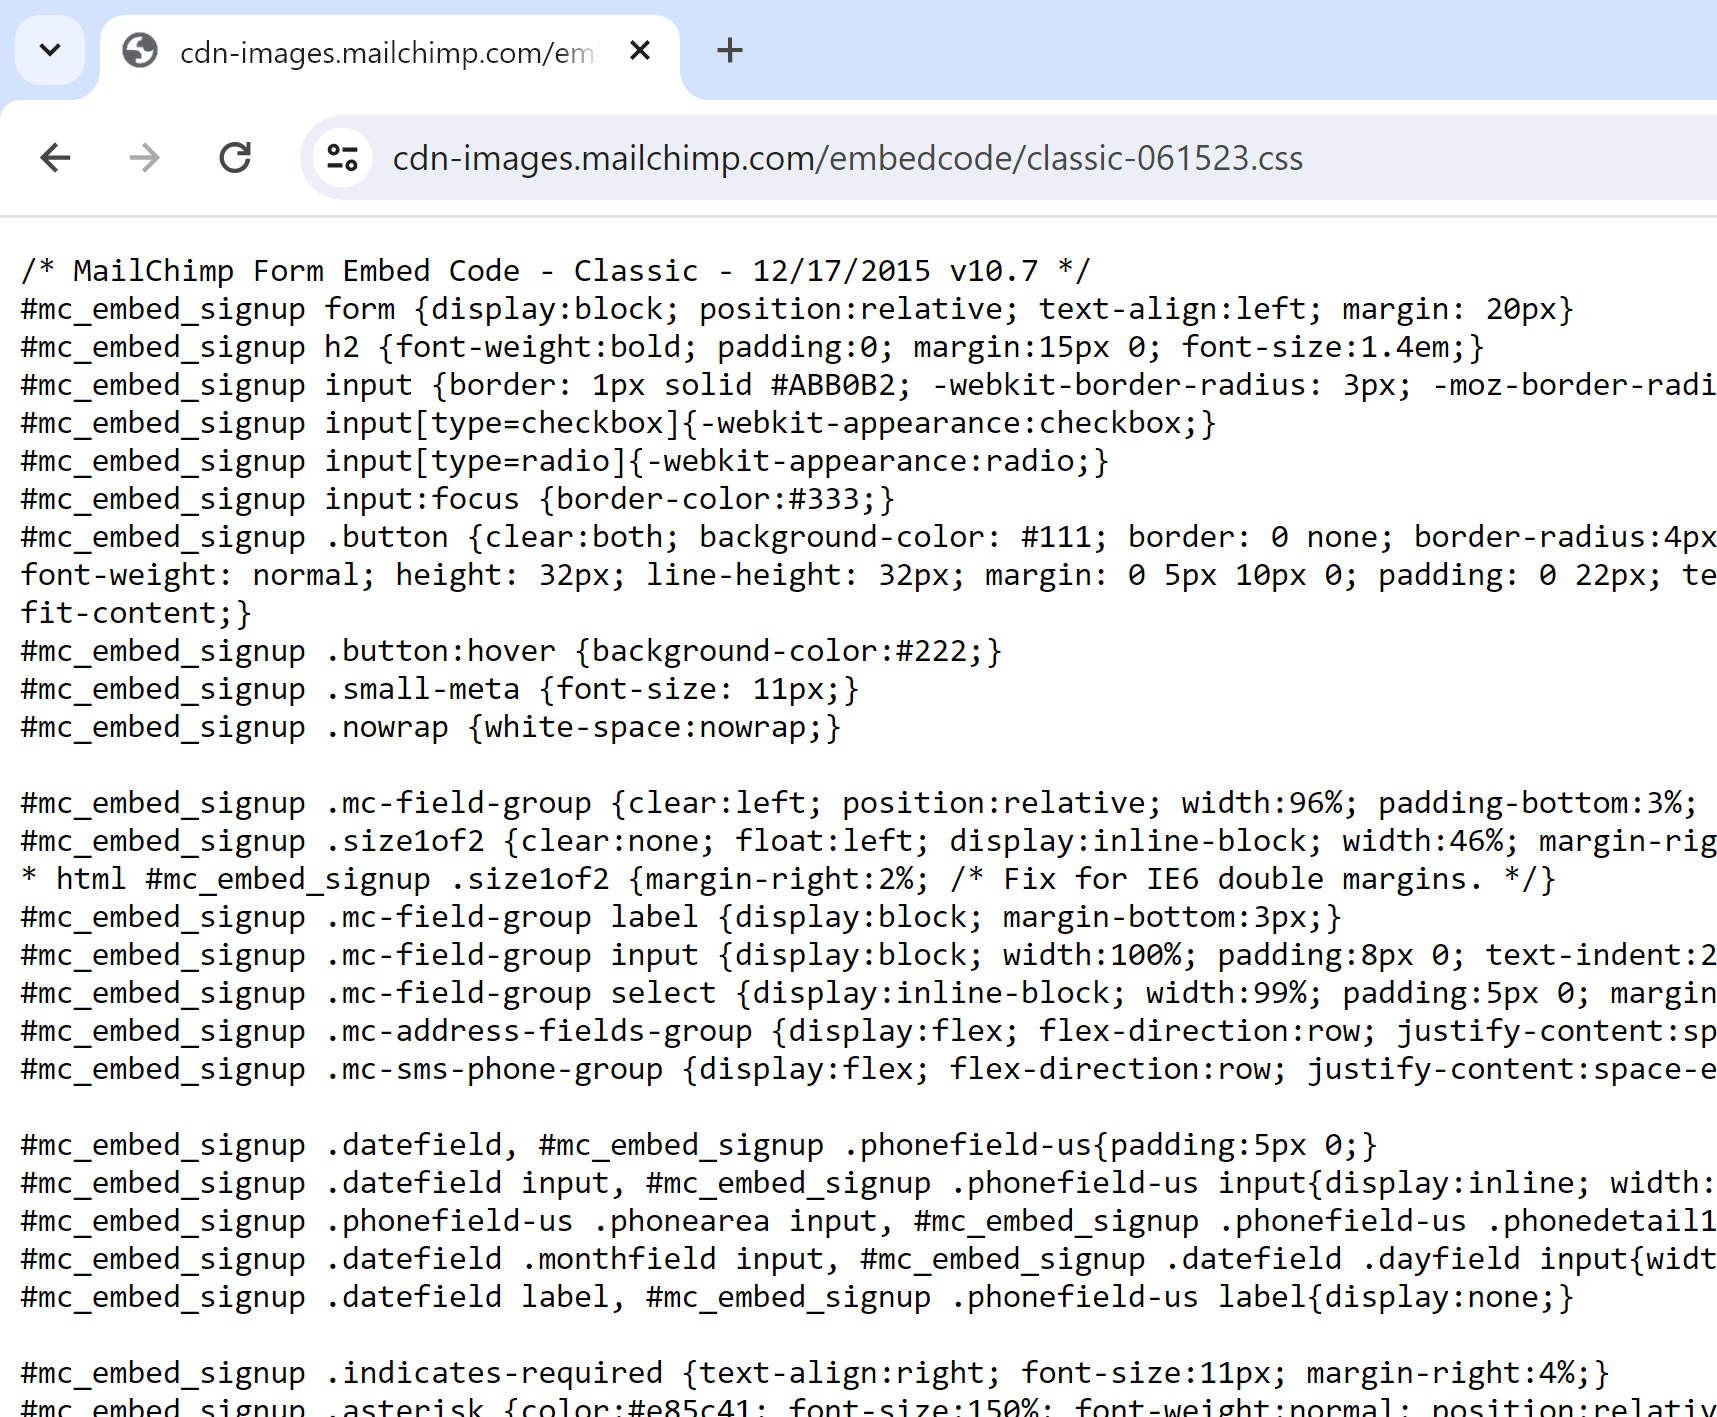
But being this ready-to-use nature comes at a cost; deeply embedded CSS stubbornly resisting any attempt to customize the form’s look and feel.
I mean I know I definitely spent WAY more than I should have doing this, having to throw CSS !important all over the place and all…
Stubbornly rigid JS
On the JS side I had the remote Mailchimp script showing these pre-defined error/success messages after the request to the Mailchimp API.
Sure this was an decent success message but there was simply no built-in option to customize it. And we couldn’t indicate success in other ways like a color or icon change.
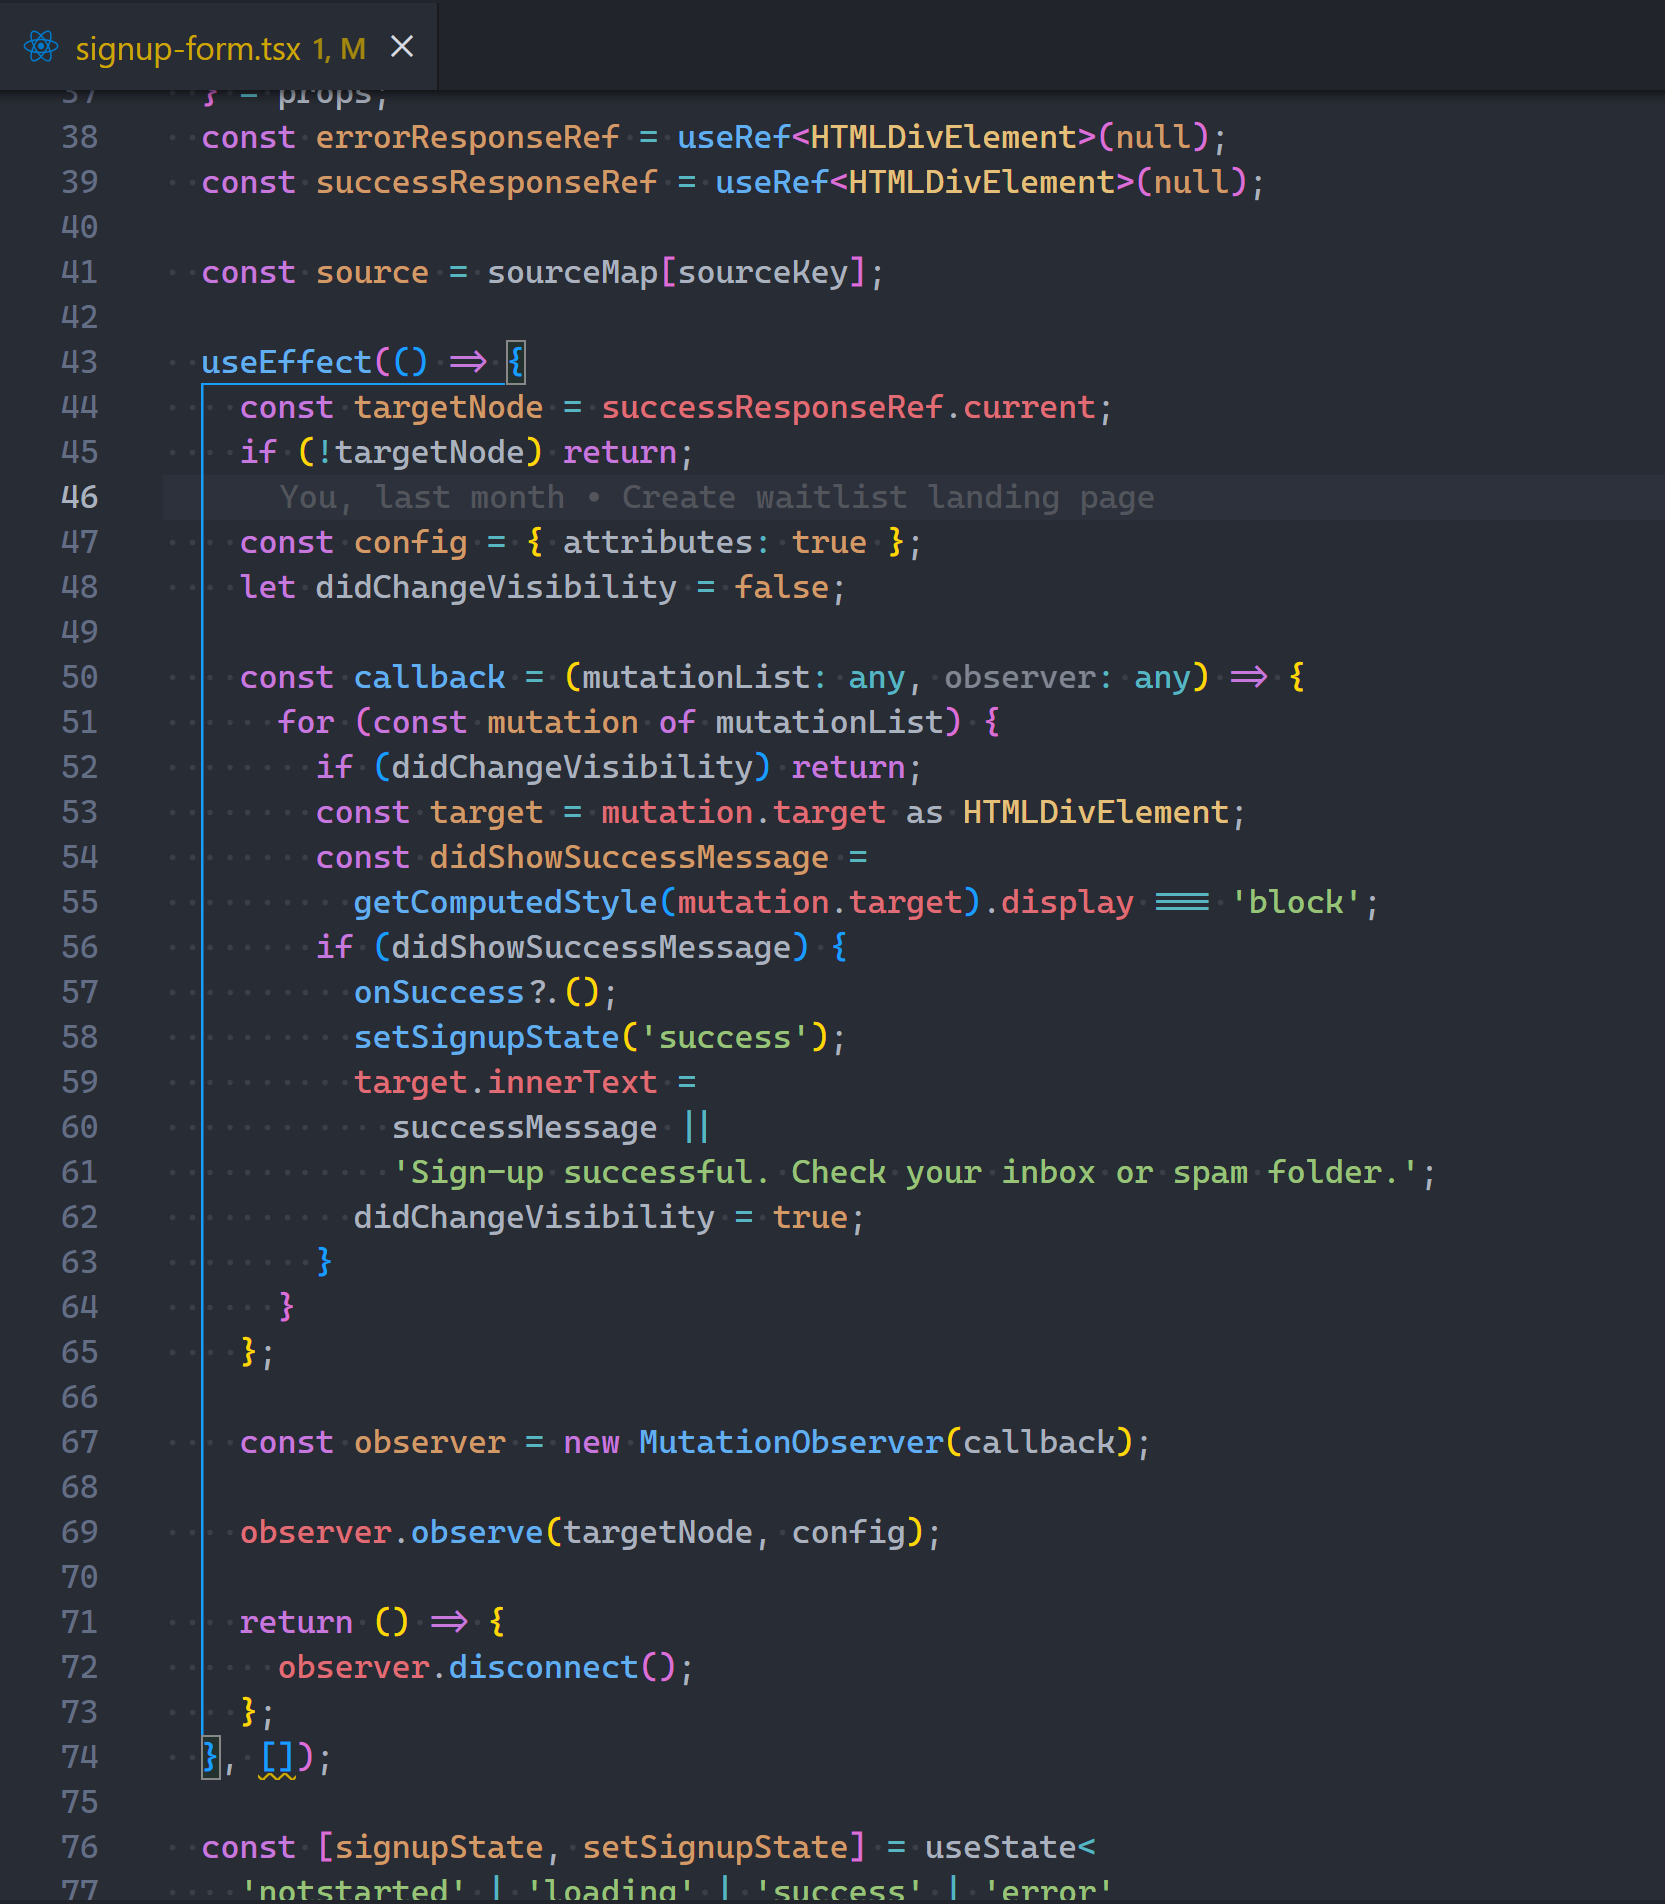
Mutation Observer to the rescue…
Waiting for the precise moment the success text came in and instantly swapping out the copy for whatever I wanted and doing anything else.
And just like that the script was blocked from directly affecting the UI.
We basically turned it into an Event Emitter service; an observable.
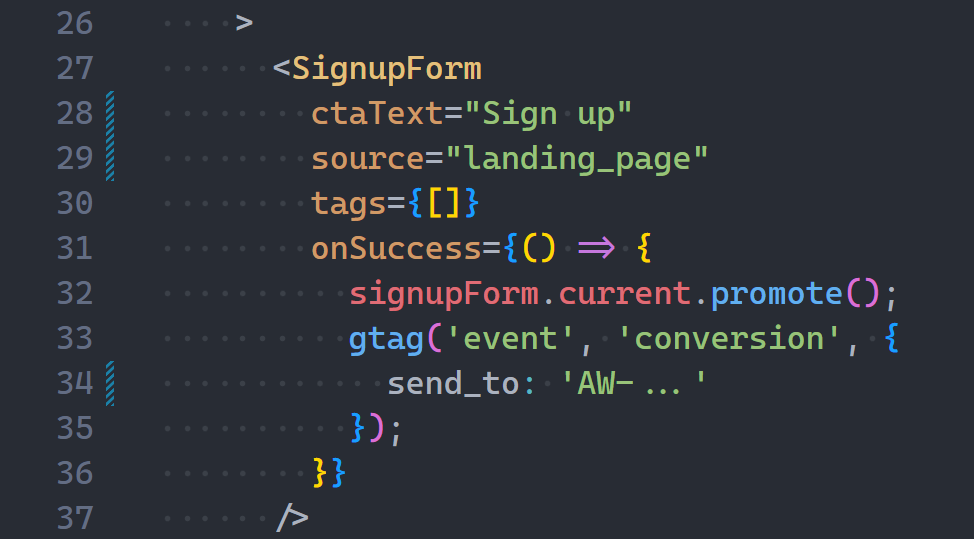
This let us easily abstract everything into a React component and add various event listeners (like onSuccess and onError):
To create the polished form we saw earlier:
This is the power of the JavaScript Mutation Observer API.