tutorial

How to Get the Current Mouse Position in JavaScript

To get the current position of the mouse in JavaScript, add a mousemove event listener to the window object and access the clientX and clientY properties of the MouseEvent object in the listener to get the X and Y coordinates of the mouse respectively.

For example:

HTML
<p> Mouse pos: <b><span id="mouse-pos"></span></b> </p>
JavaScript
const mousePosText = document.getElementById('mouse-pos'); let mousePos = { x: undefined, y: undefined }; window.addEventListener('mousemove', (event) => { mousePos = { x: event.clientX, y: event.clientY }; mousePosText.textContent = `(${mousePos.x}, ${mousePos.y})`; });
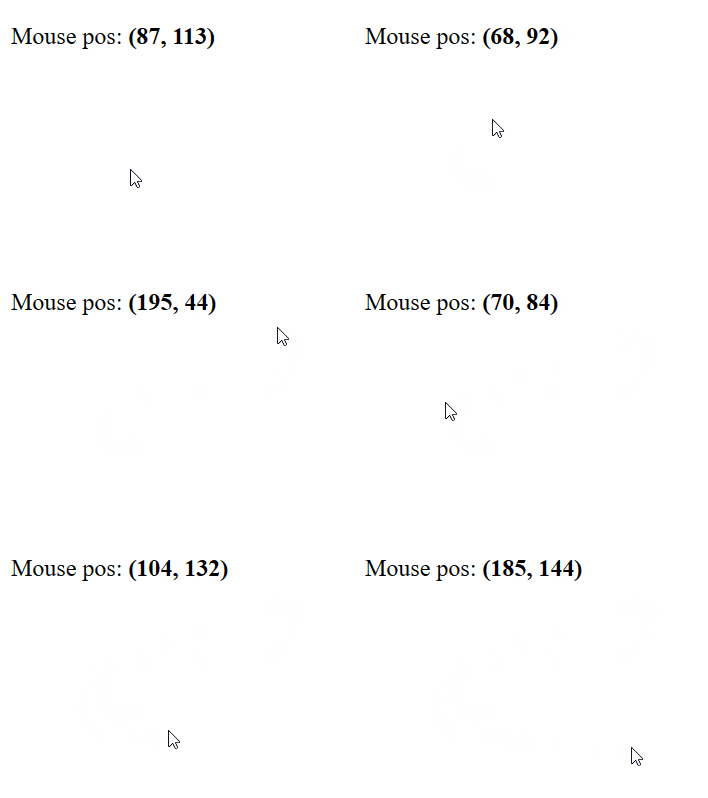
The current mouse position is shown.

The mousemove event is triggered on an element when the mouse hovers it. To be more precise, it is fired when the mouse is moved and the cursor’s hotspot is within the element’s bounds.

We attach the event listener to the window object to trigger the event whenever the mouse has moved anywhere on the page.

The mousemove event listener receives a MouseEvent object used to access information and perform actions related to the event. We use the clientX and clientY properties of this object to get the position of the mouse on the X-coordinate and Y-coordinate respectively in the application’s viewport.

Get current mouse position relative to element in React

In the first example, we get the current mouse position in global coordinates. In global coordinates, position (0, 0) is at the top-left of the webpage and position (Xmax, Ymin) is at the bottom right.

We might instead want to get the mouse position within the region of an element.

To get the current mouse position relative to an element, set a mousemove event handler on the element, then calculate the local X and Y positions using properties of the MouseEvent object passed to the event handler.

For example:

HTML
<div> <div class="local"> Local <br /> <b><span id="local-mouse-pos"></span></b> </div> <p> Global <br /> <b><span id="global-mouse-pos"></span></b> </p> </div>
CSS
.local { border: 1px solid #c0c0c0; padding: 75px; text-align: center; display: inline-block; margin-left: 100px; margin-top: 100px; }
JavaScript
const globalMousePosText = document.getElementById('global-mouse-pos'); const localMousePosText = document.getElementById('local-mouse-pos'); let localMousePos = { x: undefined, y: undefined }; let globalMousePos = { x: undefined, y: undefined }; window.addEventListener('mousemove', (event) => { const localX = event.clientX - event.target.offsetLeft; const localY = event.clientY - event.target.offsetTop; localMousePos = { x: localX, y: localY }; globalMousePos = { x: event.clientX, y: event.clientY }; globalMousePosText.textContent = `(${globalMousePos.x}, ${globalMousePos.y})`; localMousePosText.textContent = `(${localMousePos.x}, ${localMousePos.y})`; });

Now the resulting X and Y coordinates will be relative to the element. For example, position (0, 0) will be at the top left of the element, not the viewport:

The current mouse position relative to the element in shown.
The current mouse position relative to the element is shown.

We subtract the offsetLeft property of the element from the clientX property of the MouseEvent object to get the position on the X-axis relative to the element.

Similarly, to get the position on the Y-axis, we subtract the offsetTop property from the clientY property of the MouseEvent object.

JavaScript
window.addEventListener('mousemove', (event) => { const localX = event.clientX - event.target.offsetLeft; const localY = event.clientY - event.target.offsetTop; localMousePos = { x: localX, y: localY }; // ... });

The offsetLeft property returns the number of pixels between the left position of an element and its parent.

Likewise, the offsetTop property returns the number of pixels between the top position of an element and its parent.

How to Check if String Contains Whitespace in JavaScript

To check if a string contains whitespace in JavaScript, call the test() method on this regex: \s, i.e., /\s/.test(str). test() will return true if the string contains any whitespace character. Otherwise, it will return false.

JavaScript
function containsWhitespace(str) { return /\s/.test(str); } console.log(containsWhitespace(' ')); // true console.log(containsWhitespace('JavaScript')); // false console.log(containsWhitespace('coding beauty')); // true console.log(containsWhitespace('string\twith\ttabs')); // true console.log(containsWhitespace('string\nwith\nnewline')); // true

The RegExp test() method searches a string for matches with a regular expression. It returns true if any matches are found. Otherwise, it returns false.

The forward slashes / and / indicate the start and end of the regular expression.

The \s matches any single whitespace character in the string.

This method will match any whitespace character, including:

  • space (' ')
  • tab (\t)
  • carriage return (\r)
  • line feed (\n), and
  • vertical tab (\v)
JavaScript
// space (' ') console.log(containsWhitespace('coding beauty')); // true // carriage return (\r) console.log(containsWhitespace('coding\rbeauty\r')); // true // line feed (\n) console.log(containsWhitespace('coding\nbeauty\n')); // true // form feed (\f) console.log(containsWhitespace('coding\f\beauty\f')); // true // vertical tab (\v) console.log(containsWhitespace('coding\vbeauty\v')); // true

If you only to check if the string contains a space character, you’ll need to use a different approach…

Check if string contains only spaces

To check if a string contains only spaces, simply change the regex to a space character:

JavaScript
function containsWhitespace(str) { return / /.test(str); } console.log(containsWhitespace('coding beauty')); // true console.log(containsWhitespace('coding\rbeauty\r')); // false console.log(containsWhitespace('coding\nbeauty\n')); // false console.log(containsWhitespace('coding\f\beauty\f')); // false console.log(containsWhitespace('coding\vbeauty\v')); // false

You can also use call the String includes() methods with a space character to check if such a character exists in the string.

JavaScript
function containsWhitespace(str) { return str.includes(' '); } console.log(containsWhitespace('coding beauty')); // true console.log(containsWhitespace('coding\rbeauty\r')); // false console.log(containsWhitespace('coding\nbeauty\n')); // false console.log(containsWhitespace('coding\f\beauty\f')); // false console.log(containsWhitespace('coding\vbeauty\v')); // false

Check if string contains whitespace with String match()

We can use the call the match() method on a string with the /\s/ as an argument to check whether the string contains whitespace.

JavaScript
function containsWhitespace(str) { return Boolean(str.match(/\s/)); } console.log(containsWhitespace(' ')); // true console.log(containsWhitespace('JavaScript')); // false console.log(containsWhitespace('coding beauty')); // true console.log(containsWhitespace('string\twith\ttabs')); // true console.log(containsWhitespace('string\nwith\nnewline')); // true

Like the RegExp test() method, match() searches a string for matches with a regular expression, but it returns an array of the matches, instead of a boolean value.

JavaScript
// [ ' ', index: 6, input: 'coding beauty', groups: undefined ] console.log('coding beauty'.match(/\s/));

In this case, match() returns an array that contains the first match of a whitespace character, along with some additional properties that provide more information on the match.

If there are no matches found in the string, match() returns null:

JavaScript
console.log('Coding_Beauty'.match(/\s/)); // null

Because of how match() works, we can cast the return value to a boolean, whose value would indicate whether or not any matches of a whitespace character exist in the string.

The Boolean() constructor casts a truthy or false value to true or false. An array of matches from match() will be cast to true, indicating the presence of matches, and a null value from match() will be cast to false, meaning that no matches can be found.

Note: In JavaScript, there are six falsy values: undefined, null, NaN, 0, '' (empty string), and false. Every other value is truthy.

How to Add a Class to All Elements With JavaScript

To add a class to all HTML DOM elements using JavaScript:

  1. Get a list of all the elements in the DOM with document.querySelectorAll('body *').
  2. Iterate over the list with forEach().
  3. For each element, call classList.add(class) to add the class to each element.

i.e.:

JavaScript
const elements = document.querySelectorAll('body *'); // const allElementsOfParentWithClass = document.querySelectorAll('.class *'); // const allElementsOfParentWithId = document.querySelectorAll('#id *'); // const allElementsOfParentWithTag = document.querySelectorAll('tag *'); elements.forEach((element) => { element.classList.add('class'); });

For example:

HTML
<p class="big bold text">Coding</p> <p class="big bold text">Beauty</p> <div class="container"> <p class="big text">Dev</p> <button class="big btn raised">Visit</button> </div> <br /> <button id="add">Add class</button>
CSS
.bold { font-weight: bold; } .big { font-size: 1.5em; } .text { font-family: Arial; } .btn { color: white; background-color: blue; }
JavaScript
const addBtn = document.getElementById('add'); addBtn.addEventListener('click', () => { const elements = document.querySelectorAll('*'); elements.forEach((element) => { element.classList.add('big'); }); });

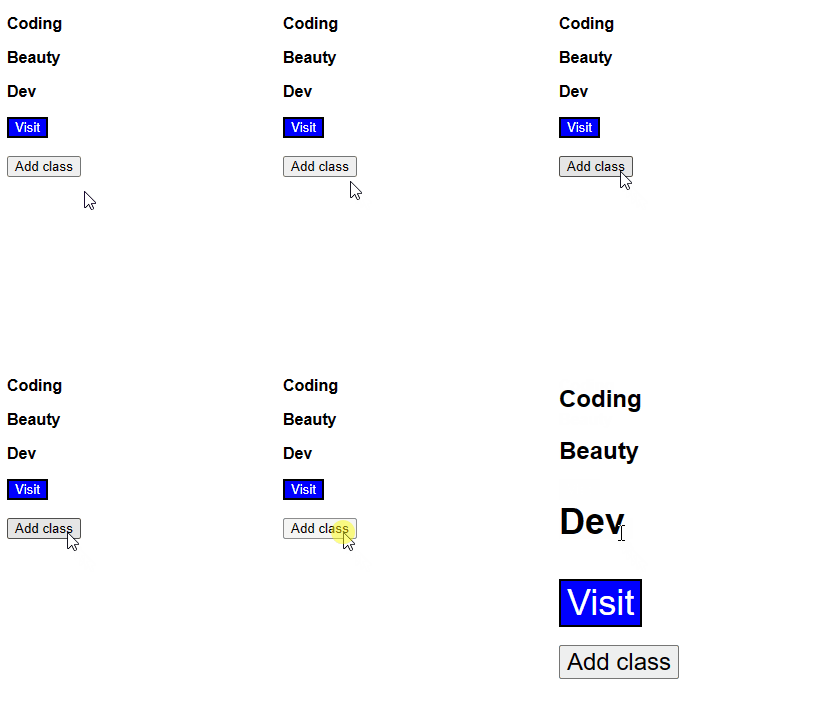
This will be the HTML after the button is clicked:

HTML
<p class="big bold text">Coding</p> <p class="big bold text">Beauty</p> <div class="big container"> <p class="big bold text">Dev</p> <button class="big btn">Visit</button> </div> <br class="big" /> <button id="add">Add class</button>
The class is added to all elements when the button is clicked.

The Dev text and Visit button are larger than other elements in font size, because font-size: 1.2em from the big class is applied to their .container parent, and also to them individually, so they each have a resulting font-size of 1.44em relative to the root element.

We use the document.querySelectorAll() method to select all the DOM elements

We loop through the elements in the list object with its forEach() method. This forEach() method works similarly to Array forEach().

classList.add() method

We use the classList.add() method to add a class to the elements. You can add multiple classes by passing more arguments to add().

JavaScript
const addBtn = document.getElementById('add'); addBtn.addEventListener('click', () => { const elements = document.querySelectorAll('body *'); elements.forEach((element) => { element.classList.add('big', 'blue'); }); });

If any of the classes passed to add() already exists on the element, add() will ignore this, instead of throwing an error.

Add class to all child elements of element

If we want, we could instead add a class to all child elements of a parent that has a specific selector, such as an ID, class, or tag. For instance, we could have done this for the .container element.

To do this, we just need to prefix the * with the element’s selector and separate them with a space. Like we did for body * to get all the elements in the body tag.

JavaScript
const addBtn = document.getElementById('add'); addBtn.addEventListener('click', () => { const elements = document.querySelectorAll('.container *'); elements.forEach((element) => { element.classList.add('big'); }); });
The class is added to all elements in the .container when the button is clicked.

Remove class from all elements

Just like the classList.add() method adds one or more classes to an element, the classList.remove() remove one or more classes from an element. This means that we can use it in the forEach() method to remove a class from all DOM elements.

JavaScript
const elements = document.querySelectorAll('body *'); elements.forEach((element) => { element.classList.remove('big', 'bold'); });

How to Fix the “Cannot read property ‘toString’ of undefined” Error in JavaScript

The “Cannot read property ‘toString’ of undefined” error occurs in JavaScript when you call the toString() on a variable that unexpectedly has a value of undefined.

The "Cannot read property 'toString' of undefined" error occurring

To fix it, try one of the following:

  1. Add an undefined check on the variable.
  2. Ensure the variable is initialized.
  3. Ensure you’re not trying to access the variable from a non-existent index in the array.

1. Add undefined check on variable

a. Use if statement

We can use an if statement to check if the variable is truthy before calling the toString() method.

JavaScript
const obj = undefined; let result = undefined; if (obj) { result = obj.toString(); } console.log(result); // undefined

b. Use optional chaining

We also use the optional chaining operator ?. to return undefined and prevent the method access if the variable is null or undefined.

JavaScript
const obj = undefined; const result = obj?.toString(); console.log(result);

We can use the ?. operator for as many levels as possible.

This:

JavaScript
if (a?.b?.c?.d?.e) { console.log('property "e" is not undefined'); }

is equivalent to the following:

JavaScript
if (a && a.b && a.b.c && a.b.c.d && a.b.c.d.e) { console.log('property "e" is not undefined'); }

c. Call toString() on fallback value

We can use the nullish coalescing operator (??) to provide a fallback value to call toString() on:

JavaScript
const num = undefined; const numStr = (num ?? 10).toString(); console.log(numStr); // 10 const date = undefined; const dateStr = (date ?? new Date()).toString(); console.log(dateStr); // Fri Jan 13 2023 20:07:10

The null coalescing operator (??) returns the value to its left if it is not null or undefined. If it is, then ?? returns the value to its right.

JavaScript
console.log(5 ?? 10); // 5 console.log(undefined ?? 10); // 10

The logical OR operator (||) can also do the same:

JavaScript
console.log(5 || 10); // 5 console.log(undefined || 10); // 10

d. Use a fallback result instead of calling replace()

We can combine the optional chaining operator (?.) and the nullish coalescing operator (??) to provide a fallback value to use as the result, instead of performing the replacement.

JavaScript
const num = undefined; const numStr = num?.toString() ?? 'no number'; console.log(numStr); // 10 const date = undefined; const dateStr = date?.toString() ?? 'no date'; console.log(dateStr); // Fri Jan 13 2023 20:07:10

2. Ensure variable is initialized

The solutions above are handy when we don’t know beforehand if the variable will be undefined or not. But there are situations where the “Cannot read property ‘toString’ of undefined” error is caused by a coding error that led to the variable being undefined.

It could be that you forgot to initialize the variable:

JavaScript
let date; // possibly missing initialized to new Date(); // code... // ❌ Cannot read property 'toString' of undefined console.log(date.toString());

Because an uninitialized variable has a default value of undefined in JavaScript, accessing a property/method causes the error to be thrown.

The obvious fix for the error, in this case, is to assign the variable to a defined value.

JavaScript
let date = new Date(); // possibly missing initialized to new Date(); // ✅ toString() called, no error thrown // Fri Jan 13 2023 20:44:22 console.log(date.toString());

3. Ensure variable is accessed from existing array index

Another common mistake that causes this error is trying to access an element at an index that doesn’t exist in the array.

For example:

JavaScript
const dates = [new Date('2020-05-17'), new Date('2021-08-11')]; const dateStrs = []; // ❌ Cannot read properties of undefined (reading 'toString') for (let i = 0; i <= dates.length; i++) { dateStrs.push(dates[i].toString()); } console.log(dateStrs);

We get the error in the example, because the for loop’s condition makes it perform an iteration where i is equal to dates.length. As the last index if dates.length - 1, accessing index dates.length will result in undefined.

The fix in this particular case is to change the <= to <, to make the loop stop after the iteration where i is the last index.

JavaScript
const dates = [new Date('2020-05-17'), new Date('2021-08-11')]; const dateStrs = []; // ✅ loop executes successfully - no error for (let i = 0; i < dates.length; i++) { dateStrs.push(dates[i].toString()); } console.log(dateStrs); // ['Sun May 17 2020 00:00:00...', 'Wed Aug 11 2021 00:00:00...'];

If you’re not sure that the index exists in the array, you can use the ?. operator like we did previously.

JavaScript
const dates = [new Date('2020-05-17'), new Date('2021-08-11')]; // No error console.log(dates[50]?.toString()); // undefined

How to Detect a URL Change With JavaScript

JavaScript has no native event for listening for URL changes in the browser, so to do this, you can create an interval listener that compares the current URL value to the previous value every X seconds.

JavaScript
let prevUrl = undefined; setInterval(() => { const currUrl = window.location.href; if (currUrl != prevUrl) { // URL changed prevUrl = currUrl; console.log(`URL changed to : ${currUrl}`); } }, 60);

We call setInterval() with a callback and 60 to invoke the callback every 60 seconds. In the callback, we check if the current URL is the same as the last URL; if it is, we perform our desired action.

For example:

HTML
<button id="change-url">Change URL</button> <br /><br /> <span id="url-change-indicator"></span>
CSS
#url-change-indicator { white-space: pre; }
JavaScript
const urlChangeIndicator = document.getElementById('url-change-indicator'); let prevUrl = undefined; setInterval(() => { const currUrl = window.location.href; if (currUrl != prevUrl) { // URL changed prevUrl = currUrl; console.log(`URL changed to: ${currUrl}`); urlChangeIndicator.textContent += `New URL: ${currUrl}\r\n`; } }, 60); const changeUrl = document.getElementById('change-url'); changeUrl.addEventListener('click', () => { history.pushState({}, '', 'new-page.html'); });

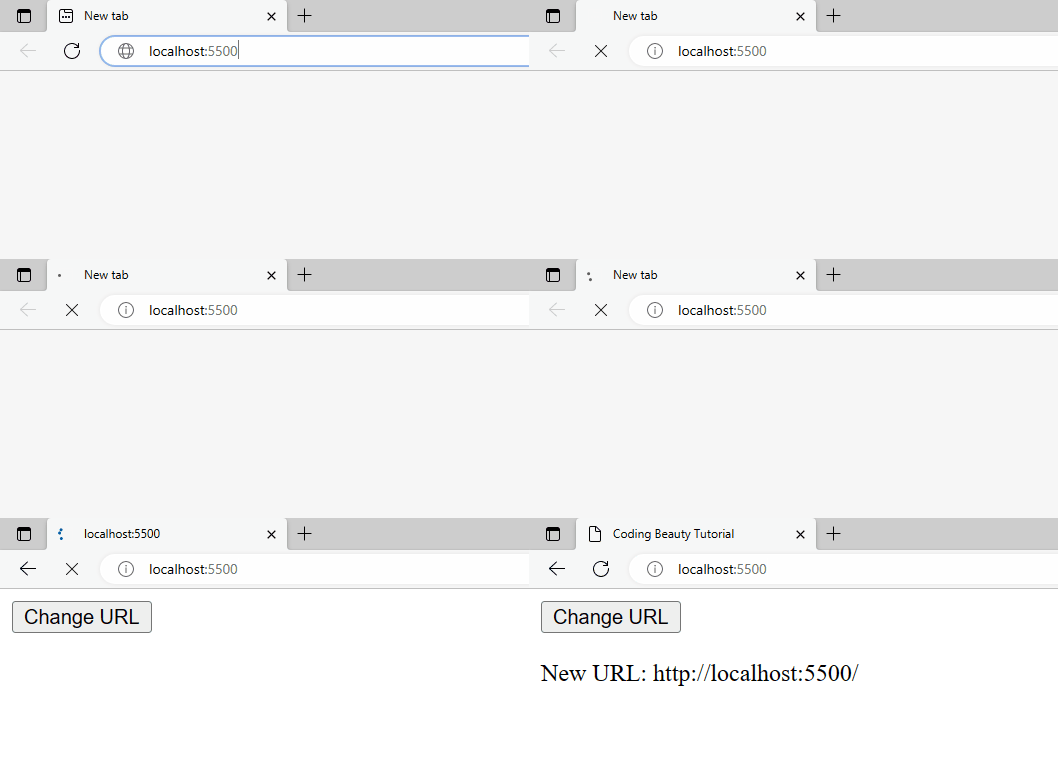
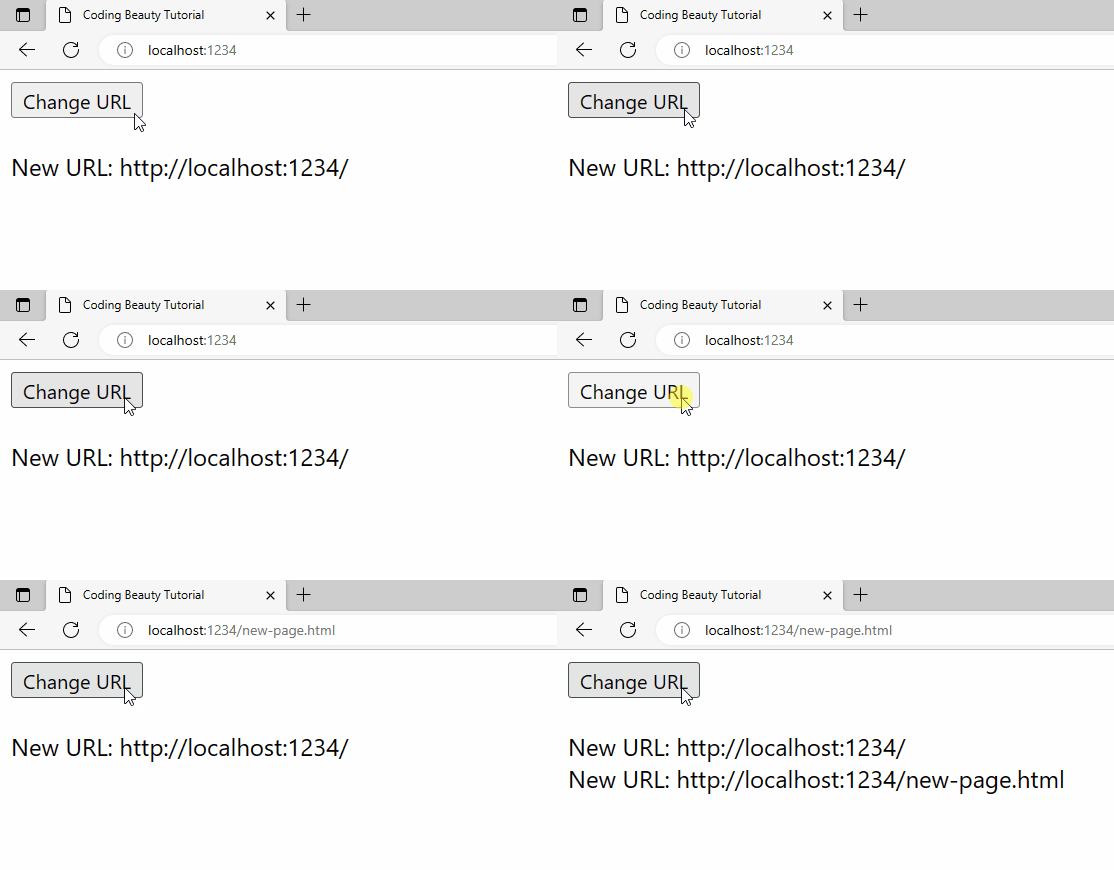
A URL change is detected right away when the page is first loaded:

A URL change is detected right away when the page is first loaded.

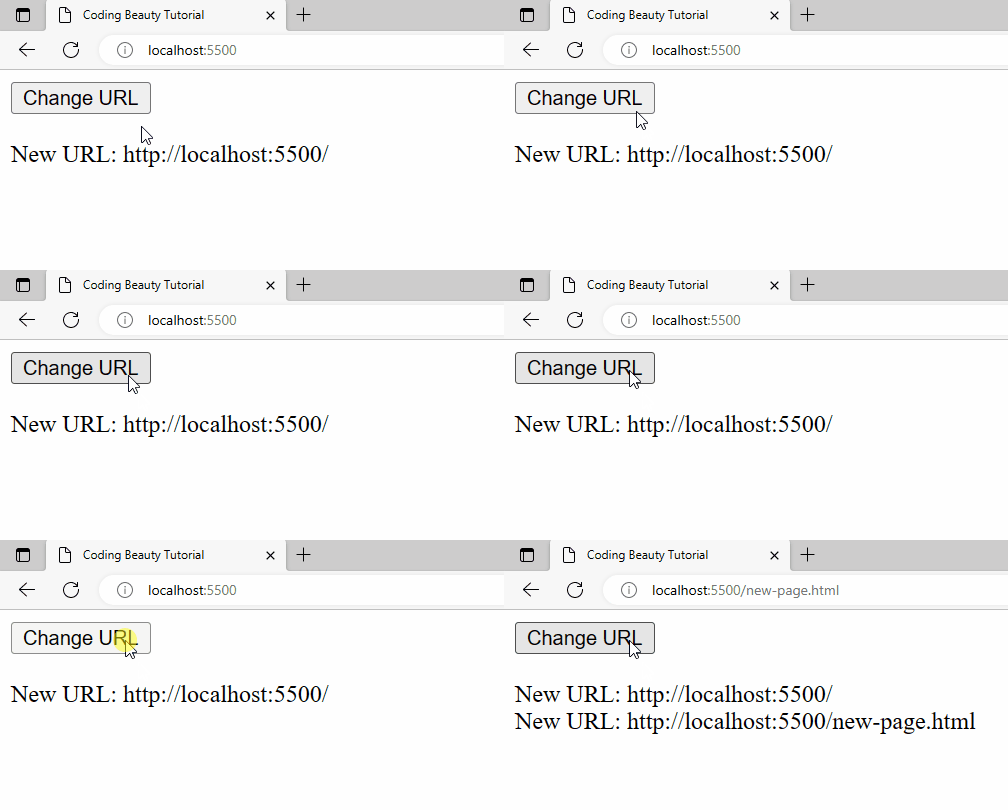
A URL change will also be detected when history.pushState() is called from the Change URL button’s click event listener.

A URL change is detected when `pushState()` is called on button click.

Detect back button click

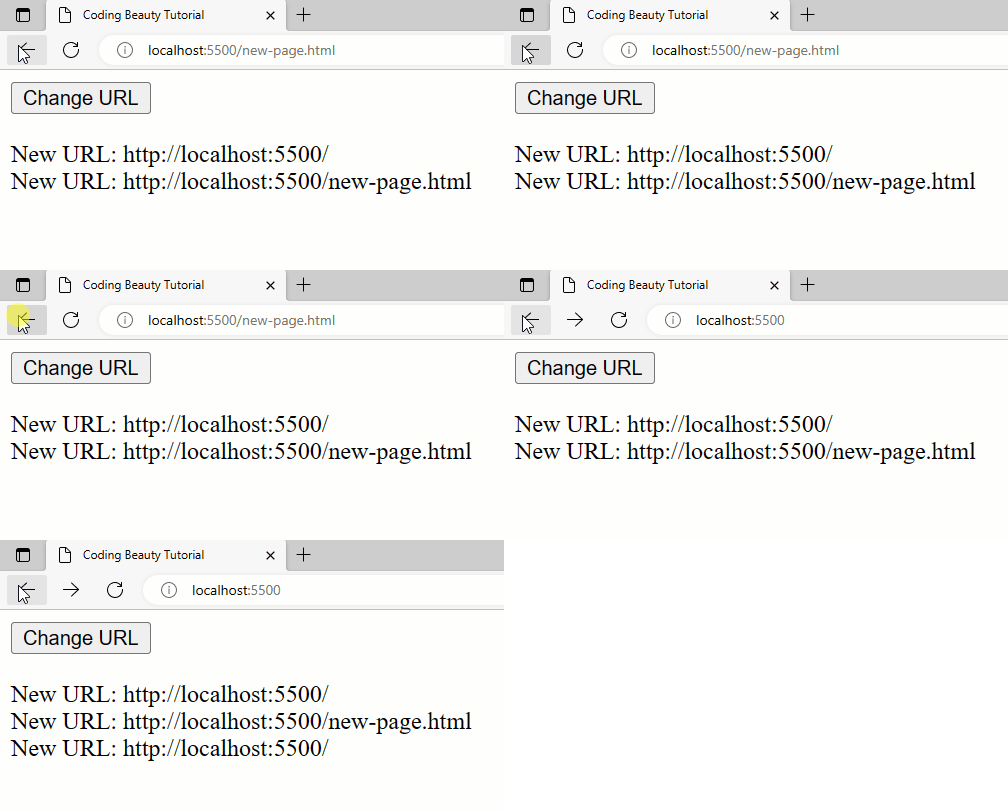
Apart from pushState(), this approach will also work when the back button is clicked, whether by the user or with a method like history.back().

A URL change is detected on back button click.

Detect forward button click

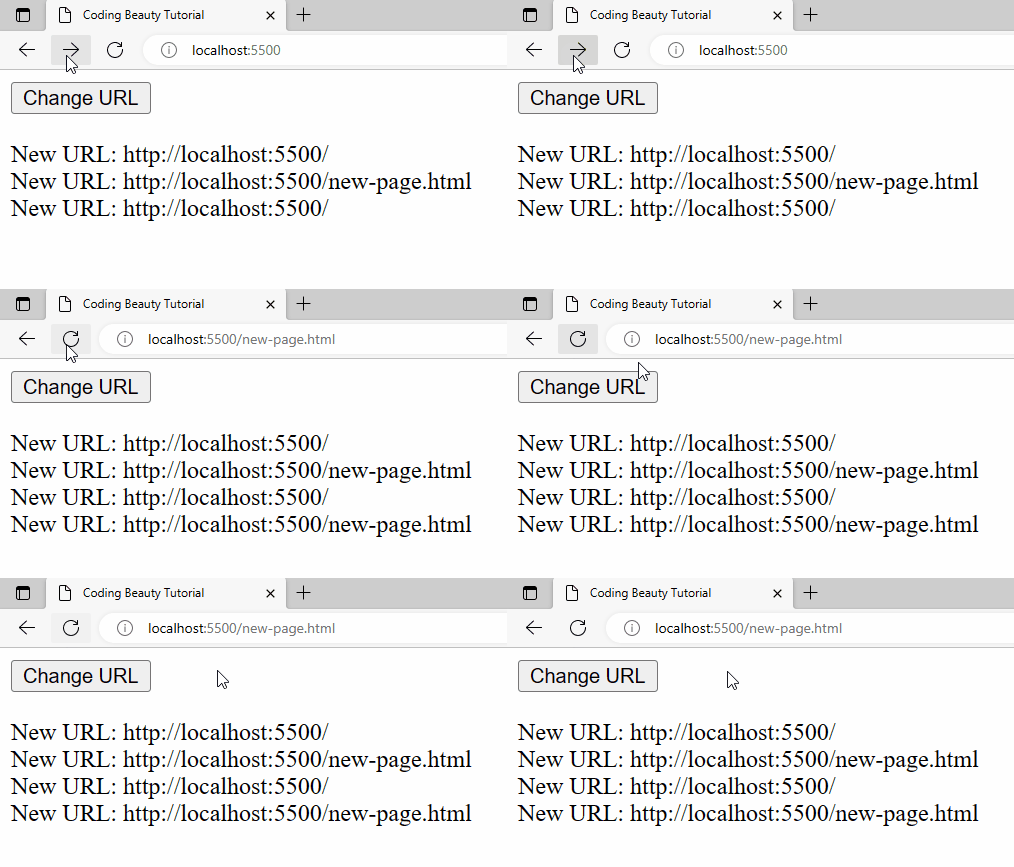
The same thing applies to a forward button click or history.forward():

A URL change is detected on forward button click.

Use detect-url-change library

Alternatively, you can use the detect-url-change library to quickly change the browser URL.

JavaScript
import detectChangeUrl from 'detect-url-change'; detectChangeUrl.on('change', (newUrl) => { console.log(`URL changed to ${newUrl}`); });

The default export is an observer on which you can attach listeners to perform an action when the URL changes.

For example:

HTML
<button id="change-url">Change URL</button> <br /><br /> <span id="url-change-indicator"></span>
CSS
#url-change-indicator { white-space: pre; } * { font-family: 'Segoe UI'; }
JavaScript
import detectChangeUrl from 'detect-url-change'; const urlChangeIndicator = document.querySelector('#url-change-indicator'); detectChangeUrl.on('change', (newUrl) => { console.log(`URL changed to ${newUrl}`); urlChangeIndicator.textContent += `New URL: ${newUrl}\r\n`; }); const changeUrl = document.getElementById('change-url'); changeUrl.addEventListener('click', () => { history.pushState({}, '', 'new-page.html'); });
A URL change is detected from a pushState() call in the button's click event listener.
A URL change is detected from a pushState() call in the button’s click event listener.

To use detect-url-change like in this example, you’ll first need to install it into your project. You can do this with the following command:

Shell
npm i detect-url-change # Yarn yarn add detect-url-change

You’ll also need to use a bundling tool like Webpack, Rollup, Parcel, etc.

How to Check If Function Returns a Promise in JavaScript

To check if a function returns a Promise in JavaScript, call the function (impossible without doing so), and use the instanceof operator to check if the return value is a Promise object.

For example:

JavaScript
console.log(returnsPromise(func1)); console.log(returnsPromise(func2)); console.log(returnsPromise(func3)); function returnsPromise(func) { return func() instanceof Promise; } function func1() { return new Promise((resolve) => { resolve('Coding Beauty'); }); } async function func2() { return 100; } function func3() { return 'Coding Beauty'; }

Unfortunately, there’s no way to check if a function returns a Promise without invoking it and getting its result.

After getting the return value, we use instanceof to check if it’s a Promise instance.

Ensure Promise return value from function

If you’re checking the function’s return value to convert a possible non-Promise value to a Promise, you can simply wrap the function call in the Promise.resolve() method.

If the function’s return value is a Promise, Promise.resolve() will return that Promise object.

If the function’s return value is not a Promise, Promise.resolve() will return a Promise that will resolve that return value directly.

JavaScript
Promise.resolve(func1()).then((value) => { console.log(value); // Coding Beauty }); Promise.resolve(func2()).then((value) => { console.log(value); // JavaScript; }); // does return Promise function func1() { return new Promise((resolve) => { resolve('Coding Beauty'); }); } // does NOT return Promise function func2() { return 'JavaScript'; }

Check if function is async

It’s also possible to check if a function is async, by checking if the constructor.name property of the function is 'AsyncFunction':

JavaScript
console.log(isAsync(func1)); // false console.log(isAsync(func2)); // true console.log(isAsync(func3)); // false function isAsync(func) { return func.constructor.name === 'AsyncFunction'; } // NOT async, but returns Promise function func1() { return new Promise((resolve) => { resolve('Coding Beauty'); }); } // async, returns Promise too async function func2() { return 100; } // NOT async, returns NON-Promise function func3() { return 'Coding Beauty'; }

Almost every object in JavaScript has a constructor property that returns a Function reference to the constructor function that created the object instance.

JavaScript
const num = 2; const promise = new Promise((resolve) => resolve(100)); const arr = []; const asyncFunc = async () => 'Coding Beauty'; console.log(num.constructor); // [Function: Number] console.log(promise.constructor); // [Function: Promise] console.log(arr.constructor); // [Function: Array] console.log(asyncFunc.constructor); // [Function: AsyncFunction]

After getting the constructor, we use the Function instance name property to get the name of the function.

JavaScript
console.log(num.constructor.name); // Name console.log(promise.constructor.name); // Promise console.log(arr.constructor.name); // Array console.log(asyncFunc.constructor.name); // AsyncFunction

Note that this approach is not very reliable as the value of constructor.name is not fixed. It could easy be changed in a user-defined class to any value, including 'AsyncFunction':

JavaScript
class Person { constructor(firstName, lastName) { this.firstName = firstName; this.lastName = lastName; } static name = 'AsyncFunction' } const person = new Person('Brandon', 'Evans'); console.log(isAsync(person)); // true (?!) function isAsync(func) { return func.constructor.name === 'AsyncFunction'; }

How to Check if a Variable is a String in JavaScript

To check if a variable is a string in JavaScript, use the typeof operator, i.e., if (typeof variable === 'string'). If the typeof variable returns 'string', then the variable is a string. Otherwise, it is not a string.

For example:

JavaScript
const variable = 'Coding Beauty'; if (typeof variable === 'string') { // 👇 this runs console.log('Variable is string'); } else { console.log('Variable is not string'); }

The typeof operator returns a string that indicates the type of its operand. For primitives, it returns the exact type, e.g., 'number', 'boolean', 'string', etc, for functions, it returns ‘function‘, and for complex or user-defined types, it returns 'object'.

JavaScript
console.log(typeof true); // 'boolean' console.log(typeof 'Coding Beauty'); // 'string' console.log(typeof 100); // 'number' console.log(typeof new Promise(() => {})); // 'object' console.log(typeof function () {}); // 'function' console.log(typeof Symbol()); // 'symbol' console.log(typeof (() => {})); // 'function' console.log(typeof []); // 'object' console.log(typeof {}); // 'object' console.log(typeof undefined); // 'undefined'

typeof undeclared_variable is 'undefined'?

Note that if you mistakenly use typeof on a variable that hasn’t been declared, typeof will not throw an error:

JavaScript
if (typeof undeclared === 'string') { console.log('Variable is string'); } else { console.log('Variable is NOT string'); }

When used on variables that haven’t been declared, typeof returns the string 'undefined':

JavaScript
console.log(typeof undeclared); // 'undefined'

typeof for string wrapper objects

The one instance where typeof won’t work is when the string was created as a wrapper object i.e., using the String() constructor with the new operator.

For such strings, it will return the 'object' string, instead of 'string'.

JavaScript
const strObj = new String('Coding Beauty'); console.log(typeof strObj); // 'object'

However, it’s not a good practice to use wrapper objects, as they serve no use. Wrapper objects are only used internally; when JavaScript auto-boxes a primitive value into an object to access a property on that object.

typeof null is 'object'?

Note that when typeof is used on the null value, it returns the string 'object'

JavaScript
console.log(typeof null) // 'object'

This is because, as stated in the MDN documentation:

In the first implementation of JavaScript, JavaScript values were represented as a type tag and a value. The type tag for objects was 0null was represented as the NULL pointer (0x00 in most platforms). Consequently, null had 0 as type tag, hence the typeof return value "object". (reference)

A fix was proposed for ECMAScript (via an opt-in), but was rejected. It would have resulted in typeof null === "null".

typeof NaN is 'number'?

Also, typeof NaN results in 'number':

JavaScript
console.log(typeof NaN); // 'number'

Because as stated in this StackOverflow answer and the spec, NaN is considered a numeric type in JavaScript.

How to Convert CSV to XML in JavaScript

We can use the csv-to-xml library available on NPM to quickly convert any CSV string to XML in JavaScript.

JavaScript
import csvToXml from 'csv-to-xml'; const csv = `color,maxSpeed,age red,120,2 blue,100,3 green,130,2`; const xml = csvToXml(csv); console.log(xml);

This code will produce the following output:

Output (XML)
<row> <color>red</color> <maxSpeed>120</maxSpeed> <age>2</age> </row> <row> <color>blue</color> <maxSpeed>100</maxSpeed> <age>3</age> </row> <row> <color>green</color> <maxSpeed>130</maxSpeed> <age>2</age> </row>

The default export function, csvToXml(), takes CSV data in a string and returns its equivalent XML representation.

csv-to-xml is an ES module that can work both in Node.js and browser environments.

Install csv-to-xml

Before using csv-to-xml, you’ll need to install your project. You can do this with the NPM or Yarn CLI.

Shell
npm i csv-to-xml # Yarn yarn add csv-to-xml

After installation, you’ll be able to import it into a JavaScript module, like this:

JavaScript
import csvToXml from 'csv-to-xml';

csvToXml() function

The primary function of this package is the csvToXml() function. It takes a string containing CSV data, converts it to XML, and returns the result as a string.

csvToXml() has two parameters:

  1. csvString: The string containing the CSV data.
  2. options: An object with option properties that control how the CSV is converted to the XML.
JavaScript
const xml = csvToXml(csv, { header: false, quote: 'single' });

Customize conversion of CSV to XML

The option parameter of the csvToXml() function lets you specify options to customize the CSV-to-XML conversion process.

rowName option

One such option is rowName, which lets you set the tag name used for the XML elements that each represent a row.

JavaScript
import csvToXml from 'csv-to-xml'; const csv = `color,maxSpeed,age red,120,2 blue,100,3 green,130,2`; const xml = csvToXml(csv, { rowName }); console.log(xml);
XML Output
<car> <color>red</color> <maxSpeed>120</maxSpeed> <age>2</age> </car> <car> <color>blue</color> <maxSpeed>100</maxSpeed> <age>3</age> </car> <car> <color>green</color> <maxSpeed>130</maxSpeed> <age>2</age> </car>

Now each XML row element is named car instead of the default row.

headerList option

There’s also headerList, an option used to set the CSV headers used for the conversion.

JavaScript
import csvToXml from 'csv-to-xml'; const csv = `First Name, Last Name, Location Alexander,Hill,Los Angeles Brandon,Evans,Paris Mike,Baker,London`; const xml = csvToXml(csv, { rowName: 'person', headerList: ['firstName', 'lastName', 'location'], }); console.log(xml);
XML Output
<person> <firstName>Alexander</firstName> <lastName>Hill</lastName> <location>Los Angeles</location> </person> <person> <firstName>Brandon</firstName> <lastName>Evans</lastName> <location>Paris</location> </person> <person> <firstName>Mike</firstName> <lastName>Baker</lastName> <location>London</location> </person>

header option

headerList is especially useful when the CSV data has no header row, and you see the header option to false to indicate this to the converter.

JavaScript
import csvToXml from 'csv-to-xml'; const csv = `Alexander,Hill,Los Angeles Brandon,Evans,Paris Mike,Baker,London`; const xml = csvToXml(csv, { rowName: 'user', headerList: ['fName', 'lName', 'city'], header: false, }); console.log(xml);
XML Output
<user> <fName>Alexander</fName> <lName>Hill</lName> <city>Los Angeles</city> </user> <user> <fName>Brandon</fName> <lName>Evans</lName> <city>Paris</city> </user> <user> <fName>Mike</fName> <lName>Baker</lName> <city>London</city> </user>

If header is false, and header names are not set with headerList, a default column name will be used. The name takes the format col{n} where {n} is the position of the column within its row.

JavaScript
import csvToXml from 'csv-to-xml'; const csv = `Alexander,Hill,Los Angeles Brandon,Evans,Paris Mike,Baker,London`; const xml = csvToXml(csv, { header: false, }); console.log(xml);
XML Output
<row> <col1>Alexander</col1> <col2>Hill</col2> <col3>Los Angeles</col3> </row> <row> <col1>Brandon</col1> <col2>Evans</col2> <col3>Paris</col3> </row> <row> <col1>Mike</col1> <col2>Baker</col2> <col3>London</col3> </row>

quote option

Another important option is quote, which lets you group data containing a comma (or some other separator) as a single column.

For example:

JavaScript
import csvToXml from 'csv-to-xml'; const csv = `"Hill, A.",Los Angeles "Evans, B.",Paris "Baker, M.",London`; const xml = csvToXml(csv, { header: false, headerList: ['name', 'location'], quote: 'double', // Ignore comma in double quotes }); console.log(xml);
XML Output
<row> <name>Hill, A.</name> <location>Los Angeles</location> </row> <row> <name>Evans, B.</name> <location>Paris</location> </row> <row> <name>Baker, M.</name> <location>London</location> </row>

indentation option

With the indentation option, we can control how many spaces are used to indent child XML elements in the output. By default it’s 4, but we can set it to another numeric value, or a string like '\t'.

JavaScript
import csvToXml from 'csv-to-xml'; const csv = `Alexander,Hill,Los Angeles Brandon,Evans,Paris Mike,Baker,London`; const xml = csvToXml(csv, { header: false, indentation: 2, }); console.log(xml);
XML Output
<row> <col1>Alexander</col1> <col2>Hill</col2> <col3>Los Angeles</col3> </row> <row> <col1>Brandon</col1> <col2>Evans</col2> <col3>Paris</col3> </row> <row> <col1>Mike</col1> <col2>Baker</col2> <col3>London</col3> </row>

separator option

Sometimes a character other than a comma is used to separate the columns. The separator option helps indicate this to the converter:

JavaScript
import csvToXml from 'csv-to-xml'; const csv = `color;maxSpeed;age red;120;2 blue;100;3 green;130;2`; const xml = csvToXml(csv, { separator: ';' }); console.log(xml);
XML Output
<row> <color>red</color> <maxSpeed>120</maxSpeed> <age>2</age> </row> <row> <color>blue</color> <maxSpeed>100</maxSpeed> <age>3</age> </row> <row> <color>green</color> <maxSpeed>130</maxSpeed> <age>2</age> </row>

Find a full list of options in the csv-to-xml homepage.

Native conversion of CSV to XML

It’s also possible to convert CSV data to XML without using any third-party libraries. Here’s how we can do it:

JavaScript
const csv = `color,maxSpeed,age red,120,2 blue,100,3 green,130,2`; const xml = csvToXml(csv); console.log(xml); function csvToXml(csvString) { const csvRows = csvString.split('\n').map((row) => row.trim()); // e.g., 'maxSpeed,color,age' -> ['maxSpeed', 'color', 'age'] const headers = csvRows[0].split(','); let xml = ''; // loop through each CSV row, csvRows[i] contains the row string for (let i = 1; i < csvRows.length; i++) { // e.g., 'blue,100,3' -> ['maxSpeed', 'color', 'age'] const details = csvRows[i].split(','); xml += `<row>\n`; for (let j = 0; j < headers.length; j++) { // e.g., <color>blue</color> xml += `<${headers[j]}>${details[j]}</${headers[j]}>\n`; } xml += `</row>\n`; } return xml; }
JavaScript
<row> <color>red</color> <maxSpeed>120</maxSpeed> <age>2</age> </row> <row> <color>blue</color> <maxSpeed>100</maxSpeed> <age>3</age> </row> <row> <color>green</color> <maxSpeed>130</maxSpeed> <age>2</age> </row>

This csvToXml() function is certainly not as versatile as the one from the csv-to-xml library, but as shown in the example above, it works for simple, straightforward CSV data.

You can modify it to allow for more complex and varying CSV data.

How to Add a Class to Multiple Elements in JavaScript

To add a class to multiple elements in JavaScript:

  1. Get a list of all the elements with a method like document.querySelectorAll().
  2. Iterate over the list with forEach().
  3. For each element, call classList.add(class) to add the class to each element.

i.e.:

JavaScript
const elements = document.querySelectorAll('.class'); elements.forEach((element) => { element.classList.add('class'); });

For example:

HTML
<p class="bold text">Coding</p> <p class="bold text">Beauty</p> <p class="bold text">Dev</p> <button id="add">Add class</button>
CSS
.bold { font-weight: bold; } .big { font-size: 1.2em; }
JavaScript
const elements = document.querySelectorAll('.text'); elements.forEach((element) => { element.classList.add('big'); });

This will be the HTML after the button is clicked.

HTML
<p class="big bold text">Coding</p> <p class="big bold text">Beauty</p> <p class="big bold text">Dev</p> <button id="add">Add class</button>
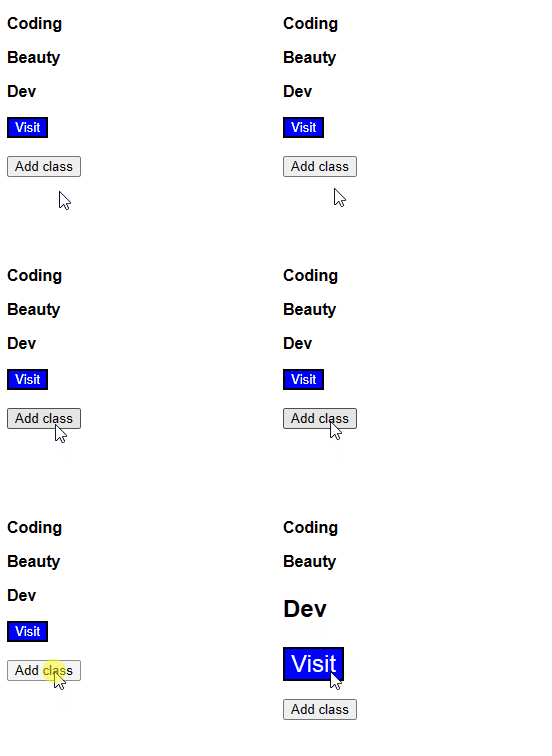
The big class to the paragraph elements when the button is clicked.
The big class to the p elements when the button is clicked.

We use the document.querySelectorAll() method to select all DOM elements to which we want to add the class.

We loop through the elements in the list object with its forEach() method. This forEach() method works much like Array forEach().

document.getElementsByClassName() method

We can use the document.getElementsByClassName() method in place of document.querySelectorAll() when the selector is a class selector. For getElementsByClassName(), we pass the class name without the . (dot), and we use Array.from() to convert the result to an array before the iteration with forEach().

JavaScript
const elements = Array.from(document.getElementsByClassName('text')); elements.forEach((element) => { element.classList.add('big'); });

Note: Unlike the querySelectorAll() method, getElementByClassName() returns a live list of HTML Elements; changes in the DOM will reflect in the array as the changes occur. If an element in the array no longer qualifies for the selector specified in getElementsByClassName(), it will be removed automatically. This means that one iteration of the list could be different from another, even without any direct modifications to the list.

classList.add() method

We use the classList.add() method to add a class to each of the elements.

You can add multiple classes by passing more arguments to add().

JavaScript
const elements = document.querySelectorAll('.text'); elements.forEach((element) => { element.classList.add('big', 'blue'); });

If any of the classes passed to add() already exists on the element, add() will ignore this, instead of throwing an error.

Add class to elements with different selectors

Sometimes there is no common selector between the elements that you want to add the class to. For such a case, you can pass multiple comma-separated selectors to the querySelectorAll() method.

JavaScript
const elements = document.querySelectorAll('.class-1, #id-1, tag-1'); elements.forEach((element) => { element.classList.add('class'); });

For example:

HTML
<p class="bold text">Coding</p> <p class="bold text">Beauty</p> <p class="bold text">Dev</p> <div id="box-1">English</div> <div>Spanish</div> <div id="box-2">French</div> <br /> <button id="add">Add class</button>
CSS
.bold { font-weight: bold; } .italic { font-style: italic; } .underline { text-decoration: underline; }
JavaScript
const elements = document.querySelectorAll('.text, #box-1, #box-2'); const addButton = document.getElementById('add'); addButton.addEventListener('click', () => { elements.forEach((element) => { element.classList.add('italic', 'underline'); }); });
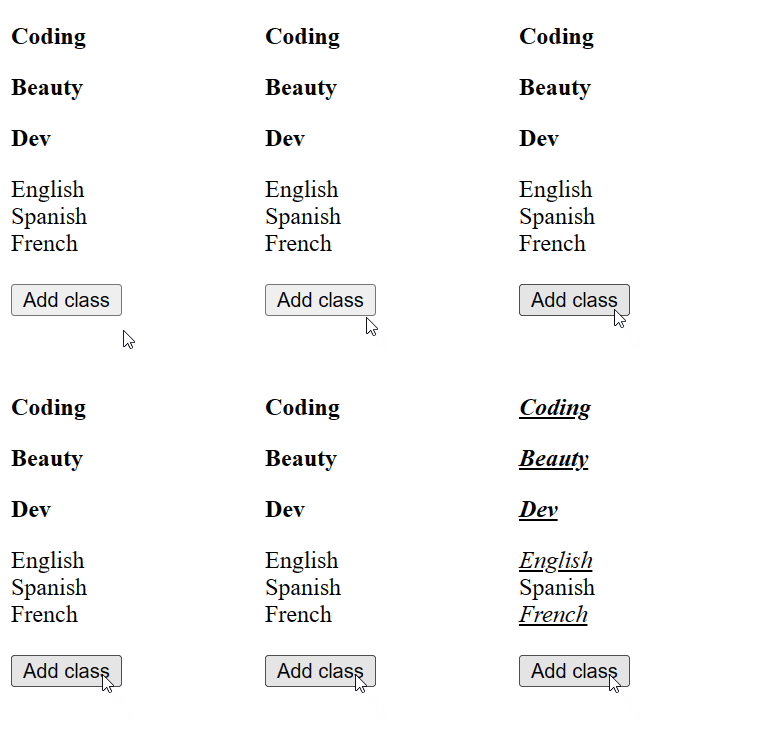
Classes are added to elements with different selectors on button click.

Remove class from multiple elements

Just as the classList.add() adds one or more classes to an element, the classList.remove() removes one or more classes from an element.

So we can use it in a forEach() loop to a class to multiple DOM elements.

JavaScript
const elements = document.querySelectorAll('.text'); elements.forEach((element) => { element.classList.remove('big', 'bold'); });

How to Simulate a Mouse Click in JavaScript

In this article, we’ll learn multiple ways to easily simulate a mouse click or tap on an element in the HTML DOM, using JavaScript.

Use click() method

This is the easiest and most basic method to simulate a mouse click on an element. Every HTMLElement has a click() method that can be used to simulate clicks on it. It fires the click event on the element when it is called. The click event bubbles up to elements higher in the document tree and fires their click events.

JavaScript
const target = document.querySelector('#target'); target.click();

To use the click() method, you first need to select the element in JavaScript, using a method like querySelector() or getElementById(). You’ll be able to access the HTMLElement object from the method’s return value, and call the click() method on it to simulate the click.

Let’s see an example, where we simulate a button click every second, by calling click() in setInterval().

JavaScript
const target = document.querySelector('#target'); let clickCount = 0; const clickCountEl = document.getElementById('click-count'); clickCountEl.innerText = clickCount; // Programmatically click button every 1 second setInterval(() => { target.click(); clickCount++; clickCountEl.innerText = clickCount; }, 1000);
HTML
<button id="target">Target</button> <br /><br /> Clicks: <span id="click-count"></span>

Result

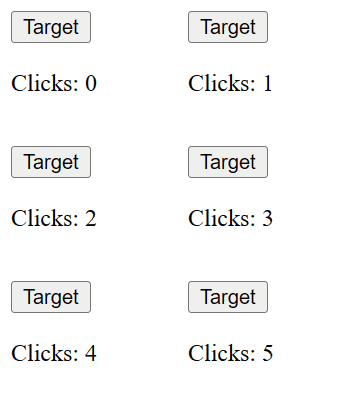
The button is clicked programmatically every 1 second.

Notice how there are no visual indicators of a click occurring because it’s a programmatic click.

Since click() causes the click event to fire on the element, any click event listeners you attach to the element will be invoked from a click() call.

In the following example, we use a click event listener (instead of setInterval) to increase the click count, and another listener to toggle the button’s style when clicked.

JavaScript
const target = document.querySelector('#target'); let clickCount = 0; const clickCountEl = document.getElementById('click-count'); clickCountEl.innerText = clickCount; target.addEventListener('click', () => { clickCount++; clickCountEl.innerText = clickCount; }); target.addEventListener('click', () => { target.classList.toggle('btn-style'); }); setInterval(() => { target.click(); }, 1000);
HTML
<button id="target">Target</button> <br /><br /> Count: <span id="click-count"></span>
CSS
.btn-style { color: white; background-color: blue; border-radius: 2px; }
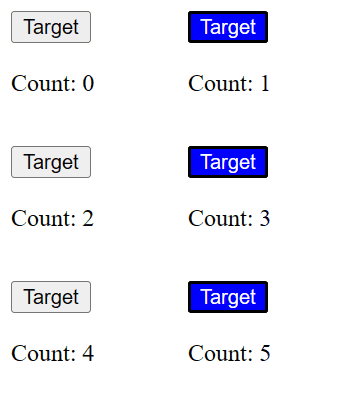
The click count is incremented and the button’s style is toggled from the simulated click.

Simulate mouse click with MouseEvent object

Alternatively, we can use a custom MouseEvent object to simulate a mouse click in JavaScript.

JavaScript
const targetButton = document.getElementById('target'); const clickEvent = new MouseEvent('click'); targetButton.dispatchEvent(clickEvent);

The MouseEvent interface represents events that occur from the user interacting with a pointing device like the mouse. It can represent common events like click, dblclick, mouseup, and mousedown.

After selecting the HTMLElement and creating a MouseEvent, we call the dispatchEvent() method on the element to fire the event on the element.

For example:

JavaScript
const clickEvent = new MouseEvent('click'); const targetButton = document.getElementById('target'); let clickCount = 0; const clickCountEl = document.getElementById('click-count'); clickCountEl.innerText = clickCount; targetButton.addEventListener('click', () => { clickCount++; clickCountEl.innerText = clickCount; }); setInterval(() => { const clickEvent = new MouseEvent('click'); targetButton.dispatchEvent(clickEvent); }, 1000);
HTML
<button id="target">Target</button> <br /><br /> Clicks: <span id="click-count"></span>
The button is clicked programmatically every 1 second.
The button is clicked programmatically every second with MouseEvent.

Any click event listener attached to the element is called with the MouseEvent object that was passed to dispatchEvent().

JavaScript
const clickEvent = new MouseEvent('click'); const targetButton = document.getElementById('target'); targetButton.addEventListener('click', (event) => { console.log(clickEvent === event); // true }); targetButton.addEventListener('click', (event) => { console.log(clickEvent === event); // true }); targetButton.dispatchEvent(clickEvent);

Result

The dispatched event object is passed to click listeners.
The dispatched MouseEvent is passed to click listeners.

Apart from the event type passed as the first argument, we can pass options to the MouseEvent() constructor to control specific details about the event:

JavaScript
const targetButton = document.getElementById('target'); const clickEvent = new MouseEvent('click', { bubbles: true, cancelable: false, view: window }); targetButton.dispatchEvent(clickEvent);

The bubbles property determines whether the event can bubble up the DOM tree to the element’s containing elements.

The cancelable property determines whether or not the event’s default action can be prevented.

The view property sets the event’s AbstractView. You should pass the window object here.

Find more options in the MDN documentation for the MouseEvent() constructor and the now deprecated MouseEvent.initMouseEvent() method.

Simulate mouse click at position

We can also simulate a mouse click on an element at a specific position on the visible part of the webpage.

We do this by selecting the element with the document.elementFromPoint() method, and then simulating the click with the click() method.

JavaScript
const targetButton = document.elementFromPoint(x, y).click(); targetButton.click();

The elementFromPoint() method returns the topmost element at the specified coordinates, relative to the browser’s viewport. It returns an HTMLElement, which we call click() on to simulate the mouse click from JavaScript.

In the following example, we have a button and a containing div:

HTML
<div id="container"> <button id="target">Target</button> <br /><br /> Count: <span id="click-count"></span> </div>

Using CSS, we position the #container div to make its top-left corner exactly at the position (200, 100) in the viewport.

CSS
#container { position: absolute; top: 100px; left: 200px; height: 100px; width: 100px; border: 1px solid black; }

The #target button is at point (0, 0) in its #container, so point (200, 100) in the viewport.

To get the position of the #target with more certainty, we add an offset of 10px each to get the final position to search for: (210, 110).

JavaScript
let clickCount = 0; const clickCountEl = document.getElementById('click-count'); clickCountEl.innerText = clickCount; const targetButton = document.getElementById('target'); targetButton.addEventListener('click', () => { clickCount++; clickCountEl.innerText = clickCount; }); // Offset of 10px to get button's position in container const x = 200 + 10; const y = 100 + 10; setInterval(() => { const buttonAtPoint = document.elementFromPoint(x, y); buttonAtPoint.click(); }, 1000);

To verify that we’re actually selected the button by its position and it’s getting clicks, we select it by its ID (target) and set a click event listener on the HTMLElement returned, which will increase the count of how many times it has been clicked.

And we’re successful:

A click is simulated on the button at point (210, 110).

Simulate mouse click at position with MouseEvent object

We can also simulate a mouse click on an element at a certain (x, y) position using a MouseEvent object and the dispatchEvent() method.

Here’s how:

JavaScript
const clickEvent = new MouseEvent('click', { view: window, screenX: x, screenY: y, }); const elementAtPoint = document.elementFromPoint(x, y); elementAtPoint.dispatchEvent(clickEvent);

This time we specify the screenX and screenY options when creating the MouseEvent.

screenX sets the position where the click event should occur on the x-axis. It sets the value of the MouseEvent‘s screenX property.

screenY sets the position where the click event should occur on the Y-axis. It sets the value of the MouseEvent‘s screenY property.

So we can use MouseEvent to replace the click() method in our last example:

JavaScript
// ... // Offset of 10px to get button's position in container const x = 200 + 10; const y = 100 + 10; setInterval(() => { const buttonAtPoint = document.elementFromPoint(x, y); const clickEvent = new MouseEvent('click', { view: window, screenX: x, screenY: y, }); buttonAtPoint.dispatchEvent(clickEvent); }, 1000);

Note: screenX and screenY doesn’t decide where the click should occur (elementFromPoint does). These options are set so that they can be accessed from any click event listener attached to the element at the point.