react.js

How to Scroll to an Element After Render in React

To scroll to an element after render on React:

  1. Set a ref on the element.
  2. Create a useEffect hook to run code just after the component mounts.
  3. Call scrollIntoView() on the ref object in useEffect.
JavaScript
import { useEffect, useRef } from 'react'; export default function App() { const ref = useRef(null); const scrollToElement = () => { ref.current?.scrollIntoView({ behavior: 'smooth' }); }; useEffect(() => { scrollToElement(); }, []); return ( <div> <div style={{ height: '150rem' }} /> <div ref={ref} style={{ backgroundColor: 'blue', color: 'white' }}> Coding Beauty </div> <div style={{ height: '150rem' }} /> </div> ); }
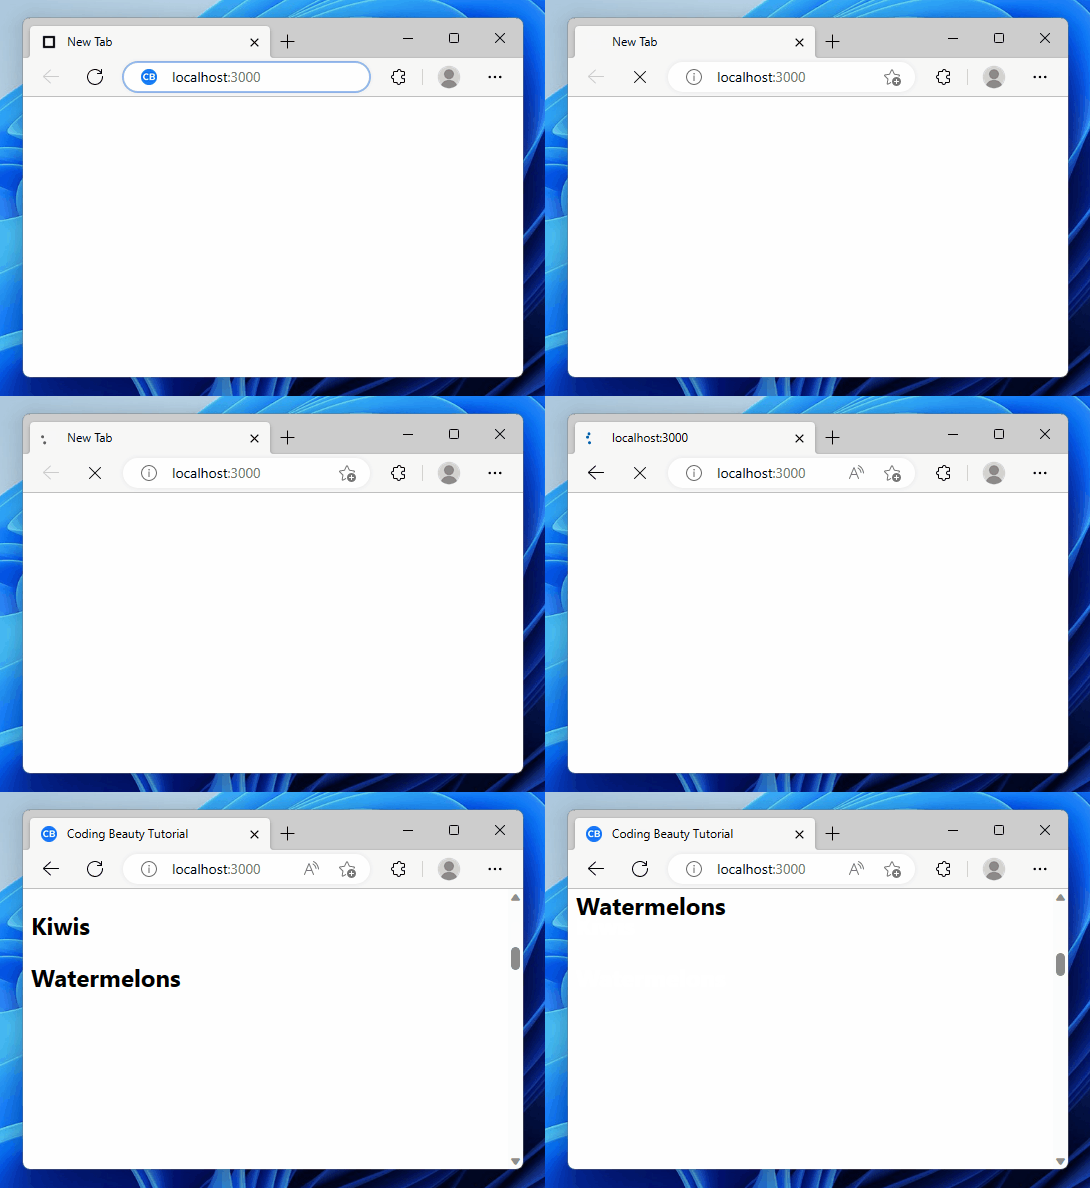
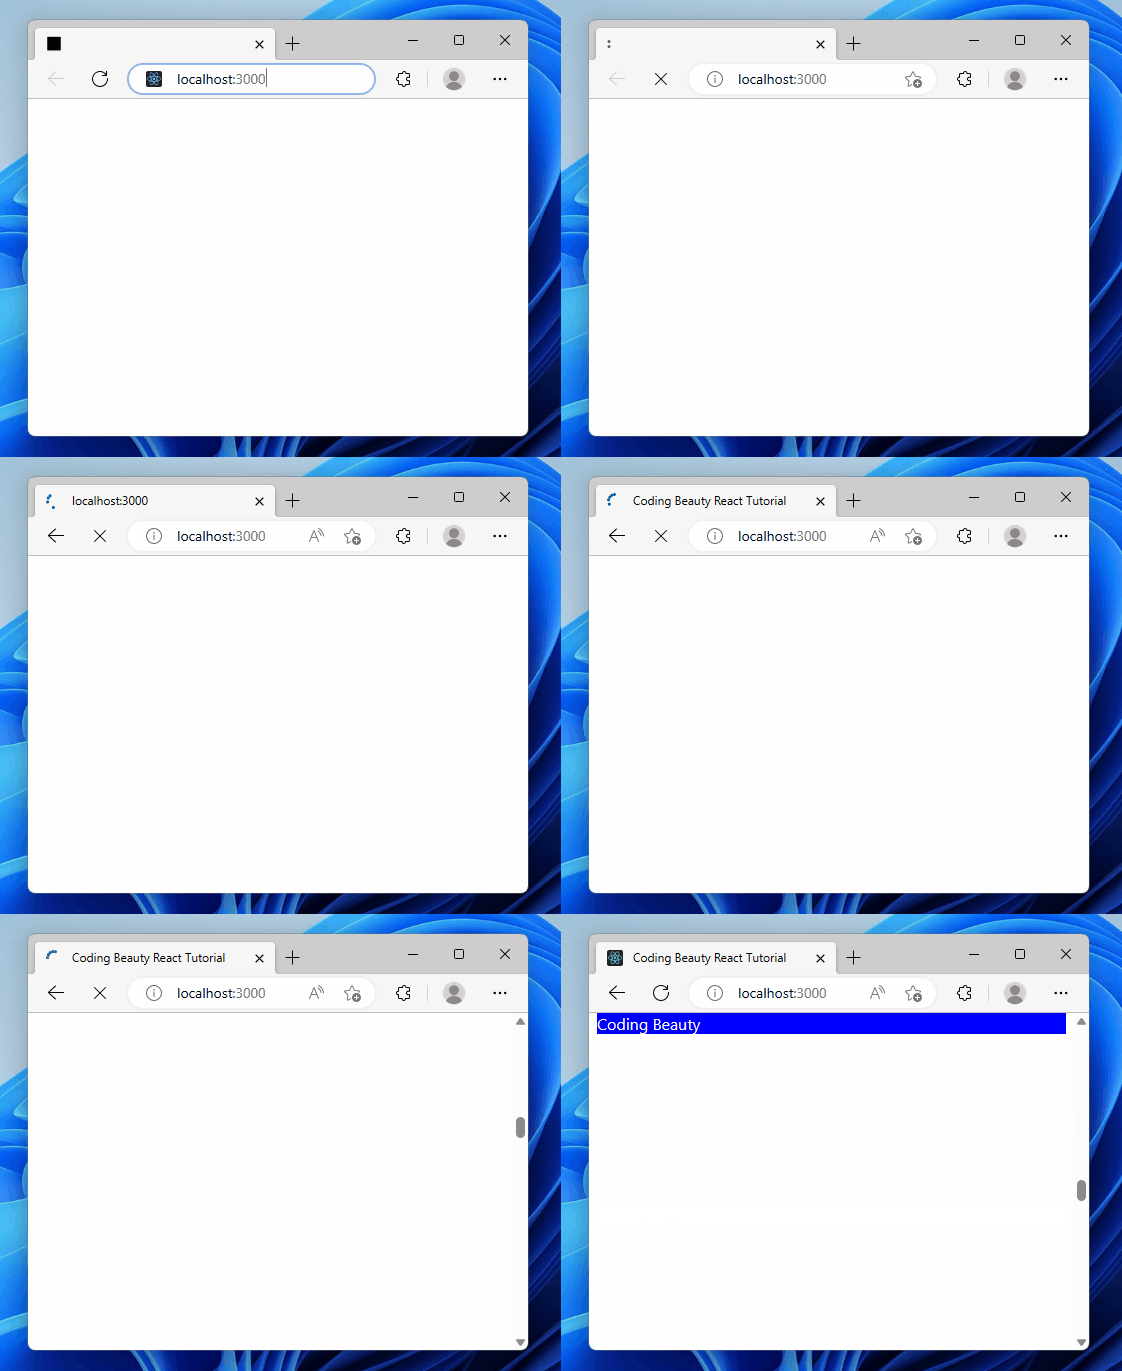
Scrolling to a particular element after render in React.

Scrolling to an element after the page loads in React helps users quickly find important information, fix errors, and is useful for those who use special software to navigate the web.

We create a ref object with the useRef hook and assign it to the ref prop of the target div element. Doing this sets the current property of the ref object to the DOM object that represents the element.

useRef returns a mutable object that maintains its value when a component updates. Also, modifying the value of this object’s current property doesn’t cause a re-render. This is unlike the setState update function return from the useState hooks.

The useEffect hook performs an action after the component renders, and when one or more of its dependencies change. We passed an empty dependencies array ([]) to make sure that action only runs when the component mounts.

In useEffect, we call the scrollIntoView() method on the ref of the target div element to scroll down to it and display it to the user.

We set the behaviour option to smooth to make the element scroll into view in an animated way, instead of jumping straight to the element in the next frame (auto). auto is the default.

Scroll to element on click in React

Learn more: How to Scroll to an Element on Click in React

We can do something similar to scroll to an element on click in React:

  1. Set a ref on the target element.
  2. Set a click listener on the element meant to cause the scroll.
  3. In the click event listener, call the scrollIntoView() method on the ref object.
JavaScript
import { useRef } from 'react'; export default function App() { const ref = useRef(null); const handleClick = () => { ref.current?.scrollIntoView({ behavior: 'smooth' }); }; return ( <div> <button onClick={handleClick}>Scroll to element</button> <div style={{ height: '150rem' }} /> <div ref={ref} style={{ backgroundColor: 'lightblue' }}> Coding Beauty </div> <div style={{ height: '150rem' }} /> </div> ); }
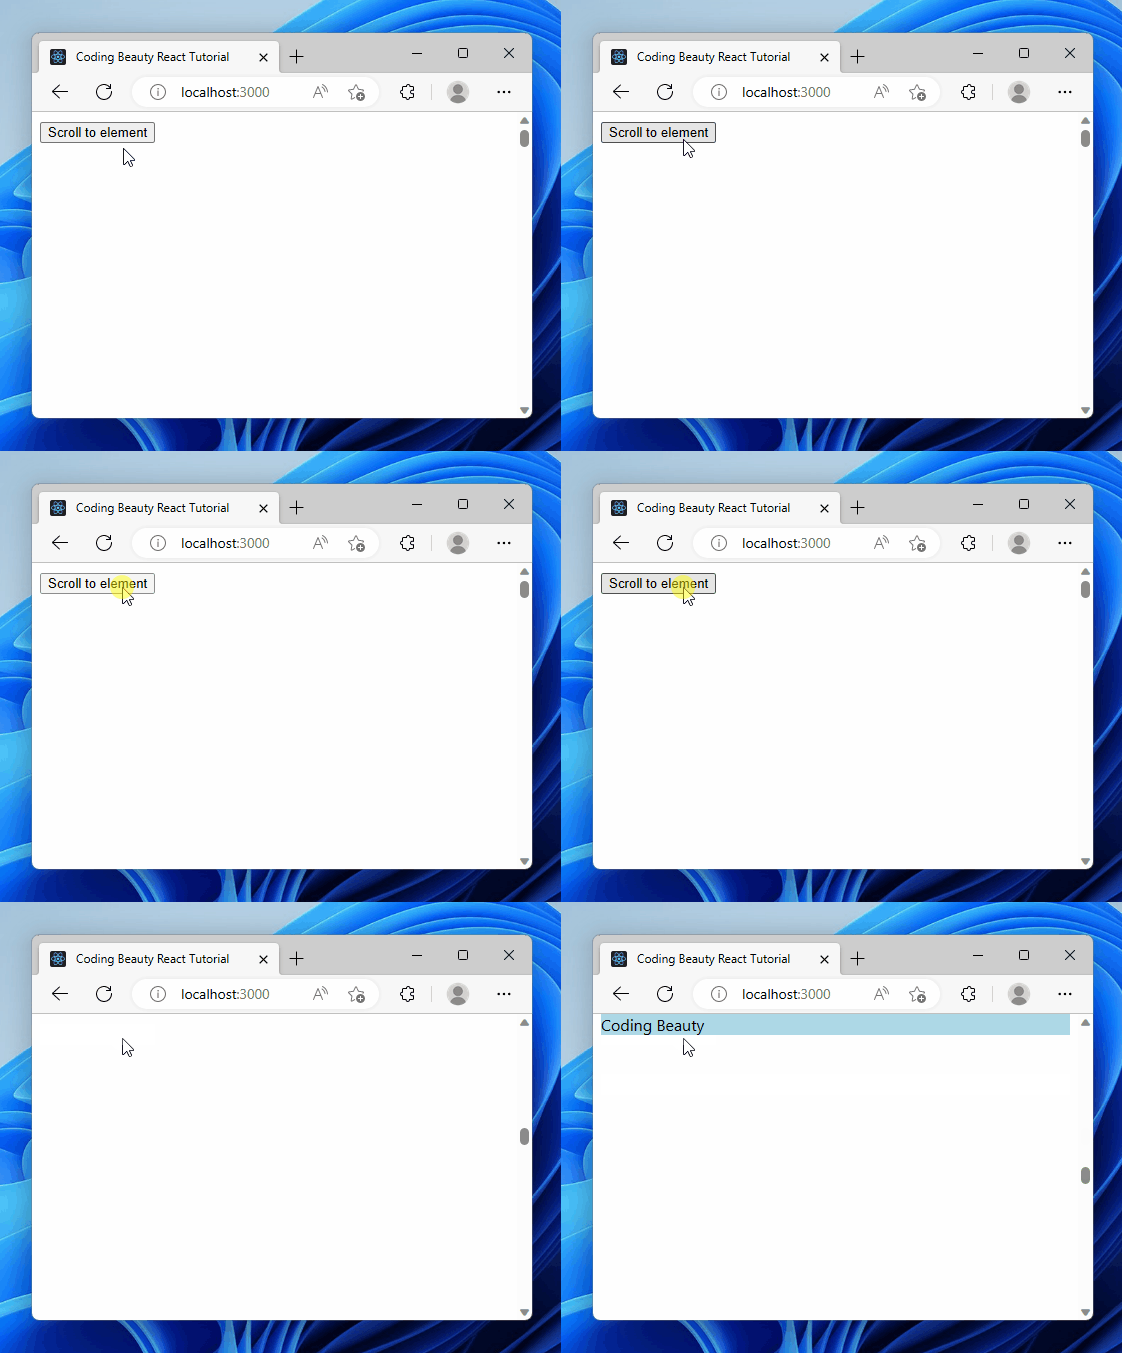
Scrolling to an element on click.

Scrolling to an element on click improves user experience by allowing for quick navigation, especially for long lists or pages with multiple sections. It can also add a touch of interactivity through smooth-scrolling animations.

We create a ref object with the useRef hook and assign it to the ref prop of the checkbox input. Doing this sets the current property of the ref object to the DOM object that represents the target element.

useRef returns a mutable object that retains its value when a component updates. Changing the value of this object’s current property doesn’t cause a re-render. This is different from the setState update function that useState returns.

We use the onClick on the button to a click listener to it. So, this listener will be called when the user clicks the button.

JavaScript
const handleClick = () => { ref.current?.scrollIntoView({ behavior: 'smooth' }); };

In the handleClick listener, we call the scrollIntoView() method on the ref of the target div element to scroll down to it and display it to the user.

As before, we set the behaviour option to smooth to make the element scroll into view in an animated way, instead of jumping straight to the element in the next frame – autoauto is the default.

Scroll to dynamic element on click in React

We can also scroll to a dynamically created element in React.

JavaScript
import { useRef, useState } from 'react'; const allFruits = [ 'Apples', 'Bananas', 'Oranges', 'Grapes', 'Strawberries', 'Blueberries', 'Pineapples', 'Mangoes', 'Kiwis', 'Watermelons', ]; export default function App() { const ref = useRef(null); const [fruits, setFruits] = useState([...allFruits.slice(0, 3)]); const addFruit = () => { setFruits((prevFruits) => [...prevFruits, allFruits[prevFruits.length]]); }; const scrollToLastFruit = () => { const lastChildElement = ref.current?.lastElementChild; lastChildElement?.scrollIntoView({ behavior: 'smooth' }); }; return ( <div> <div style={{ position: 'fixed', backgroundColor: 'white', bottom: 0, marginBottom: 10, }} > <button onClick={addFruit}>Add fruit</button> <button onClick={scrollToLastFruit} style={{ marginLeft: '8px' }}> Scroll to last </button> </div> <div style={{ height: '5rem' }} /> <div ref={ref}> {fruits.map((fruit) => ( <h2 key={fruit}>{fruit}</h2> ))} </div> <div style={{ height: '150rem' }} /> </div> ); }
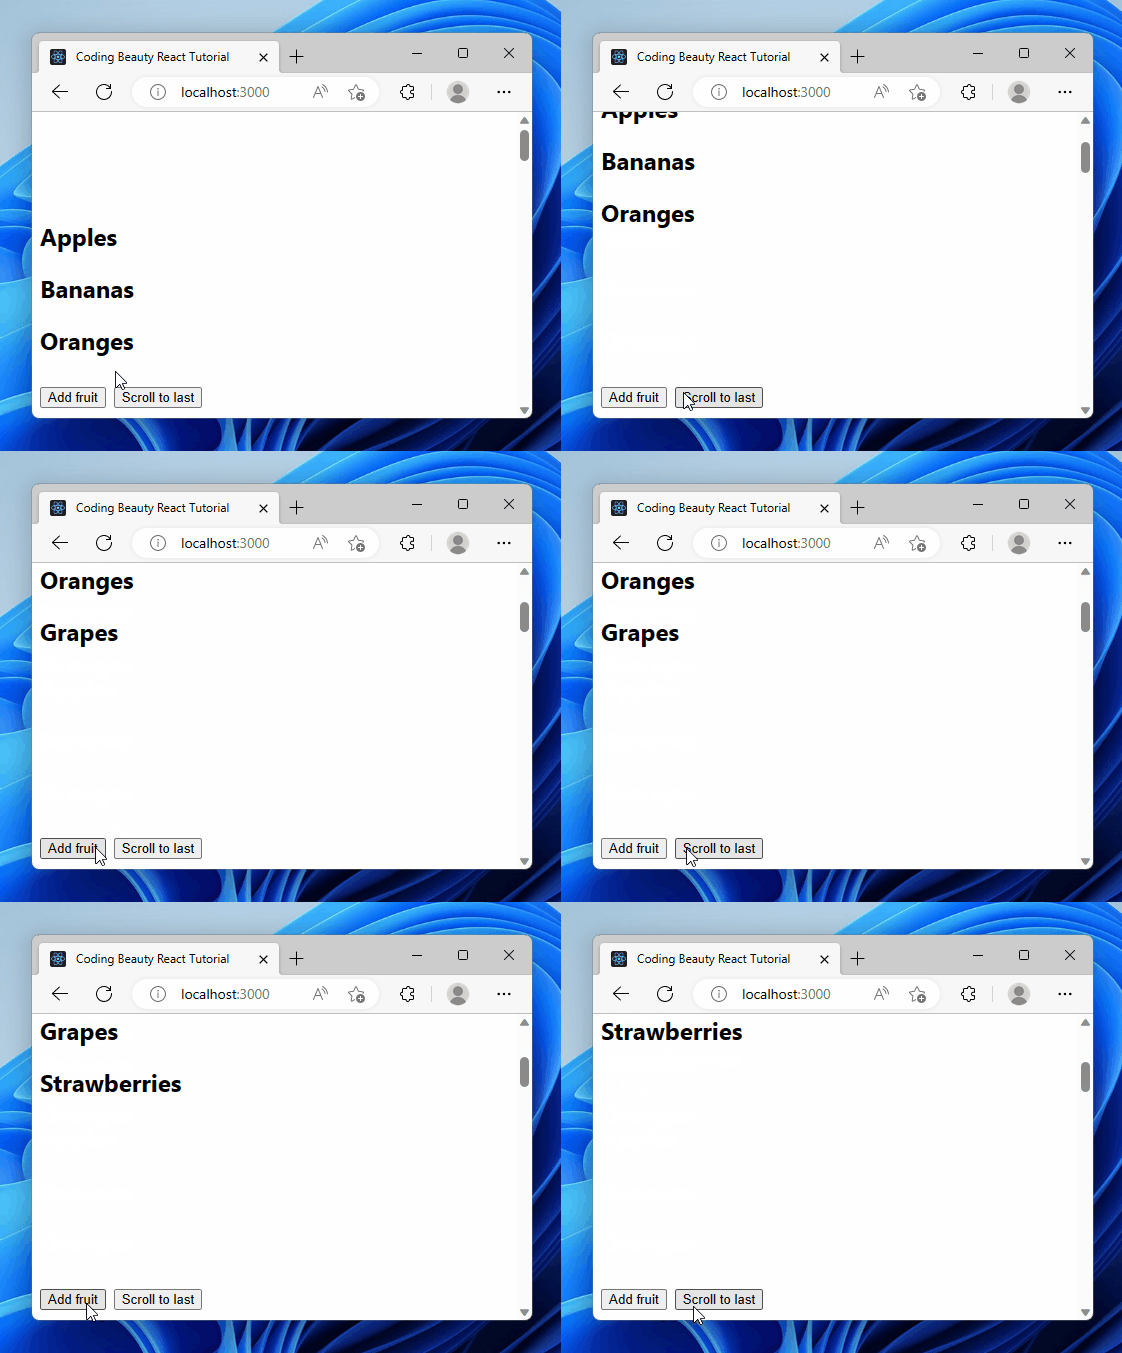
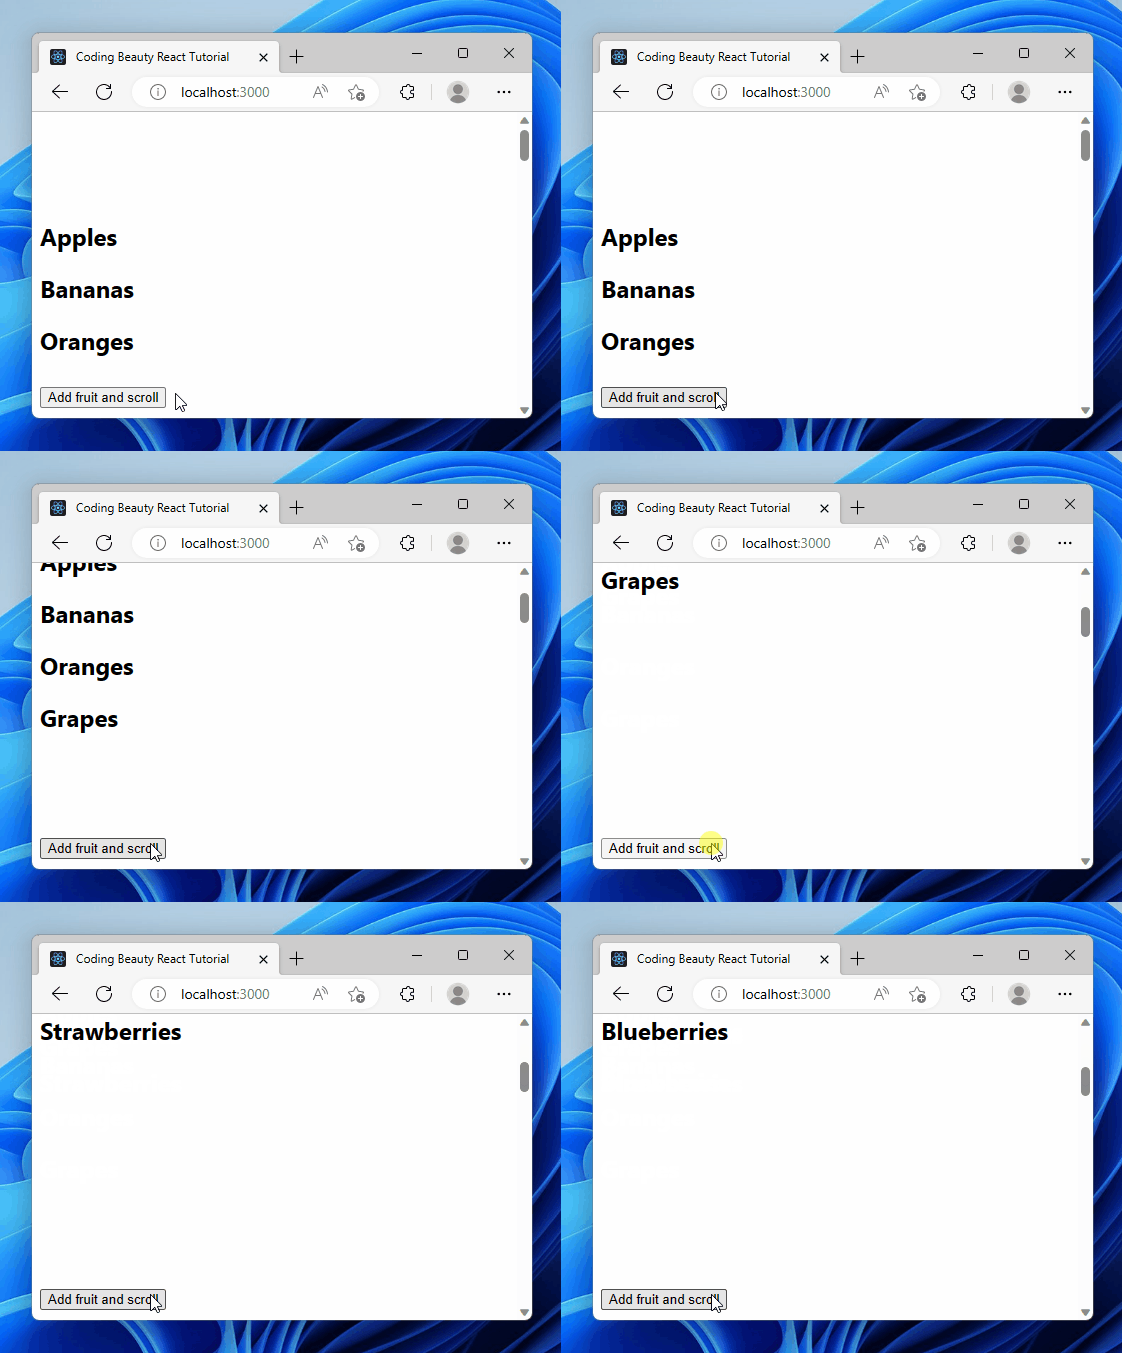
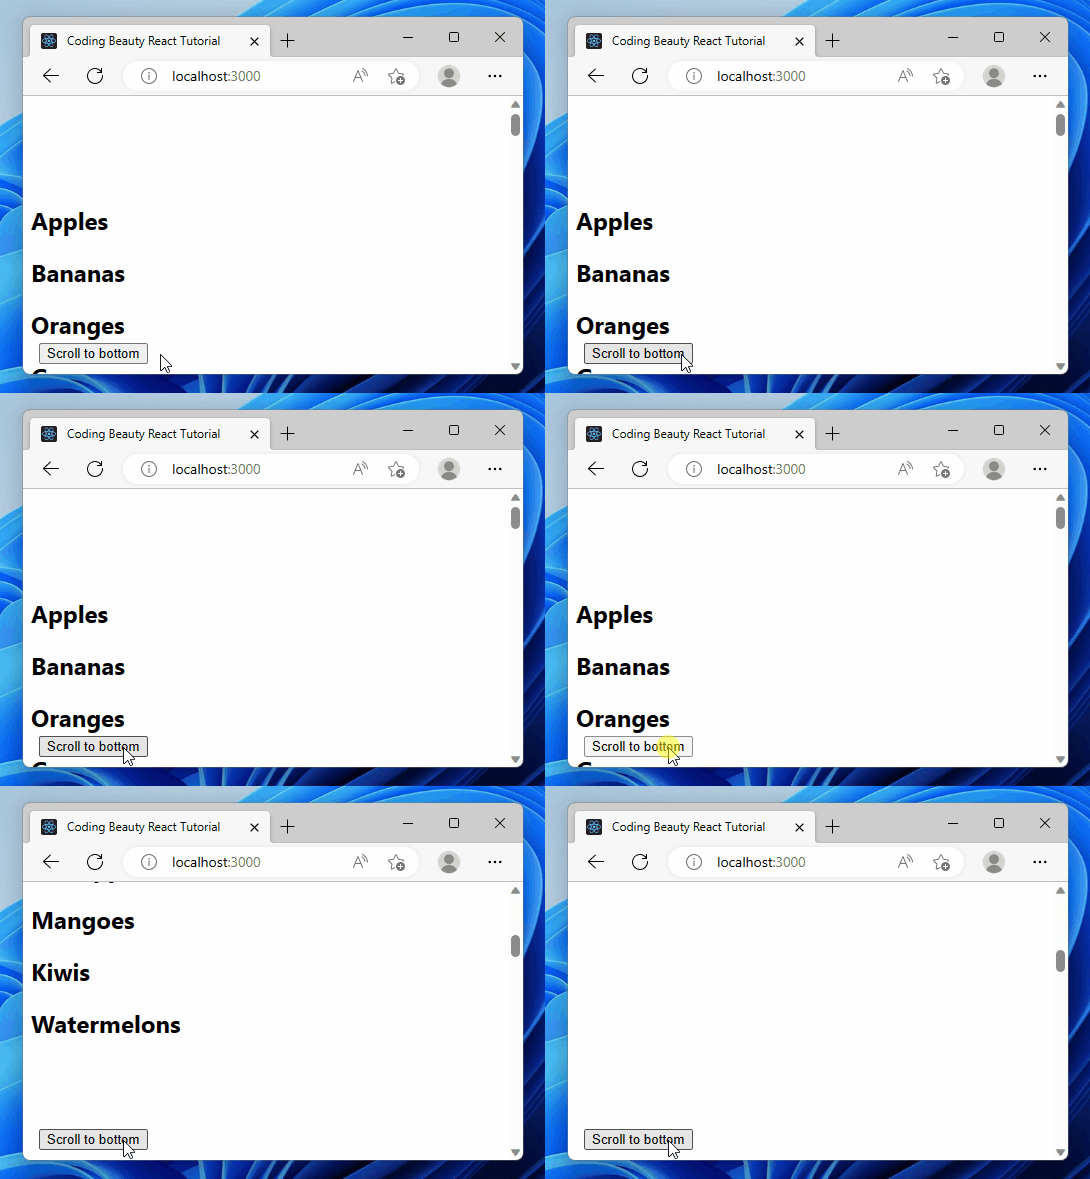
Scrolling to a dynamic element on click in React.

Here we have a list of fruits displayed. The Add fruit button dynamically adds an item to the fruit list on click. Then the Scroll to last button scrolls to this item on click, as it’s the last in the list.

Like before, we use the onClick prop to set a click event listener on the button.

This time we set the ref on the list instead of the items since the items are created dynamically, and the last item will not be constant. Doing this sets the current property of the ref object to the DOM object that represents the list element.

In this listener, we use the lastElementChild property of the list element to get its last item element. Then we call scrollIntoView() on this last item to scroll down to it.

JavaScript
const scrollToLastFruit = () => { const lastChildElement = ref.current?.lastElementChild; lastChildElement?.scrollIntoView({ behavior: 'smooth' }); };

Key takeaways

  • To scroll to an element after render, set a ref on the element, then call scrollIntoView() on the ref object in useEffect.
  • To scroll to an element on click, set a click listener on the element and call scrollIntoView() on the ref object in the click event listener.
  • To scroll to a dynamic element on click, set the ref on the list, use lastElementChild to get the last item element and call scrollIntoView() on it.

How to Scroll to an Element on Click in React

To scroll to an element on click in React:

  1. Set a ref on the target element.
  2. Set a click listener on the element meant to cause the scroll on click.
  3. In the click event listener, call the scrollIntoView() method on the ref object.
App.jsx
import { useRef } from 'react'; export default function App() { const ref = useRef(null); const handleClick = () => { ref.current?.scrollIntoView({ behavior: 'smooth' }); }; return ( <div> <button onClick={handleClick}>Scroll to element</button> <div style={{ height: '150rem' }} /> <div ref={ref} style={{ backgroundColor: 'lightblue' }}> Coding Beauty </div> <div style={{ height: '150rem' }} /> </div> ); }
Scrolling to an element on click in React

Scrolling to an element on click improves user experience by allowing for quick navigation, especially for long lists or pages with multiple sections. It can also add a touch of interactivity to navigation through smooth-scrolling animations.

We create a ref object with the useRef hook and assign it to the ref prop of the target div element. Doing this sets the current property of the ref object to the DOM object that represents the element.

useRef returns a mutable object that maintains its value when a component updates. Also, modifying the value of this object’s current property doesn’t cause a re-render. This is unlike the setState update function return from the useState hook.

We use the onClick on the button to a click listener to it. So, this listener will be called when the user clicks the button.

App.jsx
const handleClick = () => { ref.current?.scrollIntoView({ behavior: 'smooth' }); };

In the handleClick listener, we call the scrollIntoView() method on the ref of the target div element to scroll down to it and display it to the user.

We set the behaviour option to smooth to make the element scroll into view in an animated way, instead of jumping straight to the element in the next frame – auto. auto is the default.

Scroll to dynamic element on click in React

We can do something similar to scroll to a dynamically created element in React:

App.jsx
import { useRef, useState } from 'react'; const allFruits = [ 'Apples', 'Bananas', 'Oranges', 'Grapes', 'Strawberries', 'Blueberries', 'Pineapples', 'Mangoes', 'Kiwis', 'Watermelons', ]; export default function App() { const ref = useRef(null); const [fruits, setFruits] = useState([...allFruits.slice(0, 3)]); const addFruit = () => { setFruits((prevFruits) => [...prevFruits, allFruits[prevFruits.length]]); }; const scrollToLastFruit = () => { const lastChildElement = ref.current?.lastElementChild; lastChildElement?.scrollIntoView({ behavior: 'smooth' }); }; return ( <div> <div style={{ position: 'fixed', backgroundColor: 'white', bottom: 0, marginBottom: 10, }} > <button onClick={addFruit}>Add fruit</button> <button onClick={scrollToLastFruit} style={{ marginLeft: '8px' }}> Scroll to last </button> </div> <div style={{ height: '5rem' }} /> <div ref={ref}> {fruits.map((fruit) => ( <h2 key={fruit}>{fruit}</h2> ))} </div> <div style={{ height: '150rem' }} /> </div> ); }
Scrolling to a dynamic element on click in React.

Here we have a list of fruits displayed. The Add fruit button dynamically adds an item to the fruit list on click. Then the Scroll to last button scrolls to this item on click, as it’s the last in the list.

Like before, we use the onClick prop to set a click event listener on the button.

This time we set the ref on the list instead of the items since the items are created dynamically, and the last item will not be constant. Doing this sets the current property of the ref object to the DOM object that represents the list element.

In this listener, we use the lastElementChild property of the list element to get its last item element. Then we call scrollIntoView() on this last item to scroll down to it.

JavaScript
const scrollToLastFruit = () => { const lastChildElement = ref.current?.lastElementChild; lastChildElement?.scrollIntoView({ behavior: 'smooth' }); };

Create and scroll to dynamic element on click

We can also combine the element creation and scroll as a single action caused by a button click.

To do this, we’ll add a useEffect hook to call scrollToLastFruit() whenever the fruits state array changes.

App.jsx
const addFruit = () => { setFruits((prevFruits) => [...prevFruits, allFruits[prevFruits.length]]); }; const scrollToLastFruit = () => { const lastChildElement = ref.current?.lastElementChild; lastChildElement?.scrollIntoView({ behavior: 'smooth' }); }; // 👇 Call `scrollToLastFruit()` when `fruits` changes. useEffect(() => { scrollToLastFruit(); }, [fruits]);
Creating and scrolling to a dynamic element on click in React.

Here’s the full code for reference:

App.jsx
import { useEffect, useRef, useState } from 'react'; const allFruits = [ 'Apples', 'Bananas', 'Oranges', 'Grapes', 'Strawberries', 'Blueberries', 'Pineapples', 'Mangoes', 'Kiwis', 'Watermelons', ]; export default function App() { const ref = useRef(null); const [fruits, setFruits] = useState([...allFruits.slice(0, 3)]); const addFruit = () => { setFruits((prevFruits) => [...prevFruits, allFruits[prevFruits.length]]); }; const scrollToLastFruit = () => { const lastChildElement = ref.current?.lastElementChild; lastChildElement?.scrollIntoView({ behavior: 'smooth' }); }; useEffect(() => { scrollToLastFruit(); }, [fruits]); return ( <div> <div style={{ position: 'fixed', backgroundColor: 'white', bottom: 0, marginBottom: 10, }} > <button onClick={addFruit}>Add fruit and scroll</button> </div> <div style={{ height: '5rem' }} /> <div ref={ref}> {fruits.map((fruit) => ( <h2 key={fruit}>{fruit}</h2> ))} </div> <div style={{ height: '150rem' }} /> </div> ); }

Key takeaways

  • To scroll to an element on click in React, set a ref on the target element, set a click listener on the element meant to cause the scroll, and in the click event listener, call the scrollIntoView() method on the ref object.
  • To scroll to a dynamically created element in React, set the ref on the list container and call scrollIntoView() on the target item element.
  • We can combine element creation and scrolling as a single action by using the useEffect hook to call scrollToLastFruit() whenever the state array changes.

How to Get the Height of an Element Before Render in React

To get the height of an element before render in React, we can combine two React hooks: useRef and useLayoutEffect.

JavaScript
import React, { useRef, useLayoutEffect, useState } from 'react'; function ExampleComponent() { const [height, setHeight] = useState(0); const elementRef = useRef(null); useLayoutEffect(() => { setHeight(elementRef.current.offsetHeight); }, []); return ( <div ref={elementRef}> {`The height of this element is: ${height}px`} </div> ); }

See also: How to Get the Width of an Element Before Render in React

useLayoutEffect() works just like useEffect(), but the key difference is that it fires before the browser repaints the screen – before React renders the component.

We pass an empty dependencies array to useLayoutEffect() to make sure it only gets called once.

Here we create a ref for the target element with useRef(), and assign it to its ref prop, so we can access the HTMLElement object for this React element.

useRef returns a mutable ref object that doesn’t change its value when a component is updated. Also, modifying the value of this object’s current property does not cause a re-render. This is in contrast to the setState update function returned from useState.

We do use useState() though, to create a state that we update when useLayoutEffect() gets called. So calling setHeight() will cause the component to be re-rendered.

To get the actual height, we use the offsetHeight property which includes borders, padding, and any scrollbars when calculating the element’s height.

It’s also possible to get the height of the entire window in React, instead of just one element.

Get height of element with clientHeight

clientHeight is another way to get the height of an element. Unlike offsetHeight, it includes padding but excludes borders and scrollbars.

JavaScript
import React, { useRef, useLayoutEffect, useState } from 'react'; function ExampleComponent() { const [height, setHeight] = useState(0); const elementRef = useRef(null); useLayoutEffect(() => { setHeight(elementRef.current.clientHeight); }, []); return ( <div ref={elementRef}> {`The height of this element is: ${height}px`} <p>This element's height is measured using clientHeight.</p> </div> ); }

Get height of element before render and on resize in React

If you want to get the height of an element before render and also on resize, here’s what you’ll do:

  1. Combine the useLayoutEffect() and useRef() hooks to get the element’s height before it renders, like in the previous section.
  2. Track the current height with state.
  3. Add a resize event listener to the window object in useLayoutEffect().
  4. In the event listener, get the new height of the element, and update the state with it.

So it’s similar to what we did previously, but we’re adding a resize event listener this time.

JavaScript
import React, { useLayoutEffect, useState, useRef } from 'react'; function ExampleComponent() { const [height, setHeight] = useState(0); const elementRef = useRef(null); useLayoutEffect(() => { const handleResize = () => { setHeight(elementRef.current.offsetHeight); }; handleResize(); window.addEventListener('resize', handleResize); return () => { window.removeEventListener('resize', handleResize); } }, []); return ( <div ref={elementRef}> {`The height of this element is: ${height}px`} </div> ); }

We call addEventListener() in useLayoutEffect() to set the resize event listener on the element before it renders on the screen.

The resize event listener is called whenever the user resizes the window. In the listener we update the state that stores the element’s height, and this causes a re-render.

We call removeEventListener() in useLayoutEffect‘s clean-up function, to stop listening for resize events when the component is unmounted or when the dependencies change, to prevent memory leaks and unintended side effects.

Get height of element after render in React

We can also get the height of a React element after it renders in React, by combining the useRef() and useEffect() hooks.

JavaScript
import React, { useEffect, useState, useRef } from 'react'; function ExampleComponent() { const [height, setHeight] = useState(0); const elementRef = useRef(null); useEffect(() => { setHeight(elementRef.current.offsetHeight); }, []); return ( <div ref={elementRef}> {`The height of this element is: ${height}px`} </div> ); }

So the difference between “before render” and “after render” is useLayoutEffect() and useEffect().

useEffect() runs after the component mounts or re-renders, unlike useLayoutEffect() that runs before. They both have a dependencies array that cause them to fire when any of those dependencies change.

As earlier, we create a ref for the target element with useRef(), and assign it to its ref prop, so we can access the HTMLElement object for this React element.

useRef returns a mutable ref object that doesn’t change its value when a component is updated. Also, modifying the value of this object’s current property does not cause a re-render. This is in contrast to the setState update function returned from useState.

We do use useState() to create a state that we update when useEffect() gets called. This update causes the component to update again from useEffect().

Get height of element after render and on resize in React

If you want to get the height of an element after render and also on resize, here’s what you’ll do:

  1. Combine the useEffect() and useRef() hooks to get the element’s height before it renders, like in the previous section.
  2. Track the current height with state.
  3. Add a resize event listener to the window object in useEffect().
  4. In the event listener, get the new height of the element, and update the state with it.
JavaScript
import React, { useLayoutEffect, useState, useRef } from 'react'; function ExampleComponent() { const [height, setHeight] = useState(0); const elementRef = useRef(null); useLayoutEffect(() => { const handleResize = () => { setHeight(elementRef.current.offsetHeight); }; handleResize(); window.addEventListener('resize', handleResize); return () => { window.removeEventListener('resize', handleResize); } }, []); return ( <div ref={elementRef}> {`The height of this element is: ${height}px`} </div> ); }

We call addEventListener() in useEffect() to set the resize event listener on the element before it renders on the screen.

The resize event listener is called whenever the user resizes the window. In the listener, we update the state that stores the element’s height, and this causes a re-render.

We call removeEventListener() in useEffect‘s clean-up function, to stop listening for resize events when the component is unmounted or when the dependencies change, to prevent memory leaks and unintended side effects.

How to Get the Current Year in React

To get the current year in React, create a new Date object with the Date() constructor, then use the getFullYear() method to get the year of the DategetFullYear() will return a number that represents the current year.

JavaScript
import React from 'react'; function Footer() { const currentYear = new Date().getFullYear(); return ( <div> {currentYear} <div>&copy; {currentYear} Coding Beauty</div> </div> ); } export default Footer;
Displaying the current year in React.

We use the Date() constructor to create a new Date object. When Date() is called with no arguments, the Date object is created using the current date and time.

The Date getFullYear() method returns a number that represents the year of the Date. Since the Date object here stores the current date, getFullYear() returns the current year.

Get current month in React

If you also want to get the current month, the getMonth() method is for you.

getMonth() returns a zero-based index that represents the month of the Date. Zero-based here means that 0 = January, 1 = February, 2 = March, etc.

JavaScript
import React from 'react'; function MonthYear() { const currMonth = new Date().getMonth(); const currYear = new Date().getFullYear(); return <div>Month number {currMonth} in {currYear}</div>; } export default MonthYear;
The month number is displayed.

Get current month name

If you want the month name directly (the more likely case), the Date toLocaleString() method will do the job.

JavaScript
import React from 'react'; function MonthYear() { const currMonth = new Date().toLocaleString([], { month: 'long', }); const currYear = new Date().getFullYear(); return <div>{currMonth} in {currYear}</div>; } export default MonthYear;
Displaying the month name in React.

Check out this article for a full guide on how to convert a month number to its equivalent month name in JavaScript.

Get current day of month in React

Similarly, to get the current day in the month, you’d use the Date getDate() method:

JavaScript
import React from 'react'; function DateDisplay() { const currDay = new Date().getDate(); const currMonth = new Date().toLocaleString([], { month: 'long', }); const currYear = new Date().getFullYear(); return <div>{currMonth} {currDay}, {currYear}</div>; } export default DateDisplay;
The current day of the month is displayed.

Get current year, month, day, week…

While you could get each component of the date using different functions, a much more flexible and easy way to do this is by formatting the date in the given format with a format specifier.

We can carry out this formatting with the format() function from the date-fns library.

In the following example, we use date-fns format() to get the multiple individual parts of the date.

JavaScript
import React from 'react'; import { format } from 'date-fns'; function DateDisplay() { const dateString = format( new Date(), "EEEE, 'the' do 'of' LLLL, yyyy" ); return <div>{dateString}</div>; } export default DateDisplay;
Different parts of the date are displayed using formatting.

The format() function takes a pattern and returns a formatted date string in the format specified by the pattern. You can find a list of the patterns format() accepts here.

For our example, we use the following patterns:

  • EEEE: to get the full name of the day of the week.
  • do: to get the ordinal day of the month, i.e., 1st, 2nd, 3rd, etc.
  • LLLL: to get the full name of the month of the year.
  • yyyy: to get the full year.

We also use single quotes to escape strings (the and of) that are not patterns but should be included in the result of the formatting.

Key takeaways

  • To get the current year in React, use new Date().getFullYear().
  • To get the current month name, use toLocaleString() with the month: 'long' specifier.
  • To get the current day in the month, use the getDate() method.
  • Use the date-fns library’s format() function to easily format and obtain multiple parts of the date.

How to Get the Height of an Element After Render in React

To get the height of a React element after render in React, we can combine two hooks: useRef() and useEffect():

JavaScript
import React, { useEffect, useState, useRef } from 'react'; function ExampleComponent() { const [height, setHeight] = useState(0); const elementRef = useRef(null); useEffect(() => { setHeight(elementRef.current.offsetHeight); }, []); return ( <div ref={elementRef}> {`The height of this element is: ${height}px`} </div> ); }

useEffect() runs after the component mounts or re-renders, unlike useLayoutEffect() that runs before. They both have a dependencies array that cause them to fire when any of those dependencies change.

We create a ref for the target element with useRef(), and assign it to its ref prop, so we can access the HTMLElement object for this React element.

useRef returns a mutable ref object that doesn’t change its value when a component is updated. Also, modifying the value of this object’s current property does not cause a re-render. This is in contrast to the setState update function returned from useState.

We do use useState() to create a state that we update when useEffect() gets called. This update causes the component to update again from useEffect().

To get the actual height, we use the offsetHeight property, which includes borders, padding, and any scrollbars when calculating the element’s height.

It’s also possible to get the height of the entire window in React, instead of just one element.

Get height of element with clientHeight

clientHeight is another way to get the height of an element. Unlike offsetHeight, it includes padding but excludes borders and scrollbars.

JavaScript
import React, { useRef, useLayoutEffect, useState } from 'react'; function ExampleComponent() { const [height, setHeight] = useState(0); const elementRef = useRef(null); useEffect(() => { setHeight(elementRef.current.clientHeight); }, []); return ( <div ref={elementRef}> {`The height of this element is: ${height}px`} <p>This element's height is measured using clientHeight.</p> </div> ); }

Get height of element after render and on resize in React

To get the height of an element after render and on resize:

  1. Combine the useEffect() and useRef() hooks to get the element’s height before it renders.
  2. Track the current height with state.
  3. Add a resize event listener to the window object in useEffect().
  4. In the event listener, get the new height of the element, and update the state with it.
JavaScript
import React, { useLayoutEffect, useState, useRef } from 'react'; function ExampleComponent() { const [height, setHeight] = useState(0); const elementRef = useRef(null); useEffect(() => { const handleResize = () => { setHeight(elementRef.current.offsetHeight); }; handleResize(); window.addEventListener('resize', handleResize); return () => { window.removeEventListener('resize', handleResize); } }, []); return ( <div ref={elementRef}> {`The height of this element is: ${height}px`} </div> ); }

We call addEventListener() in useEffect() to set the resize event listener on the element before it renders on the screen.

The resize event listener is called whenever the user resizes the window. In the listener, we update the state that stores the element’s height, and this causes a re-render.

We call removeEventListener() in useEffect‘s clean-up function to stop listening for resize events when the component is unmounted or when the dependencies change to prevent memory leaks and unintended side effects.

Get height of element before render in React

To get the height of an element before render in React, we can combine two React hooks: useRef and useLayoutEffect.

JavaScript
import React, { useRef, useLayoutEffect, useState } from 'react'; function ExampleComponent() { const [height, setHeight] = useState(0); const elementRef = useRef(null); useLayoutEffect(() => { setHeight(elementRef.current.offsetHeight); }, [height]); return ( <div ref={elementRef}> {`The height of this element is: ${height}px`} </div> ); }

So the difference between “before render” and “after render” is useLayoutEffect() and useEffect().

useLayoutEffect() works just like useEffect(), but the key difference is that it fires before the browser repaints the screen – before React renders the component.

Here we create a ref for the target element with useRef(), and assign it to its ref prop, so we can access the HTMLElement object for this React element.

useRef returns a mutable ref object that doesn’t change its value when a component is updated. Also, modifying the value of this object’s current property does not cause a re-render. This is in contrast to the setState update function returned from useState.

We do use useState() though, to create a state that we update when useLayoutEffect() gets called. So calling setHeight() will cause the component to be re-rendered.

To get the actual height, we use the offsetHeight property which includes borders, padding, and any scrollbars when calculating the element’s height.

Get height of element before render and on resize in React

To get the height of an element before render and also on resize:

  1. Combine the useLayoutEffect() and useRef() hooks to get the element’s height before it renders.
  2. Track the current height with state.
  3. Add a resize event listener to the window object in useLayoutEffect().
  4. In the event listener, get the new height of the element, and update the state with it.
JavaScript
import React, { useLayoutEffect, useState, useRef } from 'react'; function ExampleComponent() { const [height, setHeight] = useState(0); const elementRef = useRef(null); useLayoutEffect(() => { const handleResize = () => { setHeight(elementRef.current.offsetHeight); }; handleResize(); window.addEventListener('resize', handleResize); return () => { window.removeEventListener('resize', handleResize); } }, []); return ( <div ref={elementRef}> {`The height of this element is: ${height}px`} </div> ); }

We call addEventListener() in useLayoutEffect() to set the resize event listener on the element before it renders on the screen.

The resize event listener is called whenever the user resizes the window. In the listener, we update the state that stores the element’s height, and this causes a re-render.

We call removeEventListener() in useLayoutEffect‘s clean-up function, to stop listening for resize events when the component is unmounted or when the dependencies change, to prevent memory leaks and unintended side effects.

Key takeaways

  • To get the height of a React element after render, we can use the useRef() and useEffect() hooks.
  • The offsetHeight property includes borders, padding, and scrollbars, while clientHeight includes padding only.
  • To get the height of an element after render and on resize, we can use the useLayoutEffect() hook and add a resize event listener to the window object.
  • To get the height of an element before render, we can use useLayoutEffect() instead of useEffect().

How to Get the Width of an Element After Render in React

To get the width of a React element after render in React, we can combine two hooks: useRef() and useEffect():

JavaScript
import React, { useEffect, useState, useRef } from 'react'; function ExampleComponent() { const [width, setWidth] = useState(0); const elementRef = useRef(null); useEffect(() => { setWidth(elementRef.current.offsetWidth); }, []); return ( <div ref={elementRef}> {`The width of this element is: ${width}px`} </div> ); }

useEffect() runs after the component mounts or re-renders, unlike useLayoutEffect() that runs before. They both have a dependencies array that cause them to fire when any of those dependencies change.

We create a ref for the target element with useRef(), and assign it to its ref prop, so we can access the HTMLElement object for this React element.

useRef returns a mutable ref object that doesn’t change its value when a component is updated. Also, modifying the value of this object’s current property does not cause a re-render. This is in contrast to the setState update function returned from useState.

We do use useState() to create a state that we update when useEffect() gets called. This update causes the component to update again from useEffect().

It’s also possible to get the width of the entire window in React, instead of just one element.

Get width of element with clientWidth

clientWidth is another way to get the width of an element. Unlike offsetWidth, it includes padding but excludes borders and scrollbars.

JavaScript
import React, { useRef, useLayoutEffect, useState } from 'react'; function ExampleComponent() { const [width, setWidth] = useState(0); const elementRef = useRef(null); useEffect(() => { setWidth(elementRef.current.clientWidth); }, []); return ( <div ref={elementRef}> {`The width of this element is: ${width}px`} <p>This element's width is measured using clientWidth.</p> </div> ); }

Get width of element after render and on resize in React

To get the width of an element after render and on resize:

  1. Combine the useEffect() and useRef() hooks to get the element’s width before it renders, like in the previous section.
  2. Track the current width with state.
  3. Add a resize event listener to the window object in useEffect().
  4. In the event listener, get the new width of the element, and update the state with it.
JavaScript
import React, { useLayoutEffect, useState, useRef } from 'react'; function ExampleComponent() { const [width, setWidth] = useState(0); const elementRef = useRef(null); useEffect(() => { const handleResize = () => { setWidth(elementRef.current.offsetWidth); }; handleResize(); window.addEventListener('resize', handleResize); return () => { window.removeEventListener('resize', handleResize); } }, []); return ( <div ref={elementRef}> {`The width of this element is: ${width}px`} </div> ); }

We call addEventListener() in useEffect() to set the resize event listener on the element before it renders on the screen.

The resize event listener is called whenever the user resizes the window. In the listener, we update the state that stores the element’s width, and this causes a re-render.

We call removeEventListener() in useEffect‘s clean-up function to stop listening for resize events when the component is unmounted or when the dependencies change to prevent memory leaks and unintended side effects.

Get width of element before render in React

To get the width and height of an element before render in React, we can combine two React hooks: useRef and useLayoutEffect.

JavaScript
import React, { useRef, useLayoutEffect, useState } from 'react'; function ExampleComponent() { const [width, setWidth] = useState(0); const elementRef = useRef(null); useLayoutEffect(() => { setWidth(elementRef.current.offsetWidth); }, []); return ( <div ref={elementRef}> {`The width of this element is: ${width}px`} </div> ); }

So the difference between “before render” and “after render” is useLayoutEffect() and useEffect().

useLayoutEffect() works just like useEffect(), but the key difference is that it fires before the browser repaints the screen – before React renders the component.

We pass an empty dependencies array to useLayoutEffect() to make sure it only gets called once.

Here we create a ref for the target element with useRef(), and assign it to its ref prop, so we can access the HTMLElement object for this React element.

useRef returns a mutable ref object that doesn’t change its value when a component is updated. Also, modifying the value of this object’s current property does not cause a re-render. This is in contrast to the setState update function returned from useState.

We do use useState() though, to create a state that we update when useLayoutEffect() gets called. So calling setWidth() will cause the component to be re-rendered.

To get the actual width, we use the offsetWidth property which includes borders, padding, and any scrollbars when calculating the element’s width.

Get width of element before render and on resize in React

To get the width of an element before render and also on resize:

  1. Combine the useLayoutEffect() and useRef() hooks to get the element’s width before it renders, like in the previous section.
  2. Track the current width with state.
  3. Add a resize event listener to the window object in useLayoutEffect().
  4. In the event listener, get the new width of the element, and update the state with it.
JavaScript
import React, { useLayoutEffect, useState, useRef } from 'react'; function ExampleComponent() { const [width, setWidth] = useState(0); const elementRef = useRef(null); useLayoutEffect(() => { const handleResize = () => { setWidth(elementRef.current.offsetWidth); }; handleResize(); window.addEventListener('resize', handleResize); return () => { window.removeEventListener('resize', handleResize); } }, []); return ( <div ref={elementRef}> {`The width of this element is: ${width}px`} </div> ); }

We call addEventListener() in useLayoutEffect() to set the resize event listener on the element before it renders on the screen.

The resize event listener is called whenever the user resizes the window. In the listener, we update the state that stores the element’s width, and this causes a re-render.

We call removeEventListener() in useLayoutEffect‘s clean-up function, to stop listening for resize events when the component is unmounted or when the dependencies change, to prevent memory leaks and unintended side effects.

Key takeaways

  • To get the width of a React element after it renders, we can combine the useRef() and useEffect() hooks.
  • The offsetWidth property includes borders, padding, and scrollbars, while clientWidth includes padding only.
  • To get the width of an element before render, use useLayoutEffect() instead of useEffect().
  • To get the width of an element on resize, add a resize event listener to the window object in useEffect() or useLayoutEffect().

How to Get the Width of an Element Before Render in React

To get the width of an element before render in React, we can combine two React hooks: useRef and useLayoutEffect.

JavaScript
import React, { useRef, useLayoutEffect, useState } from 'react'; function ExampleComponent() { const [width, setWidth] = useState(0); const elementRef = useRef(null); useLayoutEffect(() => { setWidth(elementRef.current.offsetWidth); }, []); return ( <div ref={elementRef}> {`The width of this element is: ${width}px`} </div> ); }

See also: How to Get the Height of an Element Before Render in React

useLayoutEffect() works just like useEffect(), but the key difference is that it fires before the browser repaints the screen – before React renders the component.

We pass an empty dependencies array to useLayoutEffect() to make sure it only gets called once.

Here we create a ref for the target element with useRef(), and assign it to its ref prop, so we can access the HTMLElement object for this React element.

useRef returns a mutable ref object that doesn’t change its value when a component is updated. Also, modifying the value of this object’s current property does not cause a re-render. This is in contrast to the setState update function returned from useState.

We do use useState() though, to create a state that we update when useLayoutEffect() gets called. So calling setWidth() will cause the component to be re-rendered.

To get the actual width, we use the offsetWidth property which includes borders, padding, and any scrollbars when calculating the element’s width.

It’s also possible to get the width of the entire window in React, instead of just one element.

Get width of element with clientWidth

clientWidth is another way to get the width of an element. Unlike offsetWidth, it includes padding but excludes borders and scrollbars.

JavaScript
import React, { useRef, useLayoutEffect, useState } from 'react'; function ExampleComponent() { const [width, setWidth] = useState(0); const elementRef = useRef(null); useLayoutEffect(() => { setWidth(elementRef.current.clientWidth); }, []); return ( <div ref={elementRef}> {`The width of this element is: ${width}px`} <p>This element's width is measured using clientWidth.</p> </div> ); }

Get width of element before render and on resize in React

If you want to get the width of an element before render and also on resize, here’s what you’ll do:

  1. Combine the useLayoutEffect() and useRef() hooks to get the element’s width before it renders, like in the previous section.
  2. Track the current width with state.
  3. Add a resize event listener to the window object in useLayoutEffect().
  4. In the event listener, get the new width of the element, and update the state with it.

So it’s similar to what we did previously, but we’re adding a resize event listener this time.

JavaScript
import React, { useLayoutEffect, useState, useRef } from 'react'; function ExampleComponent() { const [width, setWidth] = useState(0); const elementRef = useRef(null); useLayoutEffect(() => { const handleResize = () => { setWidth(elementRef.current.offsetWidth); }; handleResize(); window.addEventListener('resize', handleResize); return () => { window.removeEventListener('resize', handleResize); } }, []); return ( <div ref={elementRef}> {`The width of this element is: ${width}px`} </div> ); }

We call addEventListener() in useLayoutEffect() to set the resize event listener on the element before it renders on the screen.

The resize event listener is called whenever the user resizes the window. In the listener we update the state that stores the element’s width, and this causes a re-render.

We call removeEventListener() in useLayoutEffect‘s clean-up function, to stop listening for resize events when the component is unmounted or when the dependencies change, to prevent memory leaks and unintended side effects.

Get width of element after render in React

We can also get the width of a React element after it renders in React, by combining the useRef() and useEffect() hooks.

JavaScript
import React, { useEffect, useState, useRef } from 'react'; function ExampleComponent() { const [width, setWidth] = useState(0); const elementRef = useRef(null); useEffect(() => { setWidth(elementRef.current.offsetWidth); }, []); return ( <div ref={elementRef}> {`The width of this element is: ${width}px`} </div> ); }

So the difference between “before render” and “after render” is useLayoutEffect() and useEffect().

useEffect() runs after the component mounts or re-renders, unlike useLayoutEffect() that runs before. They both have a dependencies array that cause them to fire when any of those dependencies change.

As earlier, we create a ref for the target element with useRef(), and assign it to its ref prop, so we can access the HTMLElement object for this React element.

useRef returns a mutable ref object that doesn’t change its value when a component is updated. Also, modifying the value of this object’s current property does not cause a re-render. This is in contrast to the setState update function returned from useState.

We do use useState() to create a state that we update when useEffect() gets called. This update causes the component to update again from useEffect().

Get width of element after render and on resize in React

If you want to get the width of an element after render and also on resize, here’s what you’ll do:

  1. Combine the useEffect() and useRef() hooks to get the element’s width before it renders, like in the previous section.
  2. Track the current width with state.
  3. Add a resize event listener to the window object in useEffect().
  4. In the event listener, get the new width of the element, and update the state with it.
JavaScript
import React, { useLayoutEffect, useState, useRef } from 'react'; function ExampleComponent() { const [width, setWidth] = useState(0); const elementRef = useRef(null); useEffect(() => { const handleResize = () => { setWidth(elementRef.current.offsetWidth); }; handleResize(); window.addEventListener('resize', handleResize); return () => { window.removeEventListener('resize', handleResize); } }, []); return ( <div ref={elementRef}> {`The width of this element is: ${width}px`} </div> ); }

We call addEventListener() in useEffect() to set the resize event listener on the element before it renders on the screen.

The resize event listener is called whenever the user resizes the window. In the listener, we update the state that stores the element’s width, and this causes a re-render.

We call removeEventListener() in useEffect‘s clean-up function, to stop listening for resize events when the component is unmounted or when the dependencies change, to prevent memory leaks and unintended side effects.

How to Easily Handle the onPaste Event in React

To handle the onPaste event on a React element, set its onPaste prop to an event handler. You can get the pasted text from the handler using event.clipboardData.getData('text').

For example:

JavaScript
import React, { useState } from 'react'; export default function App() { const [pasted, setPasted] = useState(''); const handlePaste = (event) => { setPasted(event.clipboardData.getData('text')); }; return ( <div> <input placeholder="Message" onPaste={handlePaste} type="text" id="message" /> <br /> You pasted: <b>{pasted}</b> </div> ); }
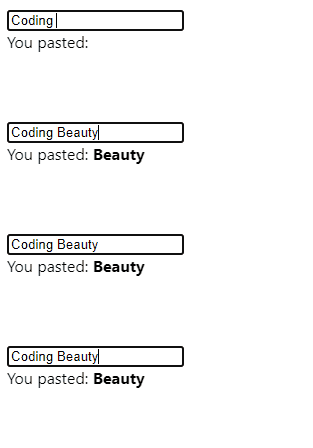
Handling the onPaste event on an element in React

The function (event listener) passed to the onPaste prop is called when the user pastes text into the input field.

The event object has various properties and methods used to get more info and take actions concerned with the event.

For the paste event, event has a clipboardData property that stores the data stored on the clipboard.

getData() gives us the data in the clipboard in a particular format. We pass 'text' as the first argument to get text data.

For the purposes of our example, we create a state that’ll be updated to the latest text data pasted in the input field. We display this text to the user.

Note: We used the useState hook to manage the state. This hook returns an array of two values, where the first is a variable that stores the state, and the second is a function that updates the state when it is called.

Handle onPaste event in entire window

To handle the paste event on the entire document window in React, set a paste event handler on the window object with addEventListener():

JavaScript
import React, { useState, useEffect } from 'react'; export default function App() { const [pasted, setPasted] = useState(''); useEffect(() => { const handlePaste = (event) => { setPasted(event.clipboardData.getData('text')); } window.addEventListener('paste', handlePaste) return () => { window.removeEventListener('paste', handlePaste) }; }) return ( <div> Pasted: <b>{pasted}</b> <br /> <input placeholder="Message" type="text" id="message" /> <br /> <input placeholder="Sender" type="text" id="sender" /> </div> ); }
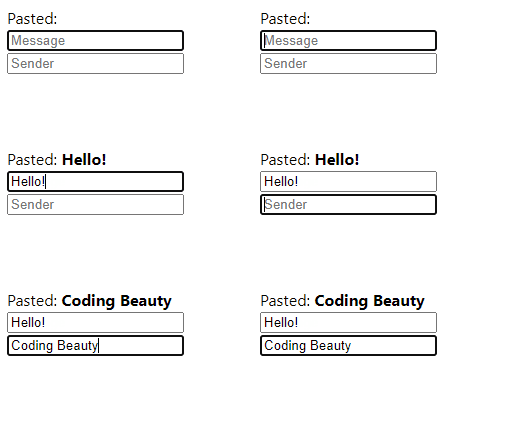
Handling the onPaste event in the entire window in React

The addEventListener() method takes up to two arguments:

  1. type: a string representing the event type to listen for. 'paste' is for a paste event.
  2. listener: the function called when the event fires.

It also takes some optional arguments, which you can learn more about here.

We call addEventListener() in the useEffect hook to register the listener once the component renders as the page loads. We pass an empty dependencies array to useEffect so this registration happens only once. In the cleanup function, we call the removeEventListener() method to unregister the event listener and prevent a memory leak.

As we saw earlier, the event object has many methods and properties that let us get more info and take event-related actions.

For the paste event, event has a clipboardData property that contains the data stored on the clipboard.

The clipboard.getData() is the clipboard data in a specific format. Like before, we pass 'text' as the first argument to get text data.

Get clipboard data without paste

We may not want to wait for the user to do a paste before getting the clipboard data. In a case like this, the clipboard.readText() method from the navigator object helps:

JavaScript
import React, { useState } from 'react'; export default function App() { const [pasted, setPasted] = useState(''); const handlePaste = async (_event) => { const clipboardText = await navigator.clipboard.readText(); setPasted(clipboardText); } return ( <div> Pasted: <b>{pasted}</b><br /> <button onClick={handlePaste}>Paste</button> </div> ); }
Getting the clipboard data without pasting.

Here we wait for a click before getting the text in the clipboard.

readText() is an async method, so we await it in an async event handler to get the Promise‘s result.

Note

Before the browser can read clipboard data, it’ll show the user a dialog to grant permission first:

Browser shows popup to grant clipboard permissions.

Prevent onPaste event in React

Like for many other events, we can prevent the default UI action of the paste event with event.preventDefault() in the handler:

JavaScript
import React, { useState, useEffect } from 'react'; export default function App() { const [pasted, setPasted] = useState(''); useEffect(() => { const handlePaste = (event) => { // 👇 Prevent default paste UI action event.preventDefault(); setPasted(event.clipboardData.getData('text')); } window.addEventListener('paste', handlePaste) return () => { window.removeEventListener('paste', handlePaste) }; }) return ( <div> Pasted: <b>{pasted}</b> <br /> <input placeholder="Message" type="text" id="message" /> <br /> <input placeholder="Sender" type="text" id="sender" /> </div> ); }
Preventing the default paste action.

Key takeaways

To listen for pastes on an element and get clipboard text, we can use the event.clipboardData.getData() method. We can also handle pasted events on the entire window with window.addEventListener() and prevent the default UI action using event.preventDefault().

To get clipboard data without pasting, we use the clipboard.readText() method. These methods are useful for copying and pasting text between fields and preventing pasting behavior we don’t want.

When Exactly is the useEffect Hook Called in React?

The useEffect hook is called in a component after the first render and every time the component updates. By the timer useEffect is called, the real DOM would have been updated to reflect any state changes in the component.

Let’s take a look at a quick example to practically observe this behavior:

JavaScript
import { useEffect, useState } from 'react'; export default function App() { const [count, setCount] = useState(0); useEffect(() => { document.title = `Button Clicks: ${count}`; }, [count]) const handleAdd = () => { setCount((count) => count + 1); } return ( <div> Count: {count} <br /> <button onClick={handleAdd}>Add</button> </div> ); }

The first time the component renders from page loading, useEffect is called and uses the document.title property to set the page title to a string whose value depends on a count state variable.

The page title is changed from useEffect being called after the component renders.
The page title is changed from useEffect being called after the component is rendered.

If you watch closely, you’ll see that the page title was initially “Coding Beauty React Tutorial”, before the component was added to the DOM and the page title was changed from the useEffect call.

useEffect will also be called when the state is changed:

The page title is changed from useEffect being called after the component updated.
The page title is changed from useEffect being called after the component is updated.

As you might know, useEffect accepts an optional dependency array as its second argument. This array contains the state variables, props, and functions that it should watch for changes.

In our example, the dependency array contains only the count state variable, so useEffect will only be called when the count state changes.

useEffect called twice in React 18?

React 18 introduced a new development-only check to Strict Mode. This new check automatically unmounts and remounts a component when it mounts for the first time, and restores the previous state on the second mount.

Note: The check was added because of a new feature that will be added to React in the future. Learn more about it here.

This means that the first render causes useEffect to actually be called two times, instead of just once.

Here’s an example that lets us observe this new behavior.

JavaScript
import { useEffect, useState } from 'react'; export default function App() { const [time, setTime] = useState(0); useEffect(() => { setInterval(() => { setTime((prevTime) => prevTime + 1); }, 1000); }, []); return ( <div> Seconds: {time} </div> ); }

It’s a basic time-counting app that implements the core logic that can be used to build timer and stopwatch apps.

We create an interval listener with setInterval() that increments a time state by 1 every second. The listener is in a useEffect that has an empty dependency array ([]), because we want it to be registered only when the component mounts.

But watch what happens when we check out the result on the web page:

The seconds go up by 2 every second.

The seconds are going up by 2 every second instead of 1! Because React 18’s new check causes the component to be mounted twice, an useEffect is called accordingly.

We can fix this issue by unregistering the interval listener in the useEffect‘s cleanup function.

JavaScript
useEffect(() => { const timer = setInterval(() => { setTime((prevTime) => prevTime); }); // 👇 Unregister interval listener return () => { clearInterval(timer); } }, [])

The cleanup function that the useEffect callback returns is called when the component is mounted. So when React 18 does the compulsory first unmounting, the first interval listener is unregistered with clearInterval(). When the second interval listener is registered on the second mount, it will be the only active listener, ensuring that the time state is incremented by the correct value of 1 every second.

The second go up by 1 every second - success.
The seconds go up by 1 every second – success.

Note that even if we didn’t have this issue of useEffect being called twice, we would still have to unregister the listener in the cleanup function, to prevent memory leaks after the component is removed from the DOM.

How to Toggle a Boolean State in React

To toggle a boolean state in React:

  1. Use the useState hook create the boolean state (if you haven’t already).
  2. Pass a callback to the state updater function (setState).
  3. Return the negation of the boolean variable from the callback.

For example:

JavaScript
import { useState } from 'react'; export default function App() { const [visible, setVisible] = useState(false); const handleToggle = () => { setVisible((current) => !current); }; return ( <div> <button onClick={handleToggle}>Show name</button> {visible && <p>Coding Beauty</p>} </div> ); }
The text's visibility is toggled on button click
The text’s visibility is toggled on button click

We create the boolean state with the useState hook. useState returns an array of two values, the first is the value of the state, the second is a function that updates the state when it is called.

We pass a callback function to setVisible because the callback is always passed the latest visible state.

Tip: Always pass a function to setState when the new state is computed from the current state data.

In our case, the callback simply negates the boolean value and returns the result to negate the state.

The logical NOT (!) operator converts a truthy value to false and a falsy value to true.

JavaScript
console.log(!true); // false console.log(!false); // true console.log(!5); // false console.log(!undefined); // true

Note: In JavaScript there are only 6 falsy values: undefined, null, '' (empty string), NaN, 0, and false. Every other value is truthy and will result in false when negated.

Perform action on boolean state toggle

Sometimes you want to perform an action outside of re-rendering when the boolean state changes in the component, e.g., a network request. To carry out such an action, place the code in the useEffect hook and include the boolean state variable in useEffect‘s dependencies array.

JavaScript
import { useEffect, useState } from 'react'; import axios from 'axios'; export default function App() { const [visible, setVisible] = useState(false); const handleToggle = () => { setVisible((current) => !current); }; useEffect(() => { if (visible) { axios.post('https://example.com/stats/name/views').then(() => { console.log('Updated stats successfully.') }); } }, [visible]); return ( <div> <button onClick={handleToggle}>Show name</button> {visible && <p style={{ color: 'blue' }}>Coding Beauty</p>} </div> ); }

The code in the useEffect hook runs after the component mounts or updates from a change in the visible state. Here, the state controls the visibility of an element, so in the hook, we check if the element is visible, and if so, we make a network request to a server to update view stats associated with the element.

Perform action on boolean state change but skip first render

Depending on your scenario, you might want the action to run when the component updates from a state change, but not it when it first mounts.

We can do this by creating a ref flag variable having an initial value of false in the first render, and change its value to true for all subsequent renders.

JavaScript
import { useEffect, useRef, useState } from 'react'; import axios from 'axios'; export default function App() { const afterFirstRender = useRef(false); const [visible, setVisible] = useState(false); const handleToggle = () => { setVisible((current) => !current); }; useEffect(() => { if (!afterFirstRender.current) { afterFirstRender.current = true; return; } if (visible) { axios.post('https://example.com/stats/name/show').then(() => { console.log('Stats updated successfully') }); } }, [visible]); return ( <div> <button onClick={handleToggle}>Show name</button> {visible && <p style={{ color: 'blue' }}>Coding Beauty</p>} </div> ); }

useRef returns a mutable ref object that doesn’t change value when a component is updated. Also, modifying the value of this object’s current property does not cause a re-render. This is in contrast to the setState update function returned from useState.

If the ref’s value is false, we prevent the action from happening in useEffect and change the value to true for the following renders. Otherwise, we execute the action.