How to Build an Advanced Space Remover Tool With React
In this article, we’re going to learn how to build a web app that will let us easily remove leading and trailing spaces from any text, with the ability to optionally preserve the indentation of the text. We’ll be using the React.js library to build this tool, let’s get started.
Important Links
Setting up the Project
Let’s begin by creating a new React app using Create React App. We’ll be using Yarn.
yarn create-react-app remove-spacesWe’ll also be using a bit of TypeScript, you can set it up using the instructions here.
Writing the removeSpaces() Function
The core part of the app will be a removeSpaces() function that takes a string as input and returns a new string with the spaces removed. Let’s write this function in a new remove-spaces.ts file.
src/remove-spaces.ts
export default function removeSpaces(params: {
  text: string;
  leading: boolean;
  trailing: boolean;
  preserveIndent: boolean;
}) {
  let regex: RegExp;
  const { text, leading, trailing, preserveIndent } = params;
  let spaceCountPattern: string | undefined;

  let leadingMatch: string;
  if (leading) {
    if (preserveIndent) {
      const firstSpacePattern = new RegExp(String.raw`^(\s*).+?((\r\n)|\n|$)`);
      const firstSpaces = text.match(firstSpacePattern)?.[1];
      const spaceCount = firstSpaces?.length;
      spaceCountPattern = `{0,${spaceCount}}`;
    } else {
      spaceCountPattern = '*';
    }
    leadingMatch = String.raw`\s${spaceCountPattern}`;
  } else {
    leadingMatch = '';
  }

  const trailingMatch = trailing ? String.raw`\s*?` : '';
  regex = new RegExp(String.raw`((()((\r\n)|\n))|(.*?((\r\n)|\n|$)))`, 'g');
  const lines = text.match(regex);
  const lineRegex = new RegExp(
    String.raw`^${leadingMatch}(.*?)${trailingMatch}((\r\n)|\n|$)`,
    'g'
  );

  const result = lines
    ?.map((line) => {
      if (line === '\r\n' || line === '\n') return line;
      return line.replace(lineRegex, '$1$2');
    })
    .join('');
  return result;
}
Apart from the input string, the function accepts options that will allow the user to customize how the spaces are removed.
When leading is true and preserveIndent is false, the leading spaces are removed from the text, apart from the spaces that add indentation.
When leading is true and preserveIndent is false, all the leading spaces are removed from the text.
When trailing is true, all the trailing spaces are removed from the text.
The function creates a regular expression from the combination of these options. It uses the String replace() method to replace each line of the text with captured groups from the regex.
Testing the removeSpaces() function
We can test this function to be sure it works as intended. Let’s install the Jest testing framework to do this.
yarn add --dev jest ts-jest @types/jestInitialize ts-jest with the following command:
yarn ts-jest config:initLet’s write some tests for the function in a new remove-spaces.test.ts file:
src/remove-spaces.test.ts
import removeSpaces from './remove-spaces';

const s2 = '  ';
const s4 = '    ';

const text = `${s4}<div>${s4}
${s4}${s2}<p></p>${s4}
${s4}</div>${s4}`;

it('removes leading spaces without preserving indent', () => {
  const expectation = `<div>${s4}
<p></p>${s4}
</div>${s4}`;
  const result = removeSpaces({
    text,
    leading: true,
    trailing: false,
    preserveIndent: false,
  });
  expect(result).toBe(expectation);
});

it('removes leading spaces and preserves indent', () => {
  const expectation = `<div>${s4}
${s2}<p></p>${s4}
</div>${s4}`;
  const result = removeSpaces({
    text,
    leading: true,
    trailing: false,
    preserveIndent: true,
  });
  expect(result).toBe(expectation);
});

it('removes trailing spaces', () => {
  const expectation = `${s4}<div>
${s4}${s2}<p></p>
${s4}</div>`;
  const result = removeSpaces({
    text,
    leading: false,
    trailing: true,
    preserveIndent: false,
  });
  expect(result).toBe(expectation);
});

it('removes leading and trailing spaces', () => {
  const expectation = `<div>
<p></p>
</div>`;
  const result = removeSpaces({
    text,
    leading: true,
    preserveIndent: false,
    trailing: true,
  });
  expect(result).toBe(expectation);
});
The function should pass all these tests if it was written correctly.
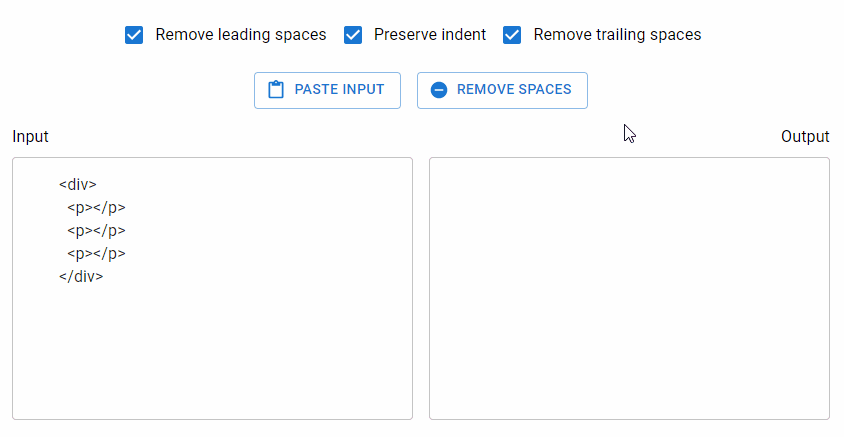
Creating the Text Inputs
It’s time for us to start creating the user interface with React. We’ll begin with the text inputs. We’ll create two – one will take will user input, and the other will be readonly and display the output.
We’ll be using the Material UI framework to make the app look great, you can set it up using the instructions here.
src/App.js
import { Box, Typography, TextField } from '@mui/material';
import { useState } from 'react';

function App() {
  const [input, setInput] = useState('');
  const [output, setOutput] = useState('');

  const handleInputChange = (event) => {
    setInput(event.target.value);
  };

  return (
    <Box
      sx={{
        height: '100%',
        display: 'flex',
        flexDirection: 'column',
        padding: 2,
        boxSizing: 'border-box',
      }}
    >
      <Box
        sx={{
          display: 'grid',
          gridTemplateColumns: 'repeat(auto-fit, minmax(400px, 1fr))',
          justifyContent: 'stretch',
          marginTop: 2,
          rowGap: '16px',
        }}
      >
        <Box sx={{ flex: 1, marginRight: 1, textAlign: 'left' }}>
          <Typography>Input</Typography>
          <TextField
            sx={{ width: '100%', marginTop: 1, minWidth: '300px' }}
            multiline
            value={input}
            minRows={10}
            inputProps={{
              style: { maxHeight: '300px', overflow: 'auto' },
            }}
            onChange={handleInputChange}
          ></TextField>
        </Box>
        <Box sx={{ flex: 1, marginLeft: 1, textAlign: 'right' }}>
          <Typography>Output</Typography>
          <TextField
            sx={{
              width: '100%',
              marginTop: 1,
              minWidth: '300px',
            }}
            multiline
            value={output}
            readOnly
            minRows={10}
            inputProps={{
              style: { maxHeight: '300px', overflow: 'auto' },
            }}
          ></TextField>
        </Box>
      </Box>
    </Box>
  );
}

export default App;

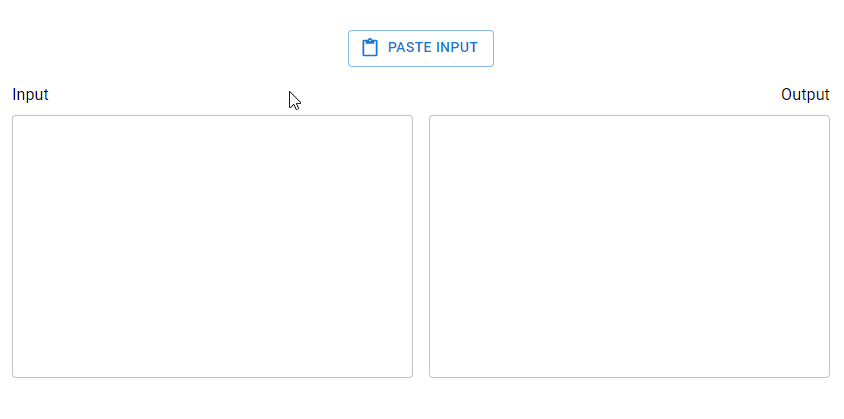
Pasting Input from the Clipboard
Let’s create a button that will paste text from the system clipboard to the input text field when clicked.
src/App.js
// ...
import { Box, Typography, TextField, Stack, Button } from '@mui/material';
import { ContentPaste } from '@mui/icons-material';

function App() {
  // ...

  const pasteInput = async () => {
    setInput(await navigator.clipboard.readText());
  };

  const handlePasteInput = async () => {
    await pasteInput();
  };

  return (
    <Box
      sx={{
        height: '100%',
        display: 'flex',
        flexDirection: 'column',
        padding: 2,
        boxSizing: 'border-box',
      }}
    >
      <Stack
        direction="row"
        spacing={2}
        justifyContent="center"
        sx={{ flexWrap: 'wrap', marginTop: 2 }}
      >
        <Box>
          <Button
            onClick={handlePasteInput}
            variant="outlined"
            startIcon={<ContentPaste />}
          >
            Paste input
          </Button>
        </Box>
      </Stack>
      {/* ... */}
    </Box>
  );
}

export default App;
Adding Options
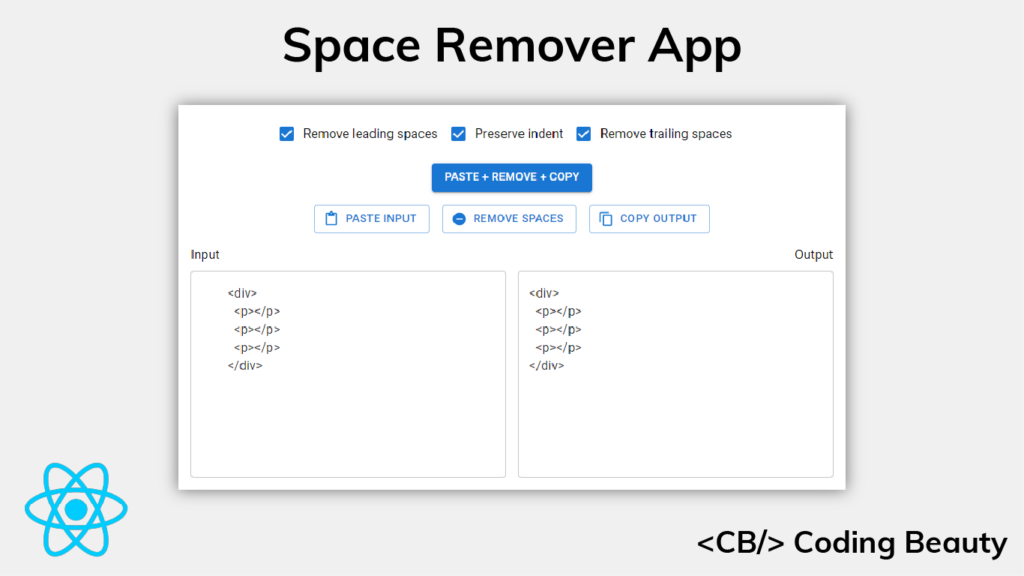
Let’s create the options that will let the user decide how the spaces will be removed from the text. There will be three boolean options, each represented with a checkbox:
- Remove leading spaces
- Remove trailing spaces
- Preserve indent
We’ll pass the options directly to the removeSpaces() function when the user decides to remove the spaces.
import {
  Box,
  Typography,
  TextField,
  Stack,
  Button,
  FormControlLabel,
  Checkbox,
} from '@mui/material';
import { useState } from 'react';
import { ContentPaste } from '@mui/icons-material';

function App() {
  // ...

  const [leading, setLeading] = useState(true);
  const [trailing, setTrailing] = useState(true);
  const [preserveIndent, setPreserveIndent] = useState(true);

  const handleLeadingChange = (event) => {
    setLeading(event.target.checked);
  };

  const handleTrailingChange = (event) => {
    setTrailing(event.target.checked);
  };

  const handlePreserveIndentChange = (event) => {
    setPreserveIndent(event.target.checked);
  };

  return (
    <Box
      sx={{
        height: '100%',
        display: 'flex',
        flexDirection: 'column',
        padding: 2,
        boxSizing: 'border-box',
      }}
    >
      <Box sx={{ display: 'flex', justifyContent: 'center' }}>
        <FormControlLabel
          control={
            <Checkbox checked={leading} onChange={handleLeadingChange} />
          }
          label="Remove leading spaces"
        />
        <FormControlLabel
          control={
            <Checkbox
              checked={preserveIndent}
              onChange={handlePreserveIndentChange}
            />
          }
          label="Preserve indent"
        />
        <FormControlLabel
          control={
            <Checkbox checked={trailing} onChange={handleTrailingChange} />
          }
          label="Remove trailing spaces"
        />
      </Box>
     {/* ... */}
    </Box>
  );
}

export default App;
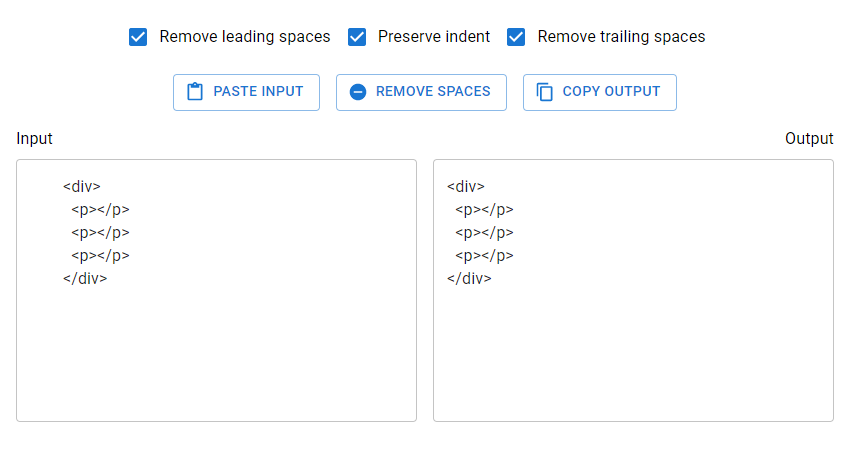
Removing the Spaces
Now let’s add a button that will cause the spaces to be removed from the input text when clicked.
// ...
import removeSpaces from './remove-spaces';

function App() {
  const handleRemoveSpaces = () => {
    setOutput(removeSpaces({ text: input, leading, trailing, preserveIndent }));
  };

  return (
    <Box
      sx={{
        height: '100%',
        display: 'flex',
        flexDirection: 'column',
        padding: 2,
        boxSizing: 'border-box',
      }}
    >
      <Box sx={{ display: 'flex', justifyContent: 'center' }}>
        {/* ... */}

        <Box>
          <Button
            onClick={handlePasteInput}
            variant="outlined"
            startIcon={<ContentPaste />}
          >
            Paste input
          </Button>
        </Box>

        {/* Button to remove spaces */}
        <Box>
          <Button
            onClick={handleRemoveSpaces}
            variant="outlined"
            startIcon={<RemoveCircle />}
          >
            Remove spaces
          </Button>
        </Box>
      </Stack>
      {/* ... */}
      </Box>
    </Box>
  );
}

export default App;
Copying Output to Clipboard
Let’s create another button that will copy the text in the output text field to the system clipboard when clicked.
// ...
import { ContentCopy, ContentPaste, RemoveCircle } from '@mui/icons-material';
import removeSpaces from './remove-spaces';

function App() {
  // ...

  const handleCopyOutput = () => {
    navigator.clipboard.writeText(output);
  };

  return (
    <Box
      sx={{
        height: '100%',
        display: 'flex',
        flexDirection: 'column',
        padding: 2,
        boxSizing: 'border-box',
      }}
    >
      {/* ... */}
      <Stack
        direction="row"
        spacing={2}
        justifyContent="center"
        sx={{ flexWrap: 'wrap', marginTop: 2 }}
      >
        {/* ... */}
        <Box>
          <Button
            onClick={handleRemoveSpaces}
            variant="outlined"
            startIcon={<RemoveCircle />}
          >
            Remove spaces
          </Button>
        </Box>

        {/* Button to copy output */}
        <Box>
          <Button
            startIcon={<ContentCopy />}
            onClick={handleCopyOutput}
            variant="outlined"
          >
            Copy output
          </Button>
        </Box>
      </Stack>

    </Box>
  );
}

export default App;
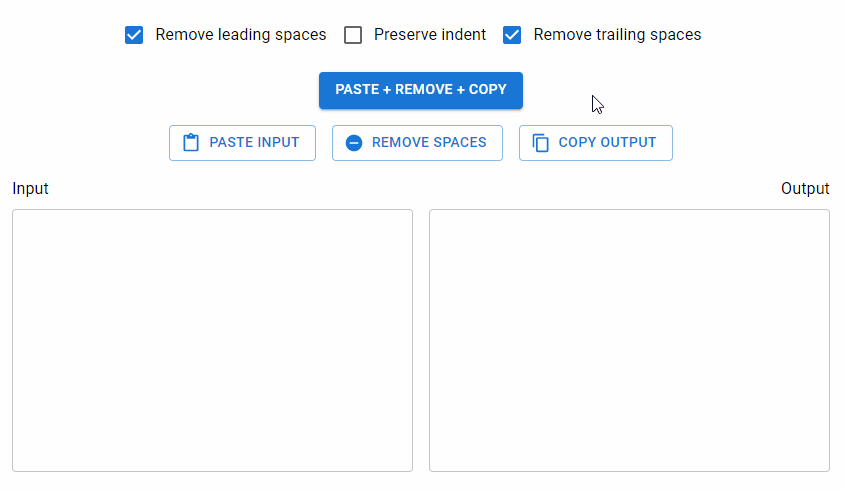
Combining Paste, Remove, and Copy Actions
It’s quite likely that users will use this tool by performing the following actions in order:
- Click the
Paste Inputbutton to put the text from the clipboard in the input text field - Click the
Remove Spacesbutton to remove the spaces from the input text and put the result in the output text field - Click the
Copy Outputto copy the text from the output text field to the clipboard.
To make things easier, we’ll create a button that will let the user perform these three actions at once:
// ...

function App() {
  // ...

  const handlePasteRemoveCopy = async () => {
    const input = await navigator.clipboard.readText();
    const output = removeSpaces({
      text: input,
      leading,
      trailing,
      preserveIndent,
    });
    navigator.clipboard.writeText(output);
    setInput(input);
    setOutput(output);
  };

  return (
    <Box
      sx={{
        height: '100%',
        display: 'flex',
        flexDirection: 'column',
        padding: 2,
        boxSizing: 'border-box',
      }}
    >
      <Box sx={{ display: 'flex', justifyContent: 'center' }}>
        {/* ... */}
        <FormControlLabel
          control={
            <Checkbox checked={trailing} onChange={handleTrailingChange} />
          }
          label="Remove trailing spaces"
        />
      </Box>

      {/* Button to perform past, remove, and copy actions at once */}
      <Box sx={{ display: 'flex', justifyContent: 'center', marginTop: 2 }}>
        <Button onClick={handlePasteRemoveCopy} variant="contained">
          Paste + Remove + Copy
        </Button>
      </Box>

      <Stack
        direction="row"
        spacing={2}
        justifyContent="center"
        sx={{ flexWrap: 'wrap', marginTop: 2 }}
      >
        <Box>
          <Button
            onClick={handlePasteInput}
            variant="outlined"
            startIcon={<ContentPaste />}
          >
            Paste input
          </Button>
        </Box>
        {/* ... */}
      </Stack>
    </Box>
  );
}

export default App;
Our space remover app is complete! We’ve been able to build a handy utility for removing leading and trailing spaces from any text and preserving indentation if necessary.
What Can This Tool Be Used for?
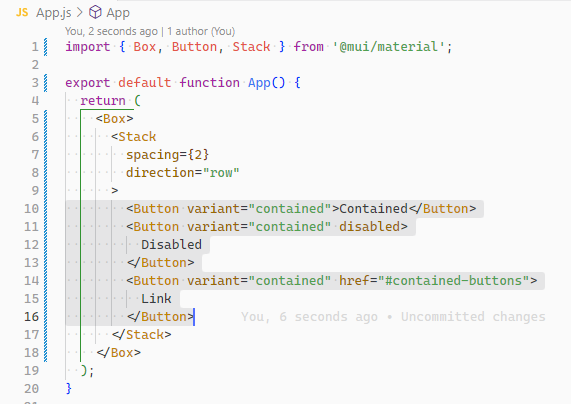
At Coding Beauty, we found this tool useful when creating code snippets displaying a portion of code from an HTML or JSX markup that was indented by some amount. For example, in our Material UI button tutorial, there were times when the file for an example contained markup like this:
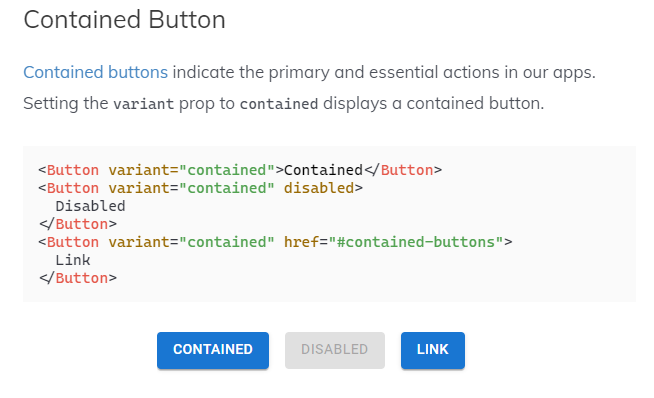
But we would only want to show the section of the file relevant to the example:
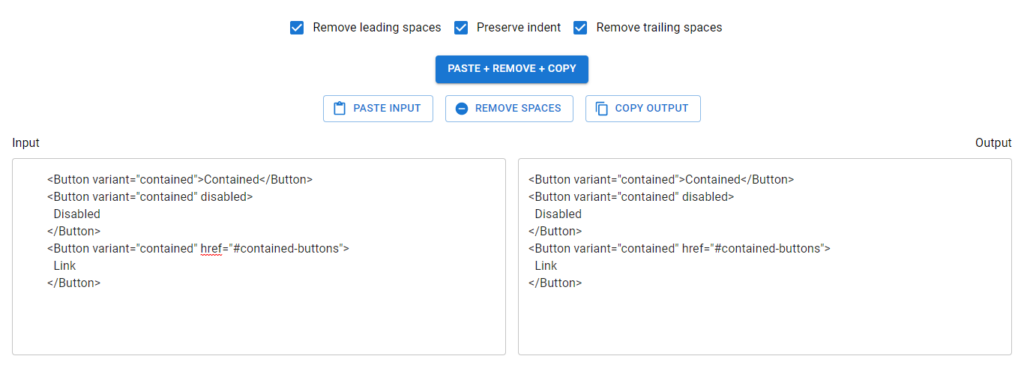
This tool helped format the relevant section properly by removing the spaces.
What about String trim()?
We couldn’t use the trim() or trimStart() string methods because then it wouldn’t be possible to preserve the indent of the entire text. These methods can only remove all the leading spaces in a given string.