Exciting news today as native TypeScript support finally comes to Node.js!
Yes you can now use types natively in Node.js.
So throw typescript and ts-node in the garbage.
❌Before now:
Node.js only ever cared for JavaScript files.
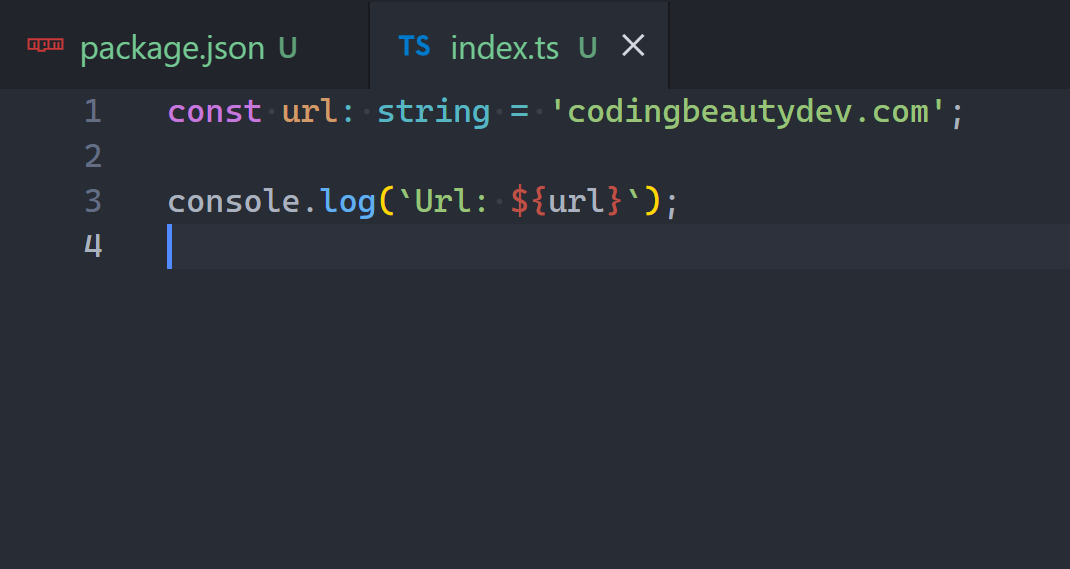
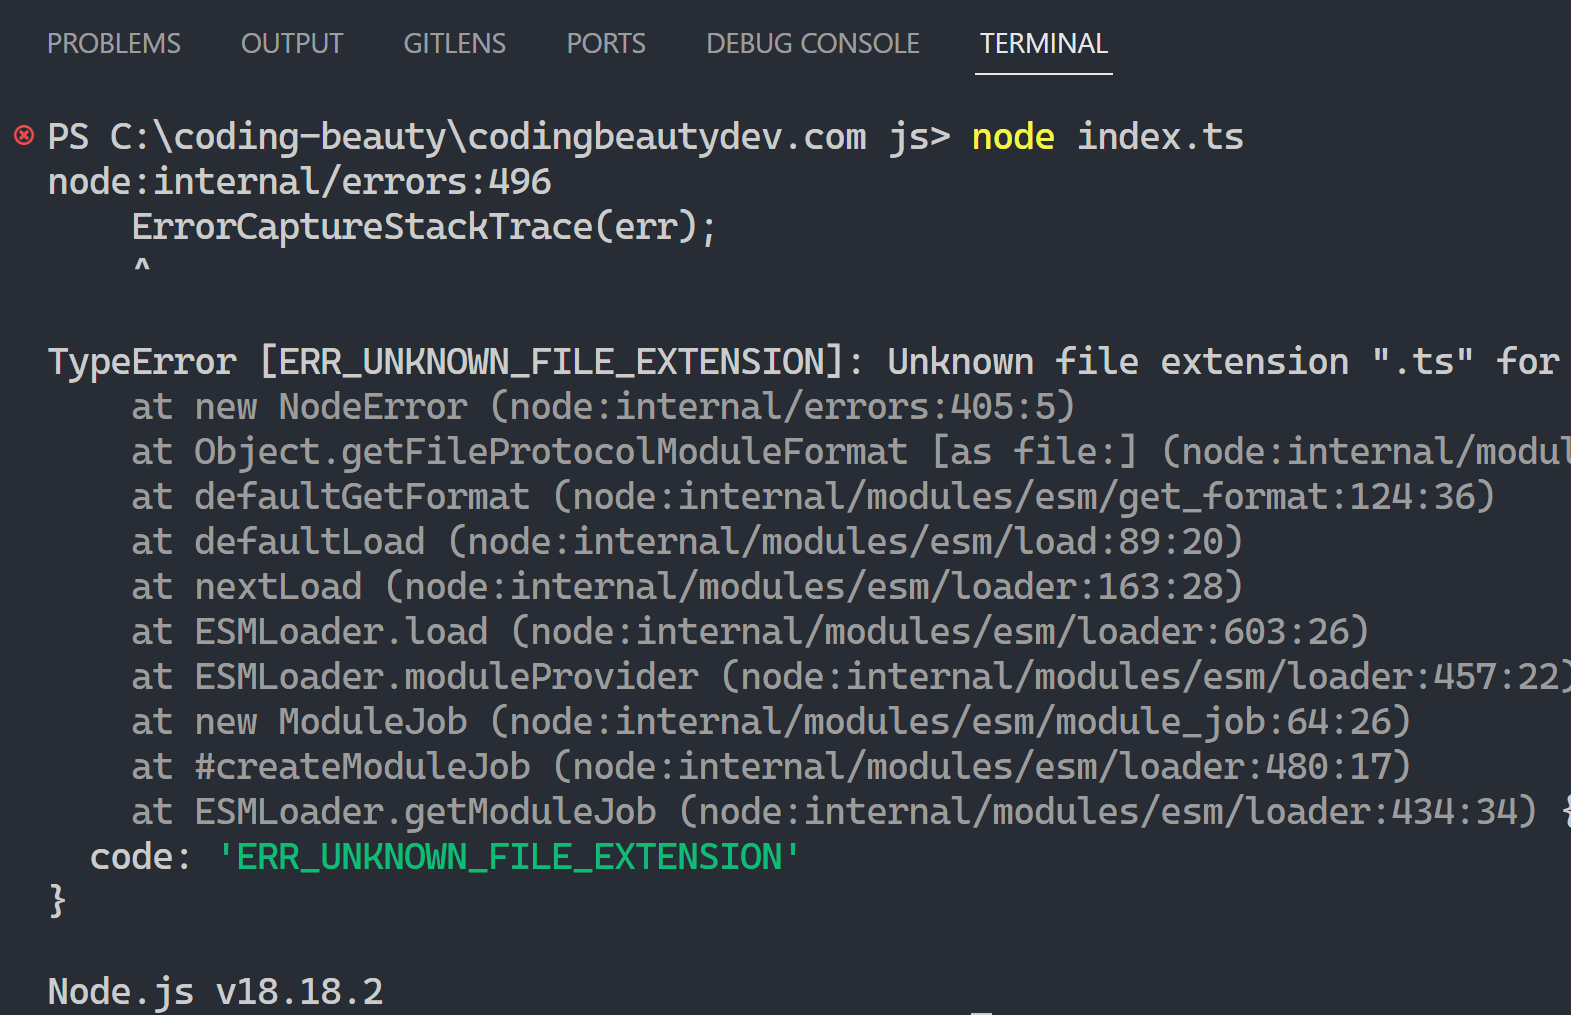
This would never have run:
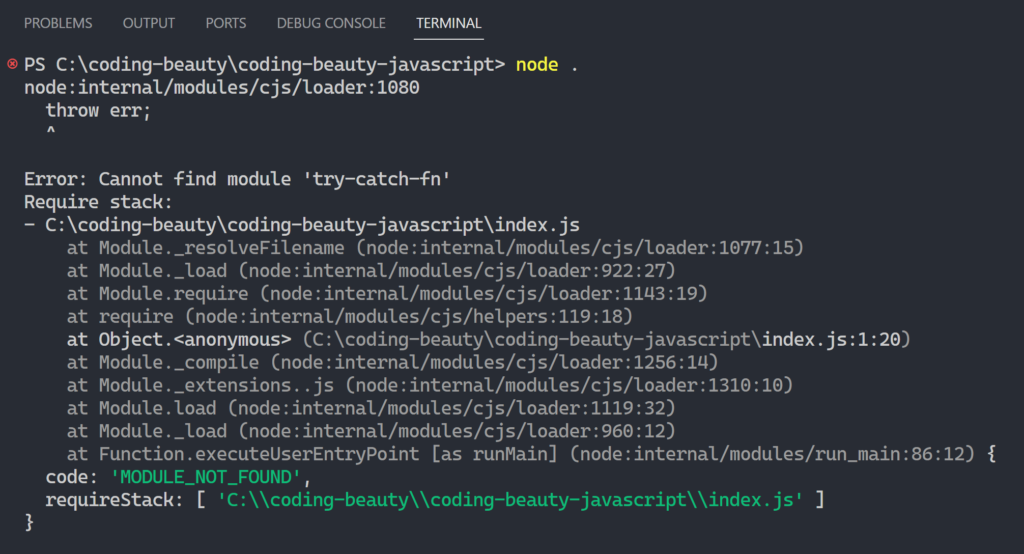
Try it and you’d get this unpleasant error:
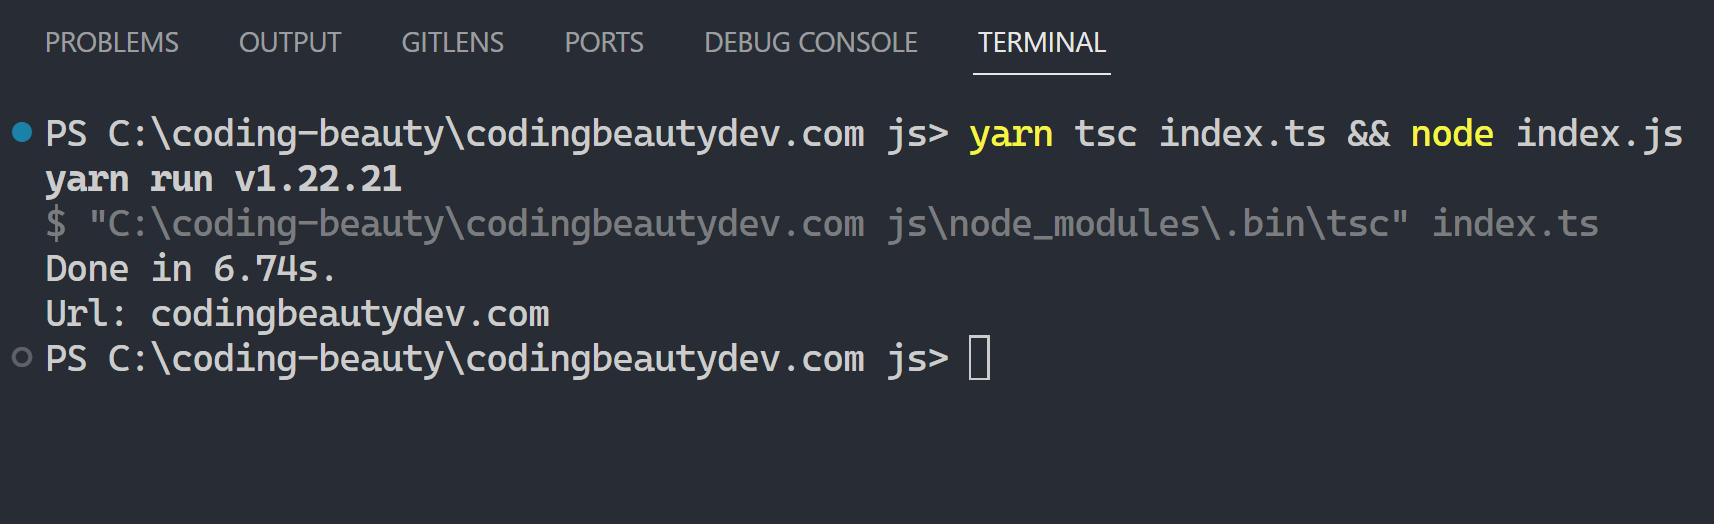
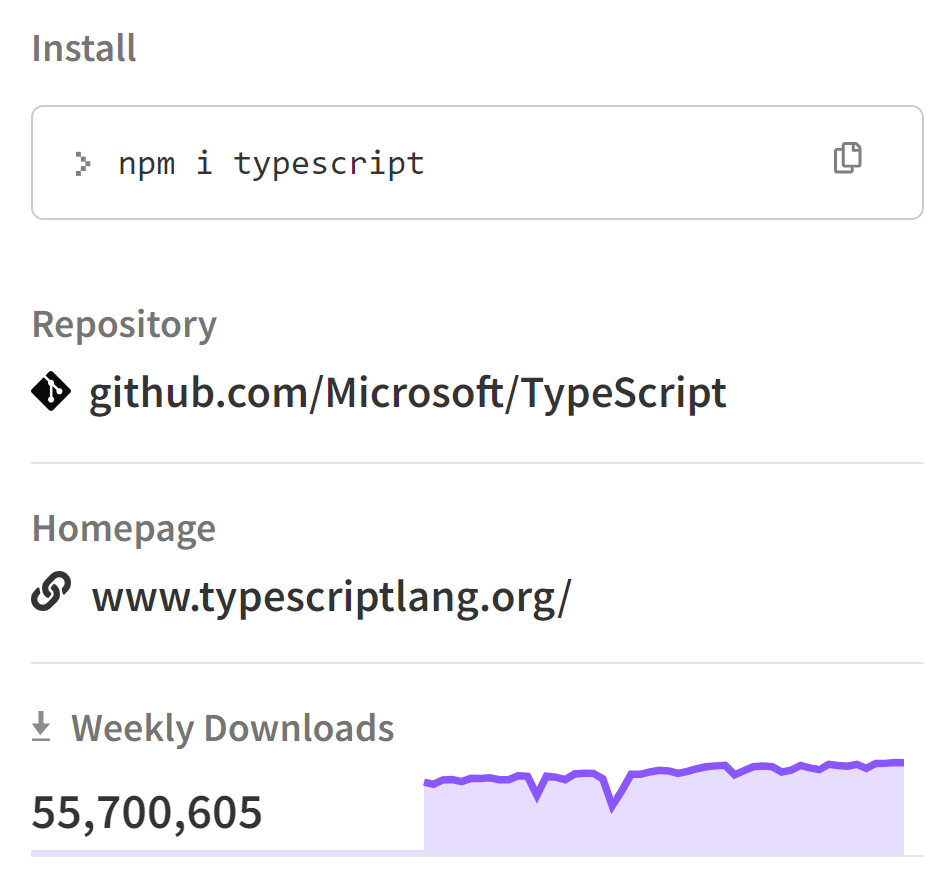
Our best bet was to install TypeScript and compile with tsc.
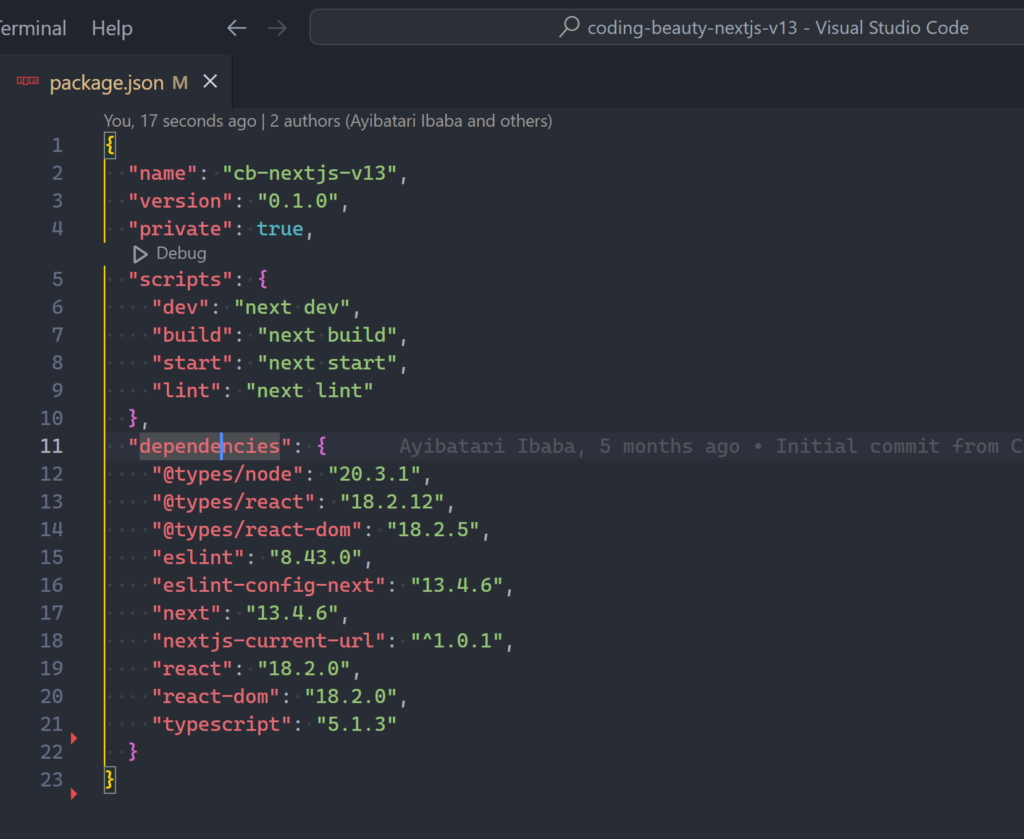
And millions of developers agreed it was a pretty good option:
But this was painful — having to install the same old package and type out the same command over and over again.
Extra compilation step to JS and having to deal with TypeScript configurations and stuff.
Pretty frustrating — especially when we’re just doing a bit of testing.
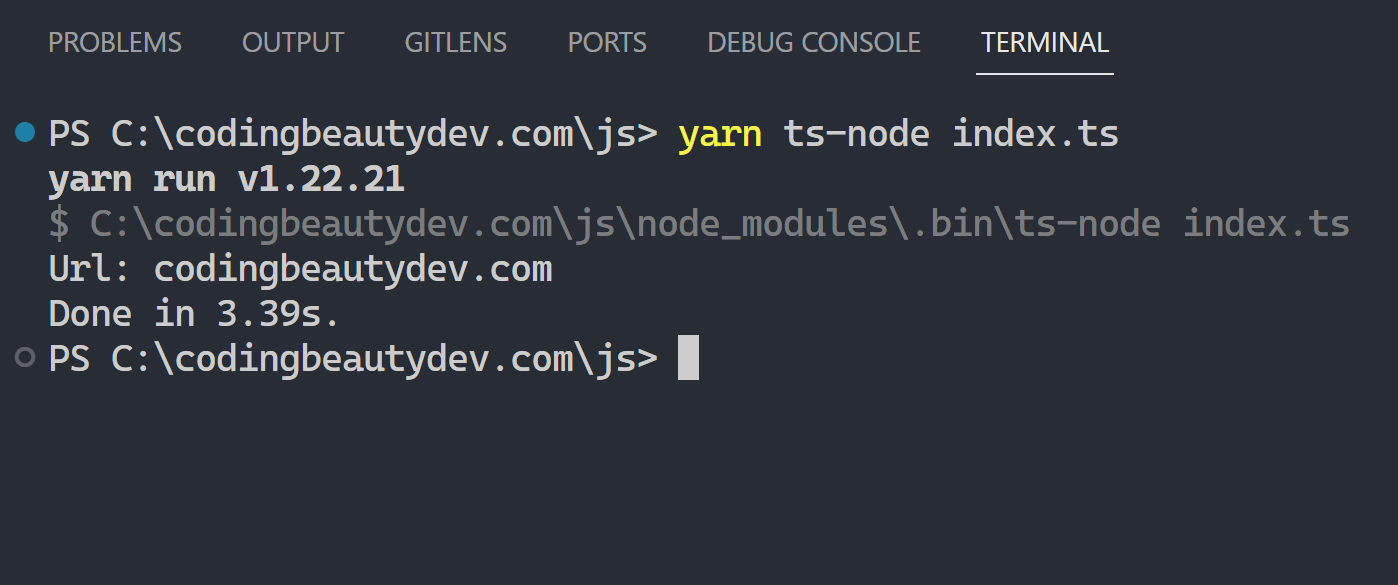
That was why ts-node arrived to try to save the day — but it still wasn’t enough.
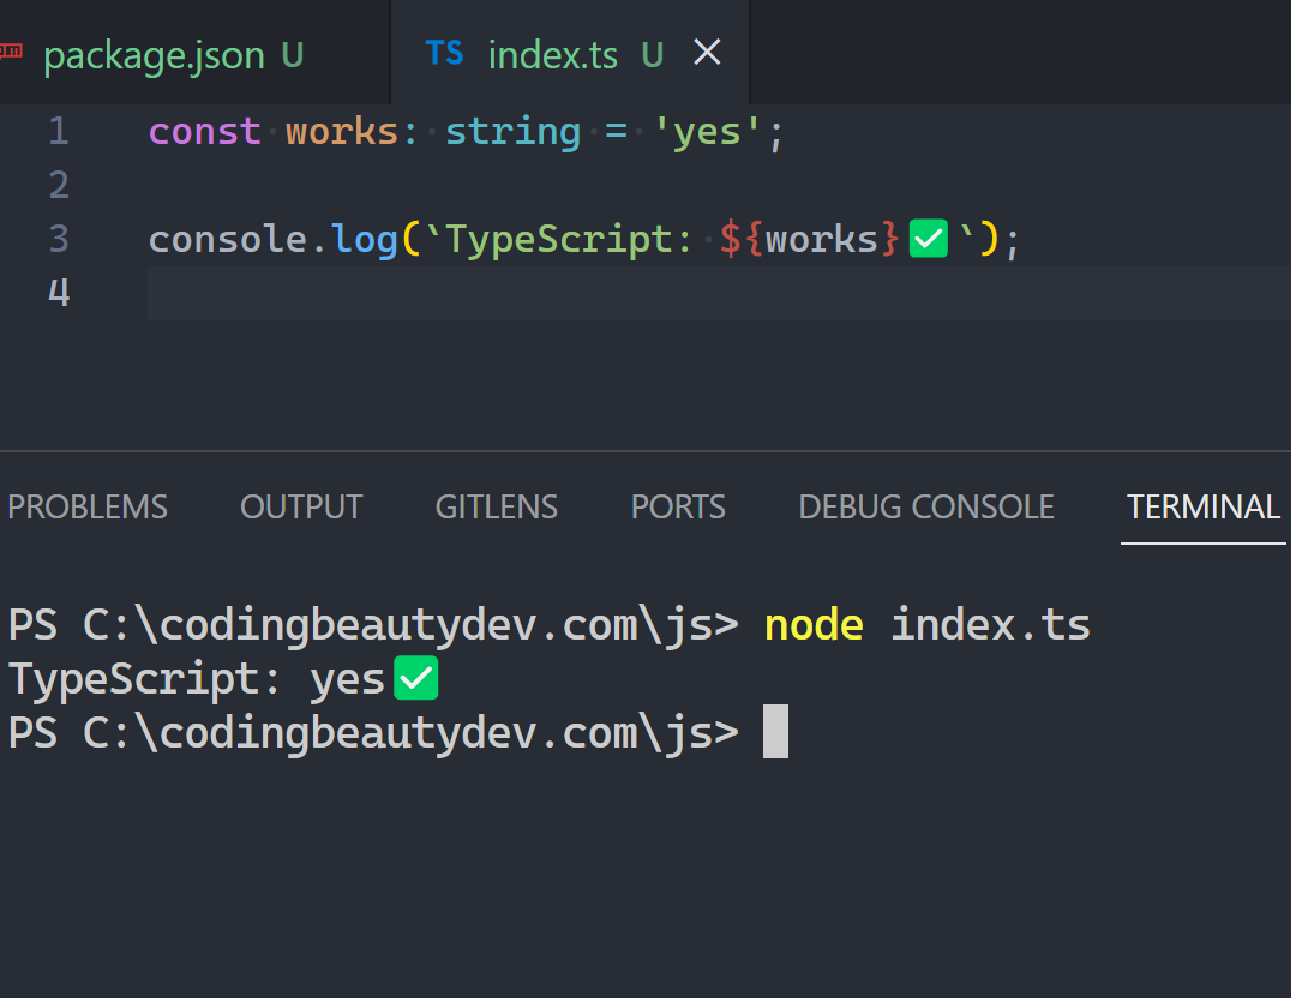
We could now run the TypeScript files directly:
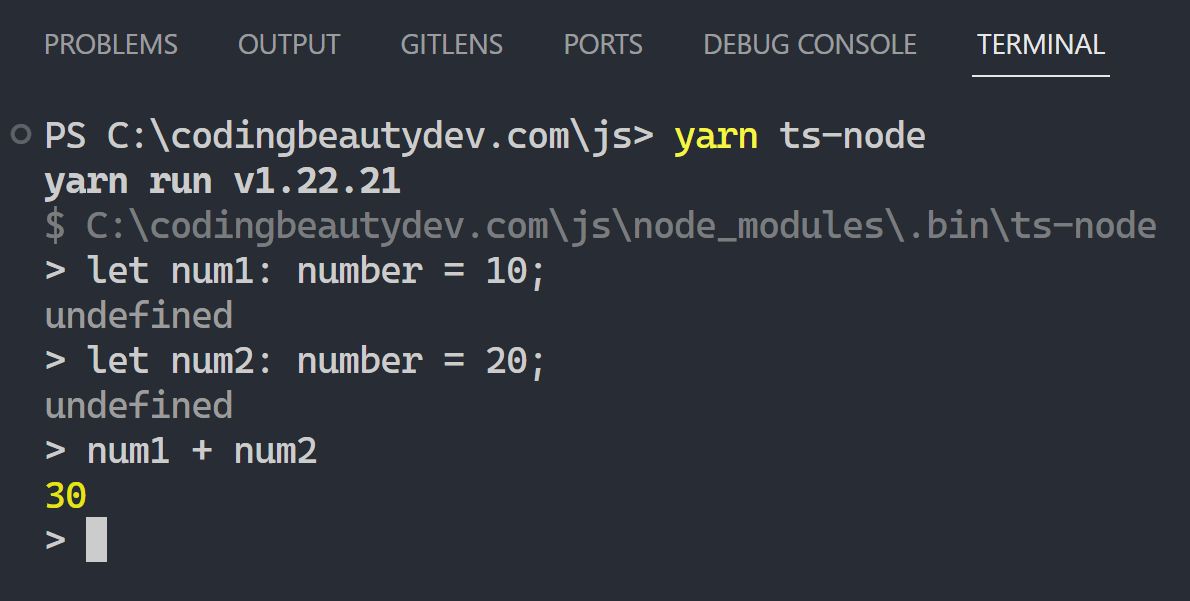
We could even start an interactive session on the fly like we’d do with the standalone node command:
And everyone loved it:
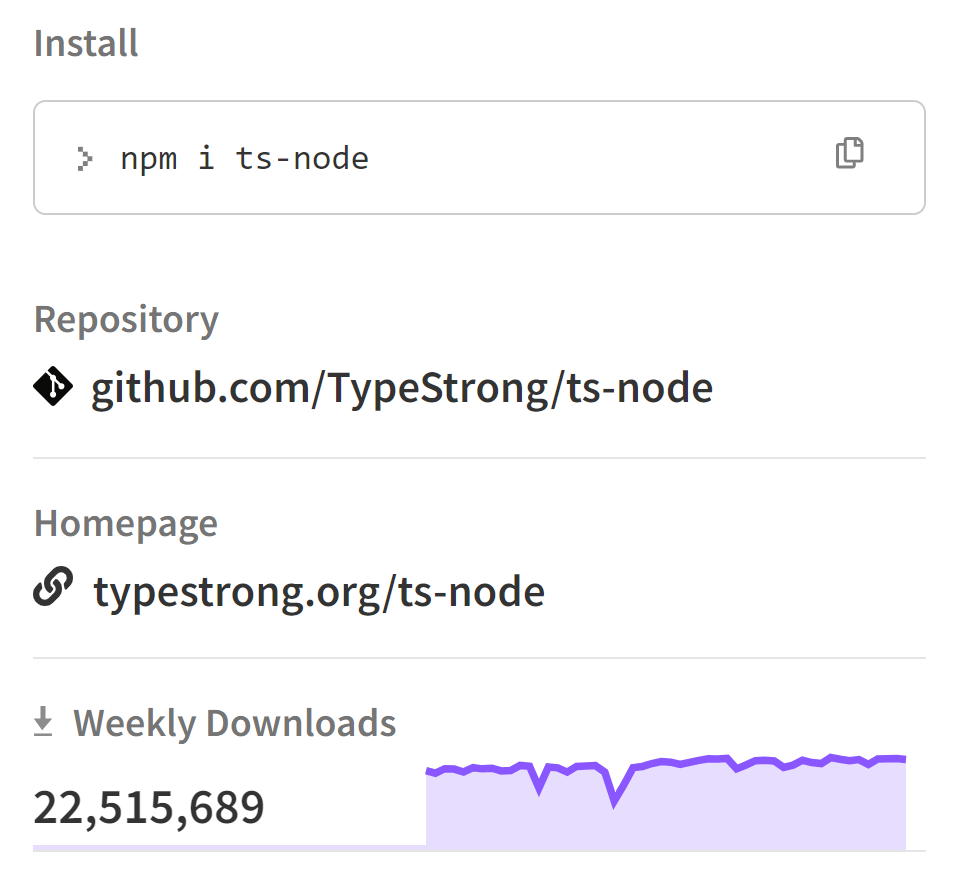
But it was still an extra dependency, and we still had to install typescript.
We still had more subtle intricacies to be aware of, like how to use ts-node for ES modules with the --esm flag:
✅Now:
All this changes now with all the brand-new upgrades now in Node:
Native built-in TypeScript support.
Zero dependencies
Zero intermediate files and module configurations
Now all our favorite JS tools like Prettier, Next.js, and Webpack can have safer and intellisense-friendly config files.
Okay almost no one has Webpack in their favorite tools list but still…
Look we already have pull requests like this to support prettier.config.ts in Prettier — and they’re going to be taking big steps forward thanks to this new development.
How does it work behind the scenes?
Support for TypeScript will be gradual, so right now it only supports types — you can’t use more TypeScript-y features like enums (although who uses enums these days).
It uses the @swc/wasm-typescript tool to internally strip the TypeScript file of all its types.
Early beginnings like I said, so it’s still experimental and for now you’ll need the --experimental-strip-types flag:
JavaScriptCopied!
node --experimental-strip-types my-file
This will be in an upcoming release.
Final thoughts
Built-in TypeScript is a serious power move to make Node.js a much more enjoyable platform for JS devs. I’ll definitely be using this.
Even though the support is not yet as seamless as in Bun or Deno, it makes a far-reaching impact on the entire JavaScript ecosystem as Node is still the most popular JS backend framework by light years.
You can also install the package as a development dependency, which indicates that the package is only used for development, and won’t be needed by the app itself. Packages like nodemon and ts-node fit this category:
If it’s a third-party module, installing the type definitions from NPM should help. For example:
JavaScriptCopied!
npm i @types/express
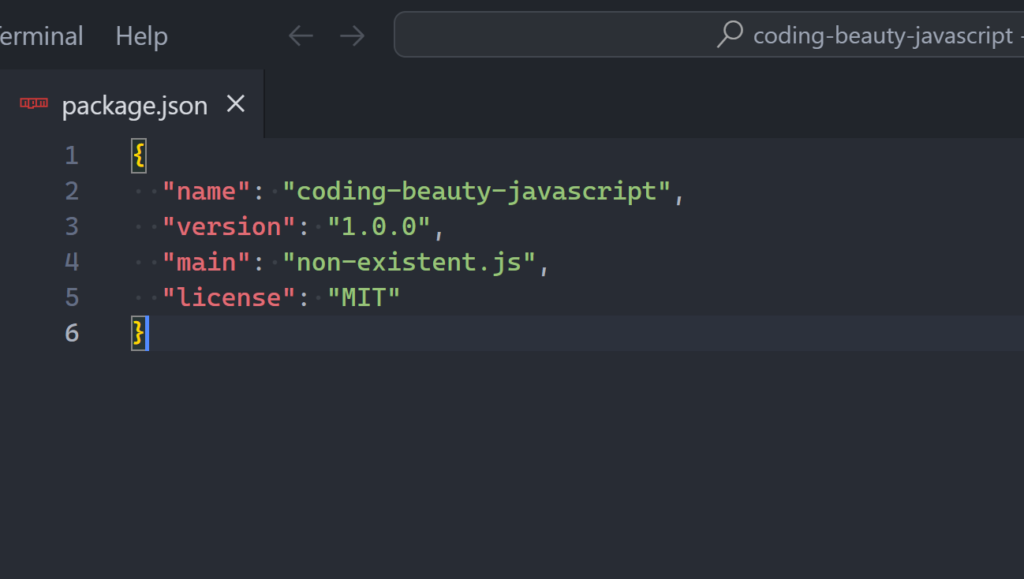
5. Ensure package.jsonmain file exists
You may encounter the “Cannot find module” error in Node.js if the main field of your package.json file doesn’t exist.
6. npm link package
You can also try the npm link command on the package to fix the MODULE_NOT_FOUND error, for example:
ShellCopied!
npm link create-react-app

npm link webpack
npm link is a command that connects a globally installed package with a local project using a symbolic link.
It enables working on a package locally without publishing it to the npm registry or reinstalling it for every change. Executing npm link in the package directory establishes a symbolic link in the global node_modules directory, directing to the local package.
Afterwards, npm link <package-name> can be used in the project to link the global package with your local project.
7. Ensure correct NODE_PATH
In older Node.js versions, you may be able to fix the “Cannot find module” error by setting the NODE_PATH environment variable to correct node_modules installation folder.
NODE_PATH is a string of absolute paths separated by colons used by Node.js to locate modules when they can’t be found elsewhere.
It was initially created to enable the loading of modules from different paths when there was no defined module resolution algorithm.
And it’s still supported, but it’s not as important anymore since the we’ve established a convention for finding dependent modules in Node.js community.
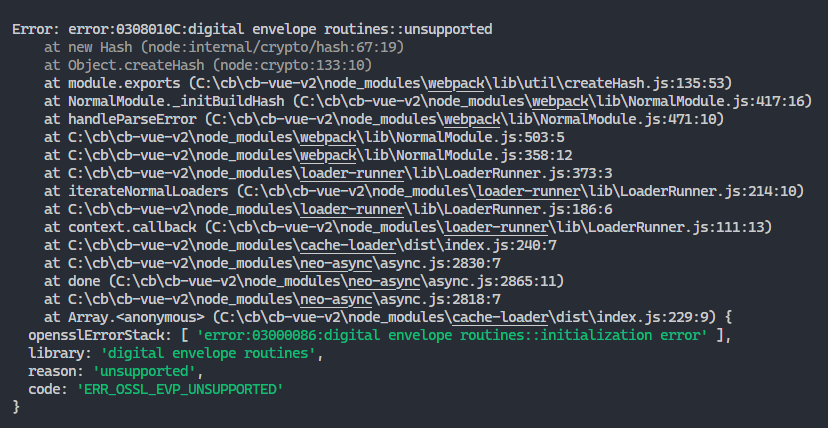
The error:0308010C:digital envelope routines::unsupported error happens in Node.js when a JavaScript module still uses a flawed OpenSSL version that is incompatible with the version Node.js uses.
The error:0308010C:digital envelope routines::unsupported error occurring.
To fix it, downgrade to Node.js v16.13.0, or use the npm audit fix --force command to upgrade your packages to versions that use the updated OpenSSL version.
Why does the error:0308010C:digital envelope routines::unsupported error occur in Node.js?
In Node.js v17, the Node.js team patched an OpenSSL security vulnerability. This fix introduced a breaking change; if you try to use OpenSSL in Node.js v17 or later versions without also updating those modules that use previous OpenSSL versions, you’ll get this error.
And you’ll get it the next time Node.js is updated to use a newer OpenSSL version with breaking changes and you haven’t updated the OpenSSL-dependent libraries.
Fix: Upgrade NPM packages
To fix the error:0308010C:digital envelope routines::unsupported error, update the Node.js packages causing the error to the latest version.
Run npm audit fix to fix vulnerabilities
You can run the npm audit fix command to identify those packages using the outdated OpenSSL version and fix them automatically.
ShellCopied!
npm audit fix
npm audit fix reviews the project’s dependency tree to identify packages that have known vulnerabilities, and attempts to upgrade and/or fix the vulnerable dependencies to a safe version.
npm audit fix --force
If you want to install semver major updates to vulnerable packages, you can use the --force option.
ShellCopied!
npm audit fix --force
Be cautious with this option: it could potentially break your project.
yarn-audit-fix
If you’re a Yarn user, you can use the yarn-audit-fix package to do what npm audit fix does.
Upgrade Webpack to v5
If you’re using Webpack directly to bundle your files, you can upgrade it to version v5 – specifically, v5.61.0 – to fix the error:0308010C:digital envelope routines::unsupported error.
ShellCopied!
npm i webpack@latest

# Yarn
yarn add webpack@latest
If instead, you’re using a tool like Create React App and the Vue CLI that uses Webpack internally, you’ll upgrade the tool to a version that doesn’t have this error.
Fix for Create React App: Upgrade react-scripts to v5
If you’re using Create React App then you can fix the error:0308010C:digital envelope routines::unsupported error by upgrading react-scripts to version 5, which comes with the newer Webpack version 5.
Install version 5 or later with this command:
ShellCopied!
npm i react-scripts@latest

# Yarn
yarn add react-scripts@latest
Fix for Vue CLI: Upgrade to v5
Similarly for the Vue CLI, you can fix the error:0308010C:digital envelope routines::unsupported error by upgrading the Vue CLI to version 5 which also comes with the newer Webpack version 5.
Install Vue CLI version 5 or later with this command:
ShellCopied!
npm update -g @vue/cli

# OR
yarn global upgrade --latest @vue/cli
To fix the error:0308010C:digital envelope routines::unsupported error in Node.js, you can also use the --openssl-legacy-provider option when running the script.
This solution is more of a hack though: it leaves your app open to security threats.
The --openssl-legacy-provider option is only available in Node version 17 or later.
Run with script
So for the start script, you’ll use this command:
ShellCopied!
export NODE_OPTIONS=--openssl-legacy-provider && npm run start

# Windows
set NODE_OPTIONS=--openssl-legacy-provider && npm run start
Modify script
You can also set this directly in the script to avoid needless repetition.
They’ll obviously be problematic when collaborating and team members use other operating systems. What do we do? We install the cross-env NPM module and run the script with it.
Now the script runs successfully on every platform.
Fix for Vue CLI
So to fix the error:0308010C:digital envelope routines::unsupported error when using Vue with the Vue CLI, install the cross-env module and set the --openssl-legacy-provider option:
And to fix the error:0308010C:digital envelope routines::unsupported error when using React with Create React App, install the cross-env module and set the --openssl-legacy-provider option.
The ERR_OSSL_EVP_UNSUPPORTED error happens in Node.js when a JavaScript module still uses a flawed OpenSSL version that is incompatible with the version Node.js uses.
The ERR_OSSL_EVP_UNSUPPORTED error occurring.
To fix it, downgrade to Node.js v16.13.0, or use the npm audit fix --force command to upgrade your packages to versions that use the updated OpenSSL version.
Why does the ERR_OSSL_EVP_UNSUPPORTED error occur in Node.js?
In Node.js v17, the Node.js team patched an OpenSSL security vulnerability. This fix introduced a breaking change; if you try to use OpenSSL in Node.js v17 or later versions without simultaneously updating those modules that use previous OpenSSL versions, you’ll get this error.
And you’ll get it the next time Node.js updates to use a newer OpenSSL version with breaking changes and you haven’t updated the OpenSSL-dependent libraries.
Fix: upgrade NPM packages
To fix the ERR_OSSL_EVP_UNSUPPORTED error, update the Node.js packages causing the error to the latest version.
Run npm audit fix to fix vulnerabilities
You can run the npm audit fix command to identify those packages using the outdated OpenSSL version and fix them automatically.
ShellCopied!
npm audit fix
npm audit fix reviews the project’s dependency tree to identify packages that have known vulnerabilities, and attempts to upgrade and/or fix the vulnerable dependencies to a safe version.
npm audit fix --force
If you want to install semver major updates to vulnerable packages, you can use the --force option.
ShellCopied!
npm audit fix --force
Be cautious with this option as it could potentially break your project.
yarn-audit-fix
If you’re a Yarn user, you can use the yarn-audit-fix package to do what npm audit fix does.
Upgrade Webpack to v5
If you’re using Webpack directly to bundle your files, you can upgrade it to version v5 – specifically, v5.61.0 – to fix the ERR_OSSL_EVP_UNSUPPORTED error.
ShellCopied!
npm i webpack@latest
# Yarn
yarn add webpack@latest
If instead, you’re using a tool like Create React App and the Vue CLI that use Webpack internally, you’ll upgrade the tool to a version that doesn’t have this error.
Fix for Create React App: Upgrade react-scripts to v5
If you’re using Create React App then you can fix the ERR_OSSL_EVP_UNSUPPORTED error by upgrading react-scripts to version 5, which comes with the newer Webpack version 5.
Install version 5 or later with this command:
ShellCopied!
npm i react-scripts@latest
# Yarn
yarn add react-scripts@latest
Fix for Vue CLI: Upgrade to v5
Similarly for the Vue CLI, you can fix the ERR_OSSL_EVP_UNSUPPORTED error by upgrading the Vue CLI to version 5 which also comes with the newer Webpack version 5.
Install Vue CLI version 5 or later with this command:
ShellCopied!
npm update -g @vue/cli
# OR
yarn global upgrade --latest @vue/cli
They’ll obviously be problematic when collaborating and team members use other operating systems. What do we do? We install the cross-env NPM module and run the script with it.
Now the script runs successfully on every platform.
Fix for Vue CLI
So to fix the ERR_OSSL_EVP_UNSUPPORTED error when using Vue with the Vue CLI, install the cross-env module and set the --openssl-legacy-provider option:
And to fix the ERR_OSSL_EVP_UNSUPPORTED error when using React with Create React App, install the cross-env module and set the --openssl-legacy-provider option.
If you’re using Chocolatey, Node.js is available as the nodejs package, meaning you can easily install it in a terminal using the following command.
ShellCopied!
# Use current LTS version

choco install nodejs --version=18.5.0
Install with nvm
If you’re using nvm or nvm-windows, use these commands to quickly install and switch to Node.js v16.13.0.
ShellCopied!
nvm install 16.13.0

nvm use 16.13.0
Key takeaways
The ERR_OSSL_EVP_UNSUPPORTED error in Node.js occurs when a JavaScript module uses an outdated OpenSSL version that is incompatible with the current Node version. This typically happens when Node.js v17 or later versions are used without updating the modules that use previous OpenSSL versions.
To fix this error, you can:
Downgrade to Node.js v16.13.0.
Use the npm audit fix --force or yarn-audit-fix command to upgrade your packages to versions that use the updated OpenSSL version.
If you’re using Webpack, you can upgrade it to version v5.61.0 to fix the error. For Create React App and Vue CLI, you can upgrade them to v5.
Another way to fix the error is to use the --openssl-legacy-provider option when running the script. However, this solution leaves your app open to security threats and is only available in Node version 17 or later.
Downgrading to Node.js v16.13.0 is another way to fix the error. However, this solution also leaves your app open to security threats. You can install this version from the official website, or use Chocolatey, nvm, or nvm-windows to install and switch to this version.
The req body undefined error occurs in an Express server when you fail to parse incoming POST request data with middleware from the body-parser NPM package. To fix it, install body-parser and parse the request with the json or the urlencoded middleware.
For example:
JavaScriptCopied!
import express from 'express';

const app = express();

app.post('/register', (req, res) => {
  // ❌ req.body is undefined
  const email = req.body.email;
  const password = req.body.password;

  // do something with email and password...
});

app.listen(3000, () => console.log('Server started'));
To fix the error, first we install body-parser from NPM:
ShellCopied!
npm i body-parser
If we’re expecting JSON requests, we can use the json() middleware:
JavaScriptCopied!
// 👇 use body-parser to parse JSON bodies
app.post('/register', bodyParser.json(), (req, res) => {
  // ✅ Now we can access the JSON body using `req.body`
  const email = req.body.email;
  const password = req.body.password;

  // do something with email and password...
});
We use urlencoded() when we expect the data to be in a URL-encoded format, like from forms:
JavaScriptCopied!
import express from 'express';
import bodyParser from 'body-parser';

const app = express();

// 👇 URL-encoded request body
app.post('/register', bodyParser.urlencoded(), (req, res) => {
  // ✅ req.body is now a JavaScript object
  const email = req.body.email;
  const password = req.body.password;

  // do something with email and password...
});

app.listen(3000, () => console.log('Server started'));
POST requests and Express req.body
One great thing Express provides that makes life easier is the body property of the request object. Without it, reading POST data would be much more complex than accessing a property.
Internally, Express uses the data and end properties of the Request object from the native http module to read POST data. Here’s a basic example of how it works; what we’d have to do if we didn’t use a framework like Express:
JavaScriptCopied!
import http from 'http';

http
  .createServer((req, res) => {
    // listen for post data
    let body = '';
    req.on('data', (chunk) => {
      body += chunk;
    });
    req.on('end', () => {
      // like using the json() method from body-parser
      req.body = JSON.parse(body);
      const email = req.body.email;
      const password = req.body.password;

      // do something with email and password...
    });
  })
  .listen(3000, () => console.log('Server started'));
How to make POST requests with Postman
Postman is a popular tool for testing APIs and making HTTP requests. We can use it to make POST requests easily, here’s a demo of how:
As you can see, we can pass different body formats in the POST request. In this demo, we set the raw type and selected the JSON sub-type to specify a JSON content type.
You can also see the editor where we put in body data for the request. Postman makes provides JSON syntax highlighting to make things more readable.
To make the request we can use the send button or the Ctrl + Enter keyboard shorcut. In this case, the server simply responds with the input it received:
By Tari Ibaba
/ Last updated on September 29, 2022
To get the name of a file without the extension in Node.js, use the parse() method from the path module to get an object representing the path. The name property of this object will contain the file name without the extension.
The parse() method returns an object with properties that represent the major parts of the given path. The object it returns has the following properties:
dir – the directory of the path.
root – the topmost directory in the operating system.
base – the last portion of the path.
ext – the extension of the file.
name – the name of the file without the extension.
If the path is not a string, parse() throws a TypeError.
// ❌ TypeError: Received type of number instead of string
path.parse(123).name;

// ❌ TypeError: Received type of boolean instead of string
path.parse(false).name;

// ❌ TypeError: Received type of URL instead of string
path.parse(new URL('https://example.com/file.txt')).name;

// ✅ Received correct type of string
path.parse('index.html').name; // index
The extname() method returns the extension of the given path from the last occurrence of the . (period) character to the end of the string in the last part of the path.
If there is no . in the last part of the path, or if the path starts with . and it is the only . character in the path, extname() returns an empty string.
If the path is not a string, extname() throws a TypeError.
const path = require('path');

// ❌ TypeError: Received type number instead of string
path.extname(123);

// ❌ TypeError: Received type boolean instead of string
path.extname(false);

// ❌ TypeError: Received URL instance instead of string
path.extname(new URL('https://example.com/file.txt'));

// ✅ Received type of string
path.extname('package.json'); // .json
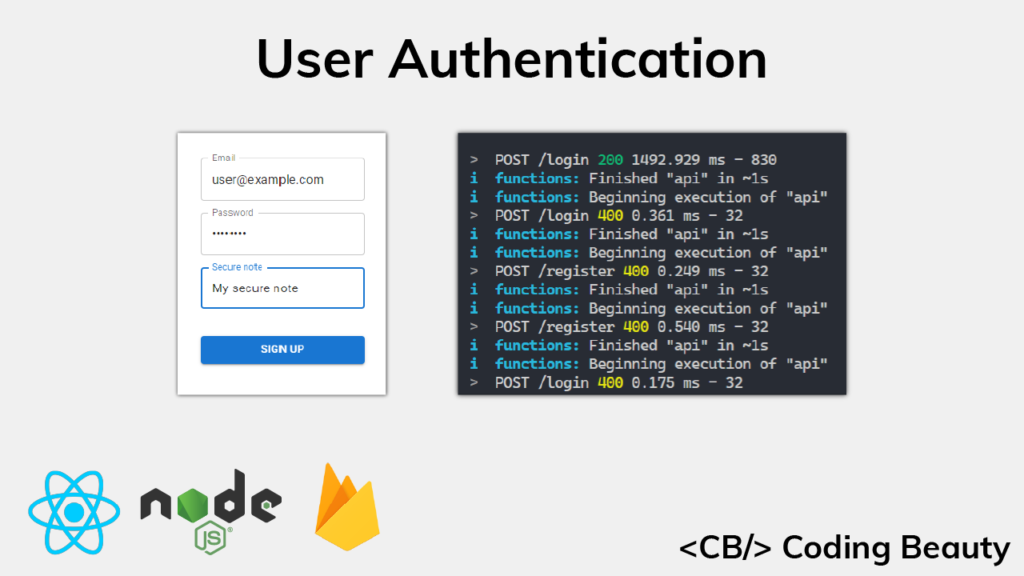
Authentication is critical for verifying the identity of your users in order to know what data they should have access to and what privileged actions they should be able to perform. The Firebase platform provides powerful libraries that let us easily integrate authentication into our projects.
In this article, we are going to implement authentication by building a RESTful API and a web app that allows a user to sign up with a secure note that will be accessible only to the user. We’ll be using Node.js and Express to build the API, and React.js to create the single-page web app.
The complete source code for the app is available here on GitHub.
What You’ll Need
Node.js installed
A Google account – to use Firebase
Basic knowledge of React.js and Node.js
A code editor – like Visual Studio Code
Setting up Firebase
Before we start coding, let’s head over to the Firebase console and create a new project, so that we can access Firebase services. I’m naming mine cb-auth-tutorial, but you can name yours whatever you like.
Creating a new Firebase project
After giving it a name, you’ll be asked whether you want to enable Google Analytics. We won’t be using the service for this tutorial, but you can turn it on if you like.
After completing all the steps, you’ll be taken to the dashboard, where you can see an overview of your Firebase project. It should look something like this:
The Firebase dashboard
Let’s create a web app. Click this icon button to get started:
You’ll be asked to enter a nickname for the app. This can also be anything you like. I’m naming mine CB Auth Tutorial, for symmetry with the project name.
Completing the steps to create the web app
After registering the app, you’ll be provided with a configuration that you’ll need to initialize your app with to be able to access the various Firebase APIs and services.
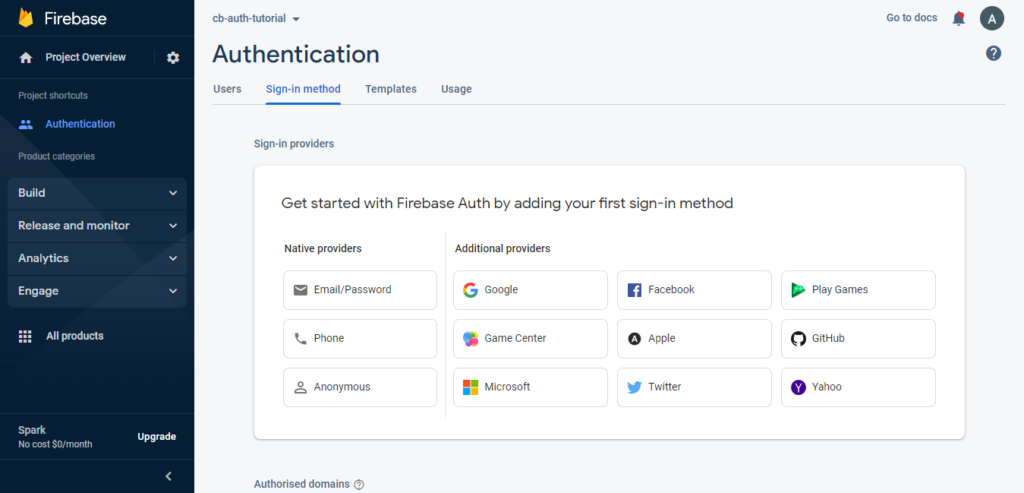
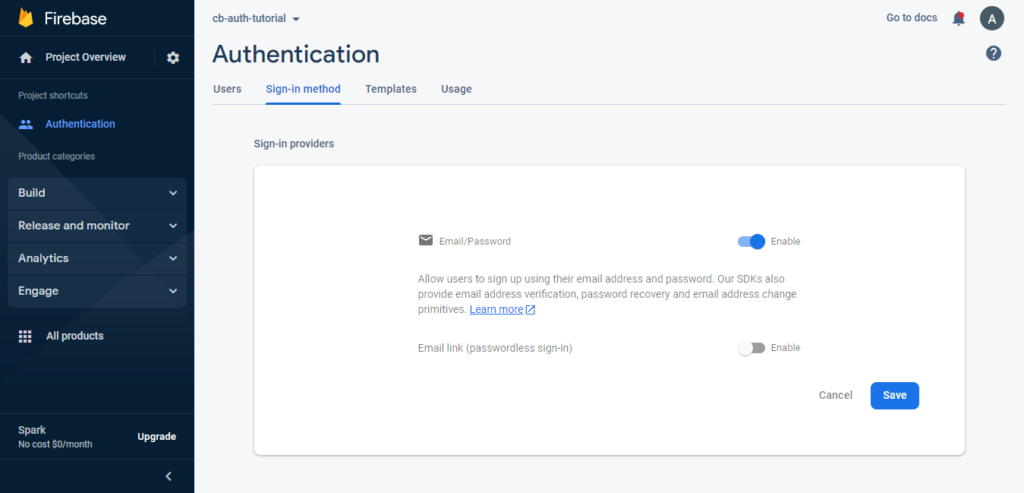
From the dashboard sidebar, click on Build > Authentication, then click on Get started on the screen that shows to enable Firebase Authentication. You’ll be asked to add an initial sign-in method.
Adding a sign-in method
Click on Email/Password and turn on the switch to enable it.
Enabling sign-in with email/password
Next, we’ll set up Firebase Firestore.
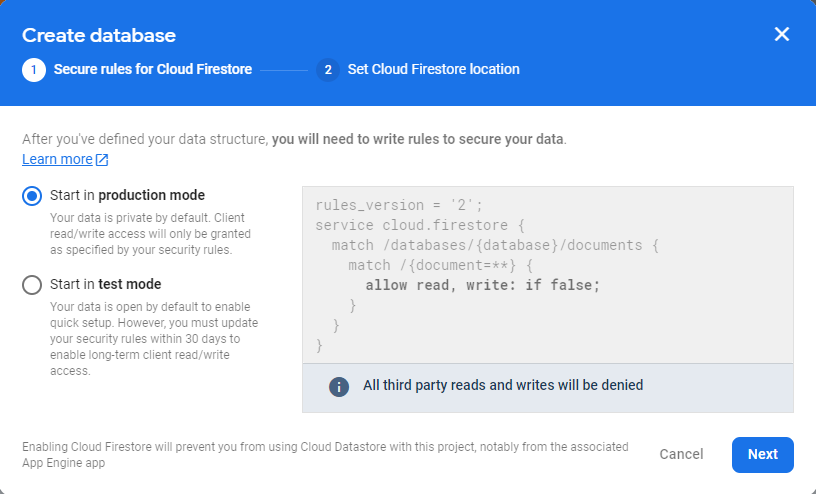
Click on Build > Firestore Database in the sidebar, then click the Create database button on the page that shows to enable Firestore.
You’ll be presented with a dialog that will take you through the steps to create the database.
The dialog used to create the Firestore database
We won’t be accessing Firestore from the client-side, so we can create the database in production mode. Firebase Admin ignores security rules when interacting with Firestore.
Next, we’ll need to generate a service account key, which is a JSON file containing information we’ll initialize our admin app with to be able to create the custom web tokens that we’ll send to the client. Follow these instructions in the Firebase Documentation to do this.
Let’s install the Firebase CLI tools with NPM. Run the following command in a terminal to do so:
npm i -g firebase-tools
Let’s create a new folder for the project. I’m naming mine auth-tutorial for symmetry with the Firebase project, but you can name it whatever you like.
Initialize Firebase in the project directory with the following command:
firebase init
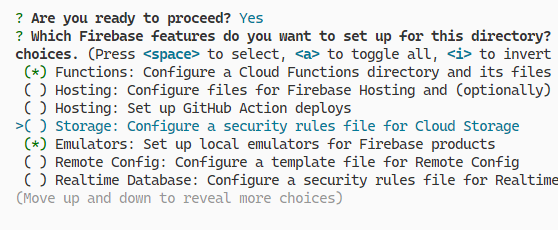
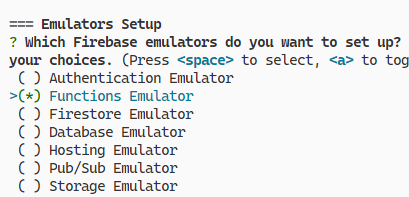
We’ll be using Firebase Functions and Firebase Emulators, so select these when asked to choose the features you want to set up for the project directory.
Setting up Firebase features in the project directory
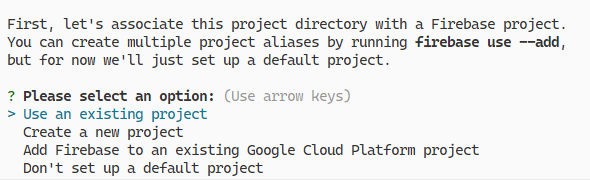
The next prompt is for you to associate the project directory with a Firebase project. Select Use an existing projectand choose the project you created earlier.
Associating the project directory with a Firebase project
We’ll be using plain JavaScript to write the functions, so choose that when asked about the language you want to use.
We’ll be using the Firebase Functions emulator to test our functions, so select it when asked to set up the emulators.
Setting up Firebase emulators
After you’ve initialized Firebase, your project directory structure should look like this:
Our project directory structure after initializing Firebase
Creating the REST API
We’ll need the following NPM packages to write our function:
express: Node.js web framework to speed up development.
cors: Express middleware to enable CORS (Cross-Origin Resource Sharing).
morgan: Logger middleware for Express.
is-email: For server-side email validation.
firebase: To authenticate users with the Firebase Web SDK.
Let’s install them all with one command:
npm i express cors morgan is-email firebase
Let’s write the handler function for the /register endpoint. Create a new folder named express in the functions directory, containing a sub-folder named routes, and create a new register.js file in routes with the following code:
If all validation is successful, the secure note of the new user will be saved in the Firestore database. Let’s create the function that will handle POST requests to the /login endpoint in a new login.js file, also saved in the routes directory.
Notice that the /login and /register route handlers don’t perform validation on the email or password sent in a request. This is because we’ll be creating custom Express middleware to do this instead. Create a new middleware sub-folder in the express folder, and create a new validate-email-and-password.js file in it, containing the following code:
Here we check that a password and a valid email are specified in the request body. If they are, the request is passed on to the next middleware. Otherwise, we end the request with an error.
Let’s create the endpoint that will allow the fetching of the secure note of a logged-in user. We’ll do this in a new get-user.js file saved in the routes folder.
We respond with an error if a user is not specified, or the user making the request for the data is not the owner.
req.token.uid is supplied by another middleware that verifies the token sent along when making an authenticated request to the API. Let’s create this middleware in a firebase-auth.js file located in the express/middleware folder.
We verify that the JSON web token sent is a valid token and assign it to the req.token property if so. Otherwise, we send a 401 error.
Now it’s time to integrate all these modules together in an Express app that will respond to any request made to the api cloud function. Replace the index.js file in the functions folder with the following code:
This file will be run to start Firebase Functions. We used the initializeApp() method from the firebase-admin module to initialize the Firebase Admin SDK with the service account key file you should have created earlier.
We also used the initalizeApp() method from the firebase/app module to initialize Firebase Web with a configuration stored in a firebase.config.js file. You were given this configuration earlier when you created the web app in the Firebase console.
functions/firebase.config.js
/**
  Enter the configuration for your Firebase web app
  module.exports = {
  apiKey: ...,
  authDomain: ...,
  projectId: ...,
  storageBucket: ...,
  messagingSenderId: ...,
  appId: ...,
  measurementId: ...
}; */
We can now start Firebase Functions in the emulator, by running the following command in the project directory.
firebase emulators:start --only functions
Testing the API
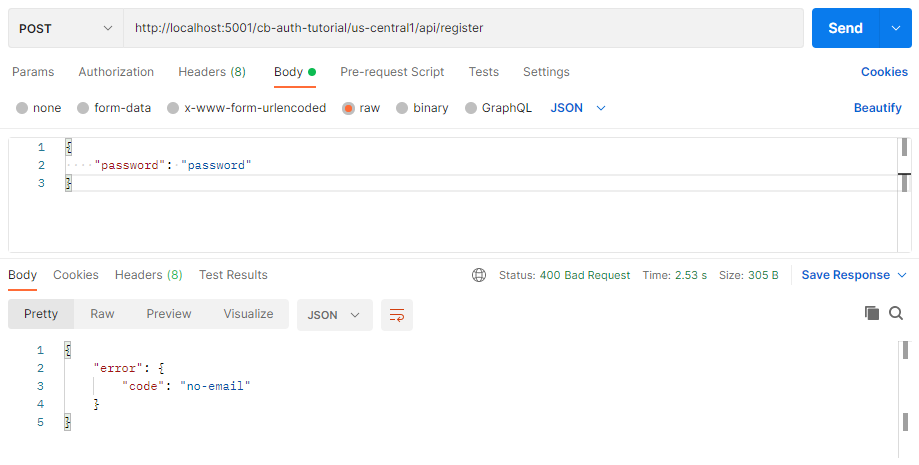
We haven’t written client code yet but we can test our API with a tool like Postman, or we can use one of the methods described here in the Firebase documentation.
Here we’re test the /register endpoint with Postman:
Testing the /register endpoint with Postman
Creating the Client App with React
Let’s write the client app that will interact with our RESTful API. Create a new React app with Create React App.
npx create-react-app client
We’ll be using the following NPM packages in the React app:
Material UI (@mui/material, @emotion/react, @emotion/styled): To style our client UI and make it attractive.
axios: To make HTTP requests to the API we’ve created.
react-router-dom: For single-page app routing.
react-hook-form: For easier React form validation.
firebase: The Firebase Web SDK library.
react-firebase-hooks: Provides a set of reusable React hooks for Firebase.
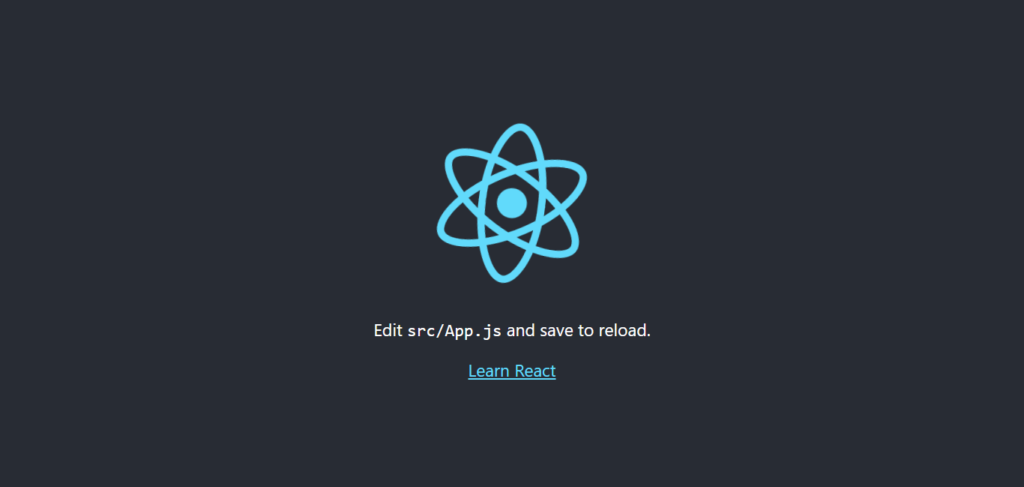
Test that the app is up and running by opening localhost:3000 in your browser. You’ll see the results of the standard React.js boilerplate in your client/src/App.js file. We’ll edit this file later.
Testing the newly created React app
The URL origin of the cloud functions running in an emulator is different from the one it has when running in a production environment. Let’s create a .env file to specify the different origins. The values you’ll need to specify will depend on the name you gave your Firebase project.
Let’s create a module that would be responsible for making the HTTP requests to our RESTful API using axios. Create this module in an api-service.js file.
Wrapping a route component in the RequireAuth component will ensure that only authenticated users will be able to view it. If not signed in, the user will be taken to the /signin route and then redirected back to the route that they trying to view after a successful sign-in.
The AuthProvider component allows its children to access important authentication-related data and methods using a React context and its provider. The useAuth() hook will provide the context values to the child components with the useContext() hook.
The signIn() and signUp() methods make requests to the API. If successful, a token will be received and passed the signInWithCustomToken() method from the firebase/auth module to authenticate the user in the browser.
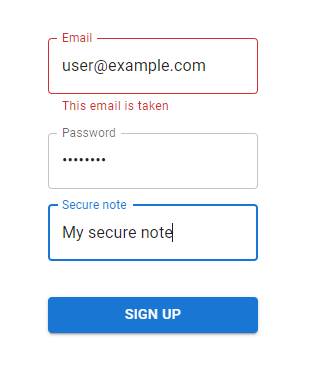
Now it’s time to create the sign-up page. Users sign up with an email, a password, and a secure note. We’ll do this in a SignUp.jsx file in a new routes folder.
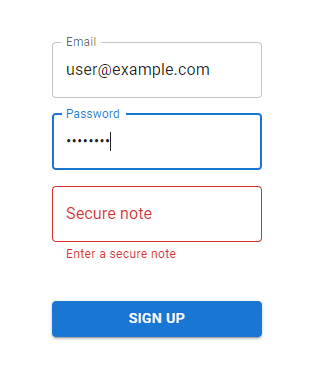
We use the Controller component from react-hook-form to register the Material UI TextField component with react-hook-form. We set validation rules with the Controllerrules prop to ensure that the user enters a valid email, a password, and a secure note.
Form validation on the sign-up page
react-hook-form ensures that the onSubmit() function is only called when all the validation rules have been satisfied. In this function, we register the user with the signUp() method from the useAuth() hook we created earlier. If successful, we take the user to the index route (/). Otherwise, we display the appropriate error message.
Displaying an error message after receiving an API response
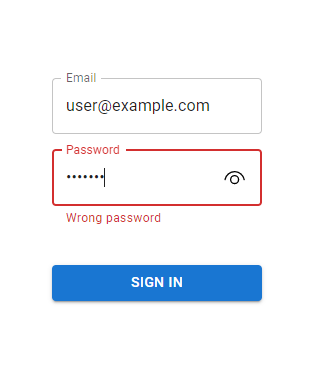
Let’s also create the sign-in page in a SignIn.jsx file in the same routes folder.
Unlike in the SignUp component, here we use the signIn() method from the useAuth() hook to sign the user in.
The HTTP errors we handle here are different from the ones we handle in SignUp. In SignUp, we display an error if the email the user attempted to sign up with has already been used. But here we display errors for a non-existent email or a wrong password.
Displaying an error message for a wrong password after receiving an API response
Now let’s create the component that will be shown for our index route. Replace the contents of App.js with the following:
If the user hasn’t been authenticated, we let them know they’re not signed in and include the relevant links to do so.
The view displayed to a user that is yet to be authenticated
If they’ve signed in, we make a request to the API to get the secure note and display it.
Displaying the private secure note to the user
We used a dataState variable to keep track of the current state of the API request and display an appropriate view to the user based on this.
We set dataState to loading just before making the request to let the user know that their data is in the process of being retrieved.
The view displayed when dataState is loading.
If an error occurs in this process, we let them know by setting dataState to error:
The view displayed when dataState is error.
Finally, let’s initialize Firebase and set up the routing logic in our index.js file.
client/src/index.js
import React from 'react';
import ReactDOM from 'react-dom/client';
import './index.css';
import App from './App';
import reportWebVitals from './reportWebVitals';
import {
  BrowserRouter,
  Route,
  Routes,
} from 'react-router-dom';
import SignIn from './routes/SignIn';
import { AuthProvider } from './auth';
import { initializeApp } from 'firebase/app';
import firebaseConfig from './firebase.config';
import SignUp from './routes/SignUp';

initializeApp(firebaseConfig);

const root = ReactDOM.createRoot(
  document.getElementById('root')
);
root.render(
  <React.StrictMode>
    <AuthProvider>
      <BrowserRouter>
        <Routes>
          <Route path="/" element={<App />} />
          <Route path="/signin" element={<SignIn />} />
          <Route path="/signup" element={<SignUp />} />
        </Routes>
      </BrowserRouter>
    </AuthProvider>
  </React.StrictMode>
);

reportWebVitals();
There should be a firebase.config.js file in your src directory that contains the config you received when setting up the web app in the Firebase console. This is the same config we used to initialize the Web SDK in the Admin environment when we were writing the API.
client/src/firebase.config.js
/**
  Enter the configuration for your Firebase web app
  module.exports = {
  apiKey: ...,
  authDomain: ...,
  projectId: ...,
  storageBucket: ...,
  messagingSenderId: ...,
  appId: ...,
  measurementId: ...
}; */
The app should be fully functional now!
Conclusion
In this article, we learned how to easily set up authentication in our web apps using Firebase. We created a RESTful API with Node.js and the Express framework to handle requests from a client app that we built using React.js and Material UI.
To copy to clipboard in Node.js, you can use the clipboardy package from NPM. First, install it by running the following command at the root of your project directory:
npm i clipboardy
We can use clipboardy to read or write to the system clipboard:
import clipboardy from 'clipboardy';

async function main() {
  await clipboardy.write('butter');
  const text = await clipboardy.read();
  console.log(text); // 'butter'
}

main();
The module can read/write synchronously as well:
import clipboardy from 'clipboardy';

clipboardy.writeSync('butter');

const text = clipboardy.readSync();
console.log(text); // butter
Note
clipboardy is an ES module, and can only be used with the import keyword. The use the import keyword in Node.js, set the the type field to module in your package.json file:
package.json
{
  // ... other fields
  "main": "index.js",
  "type": "module",
  // ... other fields
}