How to Remove the Hash From URLs in Vue Router
To remove the hash from URLs in Vue Router in Vue 3, set the history option in createRouter() to the result of createWebHistory().
main.js
const router = VueRouter.createRouter({
  history: VueRouter.createWebHistory(),
  ...
});
If you’re using Vue 2, set the mode option to 'history' in the VueRouter() constructor.
main.js
const router = new VueRouter({
  mode: 'history',
  ...
});
Remove hash from URL in Vue 3 and Vue Router 4
Here’s a sample Vue 3 app, where we make use of Vue Router 4.
main.js
import { createApp } from 'vue';
import { createRouter } from 'vue-router';
import App from './App.vue';
import HomePage from '@/views/HomePage.vue';
import ContactPage from '@/views/ContactPage.vue';
import AboutPage from '@/views/AboutPage.vue';

const app = createApp(App);

const routes = [
  { path: '/', component: HomePage },
  { path: '/about', component: AboutPage },
  { path: '/contact', component: ContactPage },
];

const router = createRouter({
  routes,
});

app.use(router);

app.mount('#app');
App.vue
<template>
  <div id="app">
    <router-link to="/">Home</router-link>{{ ' ' }}
    <router-link to="/about">About</router-link>{{ ' ' }}
    <router-link to="/contact">Contact</router-link>
    <router-view></router-view>
  </div>
</template>
views/HomePage.vue
<template>
  <div><h2>Welcome</h2></div>
</template>
views/AboutPage.vue
<template>
  <div><h2>About us</h2></div>
</template>
views/ContactPage.vue
<template>
  <div><h2>Contact us</h2></div>
</template>
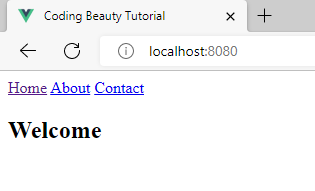
Here’s what the home page of this web app will look like:
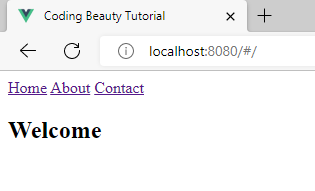
You can see that there is a hash character (#) before the index path (/) in the URL of the page. This happens because Vue Router uses hash history mode to represent the URLs of different routes. In hash mode, a hash character is placed before the route path, and this prevents the page from reloading when a Router link is clicked.
The createRouter() function from vue-router creates a Router instance to be used by the Vue app. We can pass an object with a bunch of options to the function to customize the behavior of the router.
main.js
import { createApp } from 'vue';
import { createRouter, createWebHistory } from 'vue-router';
import App from './App.vue';
import HomePage from '@/views/HomePage.vue';
import ContactPage from '@/views/ContactPage.vue';
import AboutPage from '@/views/AboutPage.vue';

const app = createApp(App);

const routes = [
  { path: '/', component: HomePage },
  { path: '/about', component: AboutPage },
  { path: '/contact', component: ContactPage },
];

// 👇
const router = createRouter({
  history: createWebHistory(),
  routes,
});

app.use(router);

app.mount('#app');
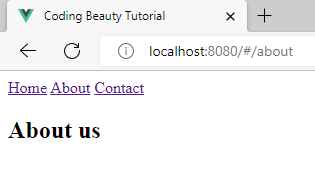
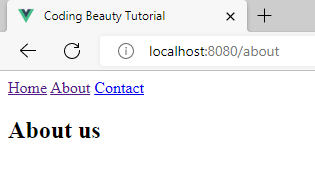
Setting the history option to the result of the createWebHistory() function from vue-router switches the router from hash history mode to HTML5 history mode. This removes the hash from the URLs.
Remove hash from URL in Vue 2 and Vue Router 3
Vue 2 apps use Vue Router 3, so the Router initialization logic will differ.
Your main.js file might look like this at the moment:
main.js
import Vue from 'vue';
import App from './App.vue';
import VueRouter from 'vue-router';
import HomePage from '@/views/HomePage.vue';
import ContactPage from '@/views/ContactPage.vue';
import AboutPage from '@/views/AboutPage.vue';

Vue.config.productionTip = false;
Vue.use(VueRouter);

const routes = [
  { path: '/', component: HomePage },
  { path: '/about', component: AboutPage },
  { path: '/contact', component: ContactPage },
];

const router = new VueRouter({
  routes,
});

new Vue({
  router,
  render: (h) => h(App),
}).$mount('#app');
Here we use a VueRouter() constructor to create a new router instance. Like createRouter(), we can pass a set of options to customize its behavior. To change from hash history mode to HTML5 history mode and remove the hash from the URLs, set the mode option to 'history'.
main.js
import Vue from 'vue';
import App from './App.vue';
import VueRouter from 'vue-router';
import HomePage from '@/views/HomePage.vue';
import ContactPage from '@/views/ContactPage.vue';
import AboutPage from '@/views/AboutPage.vue';

Vue.config.productionTip = false;
Vue.use(VueRouter);

const routes = [
  { path: '/', component: HomePage },
  { path: '/about', component: AboutPage },
  { path: '/contact', component: ContactPage },
];

// 👇
const router = new VueRouter({
  mode: 'history',
  routes,
});

new Vue({
  router,
  render: (h) => h(App),
}).$mount('#app');