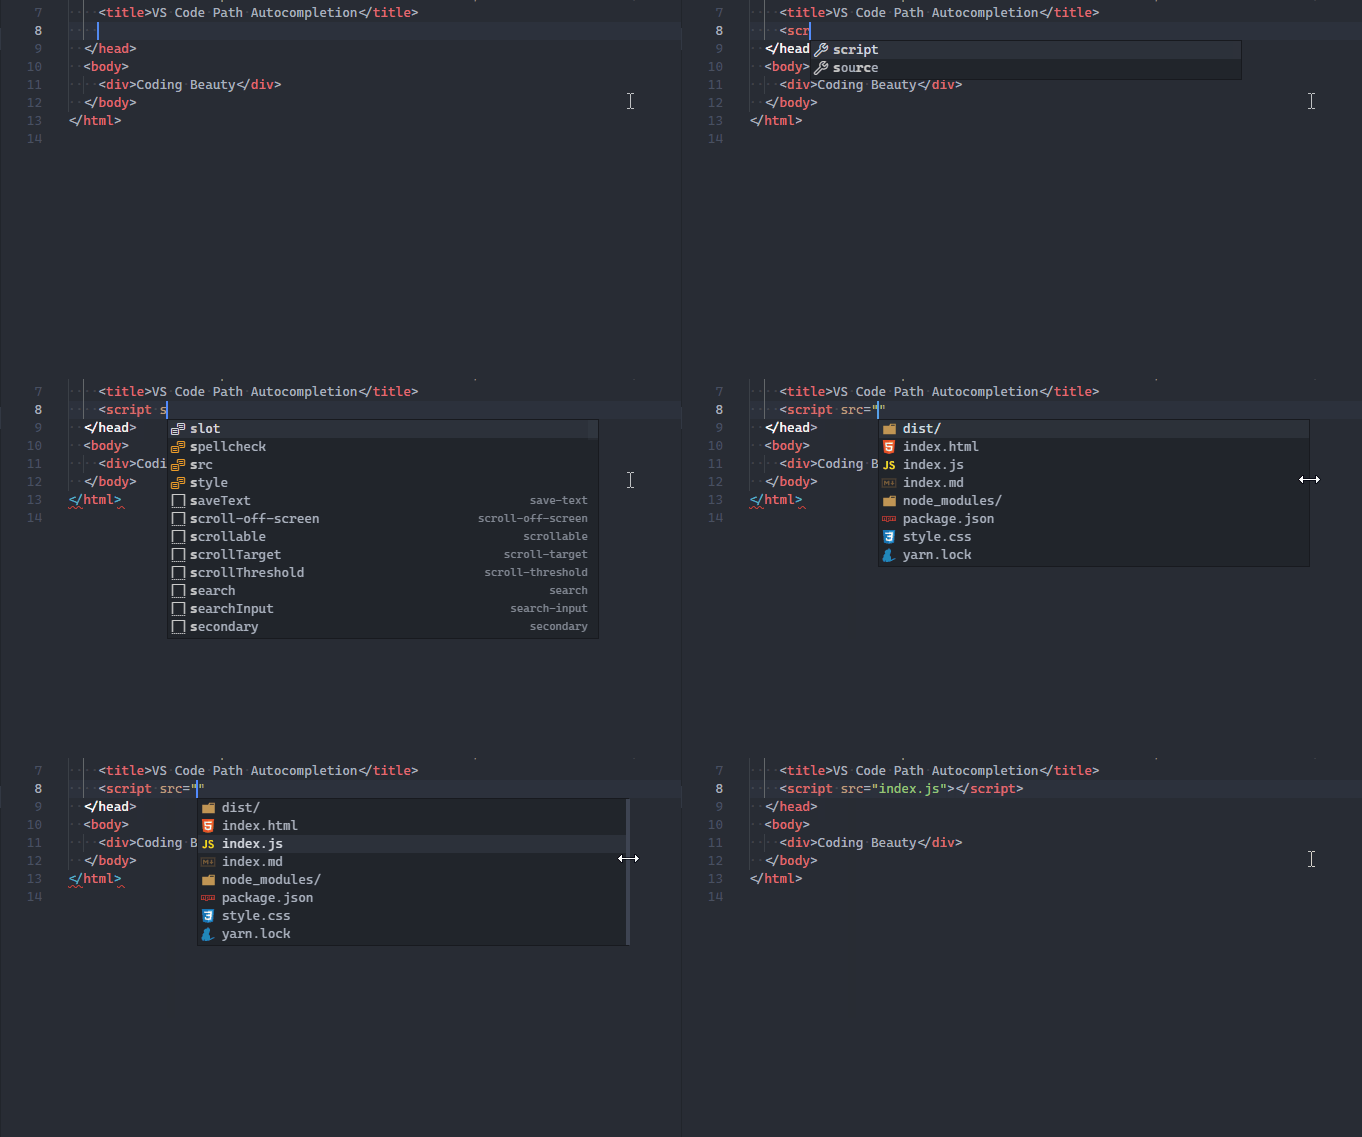
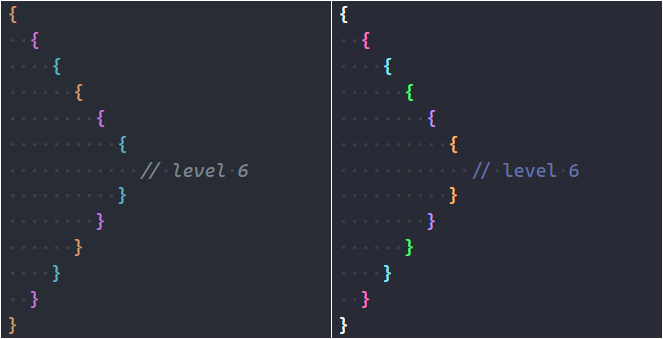
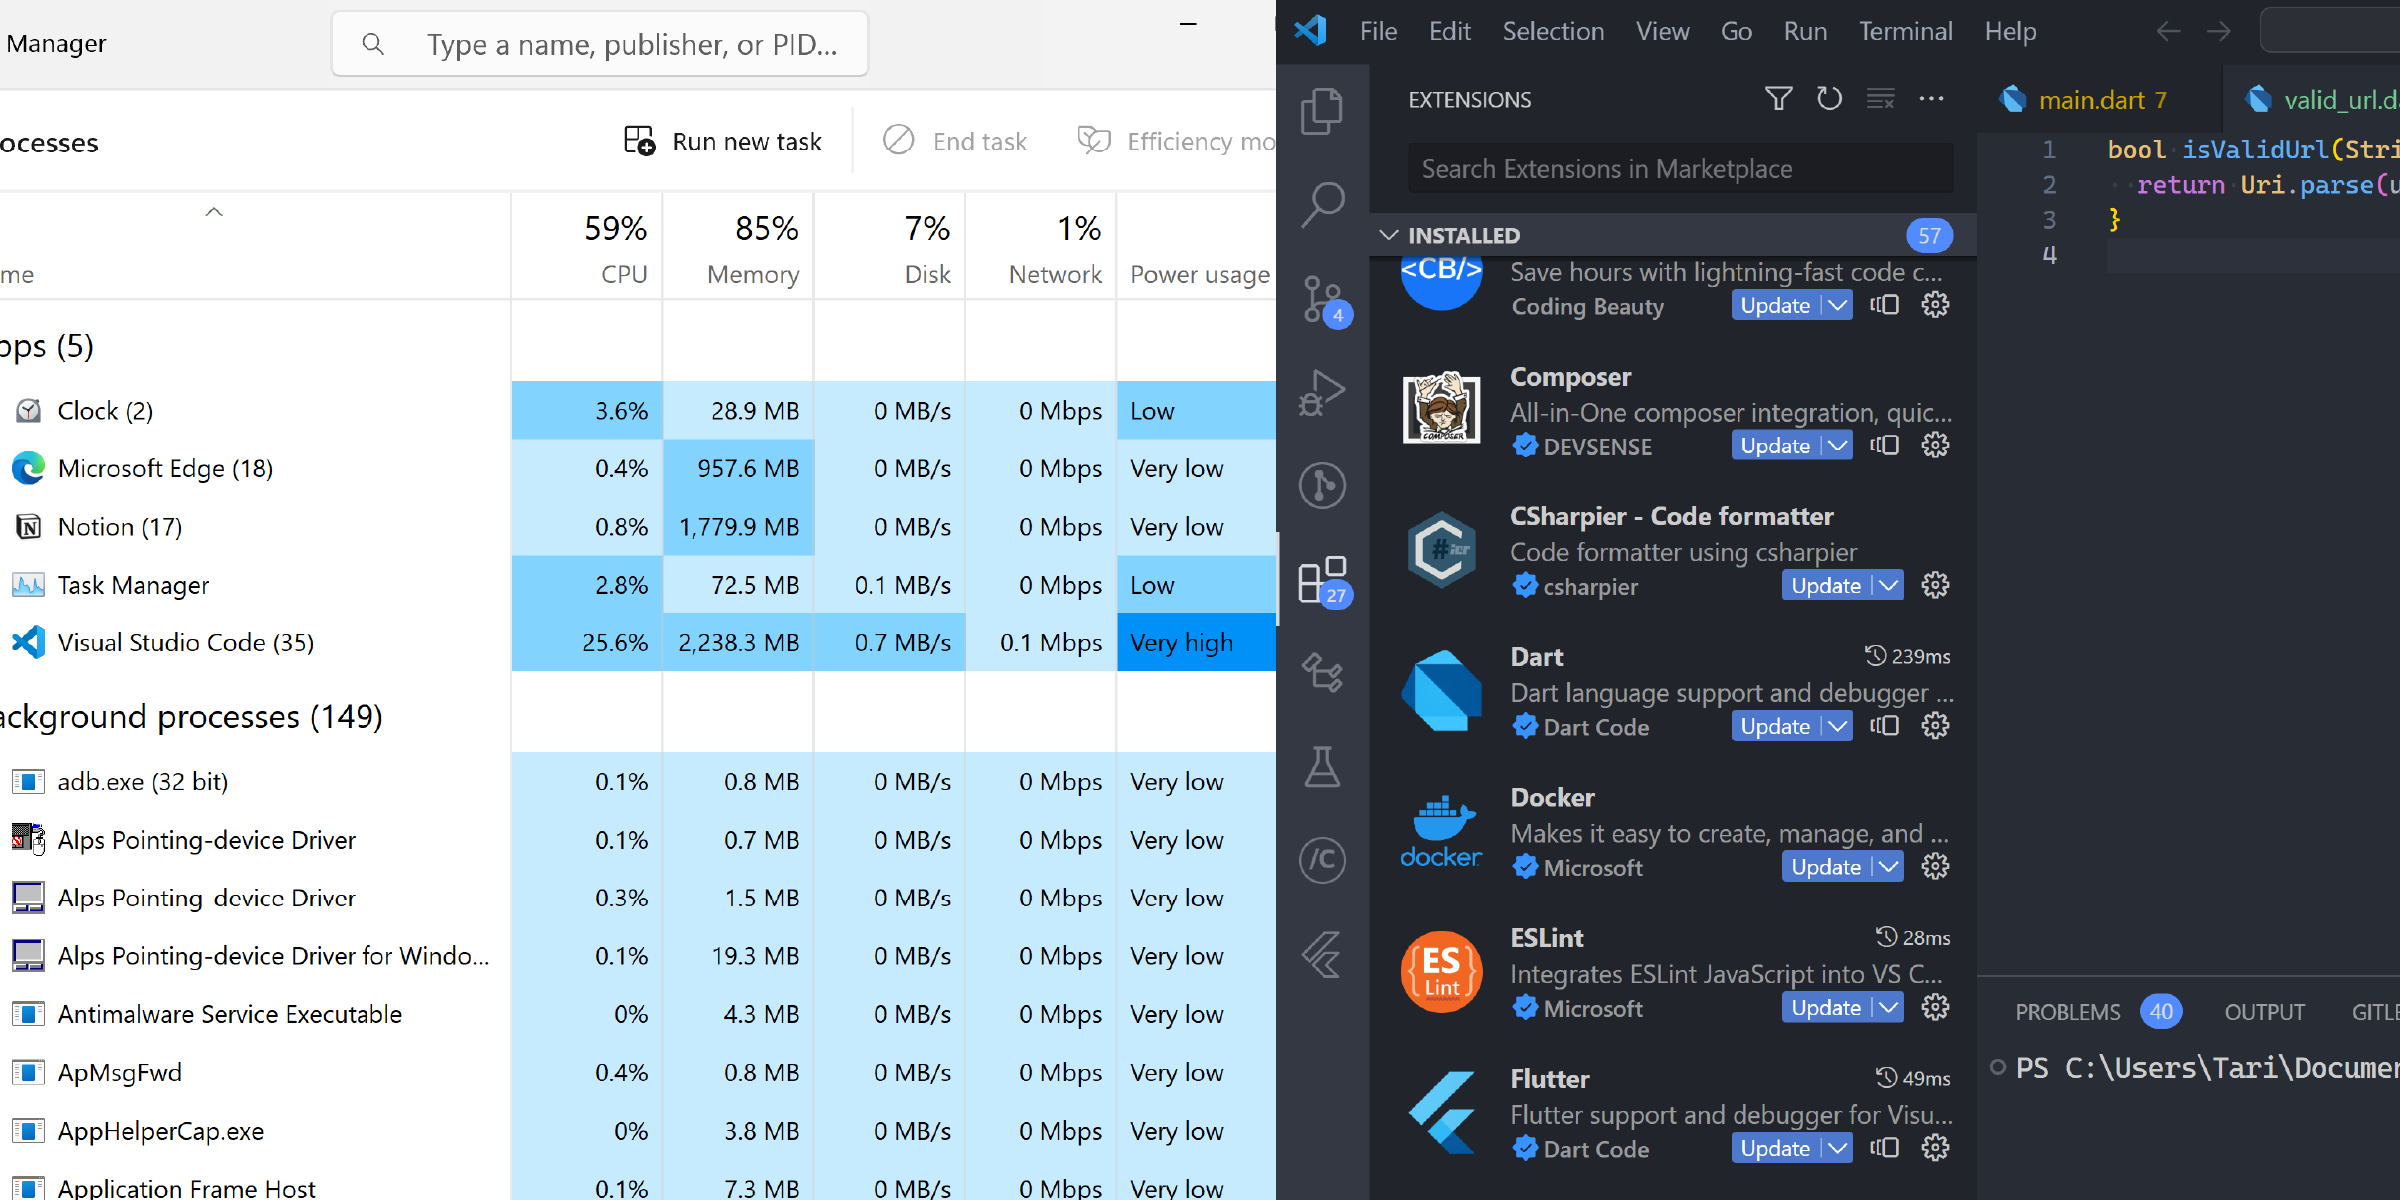
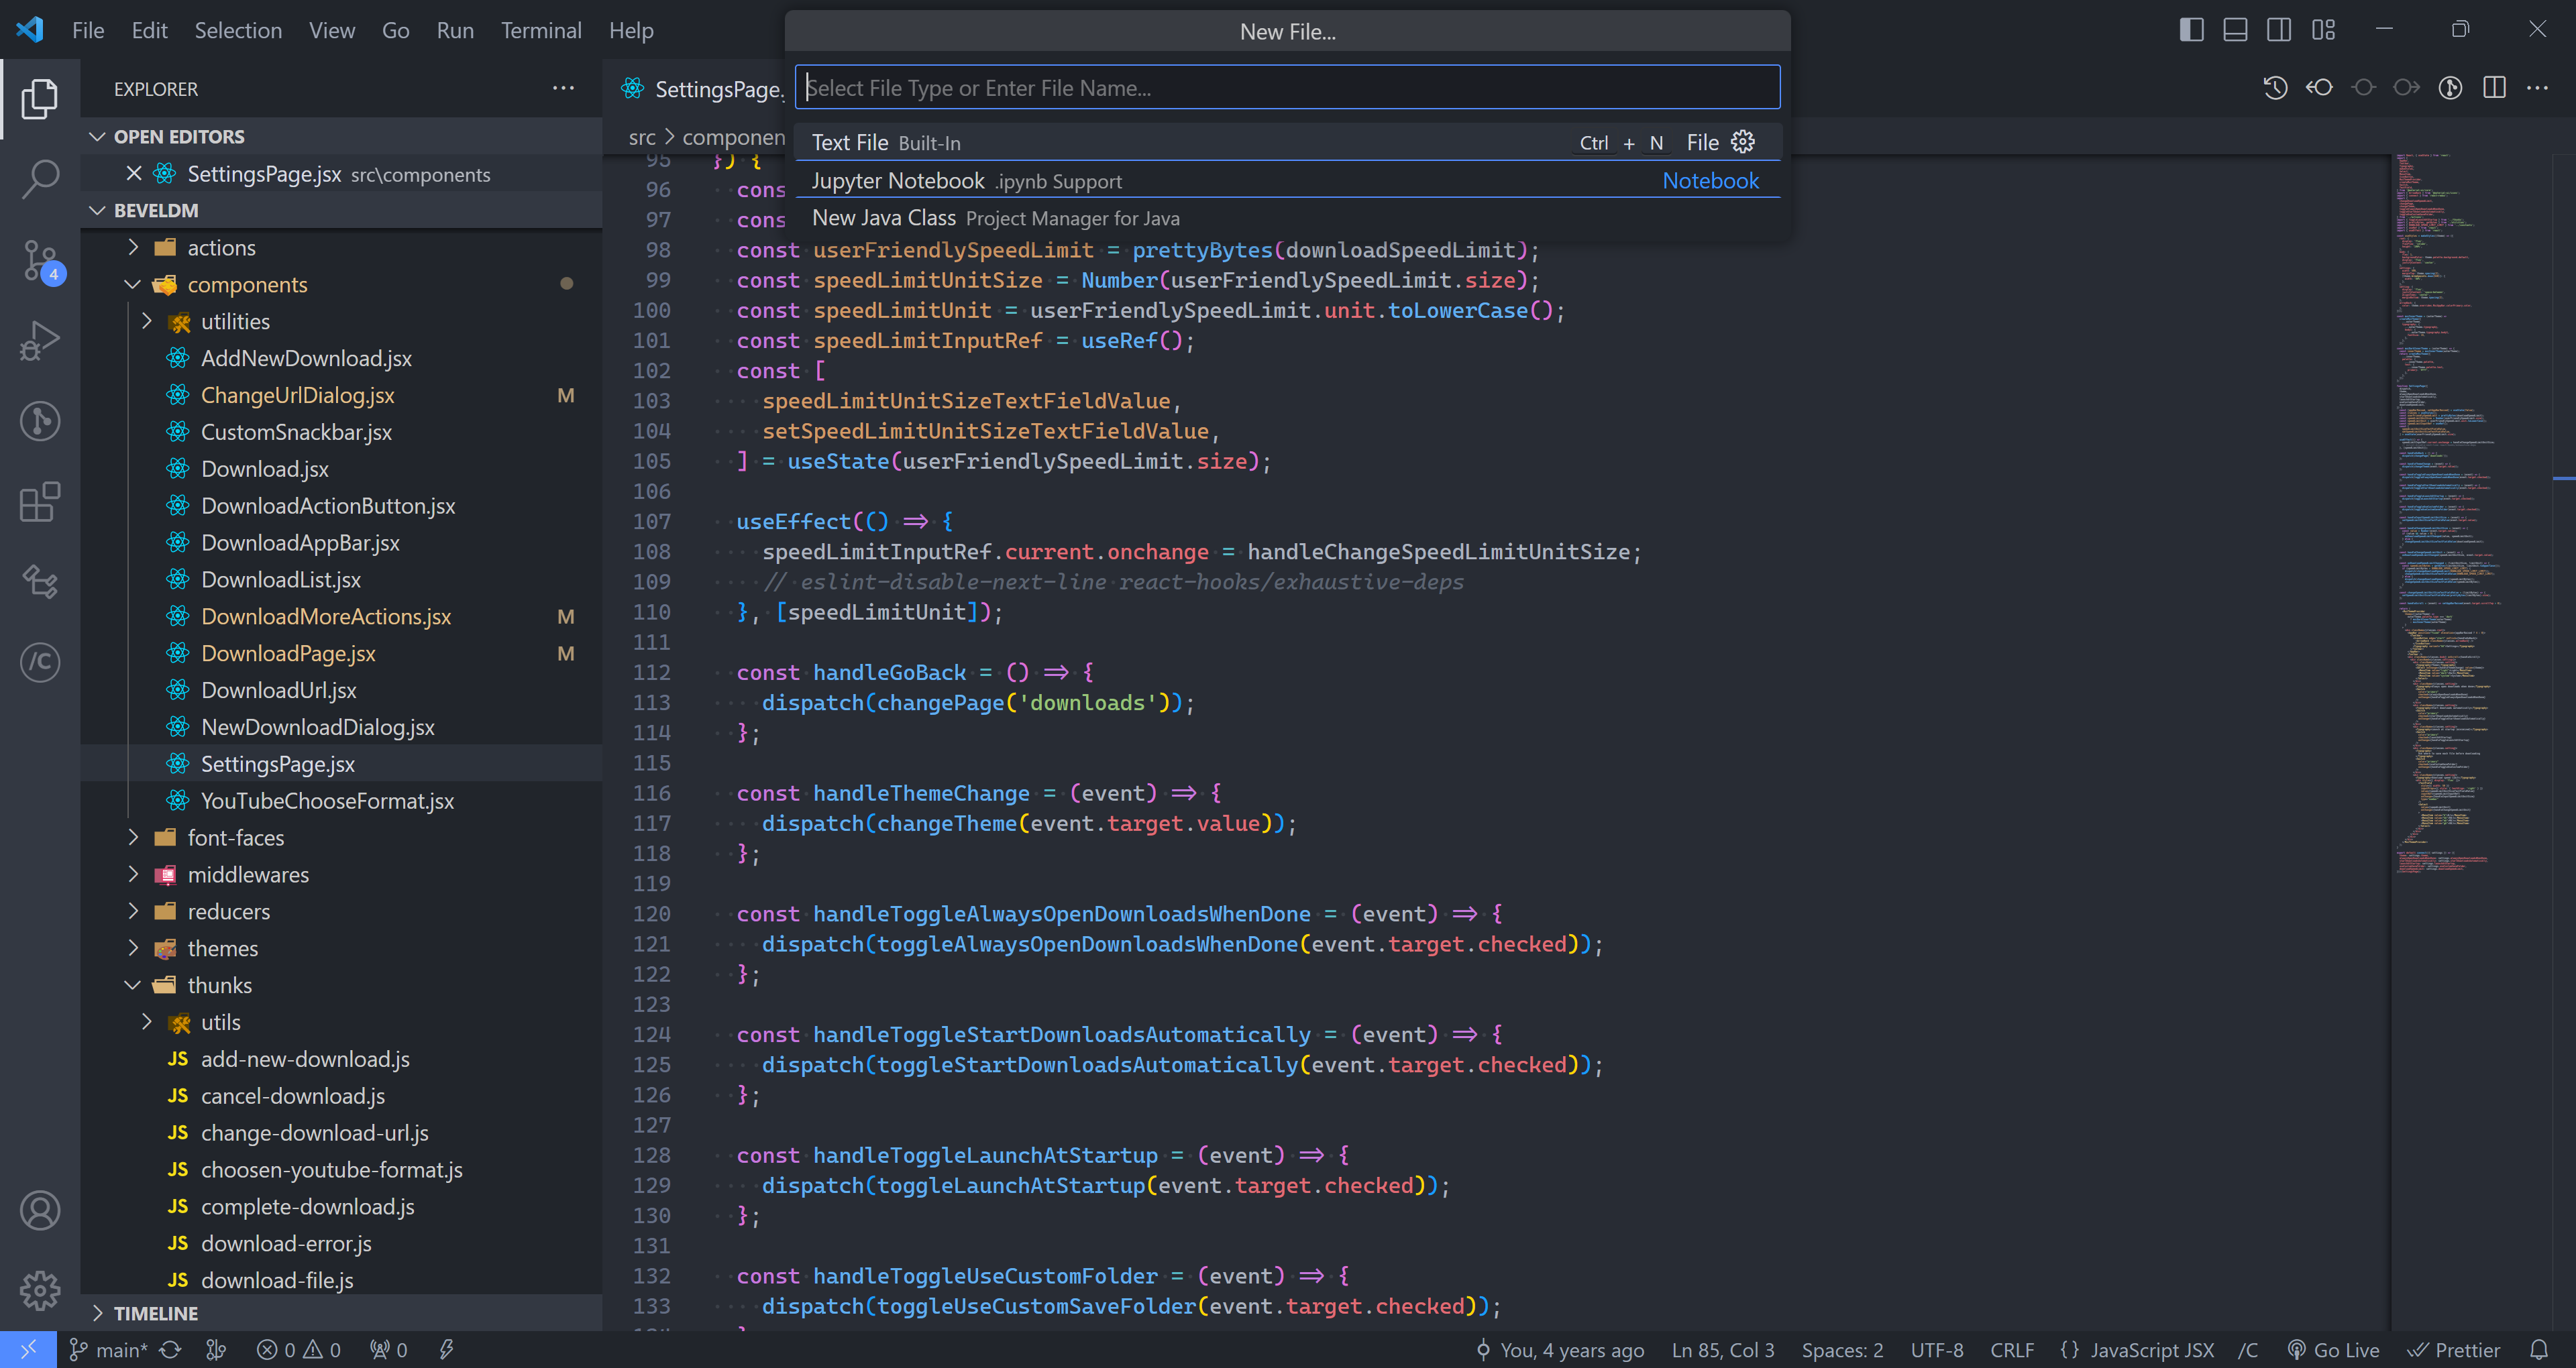
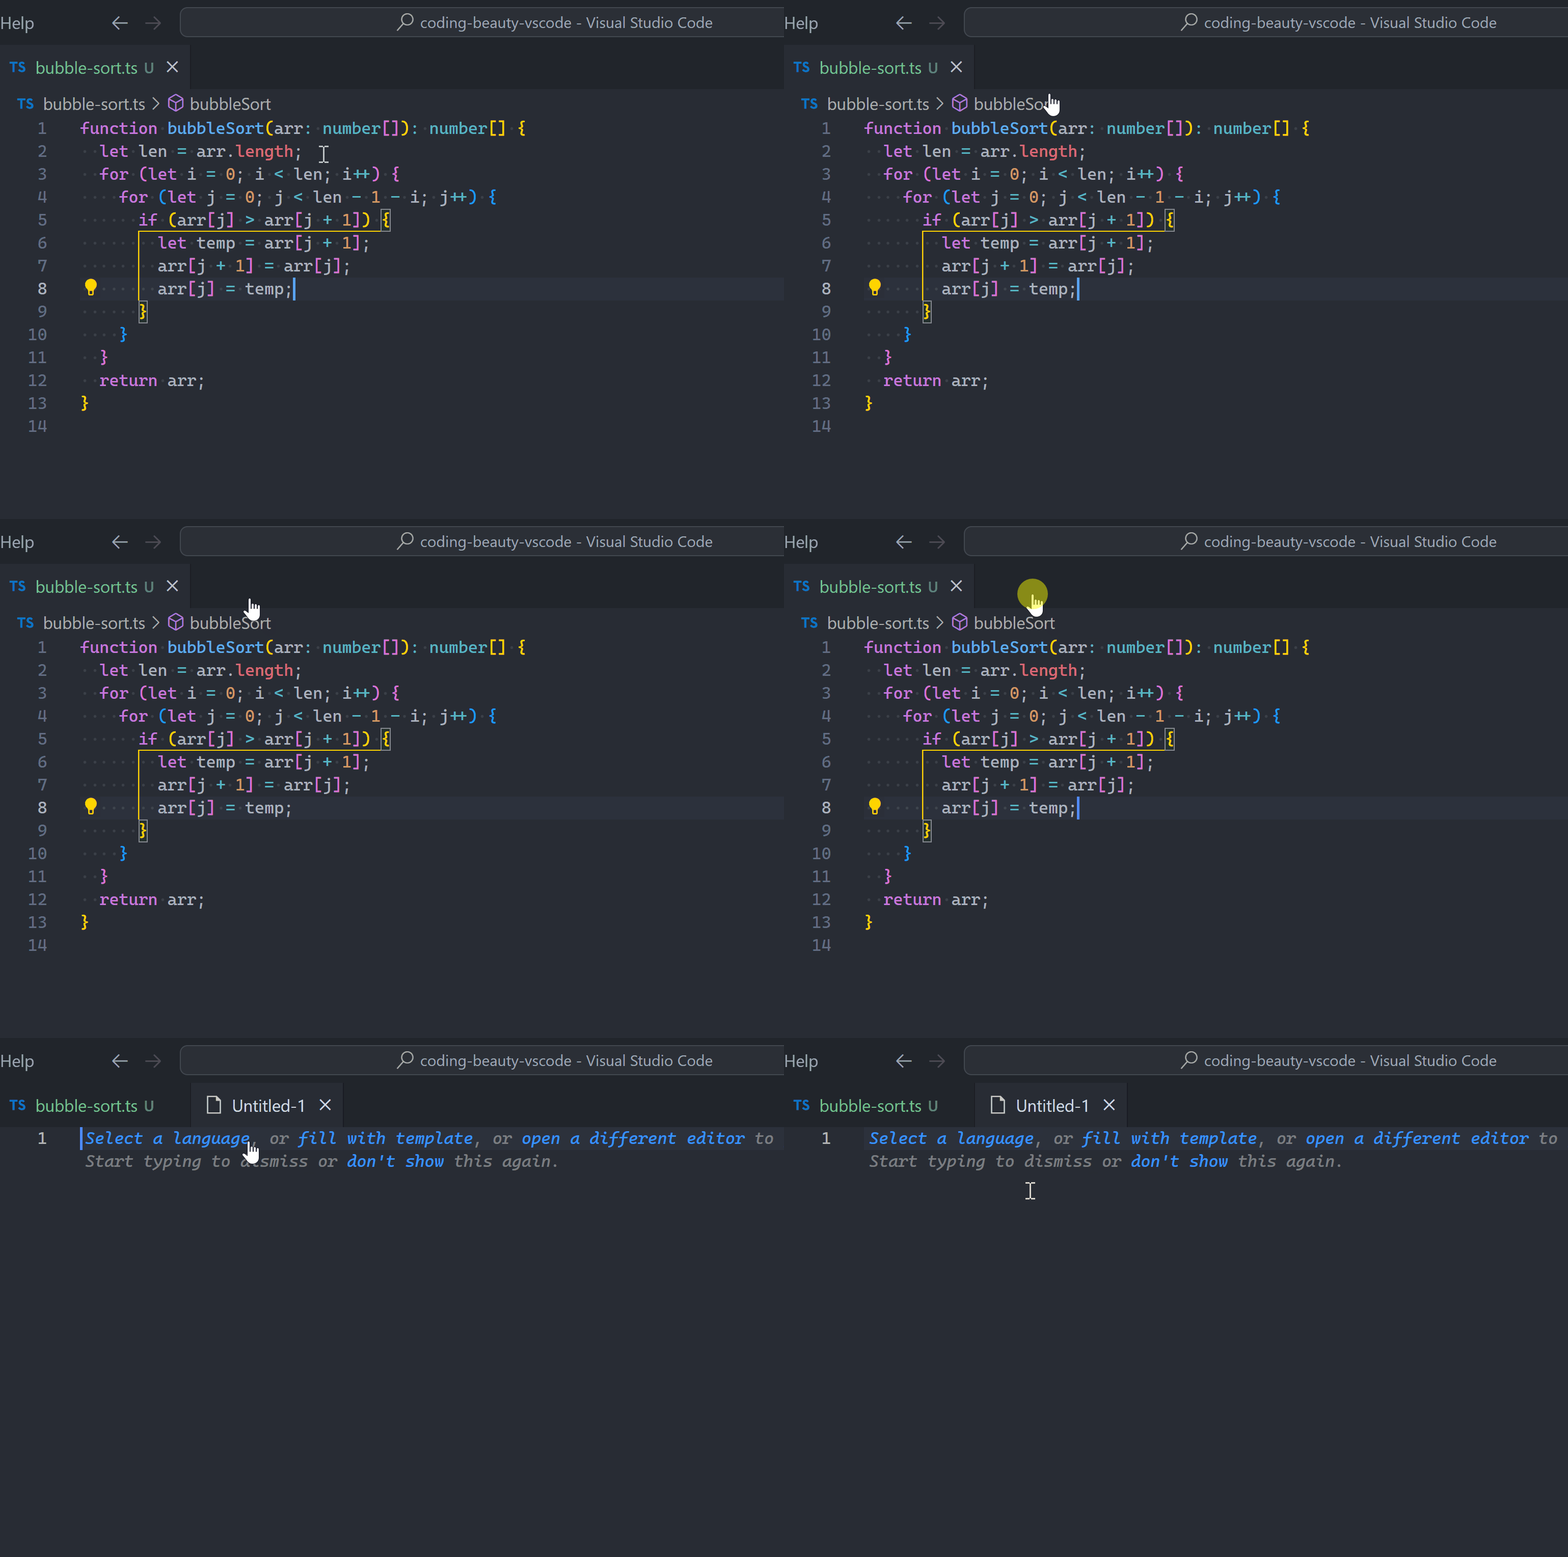
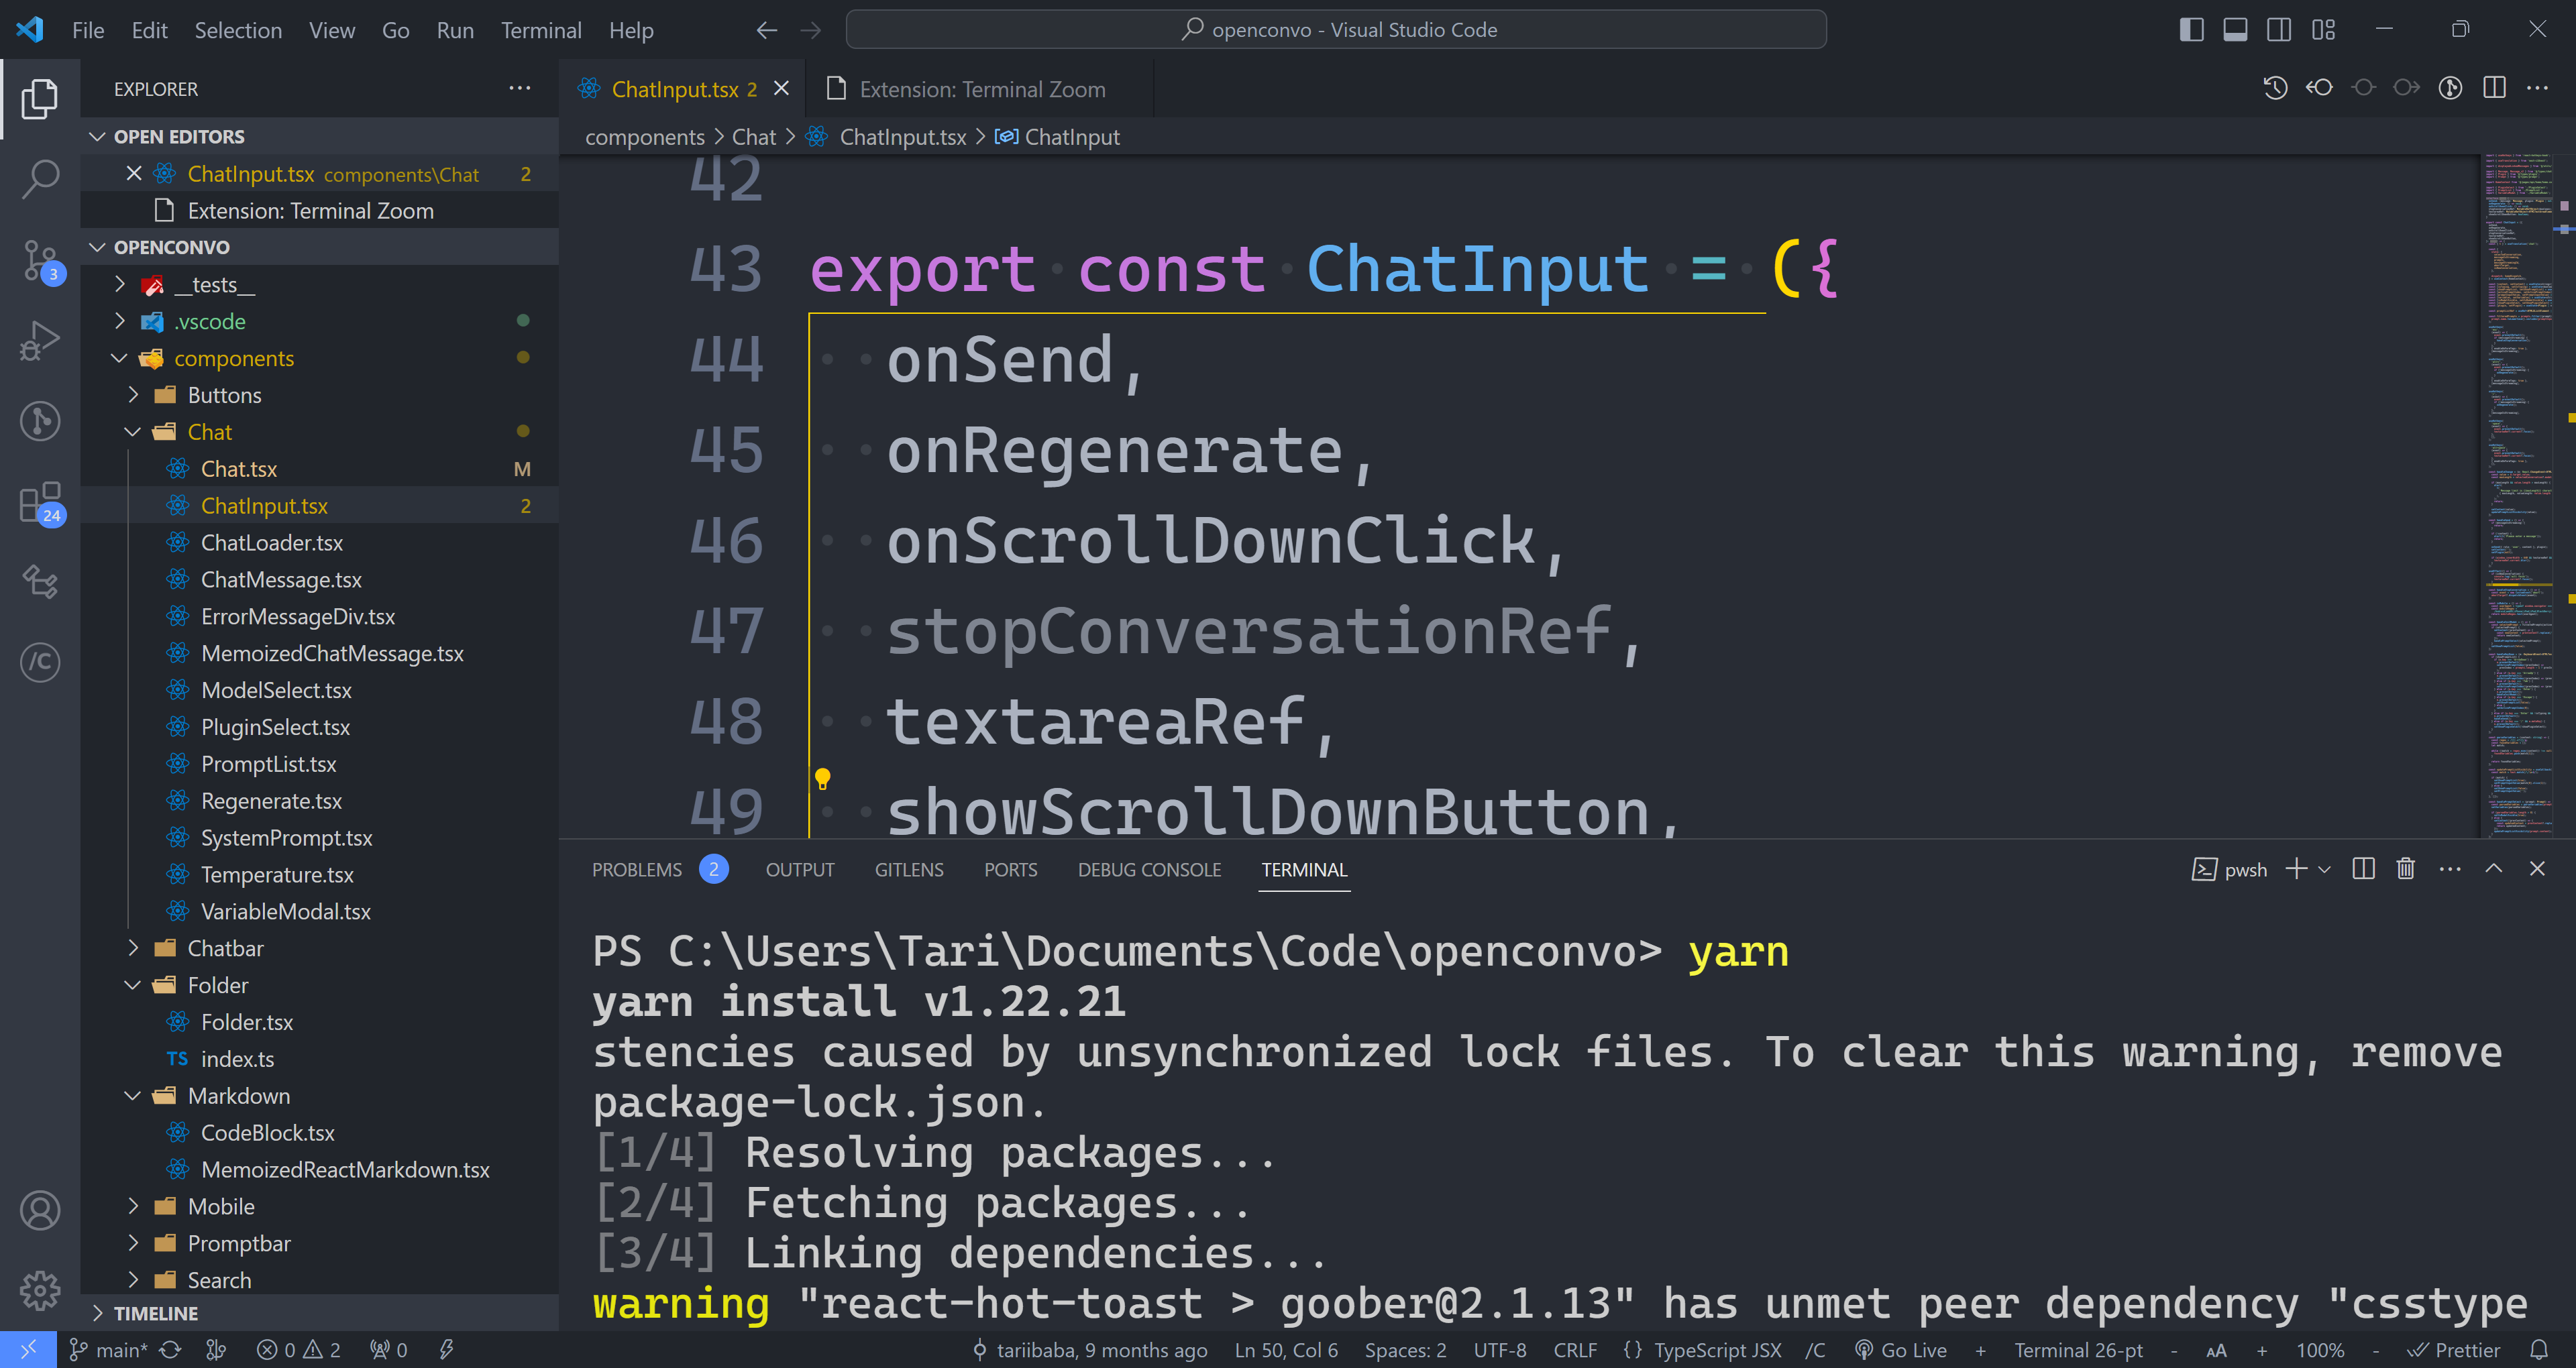
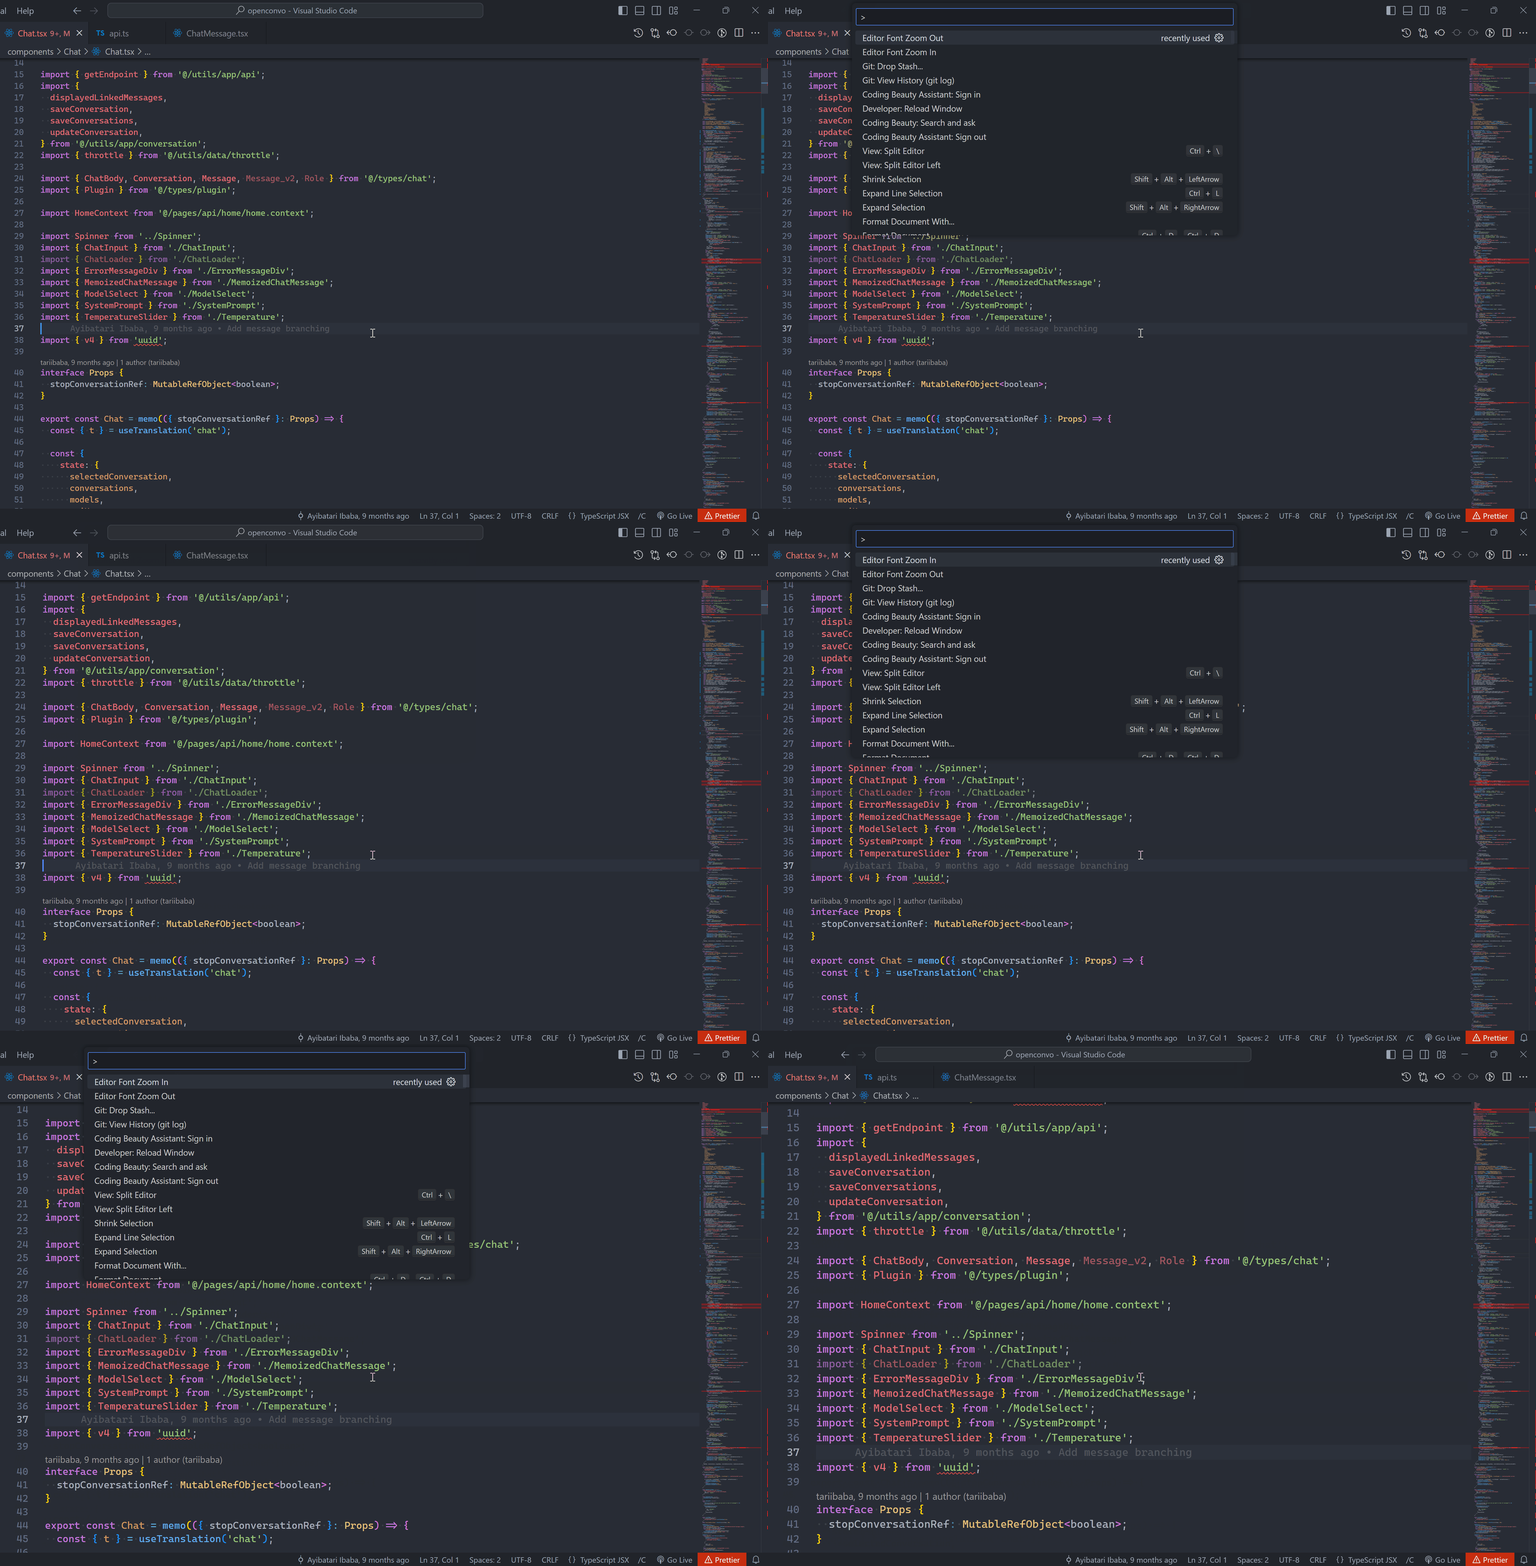
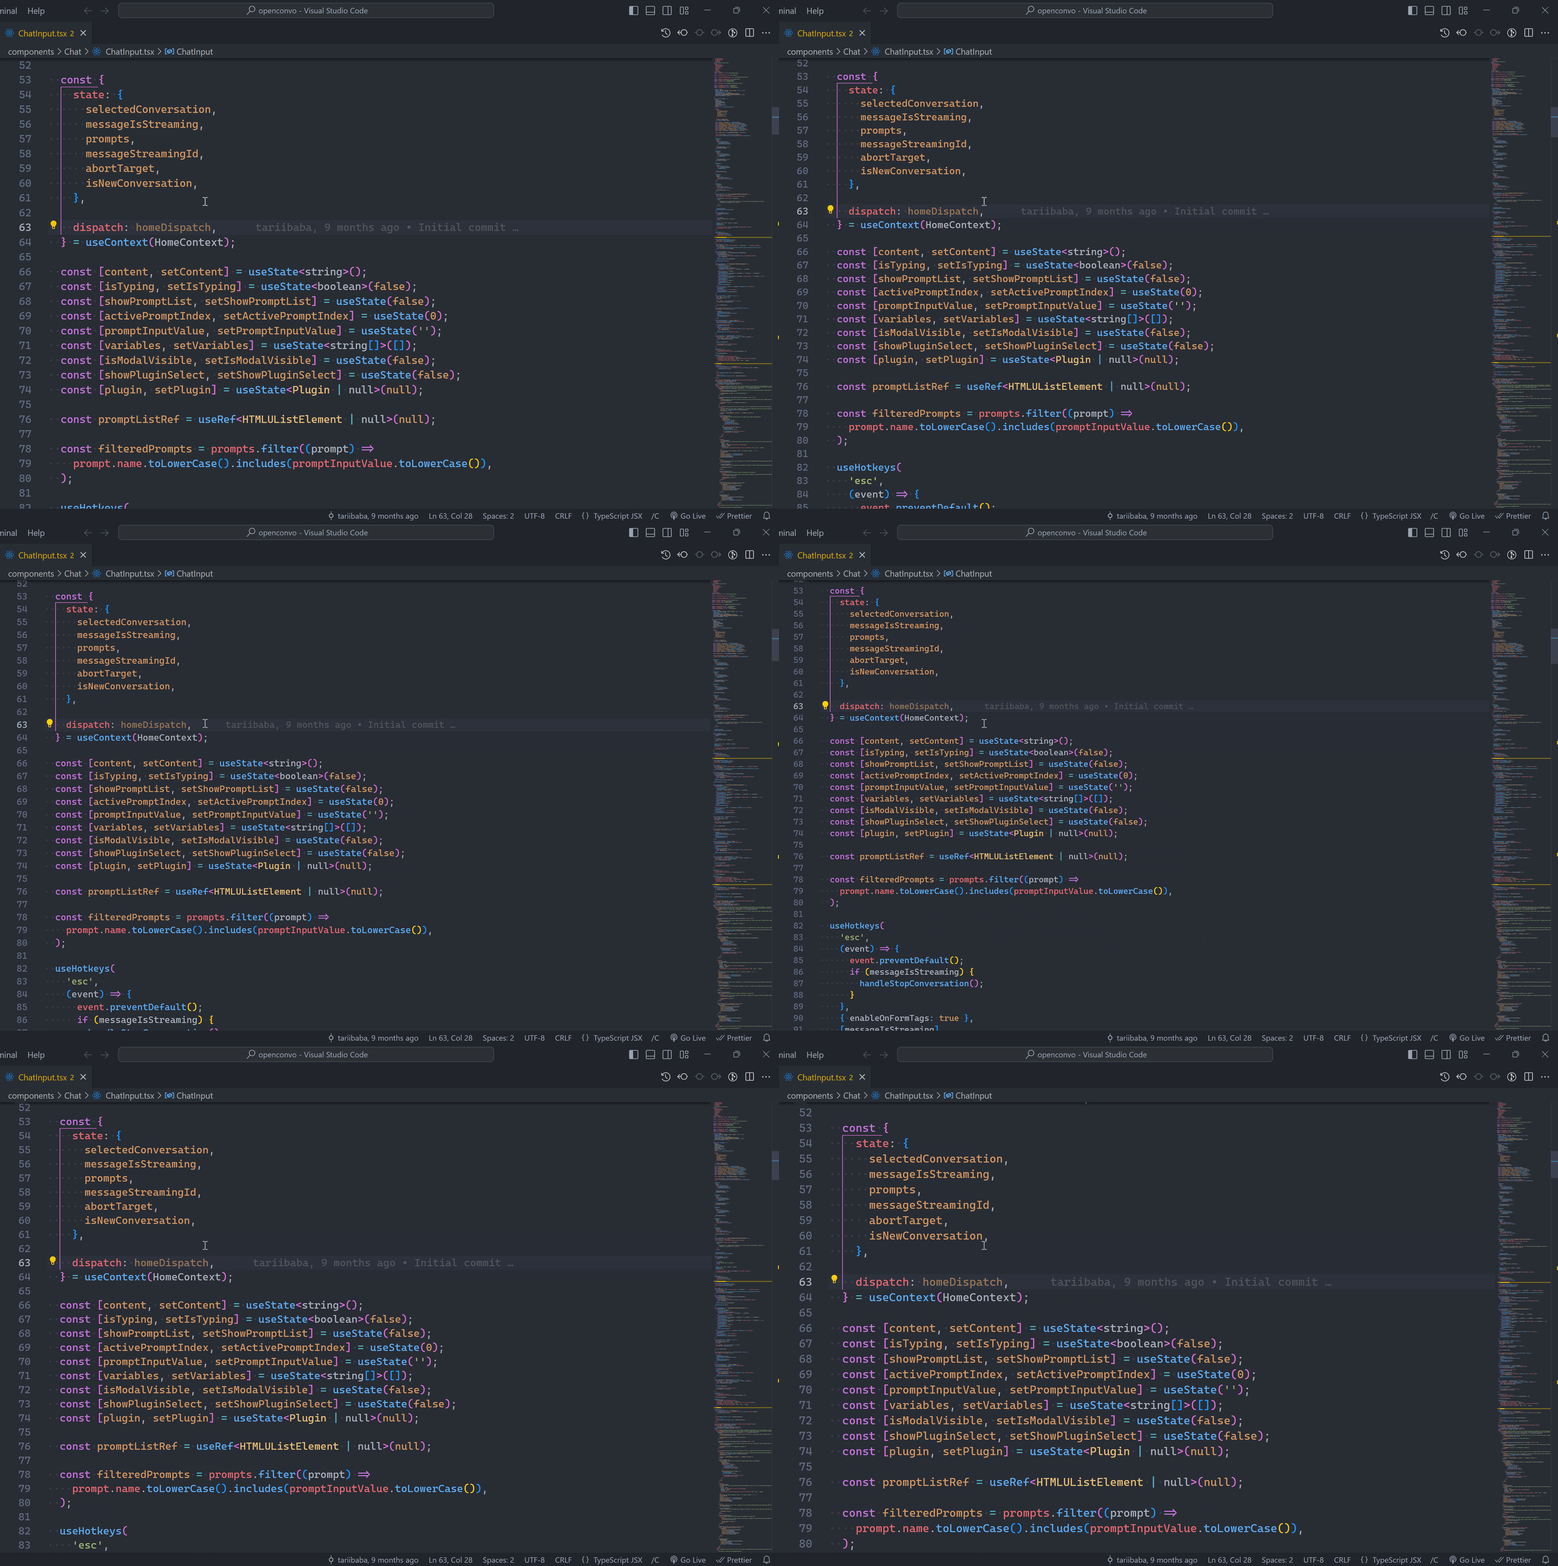
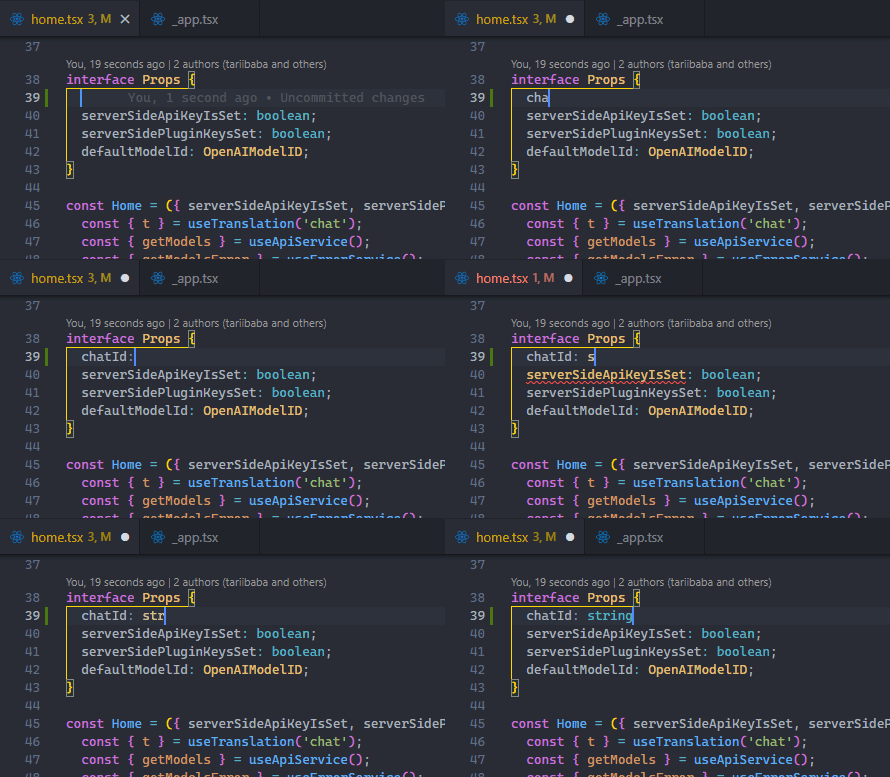
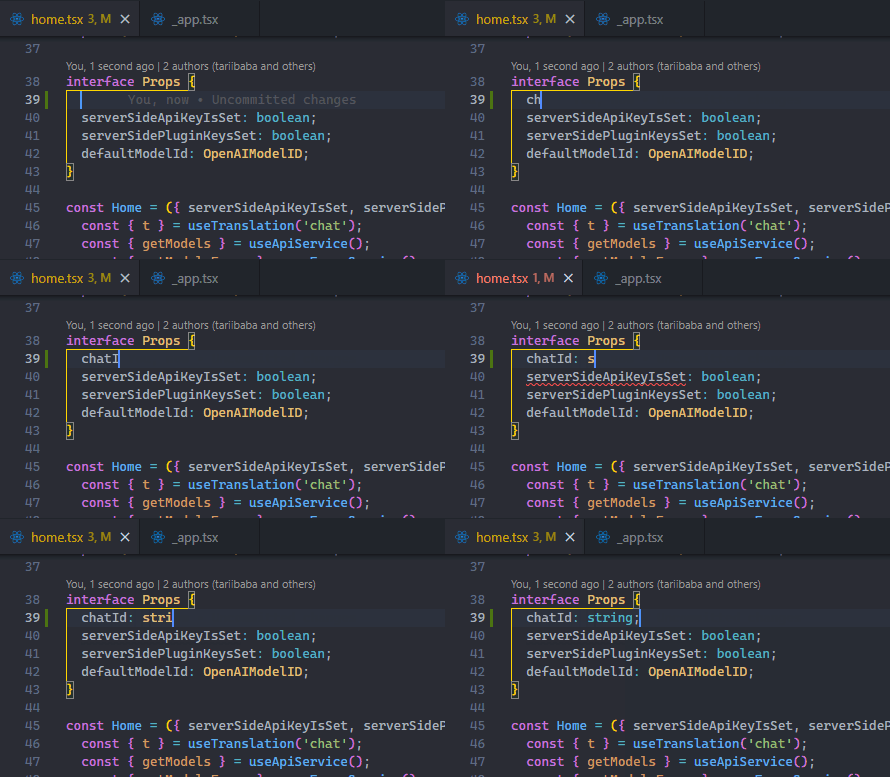
As expected VS Code has the basic zoom in & out in every text editor.
But they’re some hidden gems to quickly level up your zoom game once found.
Dig into the command palette and you’ll find Font zooming – zooming just the code without the rest of the editor UI.
Zoom with scroll
Easily adjust zoom with Ctrl + mouse scroll:
After turning on the Editor: Mouse Wheel Zoom setting:
Powerful zoom extensions
The VS marketplace is packed full with powerful, capable extensions that boost various aspects of your workflow.
For zooming, there’s none better to start with than Zoom Bar:
The first thing you notice right away after install: the exact zoom level now shows up in the status bar:
+ and - buttons are obviously to zoom in and out.
Select the zoom percentage and this dialog appears:
Just as you can see your exact zoom, you can also set it precisely with Input zoom:
And what about zooming just the terminal font?
There’s an extension for that too:
My status bar has gotten semi-painfully humongous now, but it’s clear how useful these upgrades are… They were always great for taking screenshots when I used a 768p PC.
An of course: laser-precise focus on specific lines, syntax, and details without straining your eyes. Or whatever other reason you need to zoom for.
To fix the “Command not found” error in a VS Code extension, make sure your extension registers the command under the contributed field in your package.json file:
2. Register command in package.jsonactivationEvents
To fix the “Command not found” error in a VS Code extension, make sure you’re added the command to the activationEvents array in your package.json file:
One common cause of “Command not found” error in a VS Code extension is an undetected JavaScript error. You may find such errors when you examine the VS Code console logs.
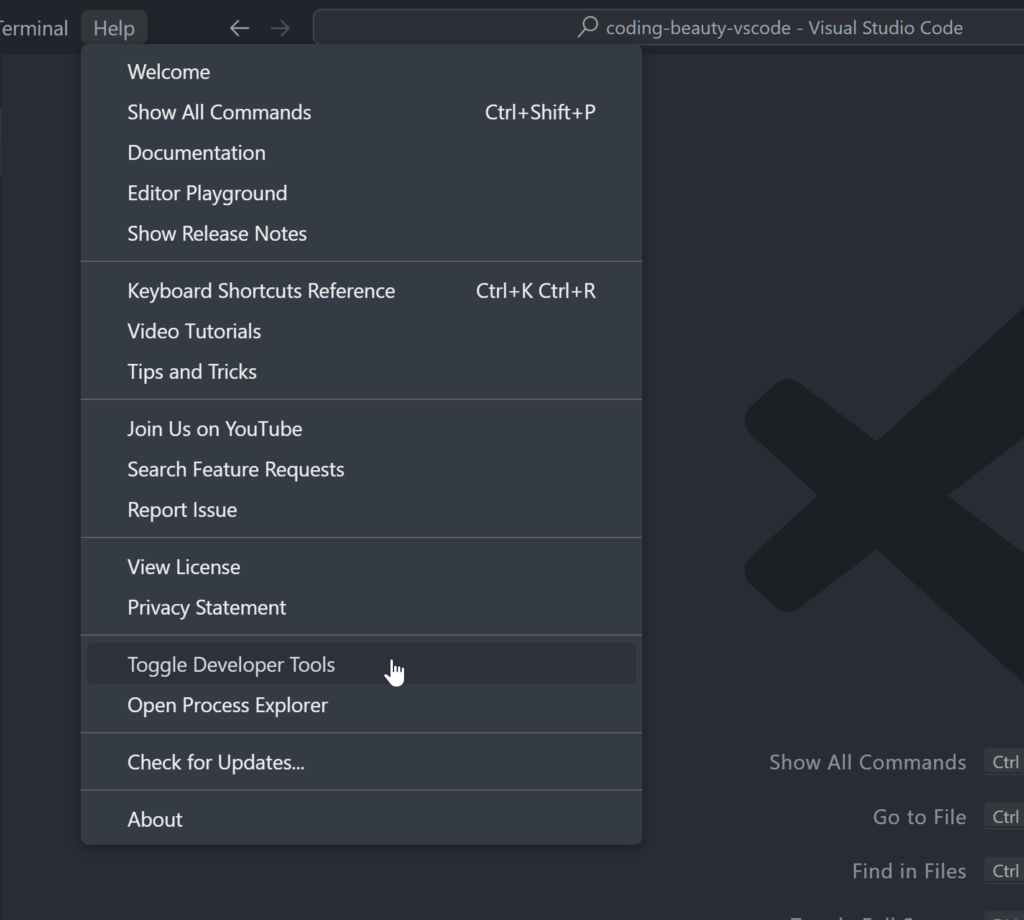
Head to the Help menu and select Toggle Developer Tools and inspect the console for potential errors.
4. Register command in extension.tsregisterCommand()
To fix the “Command not found” error in a VS Code extension, make sure you’re registered the command in extension.ts using vscode.commands.registerCommand():
JavaScriptCopied!
// ...
export async function activate(context: vscode.ExtensionContext) {
// ...
// commandAction is a callback function
context.subscriptions.push(
vscode.commands.registerCommand('command_name', commandAction)
);
// ...
}
5. Compile TypeScript source manually
The “Command not found” error happens in a VS Code extension if the TypeScript source wasn’t compiled to the out folder before launch or build.
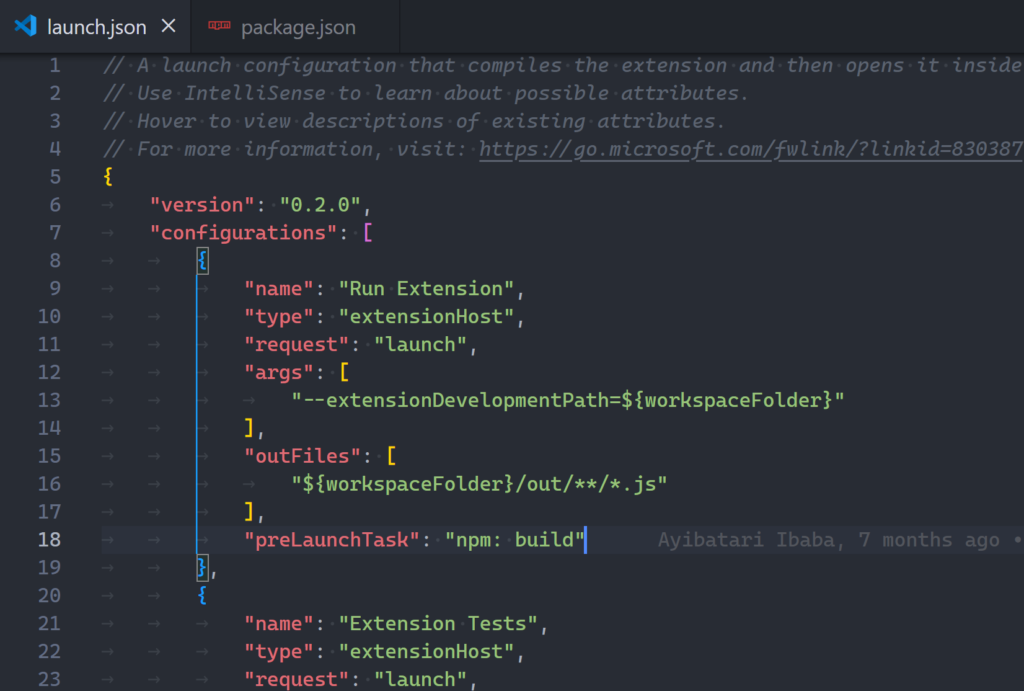
This typically indicates a problem with your VS Code debug configuration, for example, preLaunchTask may be missing from launch.json:
Or there may be a problem with the build script in package.json.
To fix the “Command not found” error in an extension, update VS Code to a version higher that what is specified in the engines.vscode field of your package.json file.
Or, downgrade engines.vscode to a version equal to or lower than the VS Code version you’re using to run the extension.
To enable or disable autosave in VS Code, use the File > Auto Save option from the menu bar.
After this, the “dirty” indicator will no longer show up when you modify a saved file.
Before:
After:
Why do we need autosave?
So we can stop mindlessly pressing Ctrl + S.
So we can save time, increase productivity, and be much more certain that we’re working with the latest changes.
Autosave is not perfect though; it’s up to you to weigh the pros and cons – which we comprehensively cover here.
What’s not to like about autosave?
Some of the cons we talk about in that autosave article:
It wastes resources because it saves even when you’re not ready to view the results of your changes.
It makes it harder to recover from unexpected errors, for example, making a buggy file change and accidentally closing the file.
There’s no auto-formatting with auto-save.
Enable/disable autosave in VS Code Settings
Alternatively, we can disable autosave in Visual Studio Code using the Files: Auto Save setting in the Settings page.
You can easily navigate to this page with the gear icon at the top-left of the code editor:
Once you get there, you can use the search bar to find the setting.
As you can see, Files: Auto Save can be one of four possible values, namely:
off – self-explanatory: disable autosave.
afterDelay: – the new value enables autosave with the File > Auto Save setting. autosaves the file sometime after your changes.
onFocusDelay – autosaves the dirty file when you switch windows or tabs.
onWindowChange – as the name implies, autosaves the unsaved file when you switch windows in the operating system.
So there are more customization options in the Settings page than in the menu bar.
Change autosave delay in VS Code
When Files: Auto Save is set to afterDelay, you can modify the autosave delay in Visual Studio Code with the Files: Auto Save Delay setting.
You may be better off increasing the autosave delay instead of disabling autosave entirely, so VS Code still saves your work automatically, while minimizing the impact on system resources.
Enable/disable autosave in VS Code with Command Palette
To turn autosave on or off in Visual Studio Code, you can also use the File: Toggle Auto Save command, accessible from the Command Palette:
You either want to reveal the current file in the VS Code Explorer sidebar view or in your OS file manager. We cover both in this article.
Reveal current file in Explorer view in VS Code
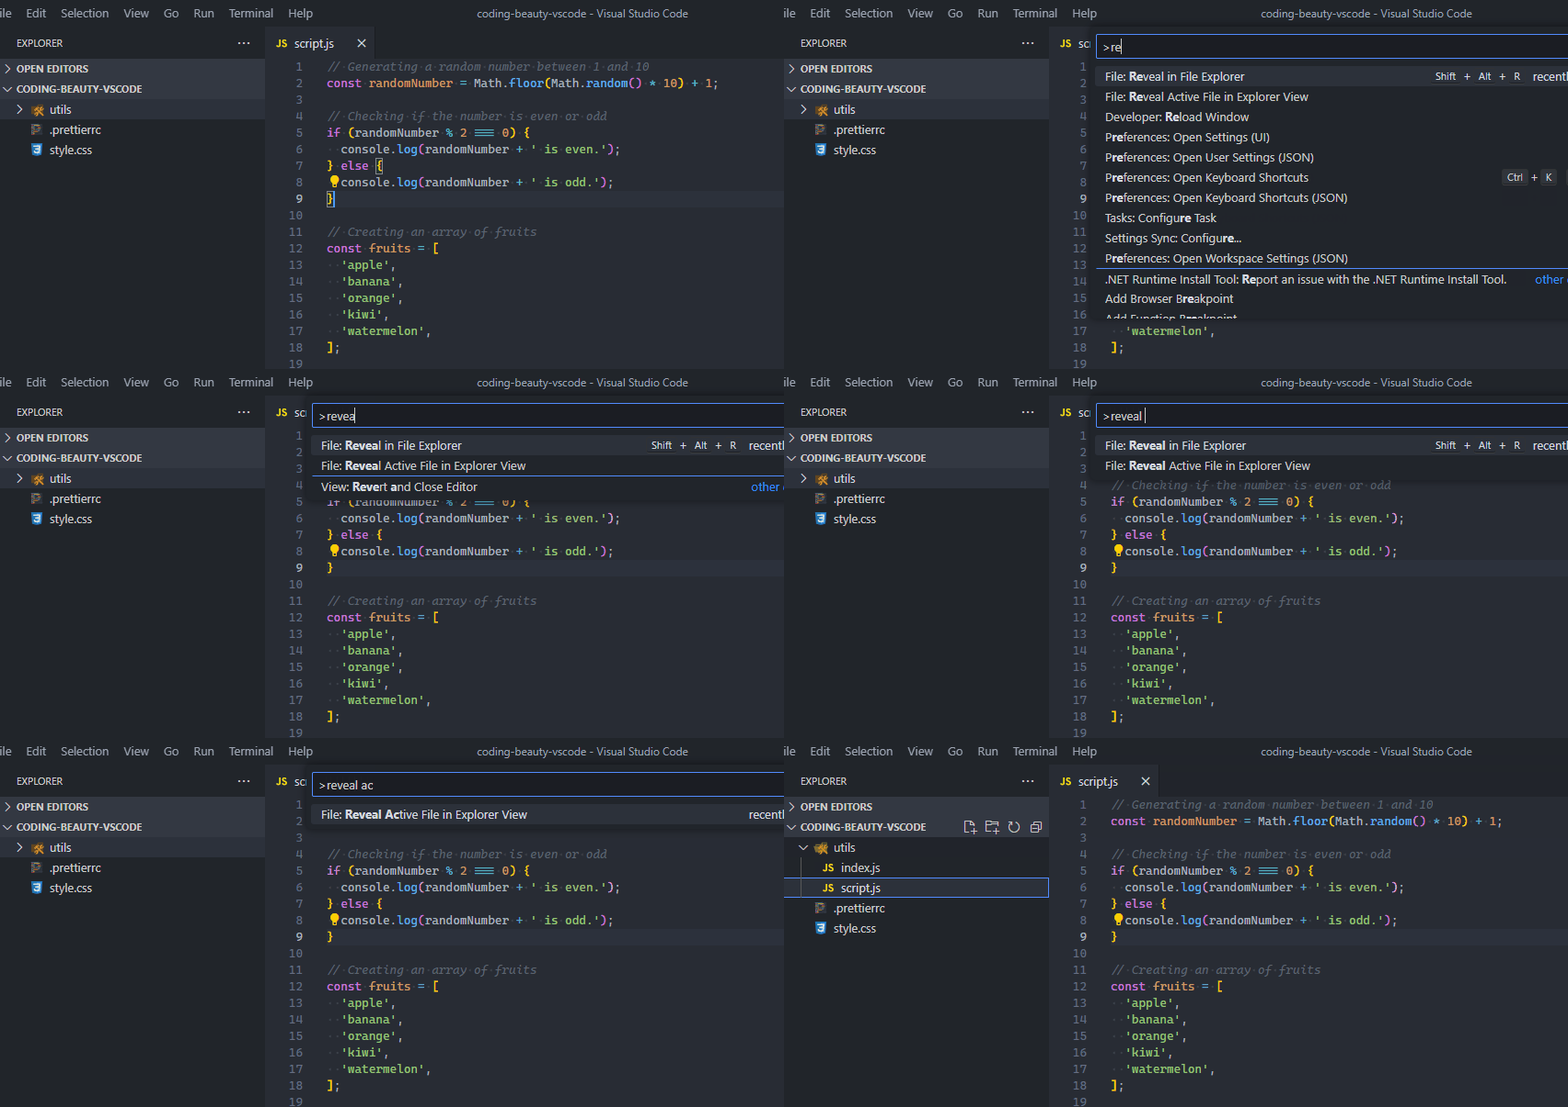
To reveal the current file in the Explorer view of Visual Studio Code, use the Reveal Active File in Explorer View command, accessible from the Command Palette.
Why is it useful to reveal the current file in the VS Code Explorer view?
When working on a project with numerous files and directories, it can sometimes be challenging to remember the exact location of a specific file. Revealing the current file in the VS Code Explorer view allows you to quickly locate the file’s position within the project structure.
Context: This is particularly useful when you want to gain a broader context of where the file is located in relation to other files and folders.
Navigation: And you can easily navigate to these related files.
File management: VS Code’s Explorer view provides file management capabilities, such as renaming, moving, and deleting files. If you’re currently editing a file and you want to perform a management action on it, revealing the file in the Explorer view makes it easier to perform these actions without having to manually navigate through the directory structure.
Version control: If your project is under version control like Git, revealing the current file in the Explorer view can help you understand the file’s status in the context of version control. You can see if the file has been modified, staged, or is part of a particular branch, which can aid in your development workflow.
Collaboration: When working on a project with others, revealing the current file can help your team members easily find and access the same file you’re working on. This is especially useful if you’re discussing a specific file in a conversation or during a code review.
Use the Reveal in File Explorer View command
To reveal the current file in the Explorer view in VS Code, run the Reveal Active File in Explorer View command.
In VS Code, we have commands – defined actions that carry our various operations in the editor.
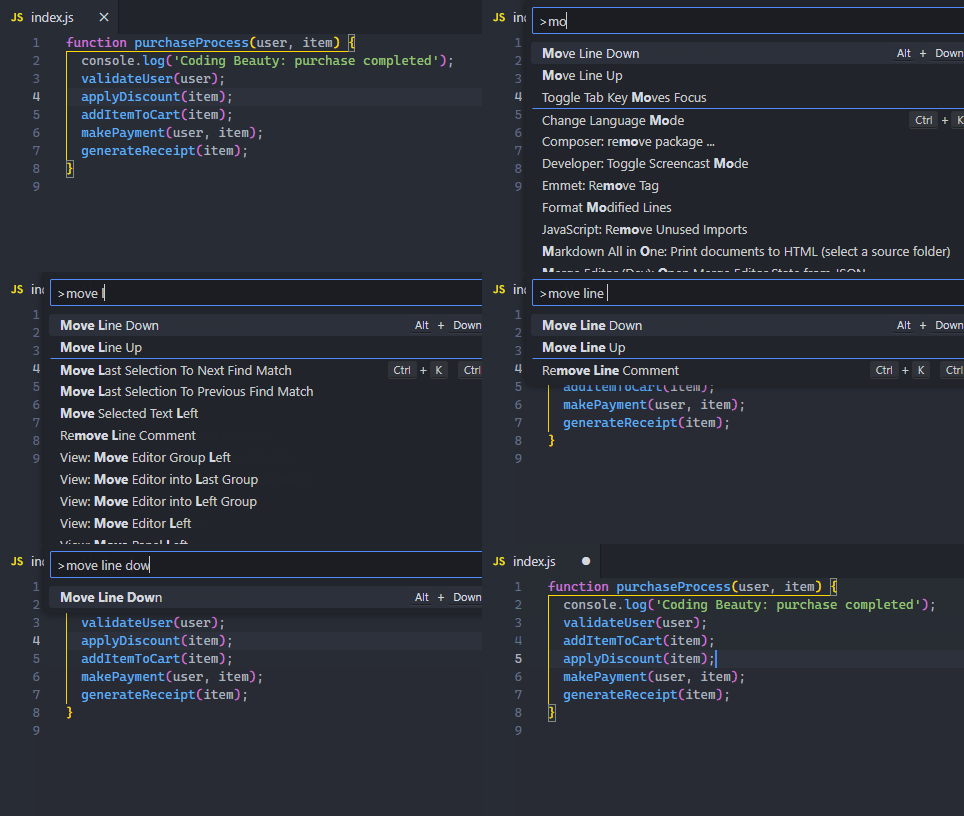
We can easily run a command with the Command Palette, which we can access with these keyboard shortcuts:
Windows / Linux: Ctrl + Shit + P
Mac: Command + Shift + P
Reveal current file in Explorer with active editor context menu
You can also reveal the current file in the VS Code Explorer sidebar with the Reveal in Explorer View option in the context menu that shows up when you right-click the filename at the top.
This item is also there in the context menu that shows when you right-click the file in the Source Control view.
Reveal current file in Windows File Explorer / Mac Finder
To reveal the current file in your operating system’s file manager, use the Reveal in File Explorer command, accessible from the Command Palette.
By the way, if you’re on Windows 11 and you’re dealing with File Explorer clutter, this tiny utility called WinENFET can help, by automatically opening File Explorer in a new tab, instead of a new window.
Why is it useful to reveal the current file in File Explorer/Finder?
When managing a project that includes many files and folders, it can occasionally become difficult to recall the precise location of a particular file. By displaying the current file in your operating system’s file manager, you can swiftly identify the file’s place within the project hierarchy.
This is useful for several reasons:
Context: Helps you understand and navigate your project’s larger file hierarchy. This is especially helpful in large projects with complex file structures.
External operations: You can perform actions not available in VS Code, like viewing file properties (creation date, size, etc.) or file permissions.
Data transfer: Allows you to quickly locate the path for file transfers. If you need to send the file as an email attachment or upload it to a server, you can quickly find it in the operating system’s file manager.
Easy access: If you’re working with a file in VS Code and you want to quickly open it in another application, revealing the file in the file manager makes this easy.
Collaboration: If you’re working with a team, it’s easy to reveal the file in the file manager, zip it, and send it to team members as needed.
Use the Reveal in File Explorer command
To reveal the current file in your OS’s file manager in VS Code, run the Reveal in File Explorer command.
In VS Code, we have commands: defined actions that carry out various operations in the editor.
We can easily run a command with the Command Palette, which we can access with these keyboard shortcuts:
Windows / Linux: Ctrl + Shit + P
Mac:Command + Shift + P
Reveal current file in File Explorer with active editor context menu
Alternatively, you can reveal the current file in your OS’s file manager with the Reveal in File Explorer option in the context menu that shows up when you right-click the filename at the top.
Set custom keyboard shortcuts for commands in VS Code
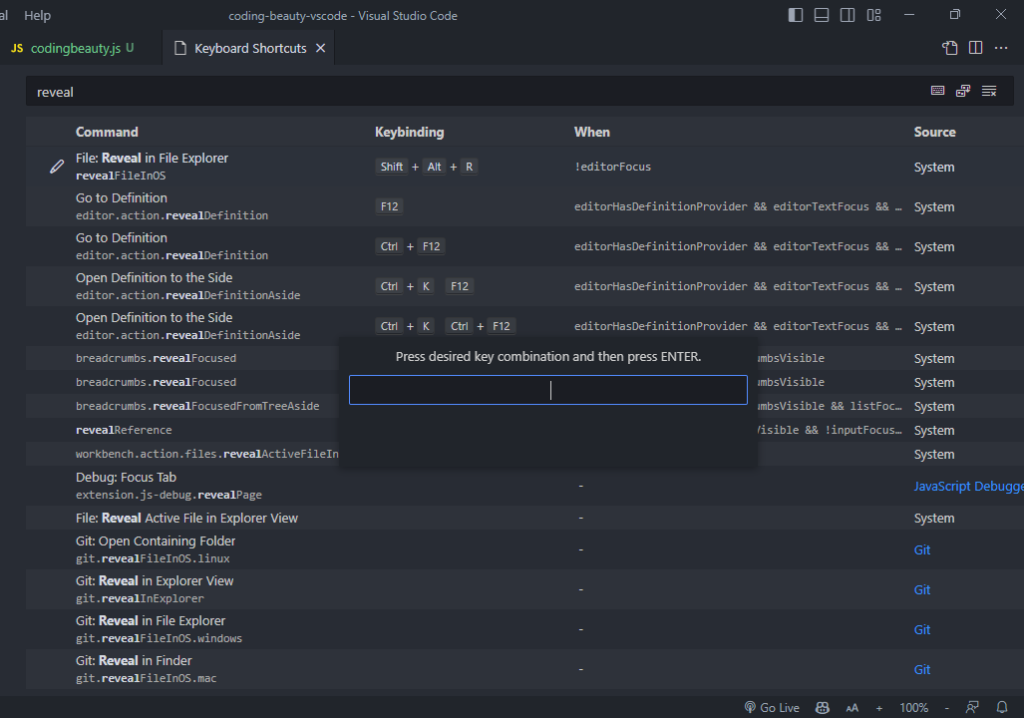
To set a custom keyboard shortcut for the Reveal in File Explorer or Reveal Active File in Explorer View command, change the keybinding for the command in the Keyboard Shortcuts page.
To get this page, you can click the Keyboard Shortcuts item on the Manage popup shown below or use the shortcut next to the text (Ctrl + K, Ctrl + S here).
Once you get there, search for the Reveal in File Explorer or Reveal Active File in Explorer View command in the search bar.
Then double-click the command, type a new keyboard shortcut, and press the Enter key to carry out the change.
Key takeaways
To reveal a file in the VS Code Explorer view, run the Reveal Active File in Explorer View command. You can do this with the Command Palette, or by setting a custom keyboard shortcut.
To reveal a file in your OS file manager (Windows File Explorer, Mac Finder, etc.), run the Reveal in File Explorer command. You can also do this with the Command Palette, or by setting a custom keyboard shortcut.
To set a keyboard shortcut for a command in VS Code, open the Keyboard Shortcuts page, select the command, type the new short, and confirm with Enter.
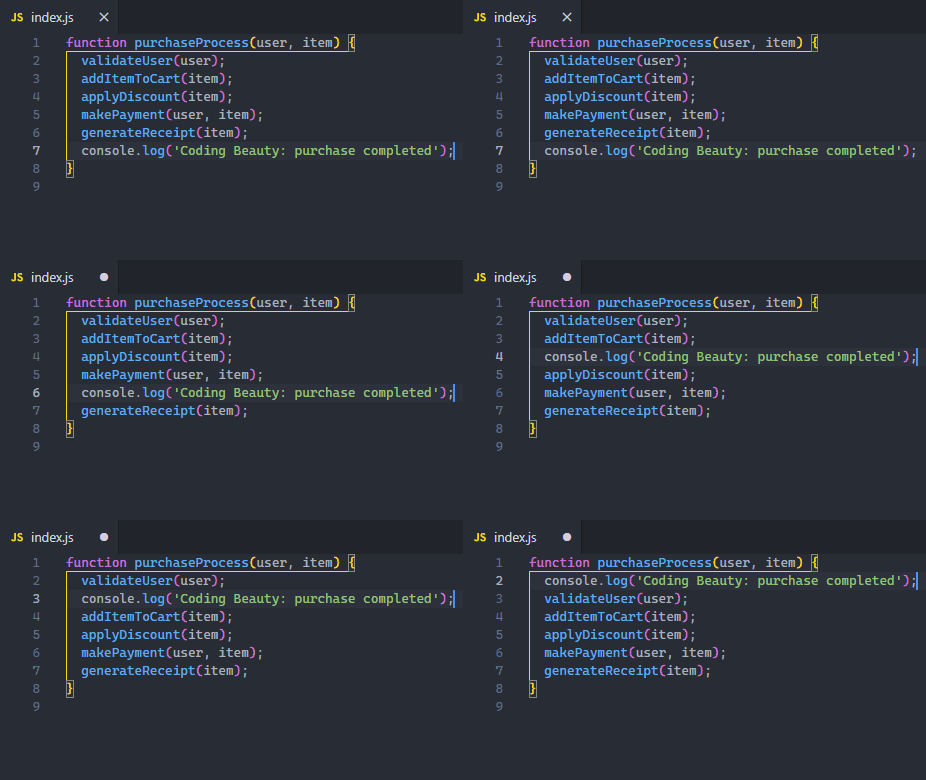
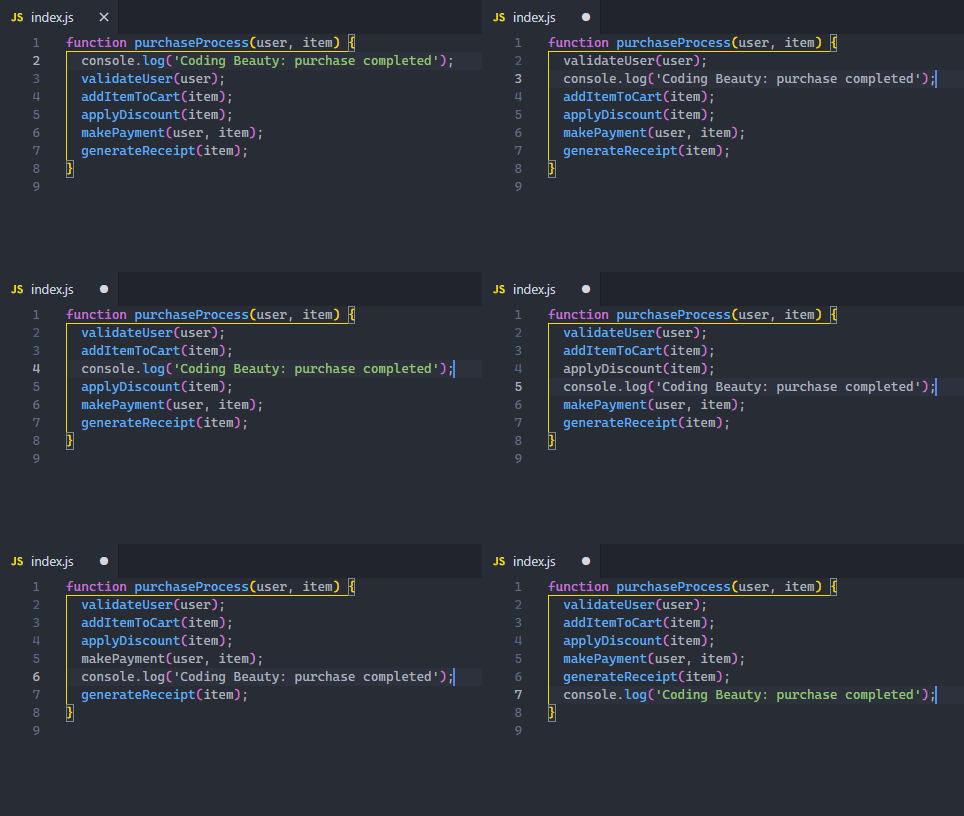
To move a line up or down in Visual Studio Code, use this keyboard shortcut:
Windows and Linux: Alt + ↑ (Up arrow) to move line up; Alt + ↓ (Down arrow) to move line down.
Mac: Option + ↑ to move line up; Option + ↓ to move line down.
Move selection up or down in VS Code
Similarly, to move a selection up or down in Visual Studio Code, use this keyboard shortcut:
Windows and Linux: Alt + ↑ (Up arrow) to move selection up, Alt + ↓ (Down arrow) to move selection down.
Mac: Option + ↑ to move selection up, Option + ↓ to move selection down.
Why would you need to move a line/selection up or down in code?
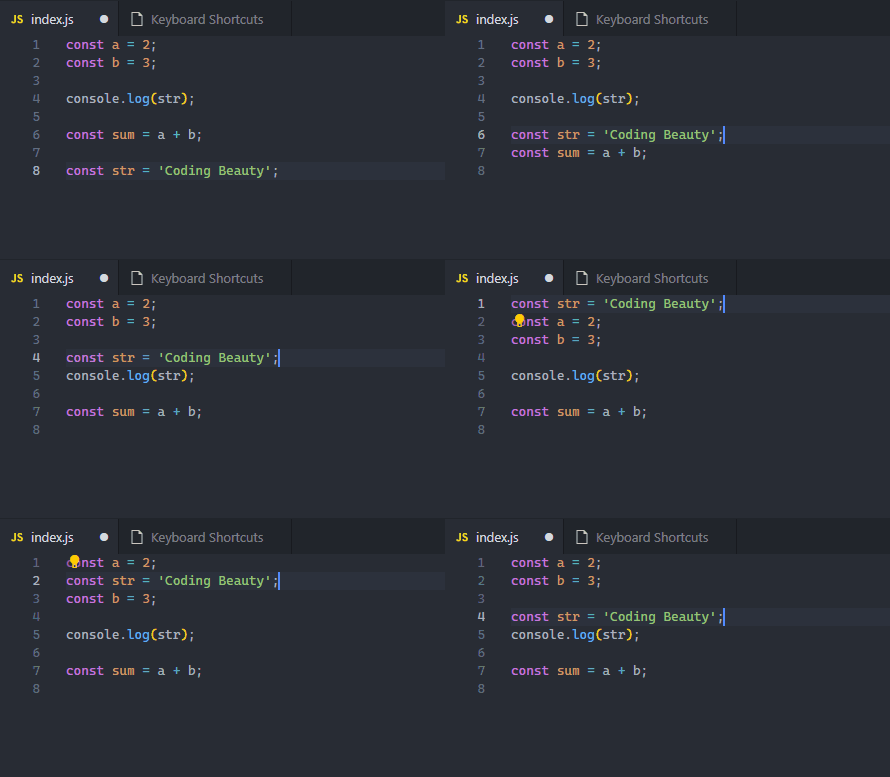
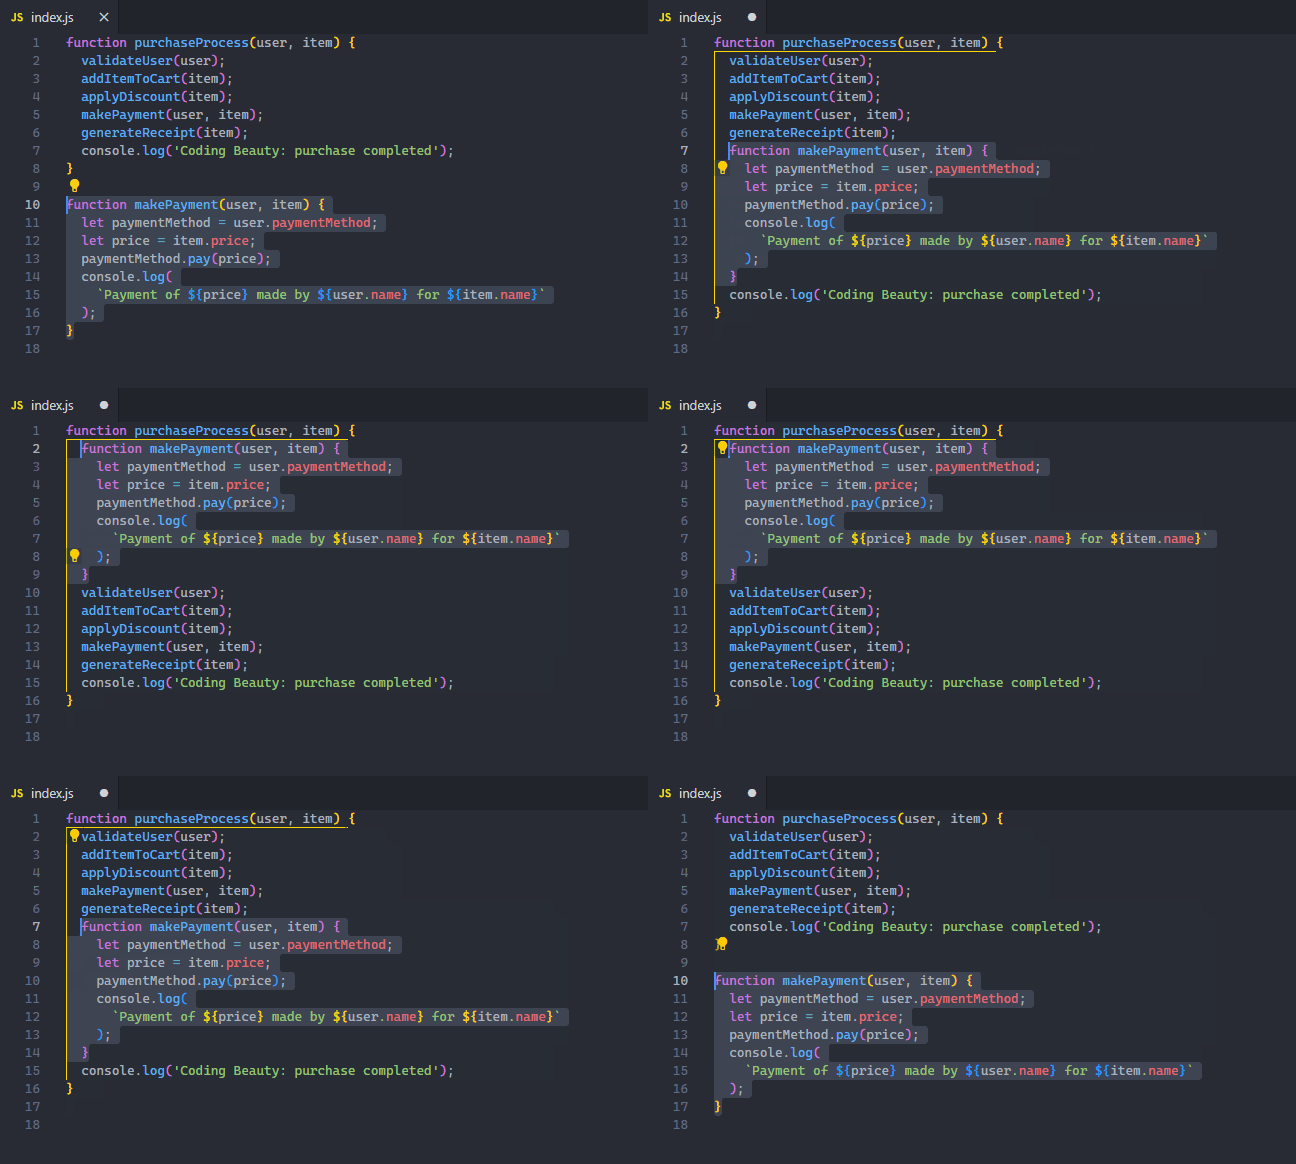
Refactoring: When cleaning up your code, you may need to move lines of code around in and out of functions and classes, to make it more readable and maintainable.
Debugging: Like when fixing that error caused by using a variable before declaration/initializing it; with the keyboard shortcuts you easily move the declaration line up before the usage.
Changing control flow: For those instances where the order of function calls or assignments need to change to reflect a new code logic update.
Commands in Visual Studio Code
In VS Code, we have commands, defined actions that carry our various operations in the editor.
We can easily run a command with the Command Palette, which we can access with these keyboard shortcuts:
Windows / Linux: Ctrl + Shit + P
Mac:Command + Shift + P
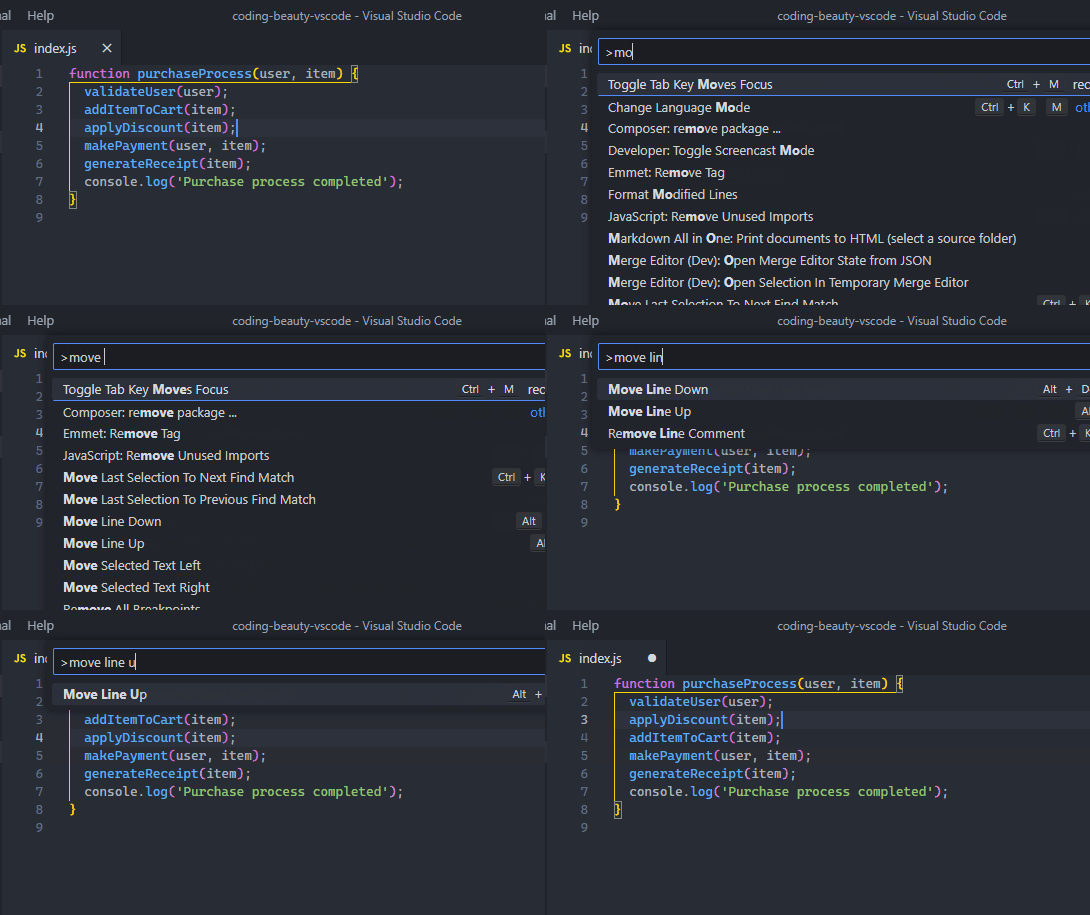
The Move Line Up command in VS Code
To move a line/selection up in Visual Studio Code, we use the Move Line Up command.
Or with the keyboard shortcuts:
Windows/Linux: Alt + ↑ (Up arrow)
Mac: Option + ↑
The Move Line Down command in VS Code
In the same manner, to move a line/selection down in Visual Studio Code, we use the Move Line Down command.
Or with the keyboard shortcuts:
Windows/Linux: Alt + ↓ (Down arrow)
Mac:Option + ↓
Change keyboard shortcut to move line up or down
Personally, I think they’re fine, but if you don’t like the keyboard shortcut to move the line up or down, then navigate to the Keyboard Shortcuts page and change the keybinding for the Move Line Up and Move Line Down commands.
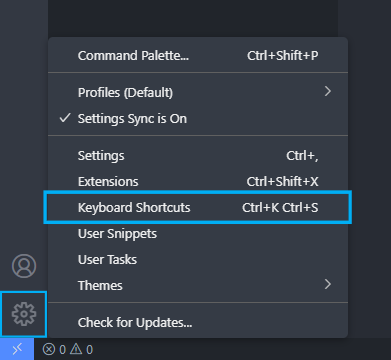
There are multiple ways to get this page; you can click the Keyboard Shortcuts item on the Manage popup shown below or use the shortcut next to the text (Ctrl + K Ctrl + S) here.
To change the keybinding, search for “move line up” or “move line down” in the search bar.
Then double-click on the Move Line Up or Move Line Down command, type a new keyboard shortcut, and press the Enter key to carry out the change.
The change here was Ctrl + E, Ctrl + E – certainly not the smartest choice, but now you’ve seen how it works.
Key takeaways
To move a line or selection up or down in Visual Studio Code, use the Alt + ↑ (Up arrow) for up and Alt + ↓ (Down arrow).
Moving lines or selections up or down in code can be useful for refactoring, debugging, and changing control flow.
You can change the keyboard shortcut to move a line up or down by changing the Move Line Up and Move Line Down command.
Autosave has grown in popularity recently and become the default for many developers and teams, a must-have feature for various code editors. Apps like Visual Studio stubbornly refuse to fully provide the feature, and others make it optional. WebStorm, PHPStorm, and other JetBrains products have it enabled by default; for VSCode, you have to turn it on if you want it.
So obviously, we have two opposing views on the value of autosave because even though it can be highly beneficial, it has its downsides. In this article, we’ll look at both sides of the autosave divide, good causes for turning it off and good causes not to.
Why you should stop autosaving your code
First, some reasons to think twice before enabling autosave in your code editor:
1. Higher and wasted resource usage
When using tools that perform an expensive action any time the file is changed and saved, like build watchers, continuous testing tools, FTP client file syncers, etc, turning on autosave will make these actions much more often. They will also happen when there are errors in the file, and when you make a tiny change. It might instead be preferable for these tools to run only when they need to; when you reach a point where you really want to see the results of your changes.
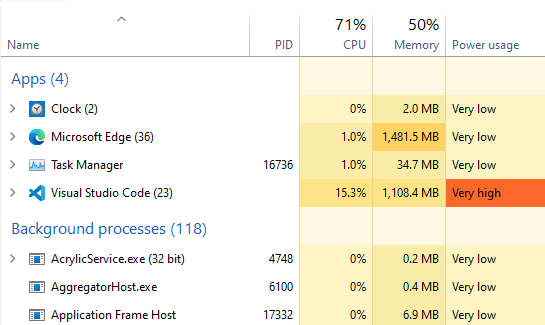
With greater CPU and memory usage comes lower battery usage and more heat from higher CPU temperature. Admittedly, this will continue to become less and less of an issue as computers increase in processing power, memory capacity, and battery life across the board. But depending on your particular situation, you might want to conserve these things as much as possible.
2. Harder to recover from unexpected errors
With autosave enabled, any single change you make to your code file is written to disk, whether these changes leave your file in a valid state or not. This makes it harder to recover from unwanted changes.
What if you make an unintended and possibly buggy change, maybe from temporarily trying something out, and then close the file accidentally or unknowingly (autosave makes this more likely to happen)? With your Undo history wiped out, it will be harder to recover the previous working version of the file. You might even forget how the code used to look before the change, and then have to expend some mental effort to take the code back to what it was.
Of course, using version control tools like Git and Mercurial significantly decrease the chances of this happening. Still, the previous working version of the file you would want to recover could be one with uncommitted changes, not available from version control, especially if you don’t commit very frequently or you have a commit scheduling determined by more than just the code working after small changes, e.g., committing when a mini milestone is reached, committing after every successful build, etc.
So if you want to continue enjoying the benefits of auto-save while minimizing the possibility of this issue occurring, it’s best if you always use source control and have a frequent commit schedule.
3. No auto-formatting on save
Many IDEs and text editors have a feature that automatically formats your code, so you can focus on the task at hand. For example, VSCode has built-in auto-formatting functionality, and also allows extensions to be written to provide more advanced or opinionated auto-formatters for various languages and file extensions.
These editors typically provide an option to format the file when it is saved. For manual saving, this makes sense, as usually you Ctrl/Cmd + S after making a small working change to a file and stop typing. This seems like a great point for formatting, so it’s a great idea to combine it with the saving action so there’s no need to think about it.
However, this feature isn’t very compatible with auto-save, and that’s why editors/IDEs like WebStorm and VSCode do not format your code for you on auto-save (you can still press Ctrl (Cmd) + S for it to happen, but isn’t one of the reasons for enabling auto-save to avoid this over-used keyboard shortcut?).
For one, it would probably be annoying for the cursor to change position due to auto-formatting as you’re typing. And then, there’s also the thing we already talked about earlier – the file won’t always be syntactically valid after an auto-save, and the auto-formatter will fail.
There is one way though, to have auto-formatting while still leaving auto save turned on, and that is enabling auto-formatting on commit. You can do this using Git pre-commit hooks provided by tools like Prettier and Husky.
Still only happens on commit though, so unless your code is not too messed up or you’re ready to format manually, you’ll have to endure the disorderliness until your next commit (or just press that Ctrl + S).
4. Can be distracting
If you have a tool in your project that performs an action when files are saved and indicate this visually in your editor, i.e, a pop-up notification to indicate recompilation, output in the terminal to indicate rebuilding, etc. With auto-save turned on, it can be a bit distracting for these actions to occur whenever you stop typing for a little while.
For instance, in this demo, notice how the terminal output in VSCode changes wildly from typing in a small bunch of characters:
Text editors have tried to fix this problem (and the resource usage problem too) by adding autosave delays; waiting a certain period of time since the file was last changed before actually committing the changes to disk.
This reduces the frequency at which the save-triggering actions occur and solves the issue to an extent, but it’s a trade-off as lack of immediate saving produces another non-ideal situation.
5. Auto-save is not immediate
Having an auto-save delay means that your code file will not be saved immediately. This can lead to some problems:
Data loss
Probably the biggest motivator for enabling auto-save is to reduce the likelihood that you’ll lose all the hard work you’ve put into creating code should an unexpected event like a system crash or the forced closing of the application occur. The higher your auto-save delay, the greater the chance of this data loss happening.
VSCode takes this into account; when its auto-save delay is set to 2 or more seconds, it will show the unsaved file indicator for a recently modified file, and the unsaved changes warning dialog if you try to close the file until the delay completes.
On-save action lags
Tools that run on save like build watchers will be held back by the auto-save delay. With manual save, you know that hitting Ctrl + S will make the watcher re-build immediately, but with delayed auto-save, you’ll have to experience the lag between your finishing and the watcher reacting to changes. This could impact the responsiveness of your workflow.
Why you should autosave your code
The reasons above probably won’t be enough to convince many devs to disable autosave. It is a fantastic feature after all. And now let’s look at some of the reasons why it’s so great to have:
1. No more Ctrl + S fatigue
If you use manual save, you probably press this keyboard shortcut hundreds or even thousands of times in a working day. Auto-saving helps you avoid this entirely. Even if you’re very used to it now, once you get used to your files being autosaved, you’ll be hesitant to back to the days of carrying out the ever-present chore of Ctrl + S.
Eradicating the need for Ctrl + S might even lower your chances of suffering from repetitive strain injury, as you no longer have to move your wrists and fingers over and over to type the key combination.
2. Save time and increase productivity
The time you spend pressing the key combination to save a file might not seem like much, but it does add up over time. Turning auto-save on lets you use this time for more productive activities. Of course, if you just switched to auto-save, you’ll have to work on unlearning your Ctrl + S reflex for this to be a benefit to you.
3. Certainty of working with latest changes
Any good automation turns a chore into a background operation you no longer have to think about. This is what auto-save does to saving files; no longer are you unsure of whether you’re working with the most recent version of the file. Build watchers and other on-file-change tools automatically run after the file’s contents are modified, and display output associated with the latest file version.
4. Avoids errors due to file not being saved
This follows from the previous point. Debugging can be a tedious process and it’s not uncommon for developers to forget to save a file when tirelessly hunting for bugs. You probably don’t want to experience the frustration of scrutinizing your code, line after line, wondering how this particular bug can still exist after everything you’ve done.
You might think I’m exaggerating, but it might take up to 15 (20? 30??) minutes before you finally notice the unsaved file indicator. Especially if you’ve been trapped in a cycle of making small changes, saving, seeing the futility of your changes, making more small changes, saving… when you’re finally successful and pressing Ctrl + S is the only issue, you might just assume your change didn’t work, instead of checking for other possible reasons for the reoccurrence of the error.
5. Encourages smaller changes due to triggering errors faster
When a tool performs an action due to a file being saved, the new contents of the file might be invalid and trigger an error. For example, a test case might fail when a continuous testing tool re-runs or there might be a syntax error when a build watcher re-builds.
Since this type of on-file-change action occur more (possibly much more) when files are auto-saved when you type code that causes an error, it will take a shorter time for the action to happen and for you to be notified of the error. You would have made a smaller amount of code changes, which will make it easier to identify the source of the error.
Conclusion
Autosave is an amazing feature with the potential to significantly improve your quality of life as a developer when used properly. Still, it’s not without its disadvantages, and as we saw in this article, enabling or disabling it is a trade-off to live with. Choose auto-format on save and lower CPU usage, or choose to banish Ctrl + S forever and gain the certainty of working with up-to-date files.
What are your views concerning the autosave debate? Please let me know in the comments!