VS Code’s new agentic editing mode is simply amazing. I think I might have to make it my main IDE again.
It’s your tireless autonomous coding companion with total understanding of your entire codebase — performing complex multi-step tasks at your command.
Competitors like Windsurf and Cursor have been stealing the show for weeks now, but it looks like VS Code and Copilot are finally fighting back.
It’s like to Cursor Composer and Windsurf Cascade but with massive advantages.
This is the real deal
Forget autocomplete, this is the real deal.
With agent mode you tell VS Code what to do with simple English and immediately it gets to work:
Analyzes your codebase
Plans out what needs to be done
Creates and edit files, run terminal commands…
Look what happened in this demo:
She just told Copilot:
“add the ability to reorder tasks by dragging”
Literally a single sentence and that was all it took. She didn’t need to create a single UI component, didn’t edit a single line of code.
This isn’t code completion, this is project completion. This is the coding partner you always wanted.
Pretty similar UI to Cascade and Composer btw.
It’s developing for you at a high level and freeing you from all the mundane + repetitive + low-level work.
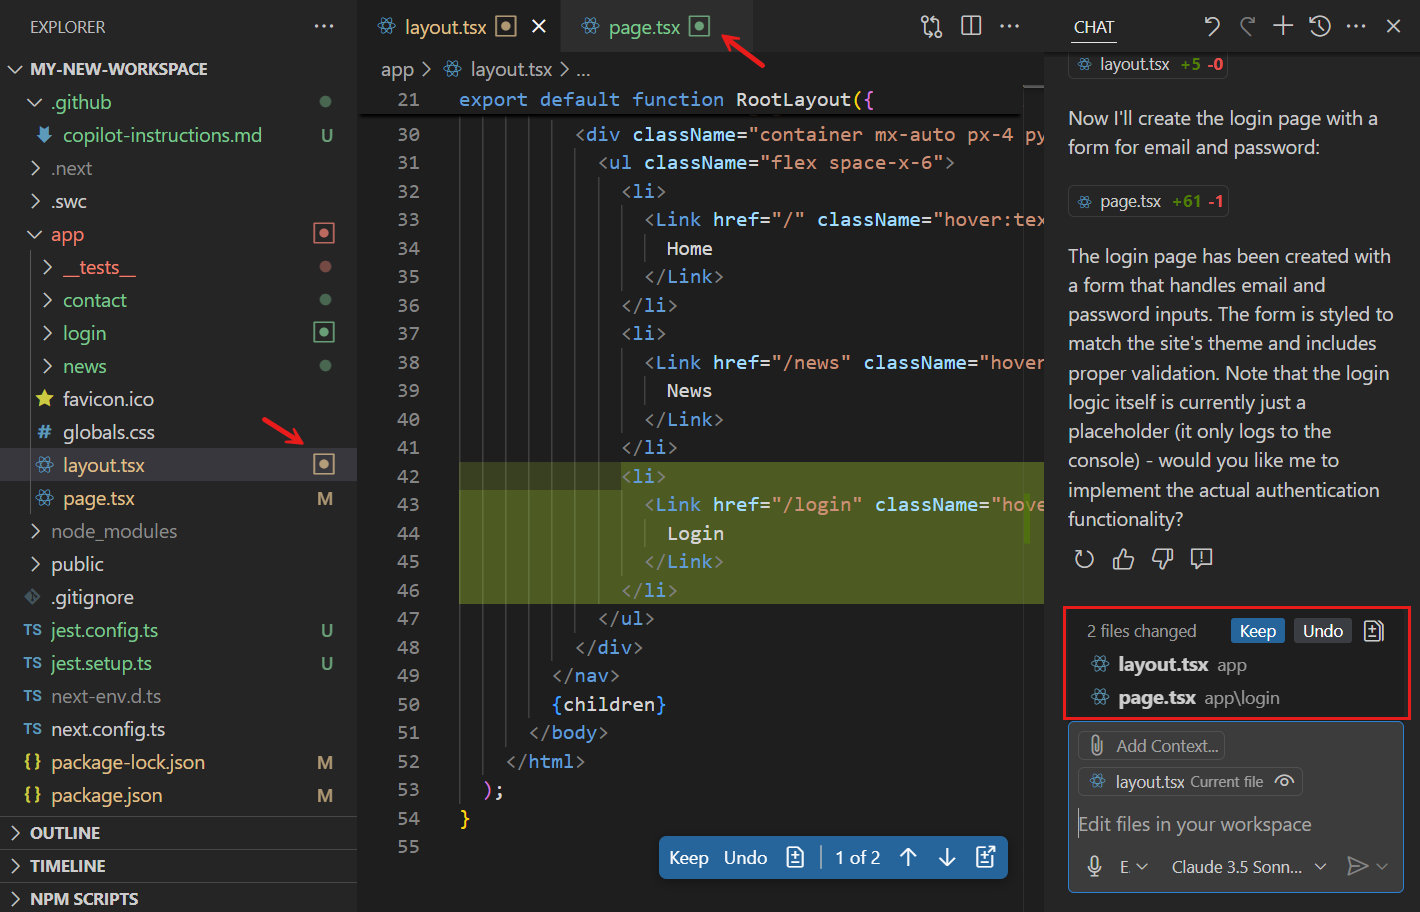
No sneak changes
You’re still in control…
Agent mode drastically upgrades your development efficiency without taking away the power from you.
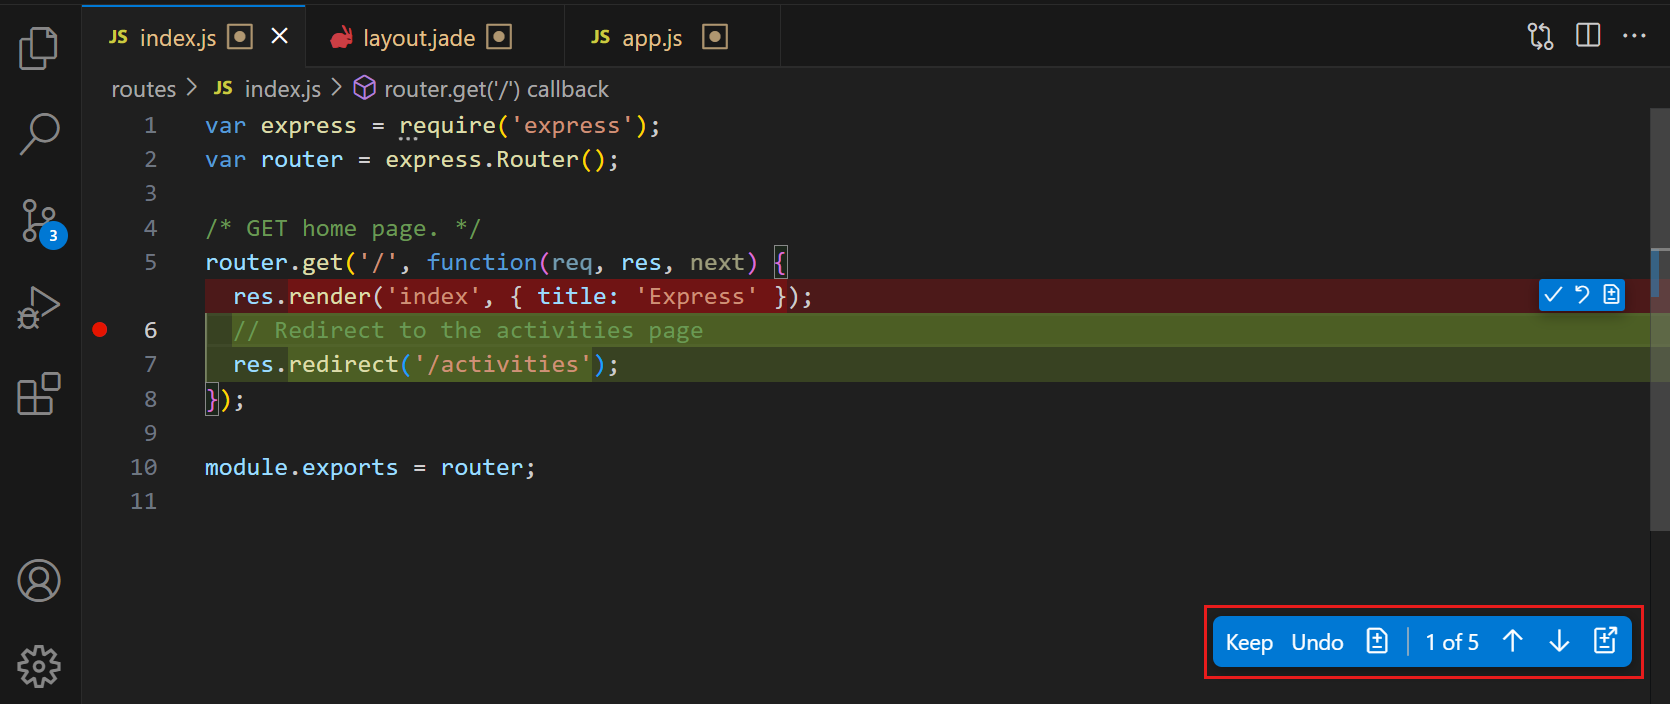
For every action it takes it’ll check with you when:
It wants to run non-default tools or terminal commands.
It’s about to make edits — you can review, accept, tweak, or undo them.
You want to pause or stop its suggestions anytime.
You’re the driver. It’s just doing the heavy lifting.
Supports that MCP stuff too
Model Context Protocol standardizes how applications provide context to language models.
Agent Mode can interact with MCP servers to perform tasks like:
AI web debugging
Database interaction
Integration with design systems.
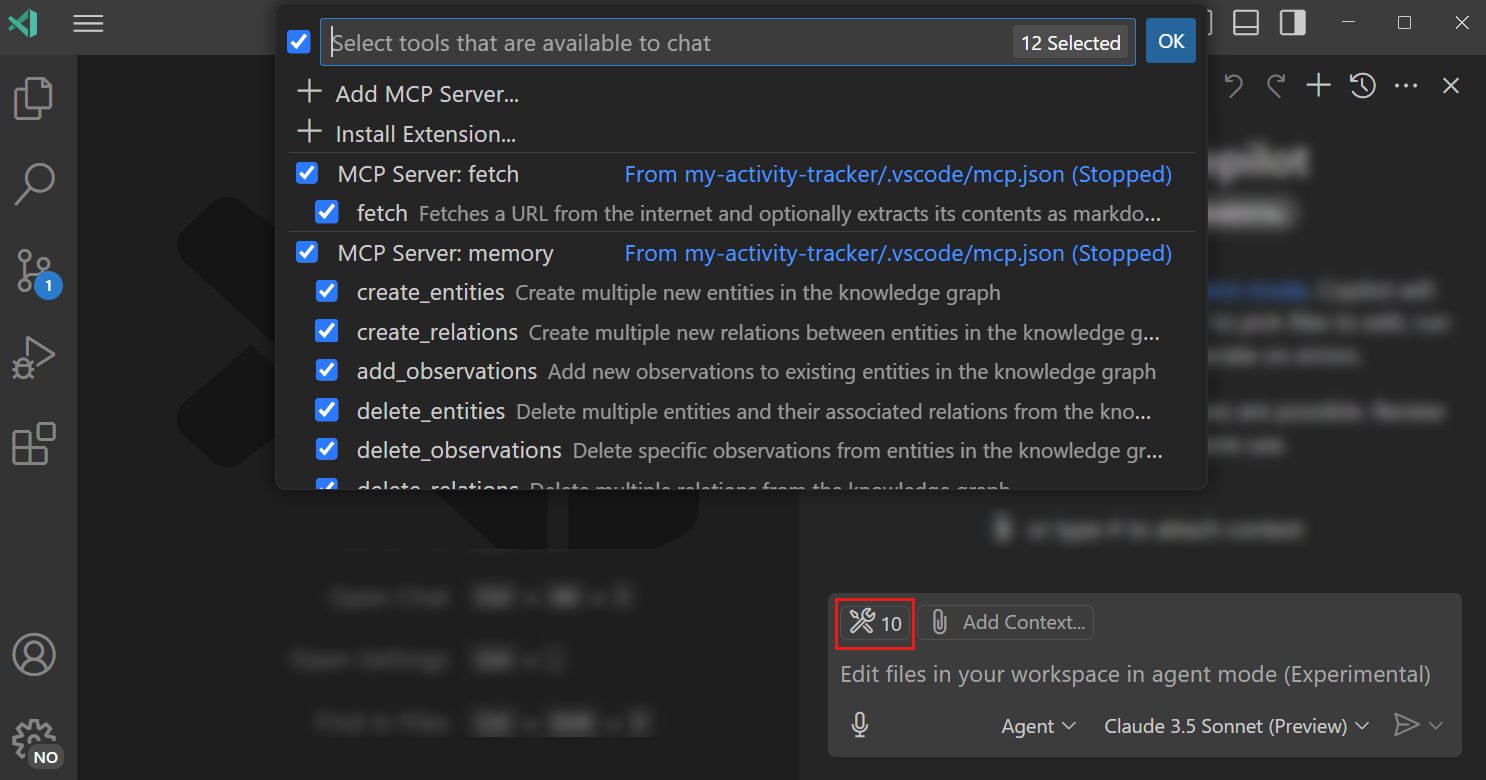
You can even enhance the Agent Mode’s power by installing extensions that provide tools for the agent can use.
You have all the flexibility to select which tools you want for any particular agent action flow.
You can try it now
Agent Mode is free for all VS Code / GitHub Copilot users.
Mhmm I wonder if this would have been the case if they never had the serious competition they do now?
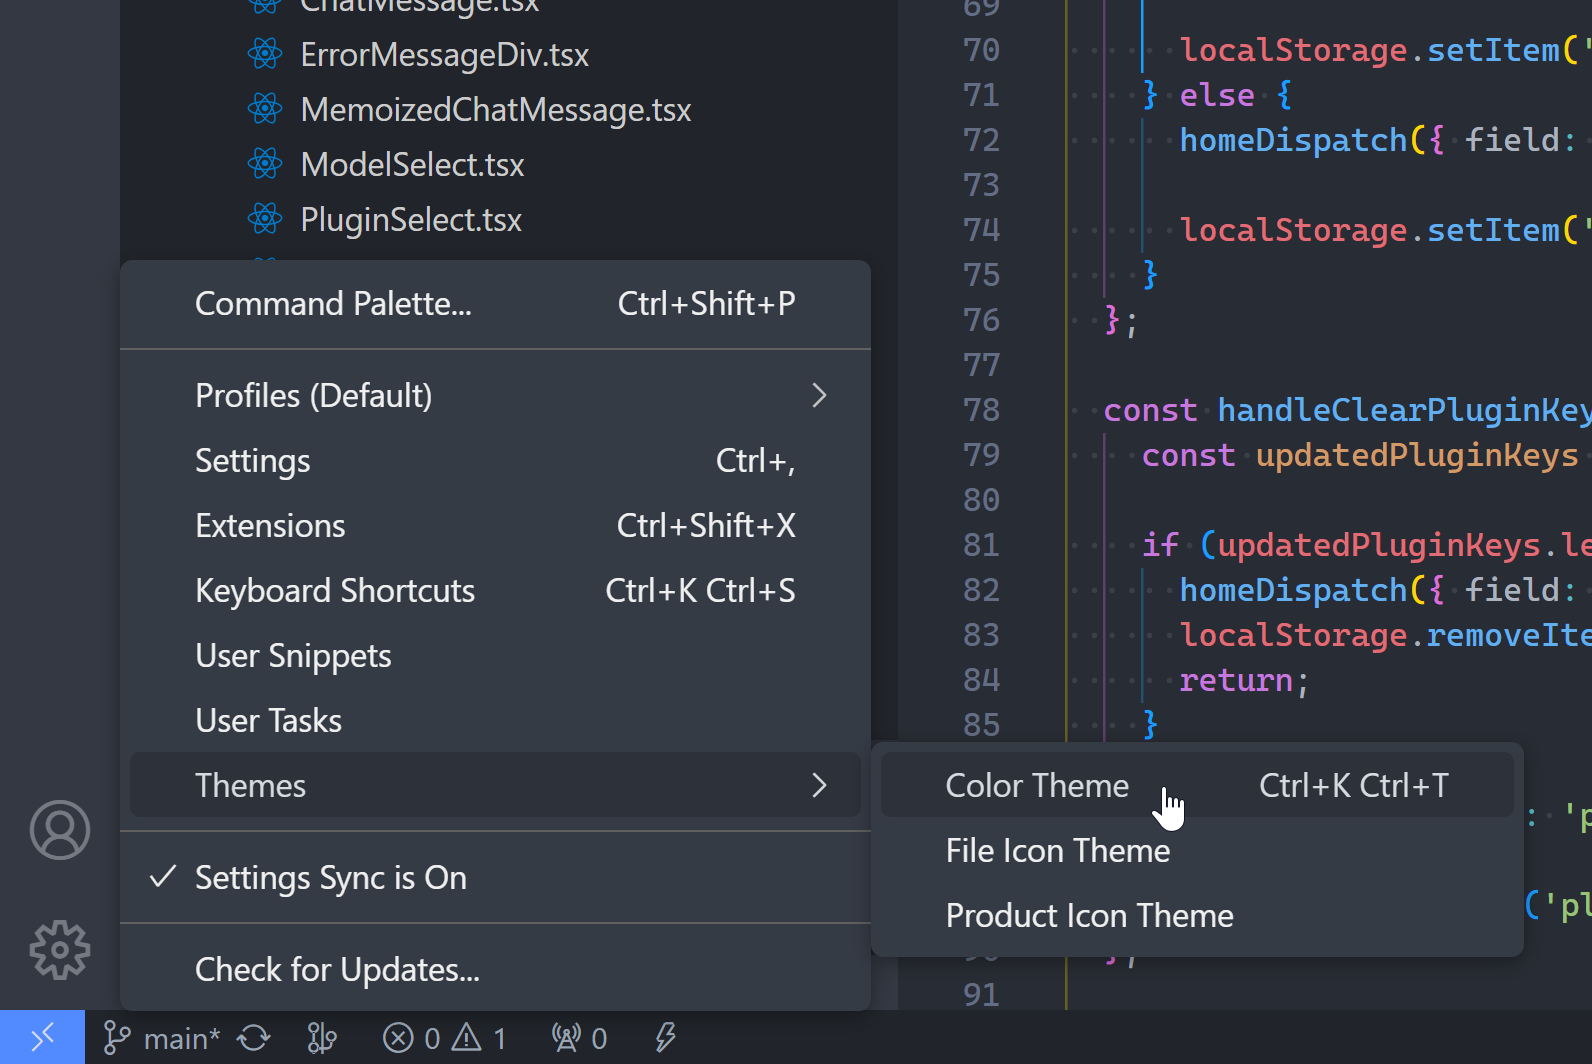
So here’s how to turn it on:
Open your VS Code settings and set "chat.agent.enabled" to true (you’ll need version 1.99+).
Open the Chat view (Ctrl+Alt+I or ⌃⌘I on Mac).
Switch the chat mode to “Agent.”
Give it a prompt — something high-level like: “Create a blog homepage with a sticky header and dark mode toggle.”
Then just watch it get to work.
When should you use it?
Agent Mode shines when:
You’re doing multi-step tasks that would normally take a while.
You don’t want to micromanage every file or dependency.
You’re building from scratch or doing big codebase changes.
For small edits here and there I’d still go with inline suggestions.
Final thoughts
Agent Mode turns VS Code into more than just an editor. It’s a proper assistant — the kind that can actually build, fix, and think through problems with you.
VS Code is no longer about having an open-source lightweight editor freely available to anyone.
Now it’s about winning the AI race with GitHub Copilot.
At first they were playing it cool — Copilot was just another extension you installed like Tabnine and others.
But soon VS Code slowly started being used more and more as a marketing platform to get people to pay for Copilot.
Copilot promo in the Welcome Page — a great, hard-to-miss location right?
And if you miss that, you most certainly wouldn’t miss the Copilot button right next to the search bar.
Visible not just on the Welcome page but on any page — or no page open at all.
I knew it once I saw this button appear. Yet another app had hopped on the AI train.
Copilot was no longer being treated as just another VS Code extension, but a core part of the editor.
The face of VS Code.
When you think of VS Code, you are to immediately think of Copilot.
Well shouldn’t we have seen this coming.
No matter how much they tuned down the branding and positioned it as a free and happy open-source tool, at the end of the day it was always a corporate-owned product.
They always had the power to change the direction it would take in the future.
And with all the serious competition from Cursor and Windsurf it was only a matter of time.
Especially with these alternatives being forks of VS Code — incredibly easy to switch and still feel at home.
It was the same competition that forced them to create a free tier for Copilot.
Every single IDE is going the AI way and they have to keep up.
They’re not the only ones feeling the heat too.
JetBrains is about to make AI take the center-stage in all their IDEs with a new agentic tool called Junie.
After the disastrous performance of their AI Assistant they also realized they needed to step up their AI game.
So very soon WebStorm and Pycharm and IntelliJ are going to be all about AI.
Android Studio not left behind.
We can complain about this as much as we want but this is the direction everyone is taking now.
Many other apps like Notion and Adobe tools have also made people angry about their heavy focus on AI at the cost of other features and fixes.
But the AI wave will continue to spread.
AI in your sleep, AI when you wake up, AI for breakfast lunch and dinner. AI before bed.
10 powerful VS Code tricks to massively enhance your productivity.
From rapid navigation to speedy code editing, these tips will help you achieve your coding goals faster than ever with a top-notch development experience.
1. Publish repo to GitHub in literal seconds
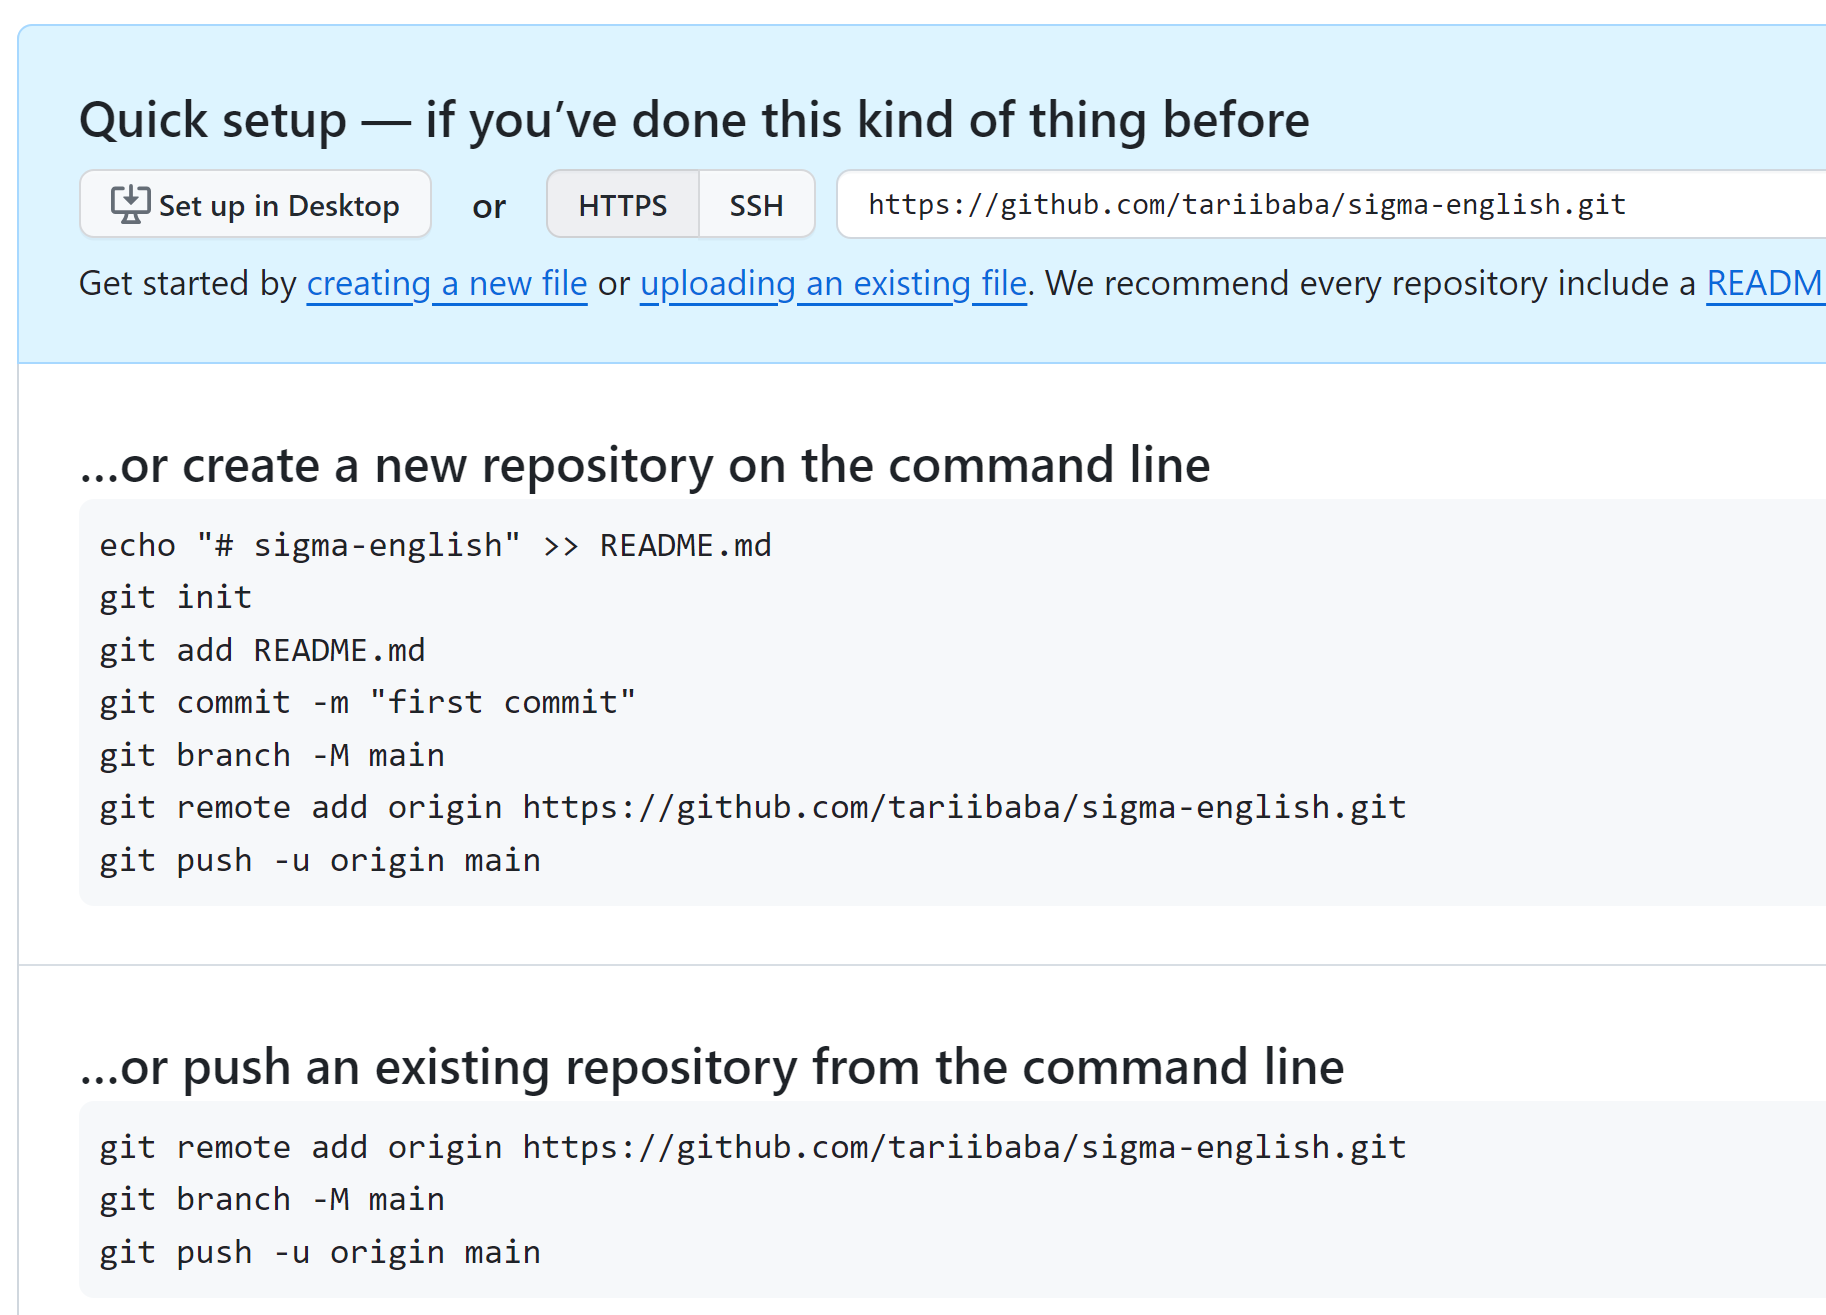
Do you remember this?
Or maybe you still do this?
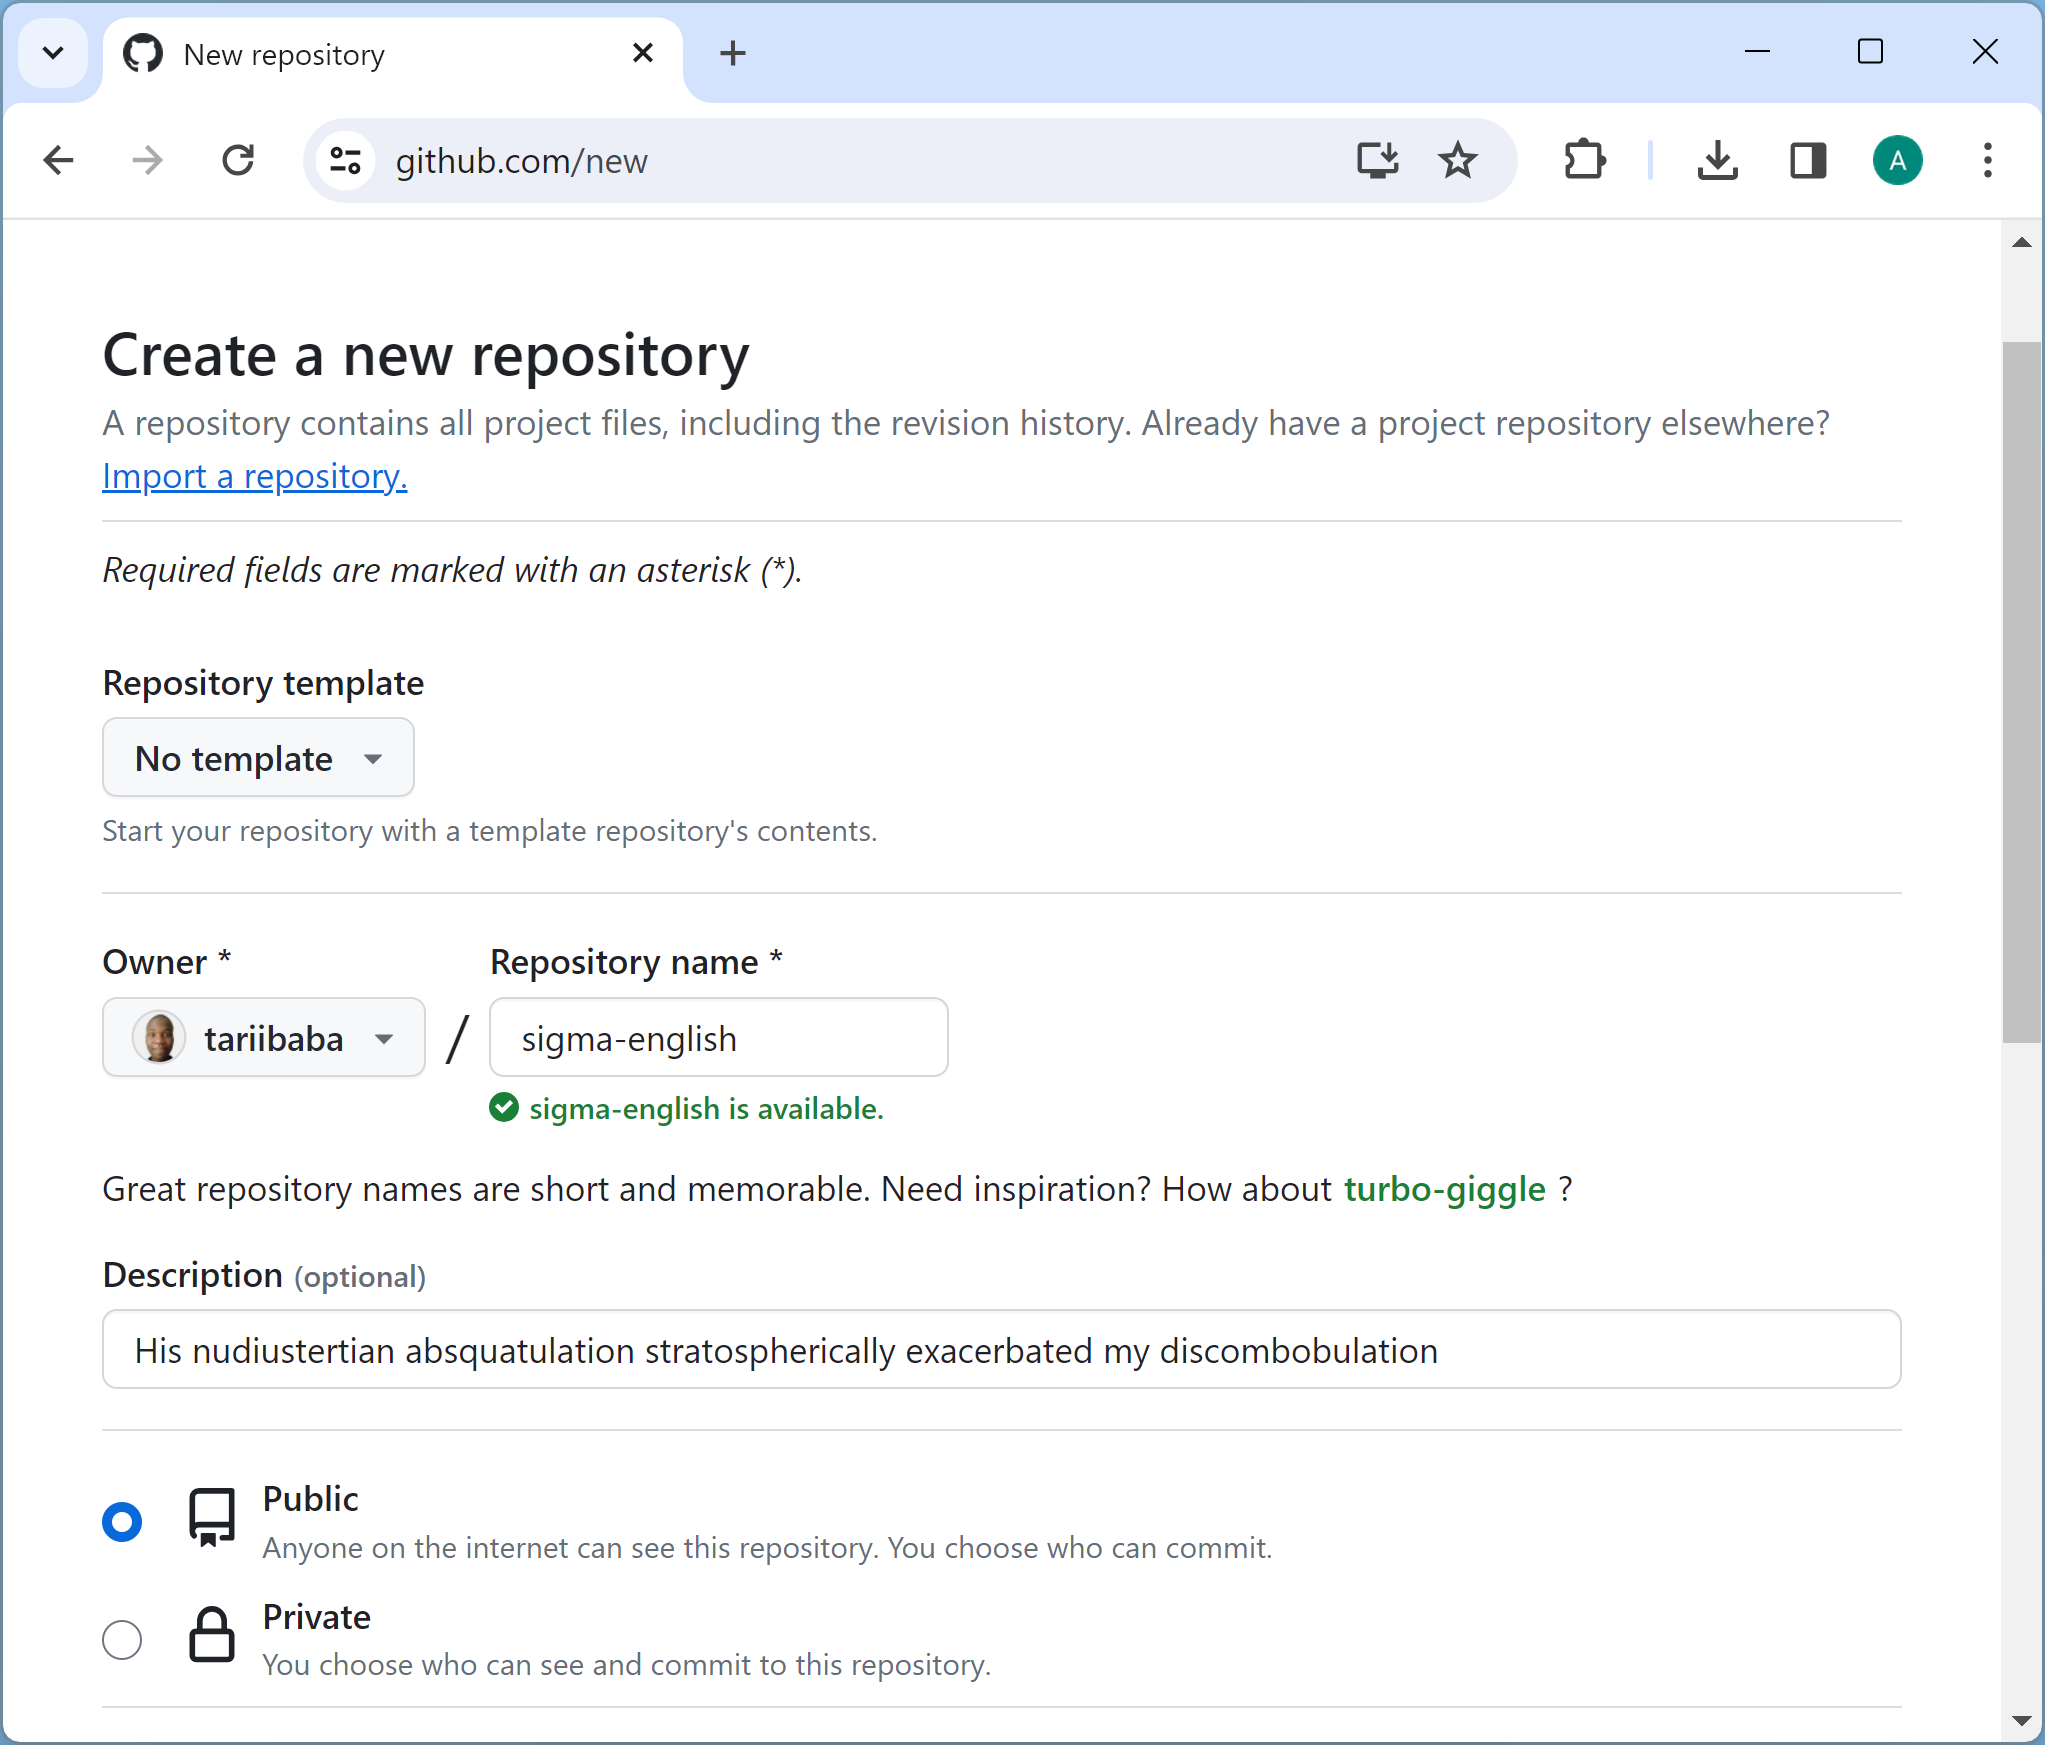
It’s the old-school way of publishing your code to GitHub. Create a repo, enter name and details, create remotes…
With VS Code you don’t need to do this anymore. From the Source Control panel you can now quickly publish any local repo to GitHub in just 2 clicks.
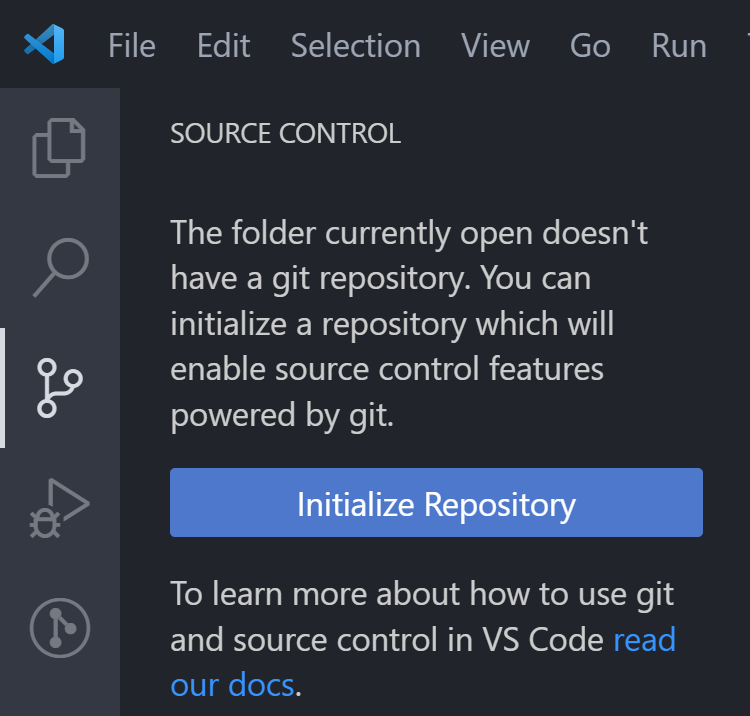
And forget git init: creating the repo is even easier with a single click:
You can safely forget about git init
Quickly commit with Ctrl + Enter:
Now easily publish your repo in seconds:
Okay this is definitely more than “seconds” — but that was the Internet connection’s fault. Ideally it should be like this:
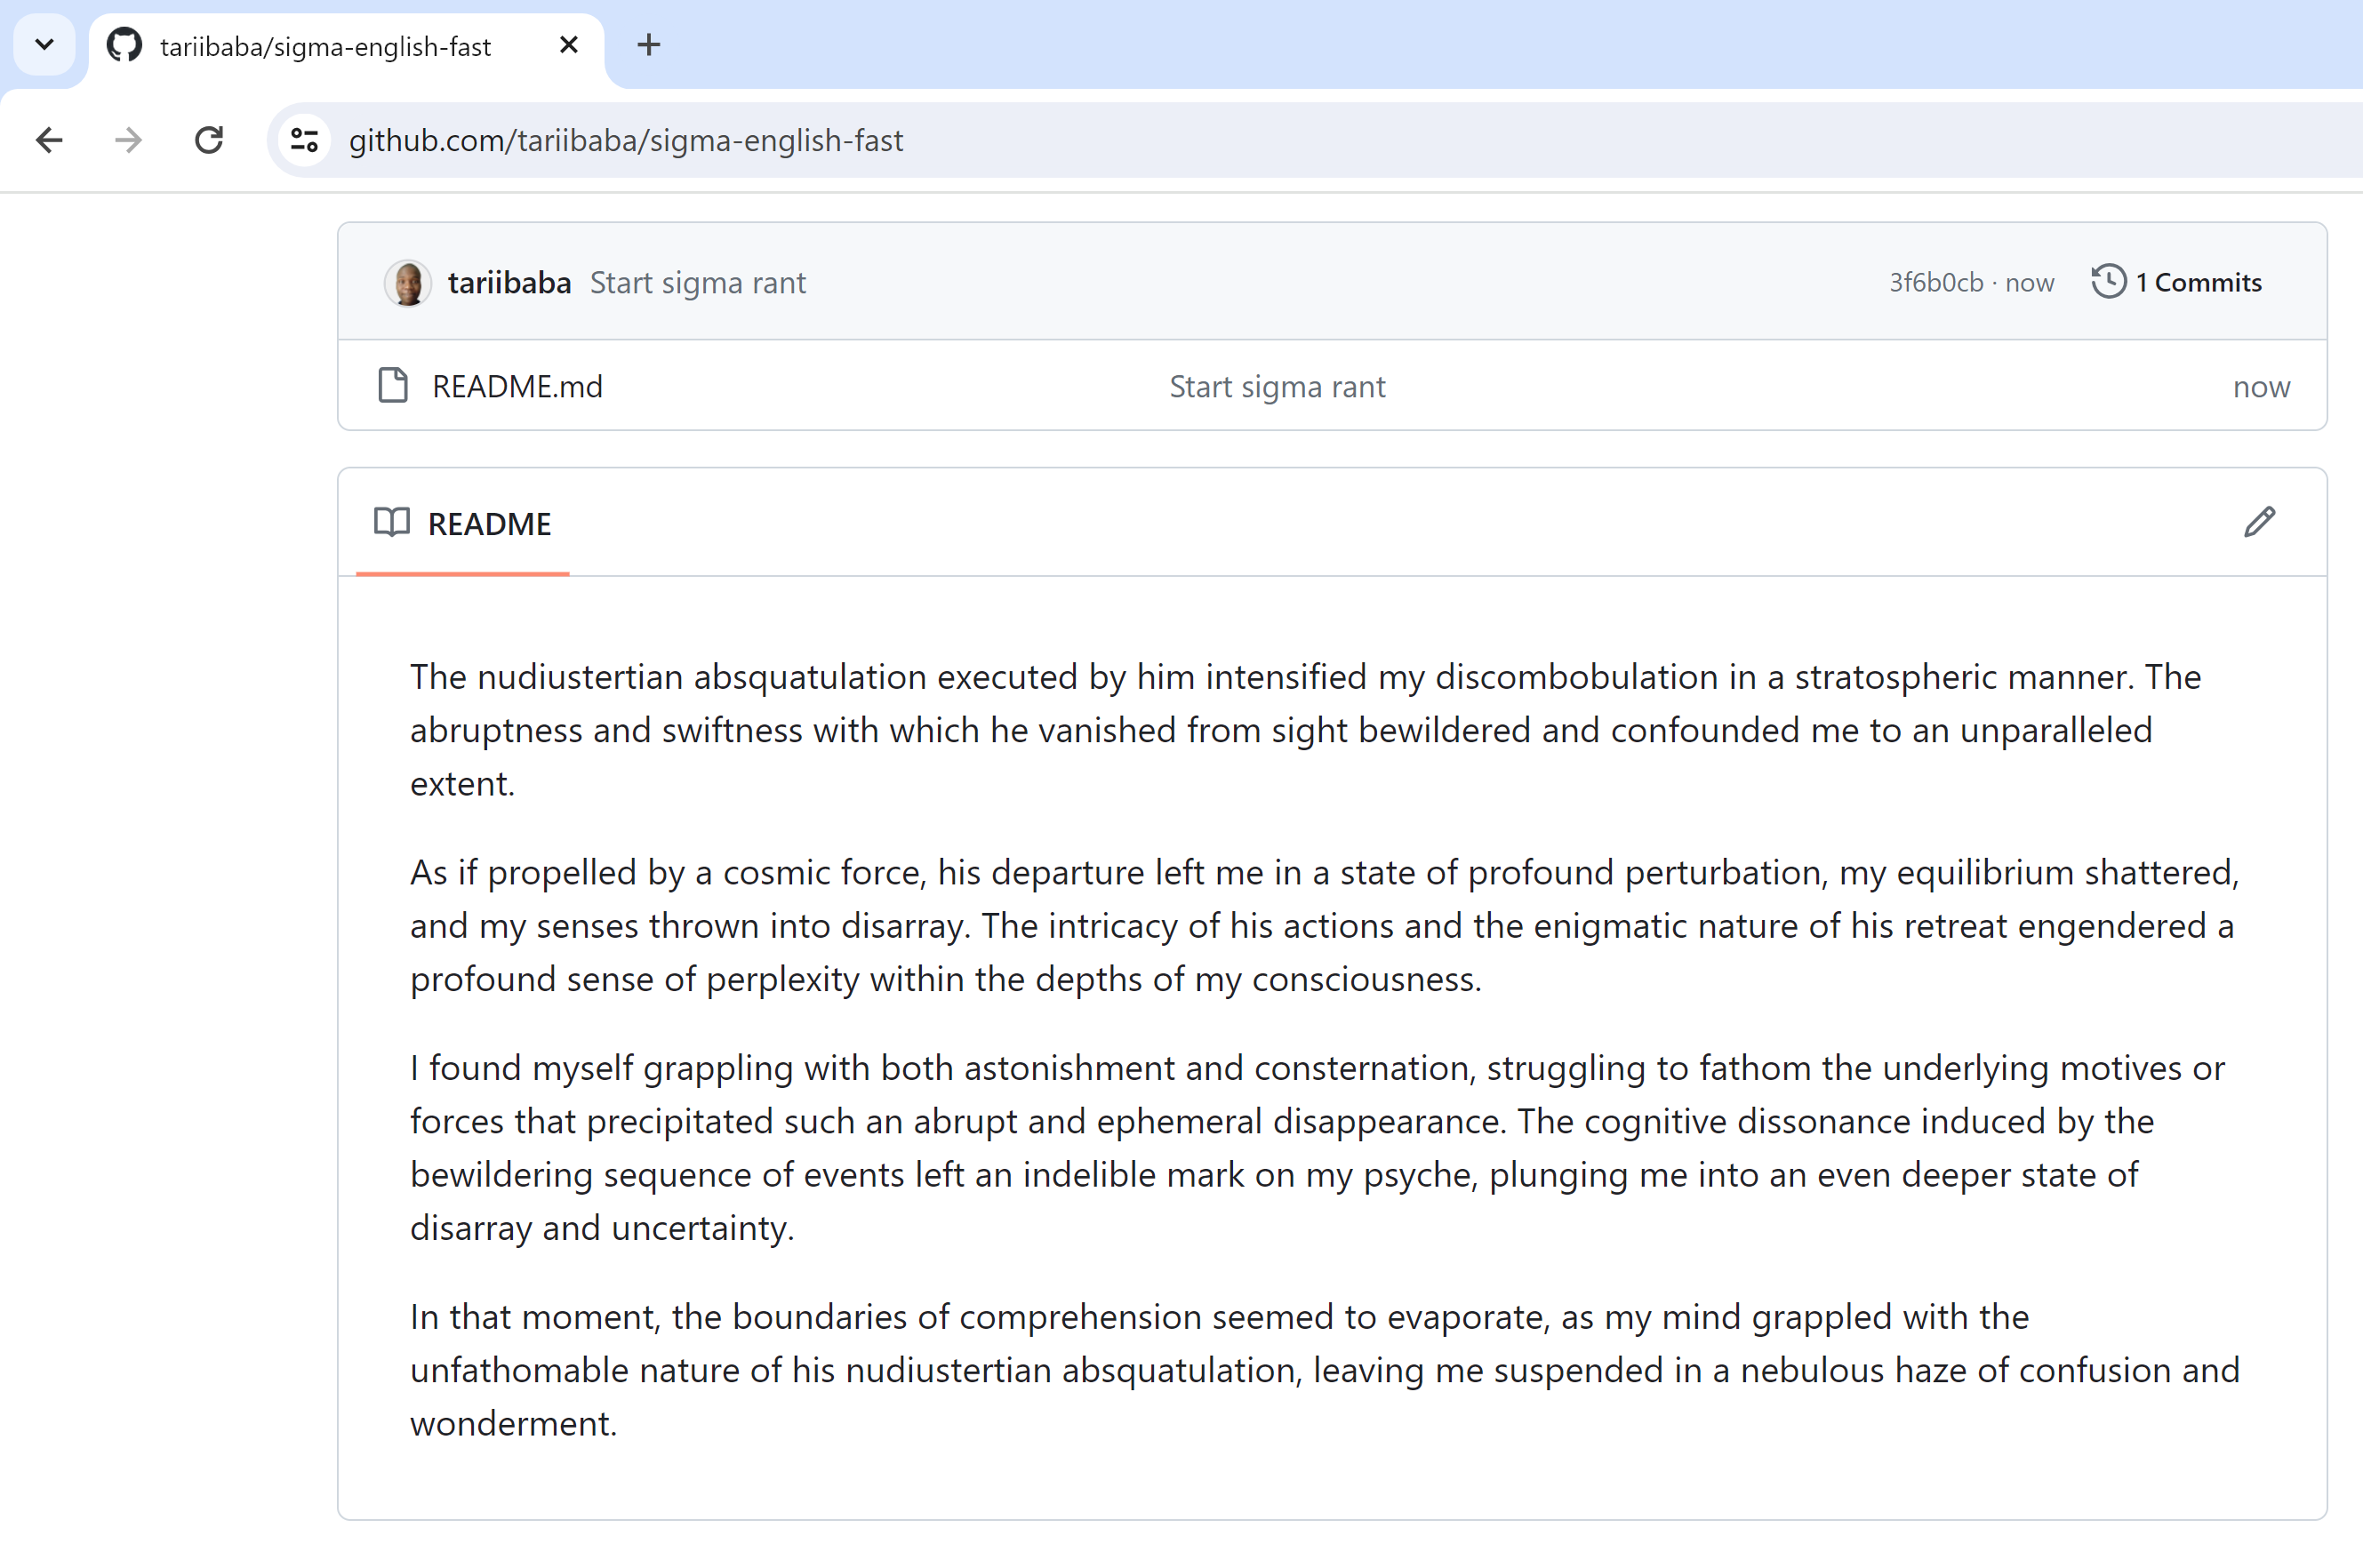
Now we can enjoy our Sigma English rant directly on GitHub:
2. Workspaces for multi-codebase coding
There was a point when I couldn’t do without this feature.
And you won’t when your project is sprawling with numerous inter-connected codebases stored in different folders that all make an important part of the system.
In one of our projects, we had at least 3 folders.
One folder for Firebase-y stuff: Functions, DB security rules, and more.
One folder for the Next.js website/app.
One folder for the cross-platform app codebase.
Imagine the pain of having to switch back and forth between these in 3 open VS Code windows; opening terminals here and there, searching for the wrong file in the wrong codebase, mixing up your Alt + Tab sequence with other open apps, along with the mental confusion and delay it causes anytime you switch apps.
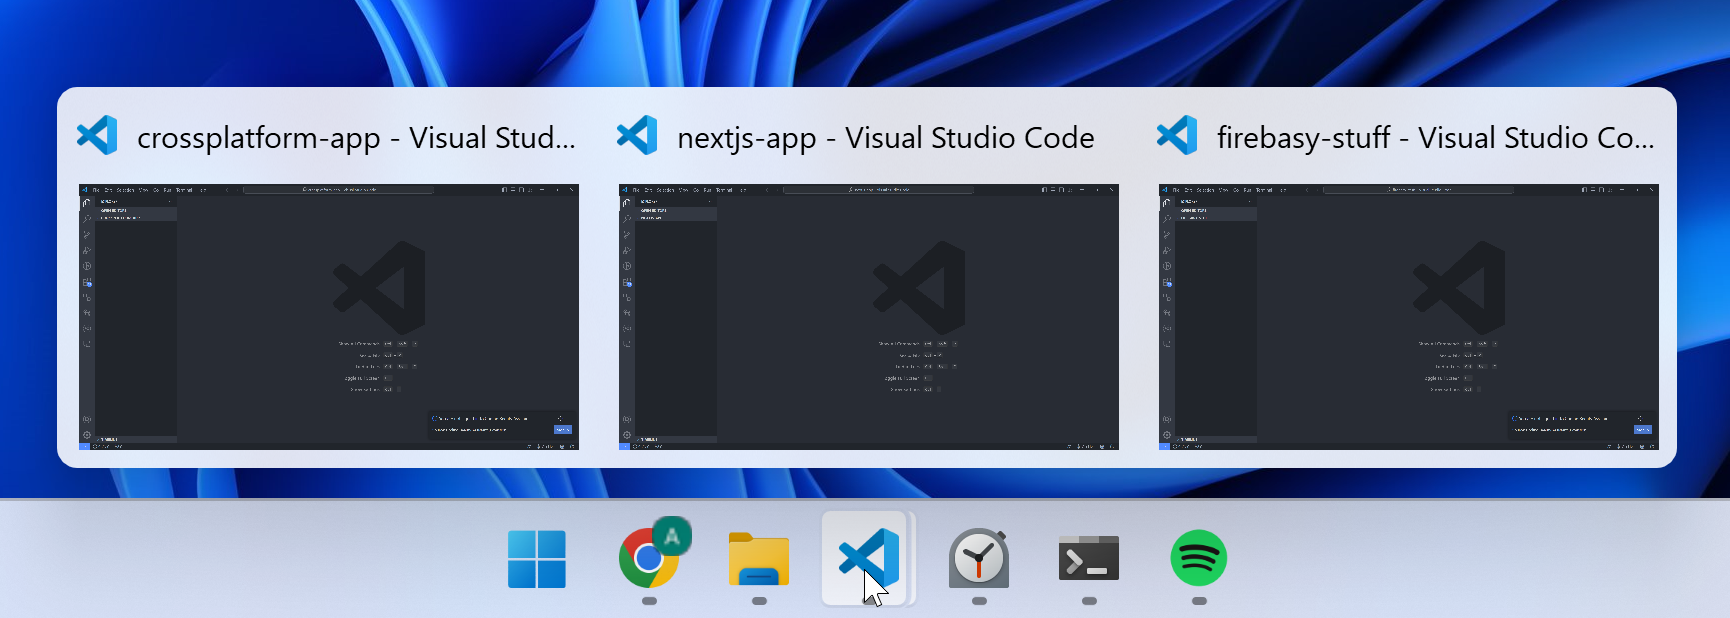
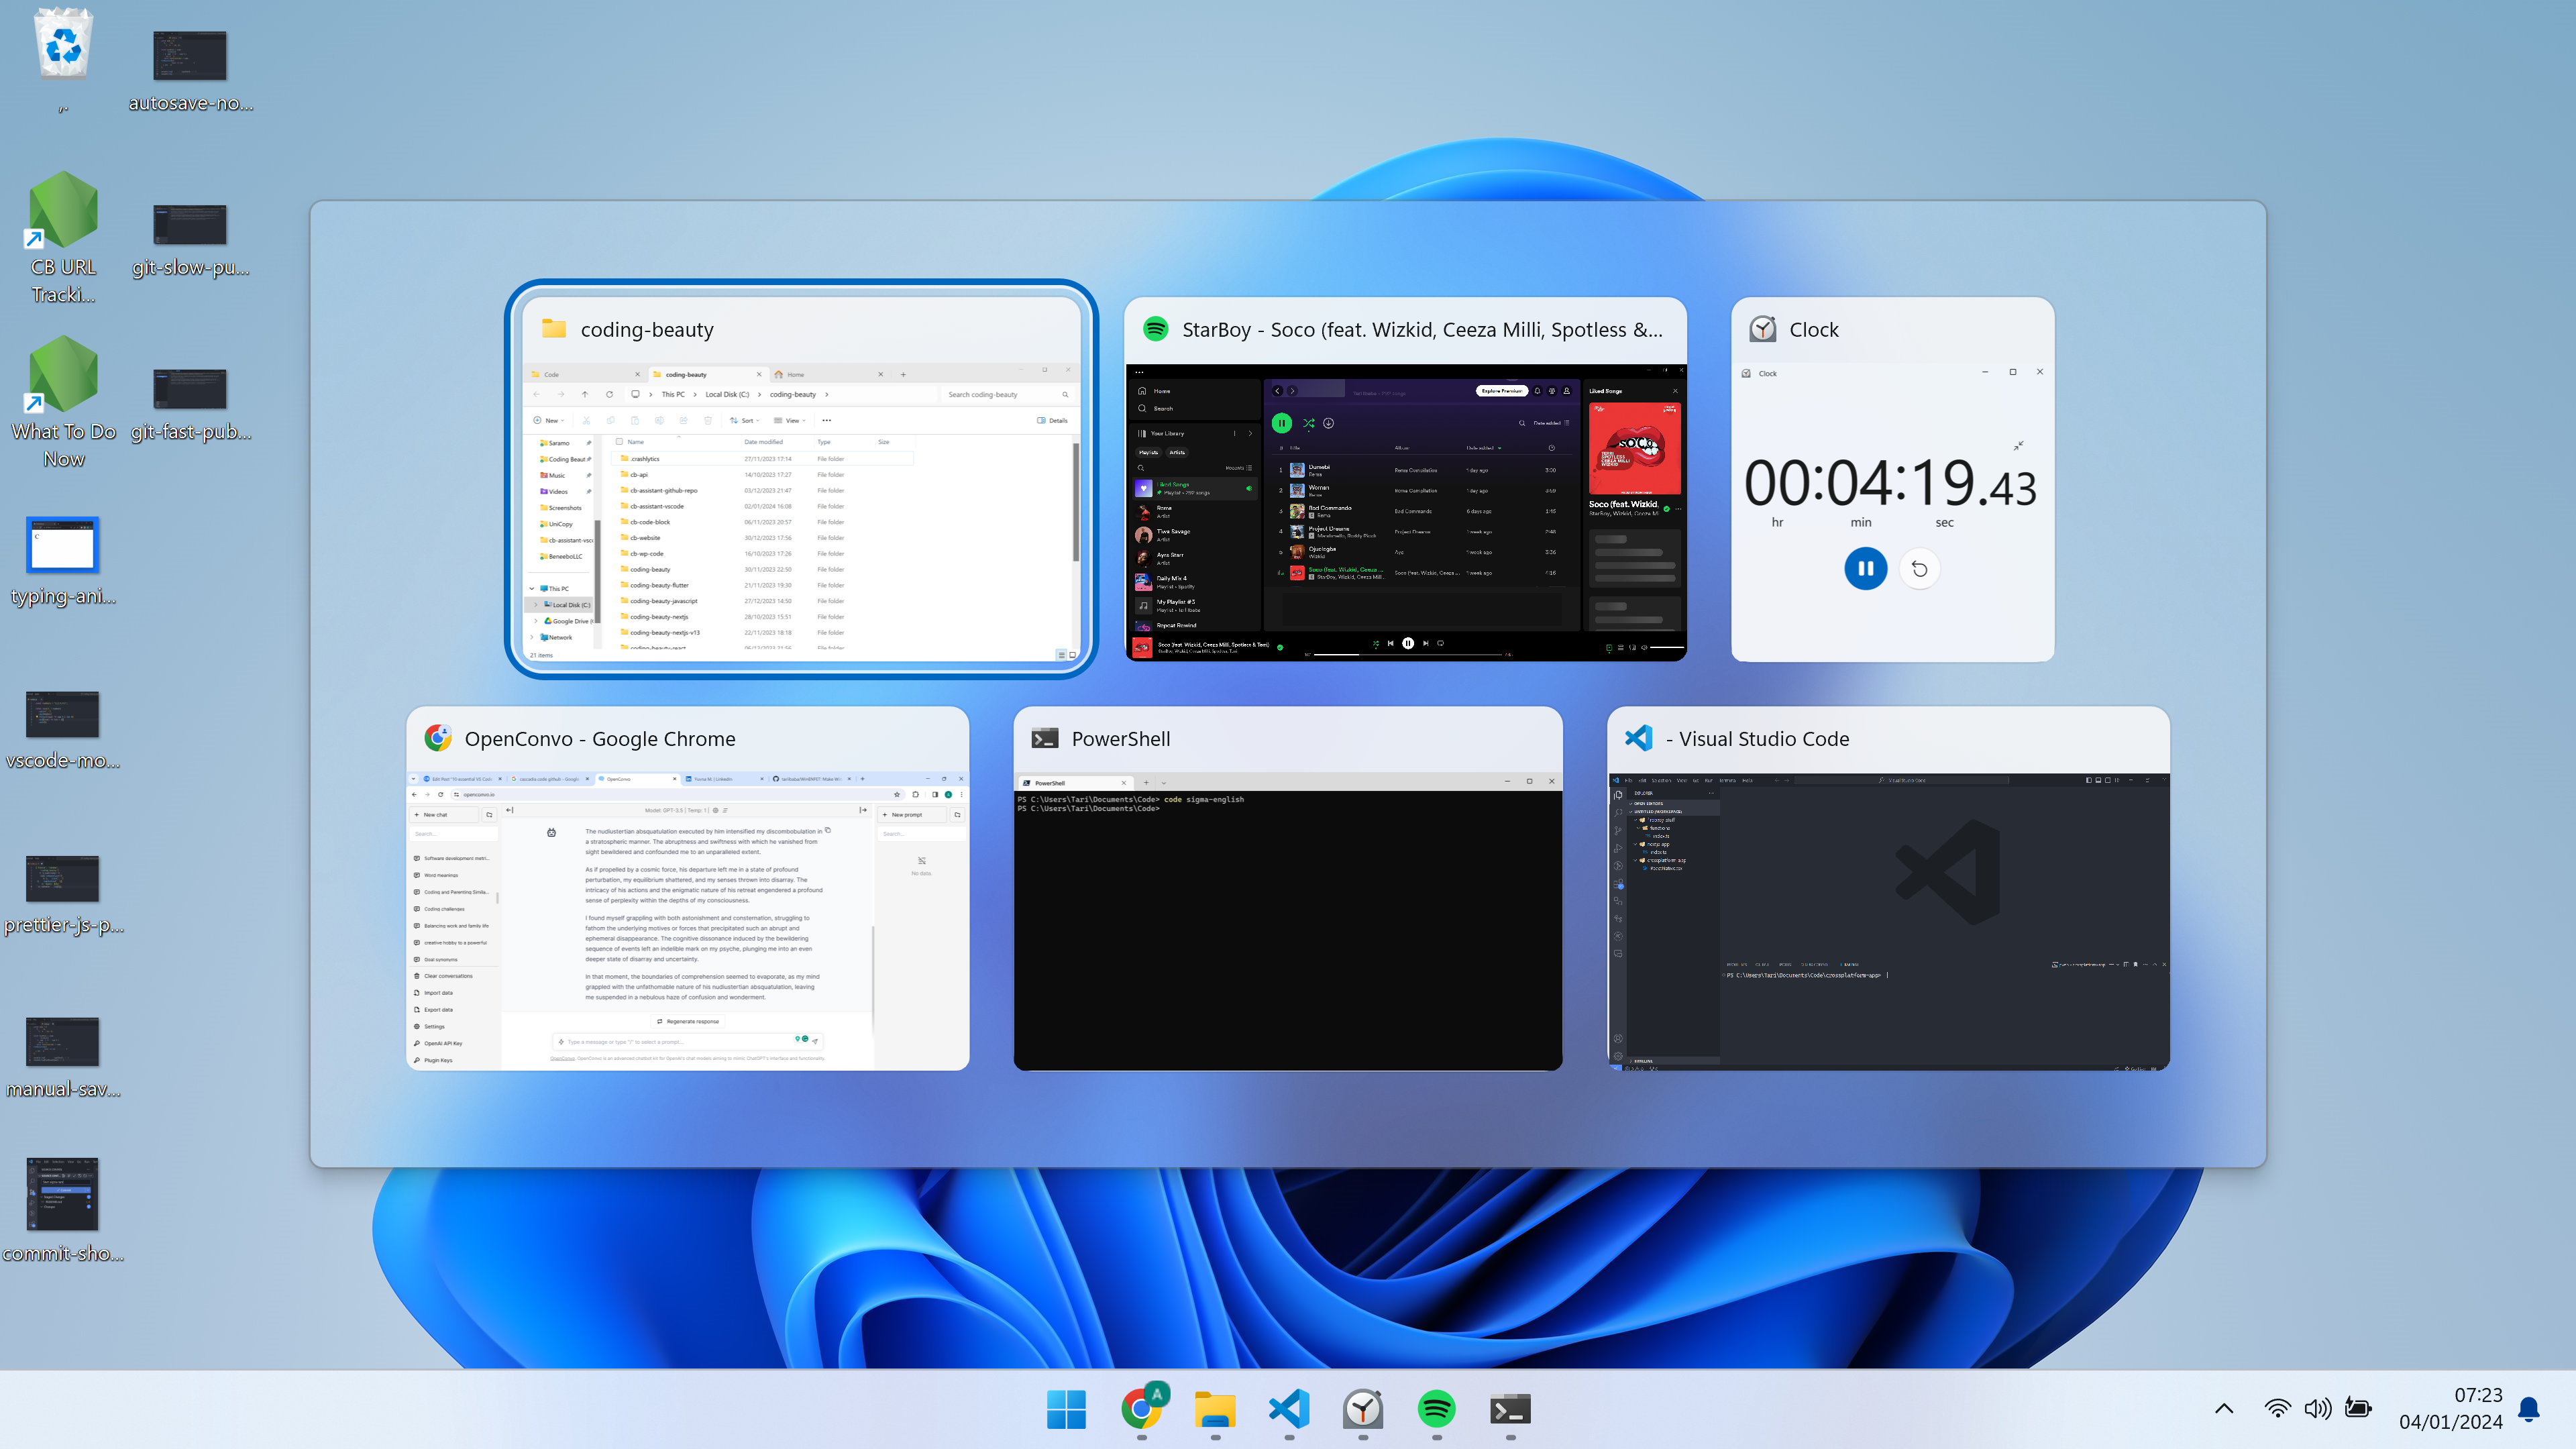
And don’t forget this 👇. This is a pain.
The pain of clicking twice and having to select the correct window based on their titles.
This is why we need workspaces — one window with all the files and subfolders you need.
Sidenote: And if you’re a Windows user struggling to manage your File Explorer you probably want to try this tiny utility (WinENFET).
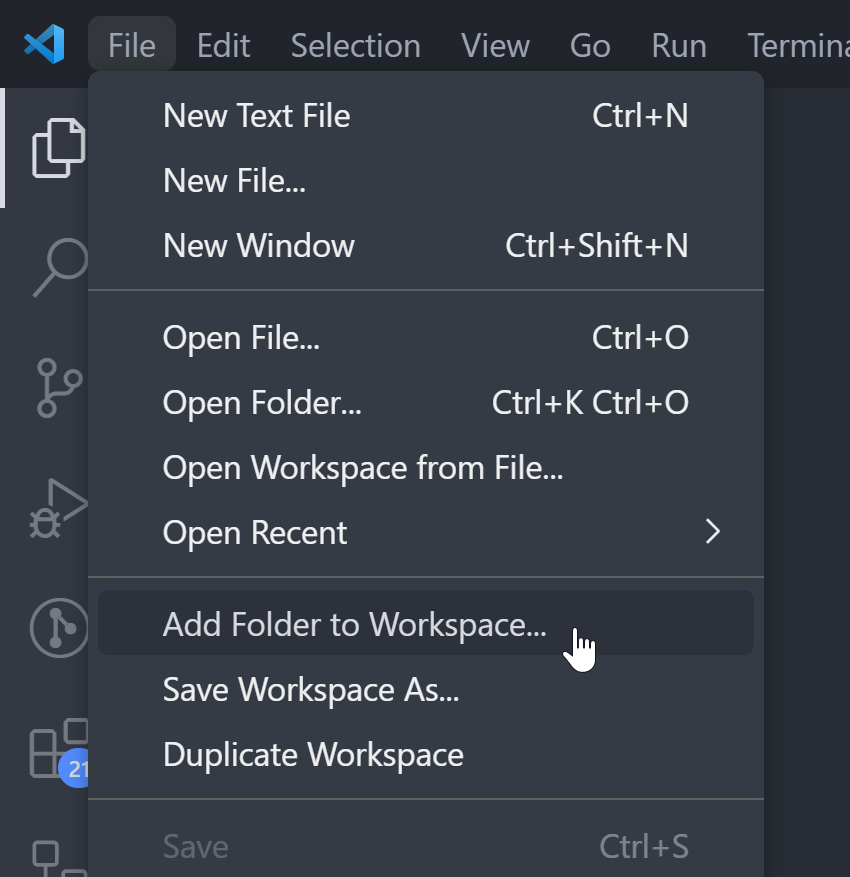
Every folder is a workspace to VS Code, so you can easily add more folders with File > Add Folder to Workspace…
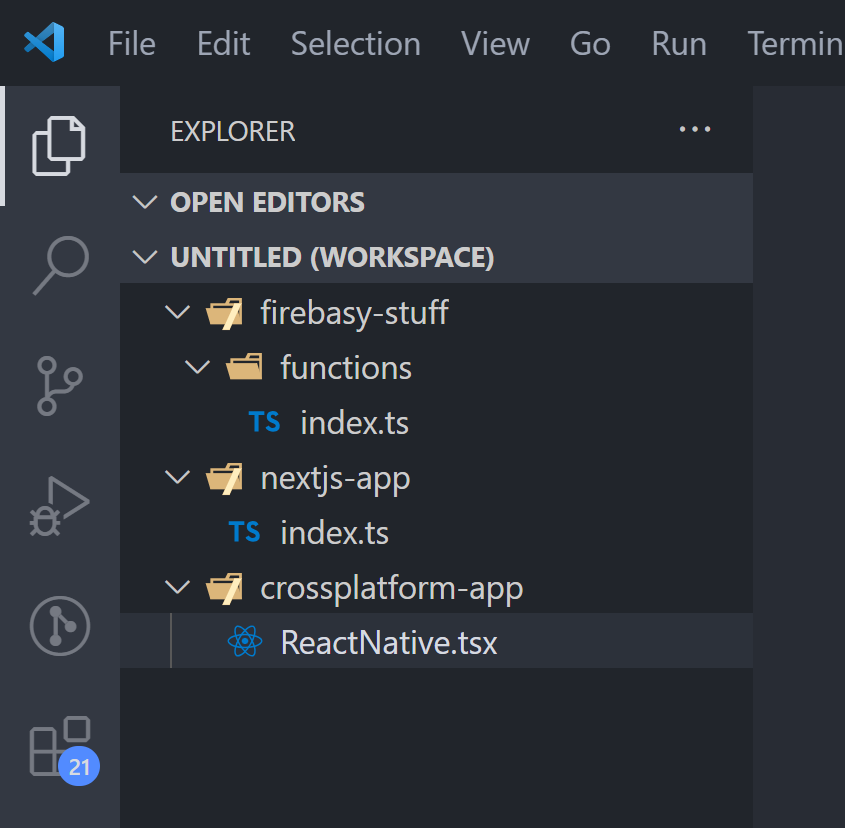
When everything is done you’ll have all the folders you need and their files easily accessible on the File Explorer pane.
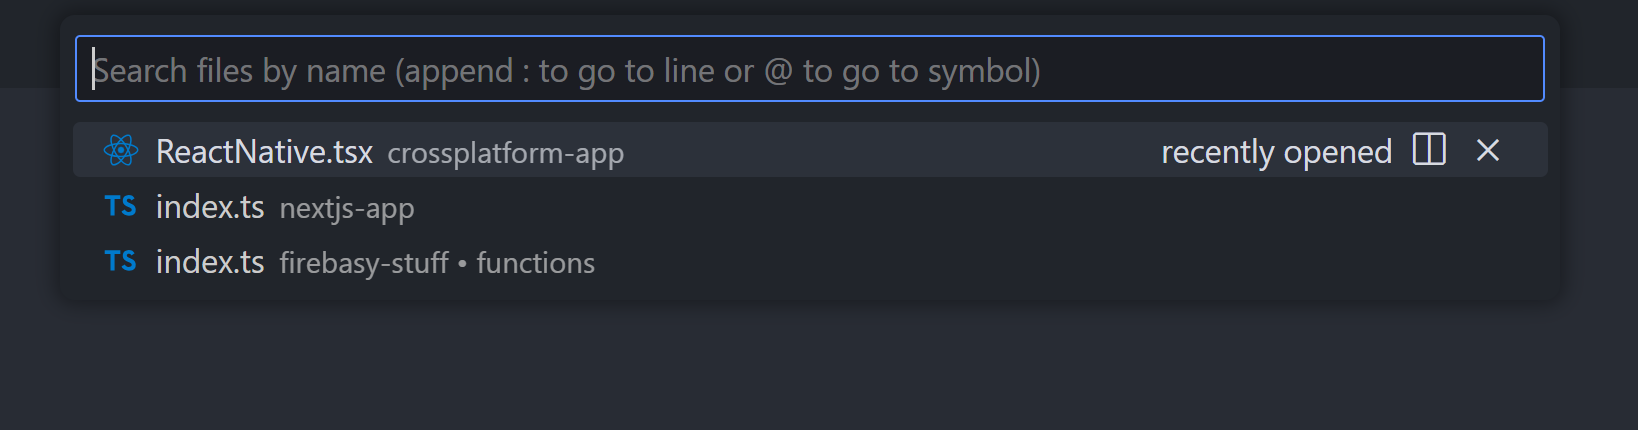
And when you search for files with Ctrl + P or Ctrl + Shift + F, it’ll apply to every file in all the folders:
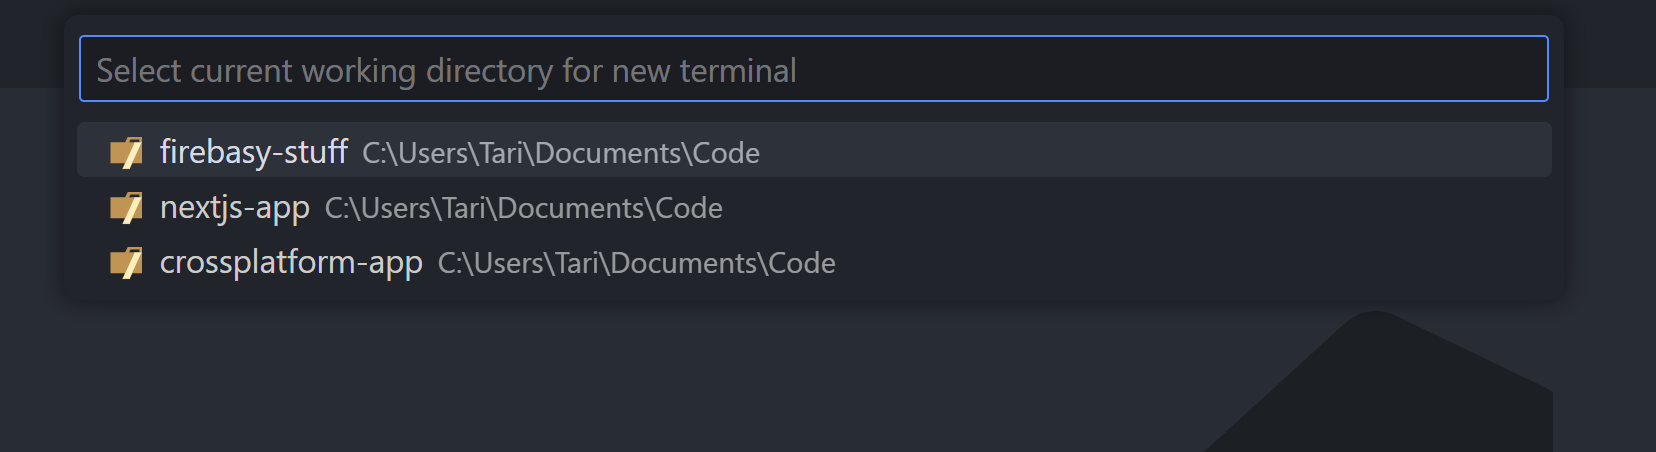
You can also rapidly create new terminals with any of the folders as the working directory.
With this and Win 11 22H2 Tabs we’ve easily cut our open windows in half.
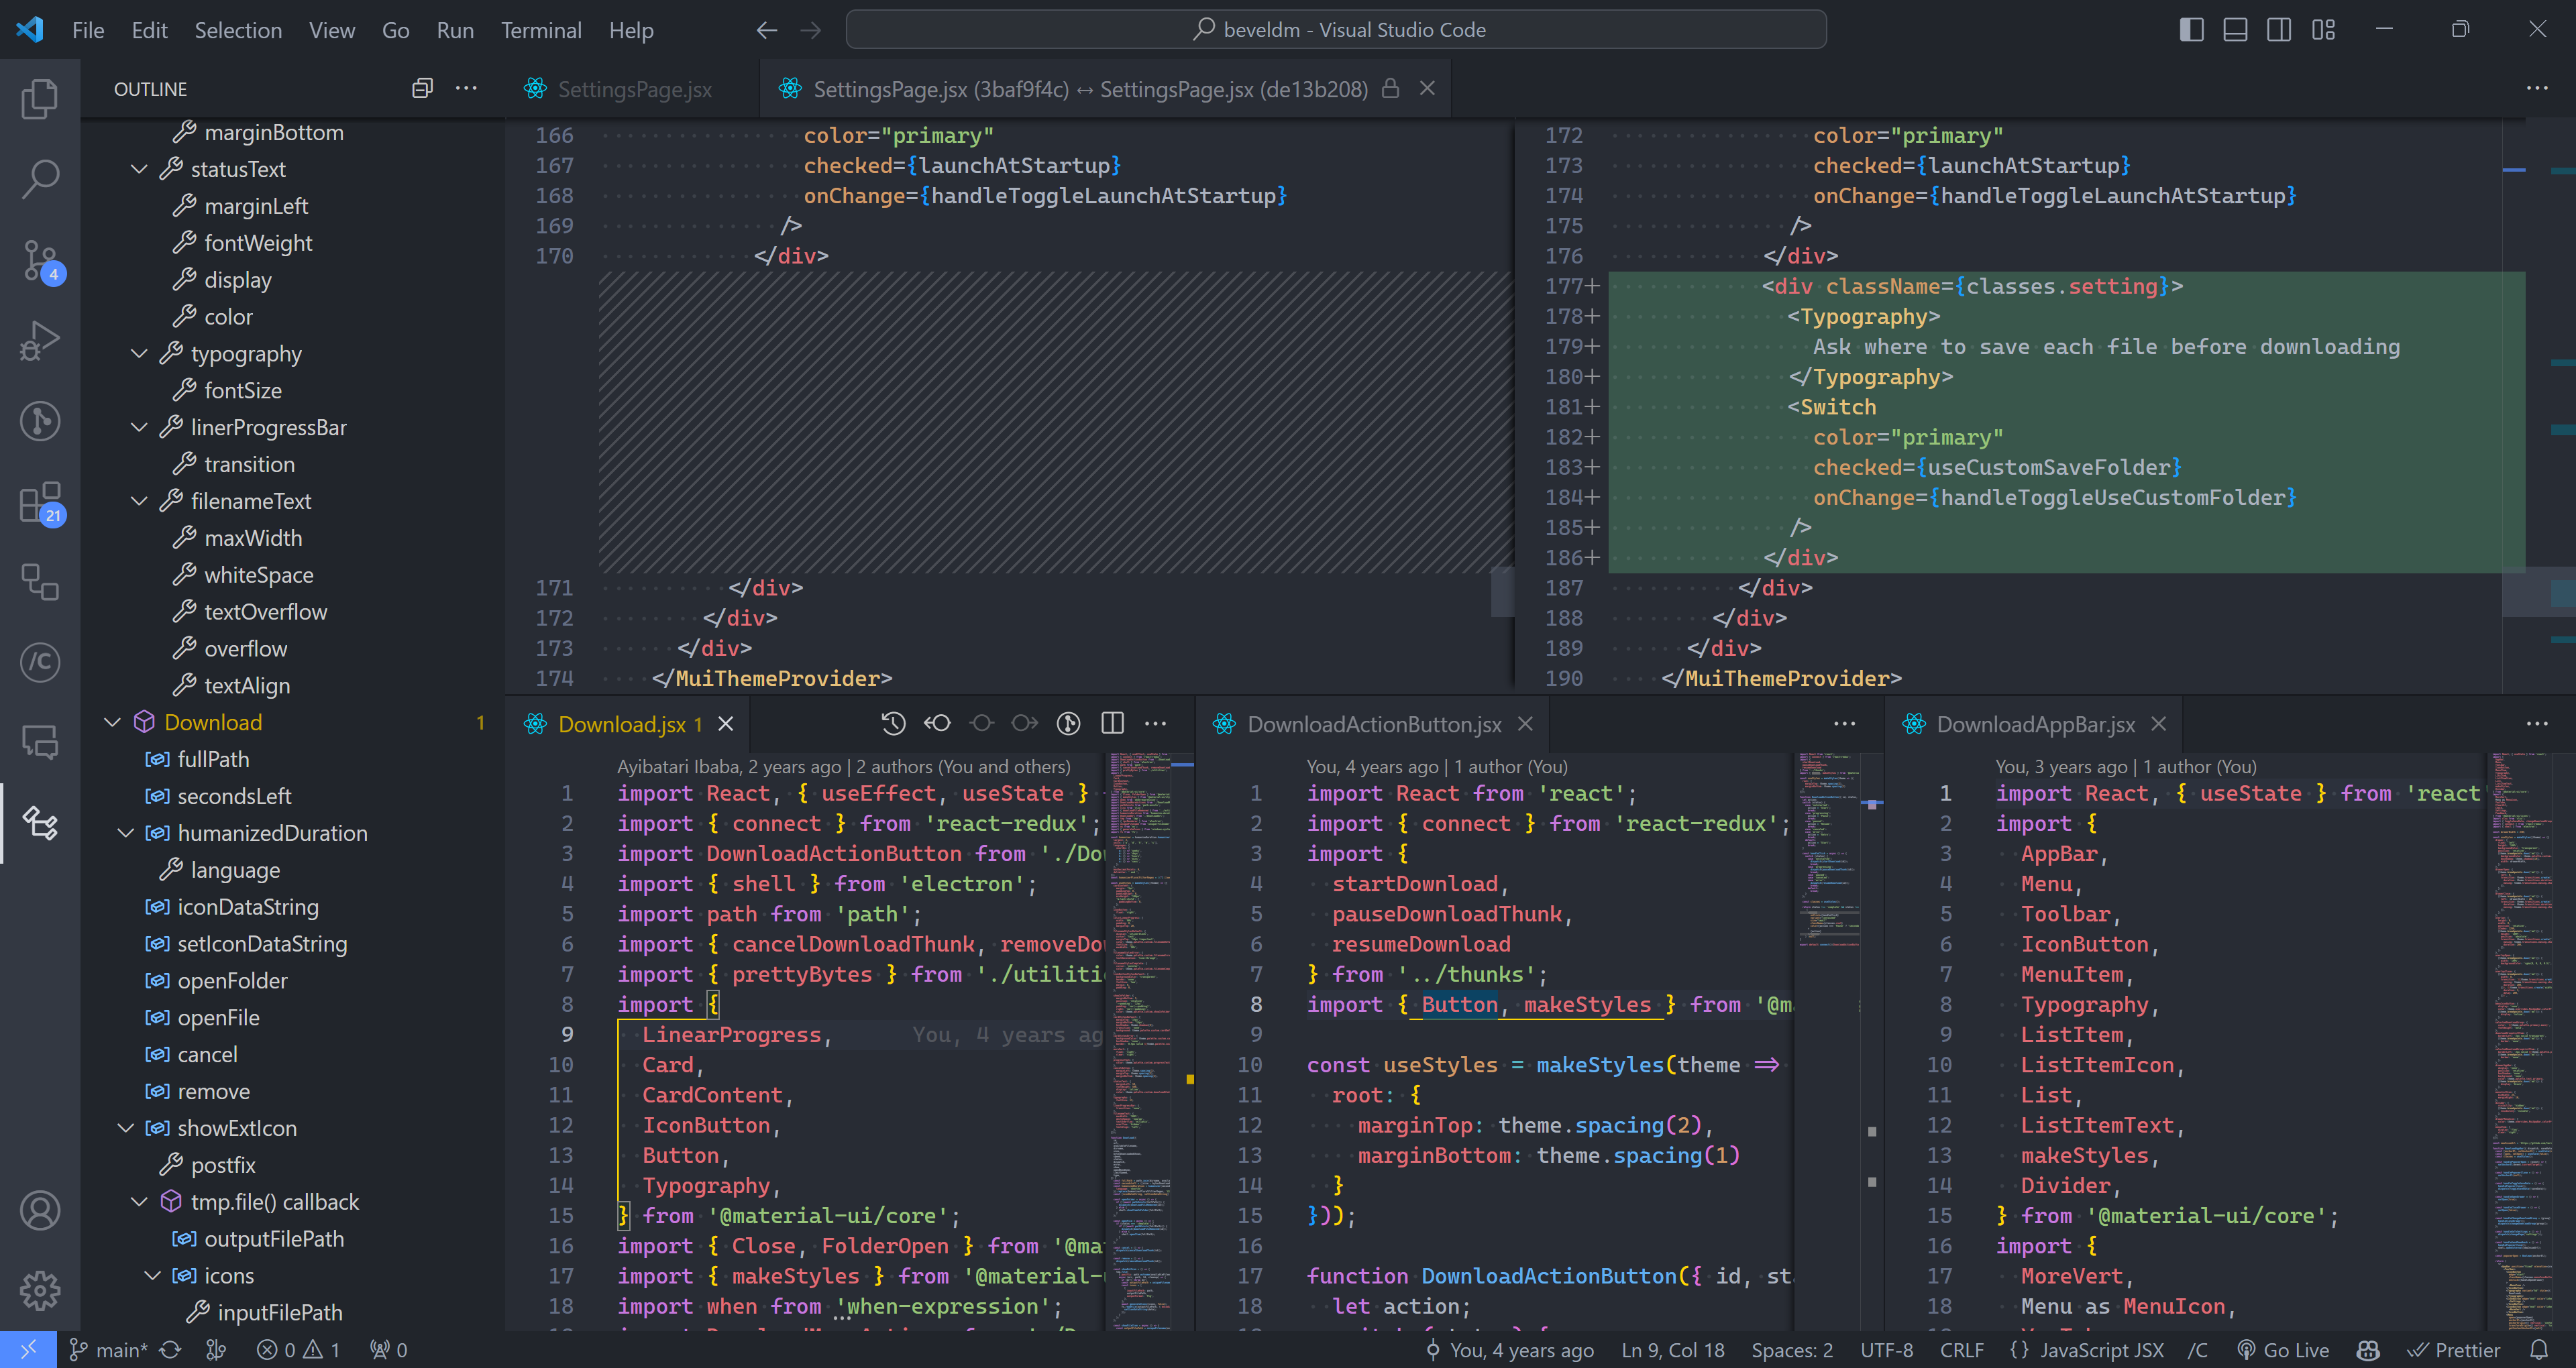
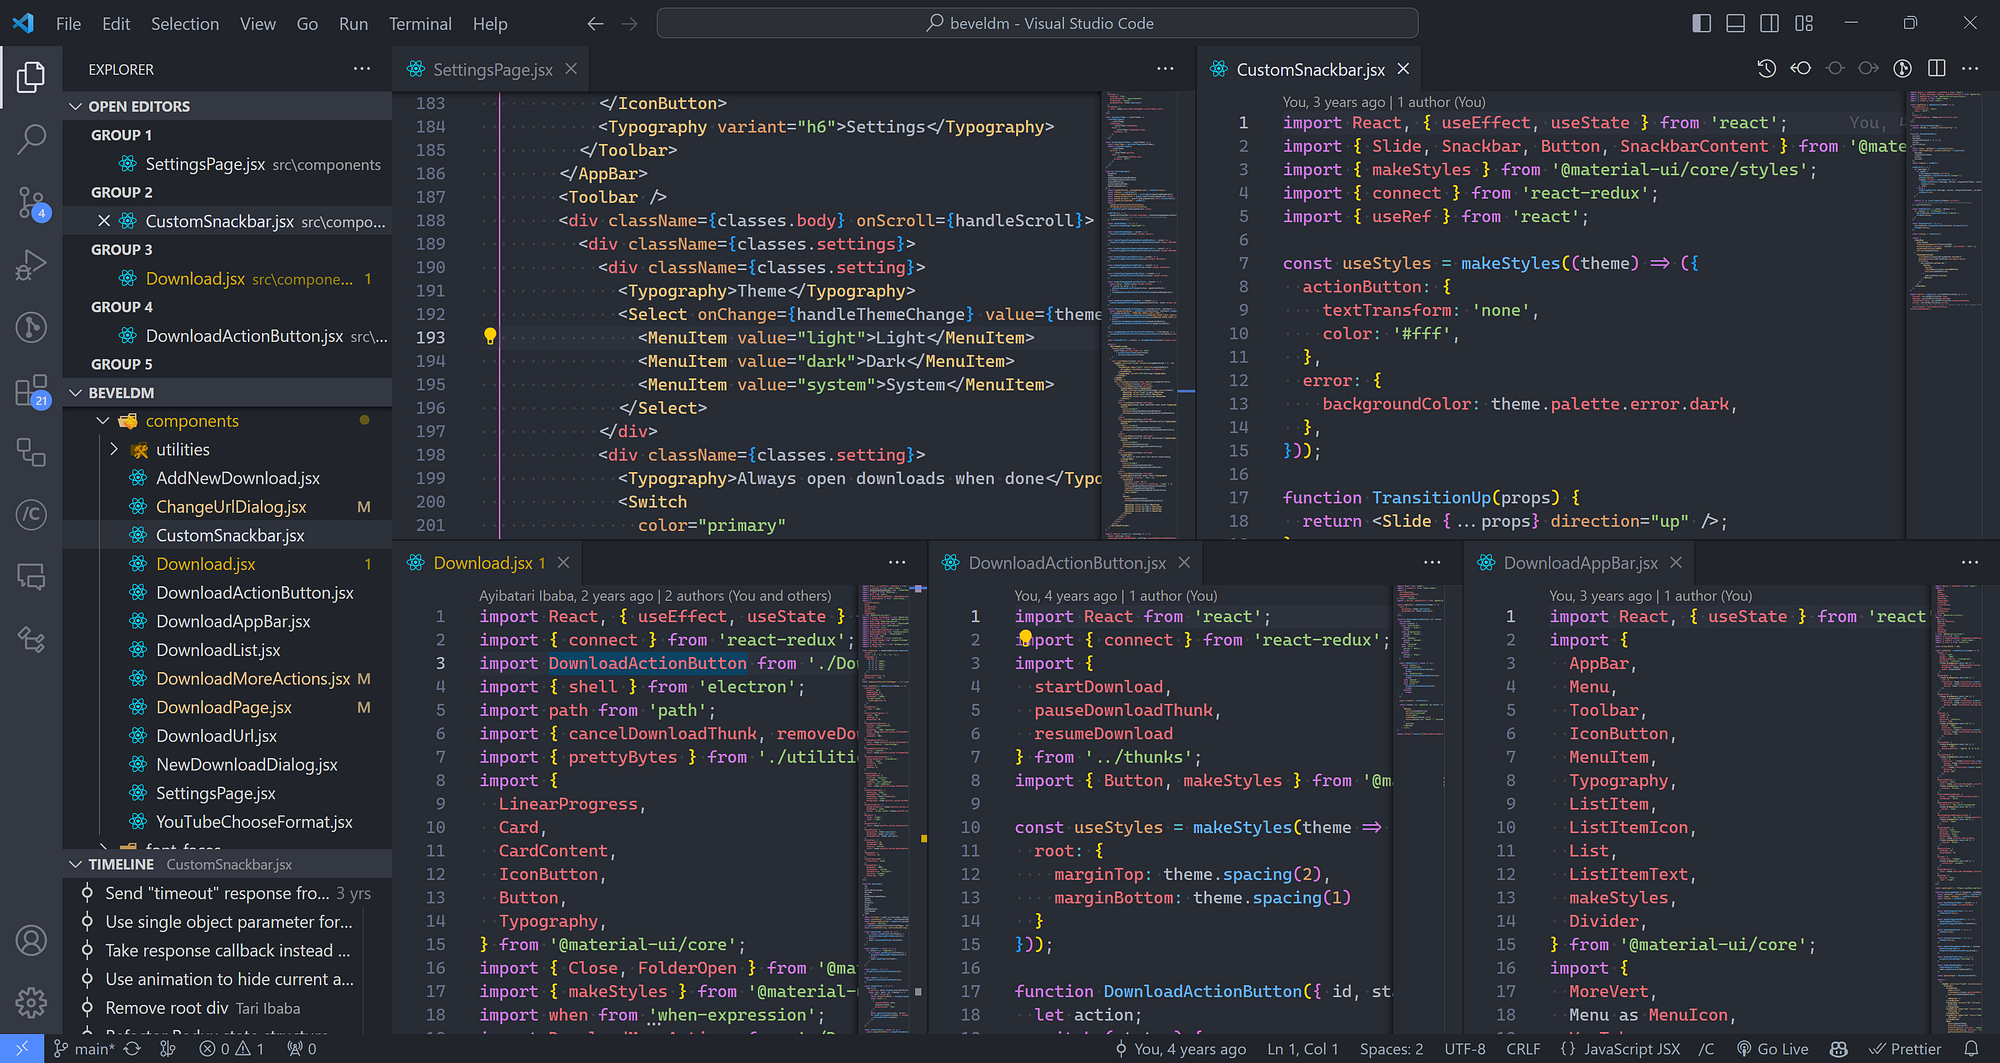
3. Power editing with side-by-side view
And when you need to work with multiple of those workspace files at once? Split mode has you covered.
I once ported a Flutter Dart class to its JavaScript equivalent and this feature made things much easier and faster.
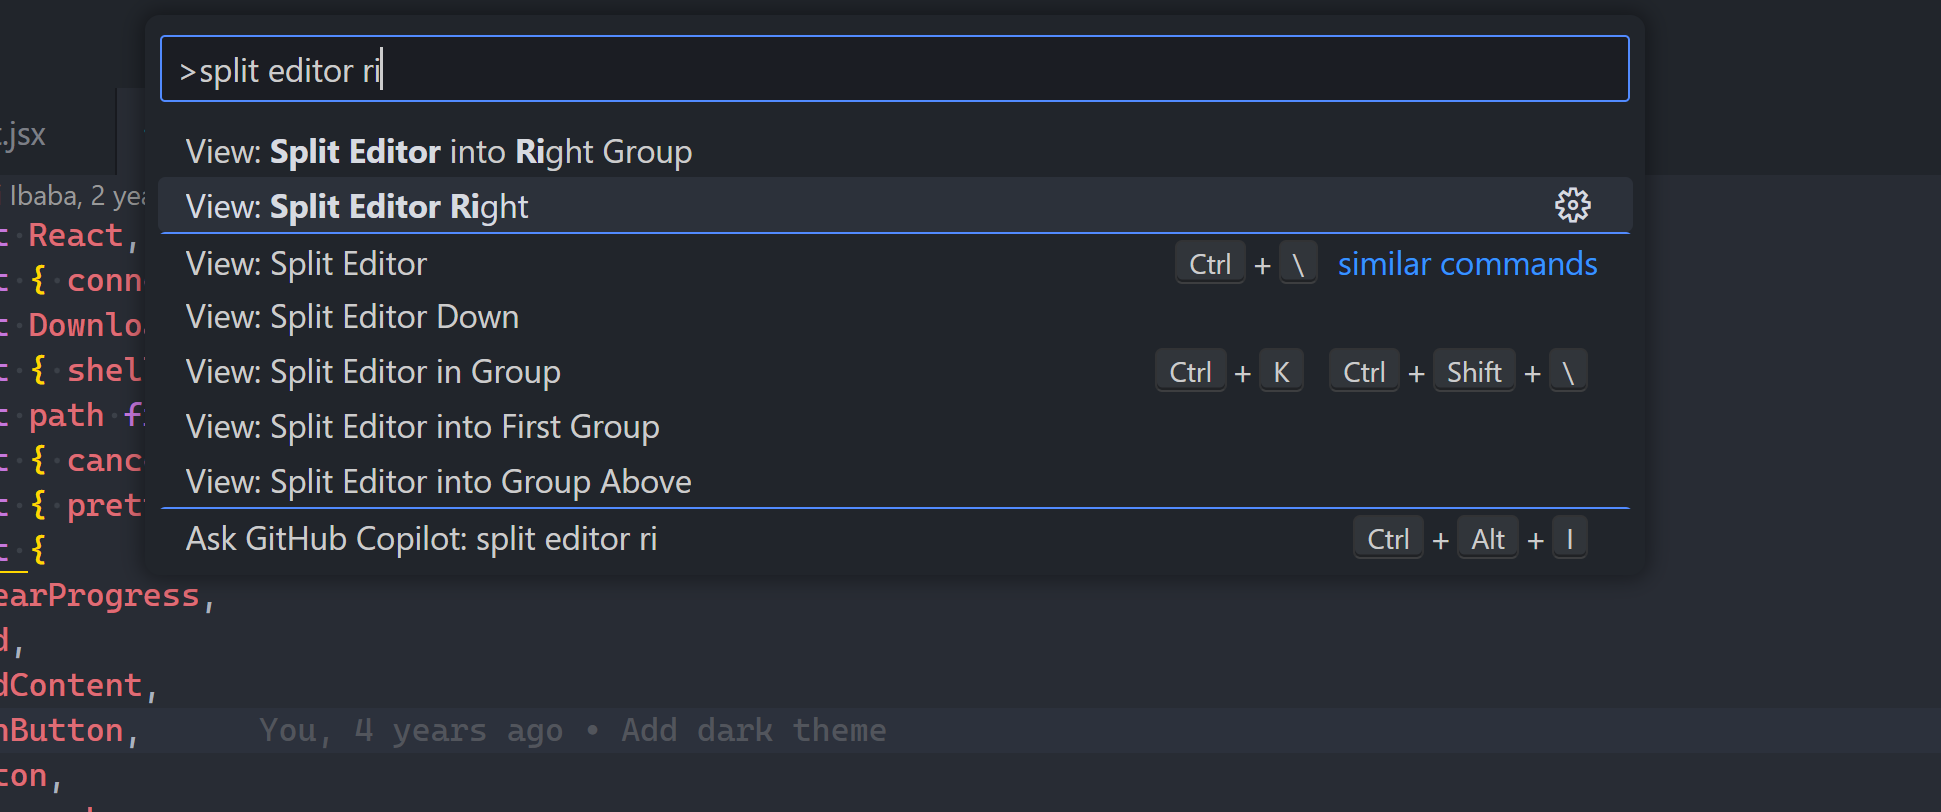
You can also do this with one of the View: Split Editor... commands.
Split them down or split them right:
Master coder at work.
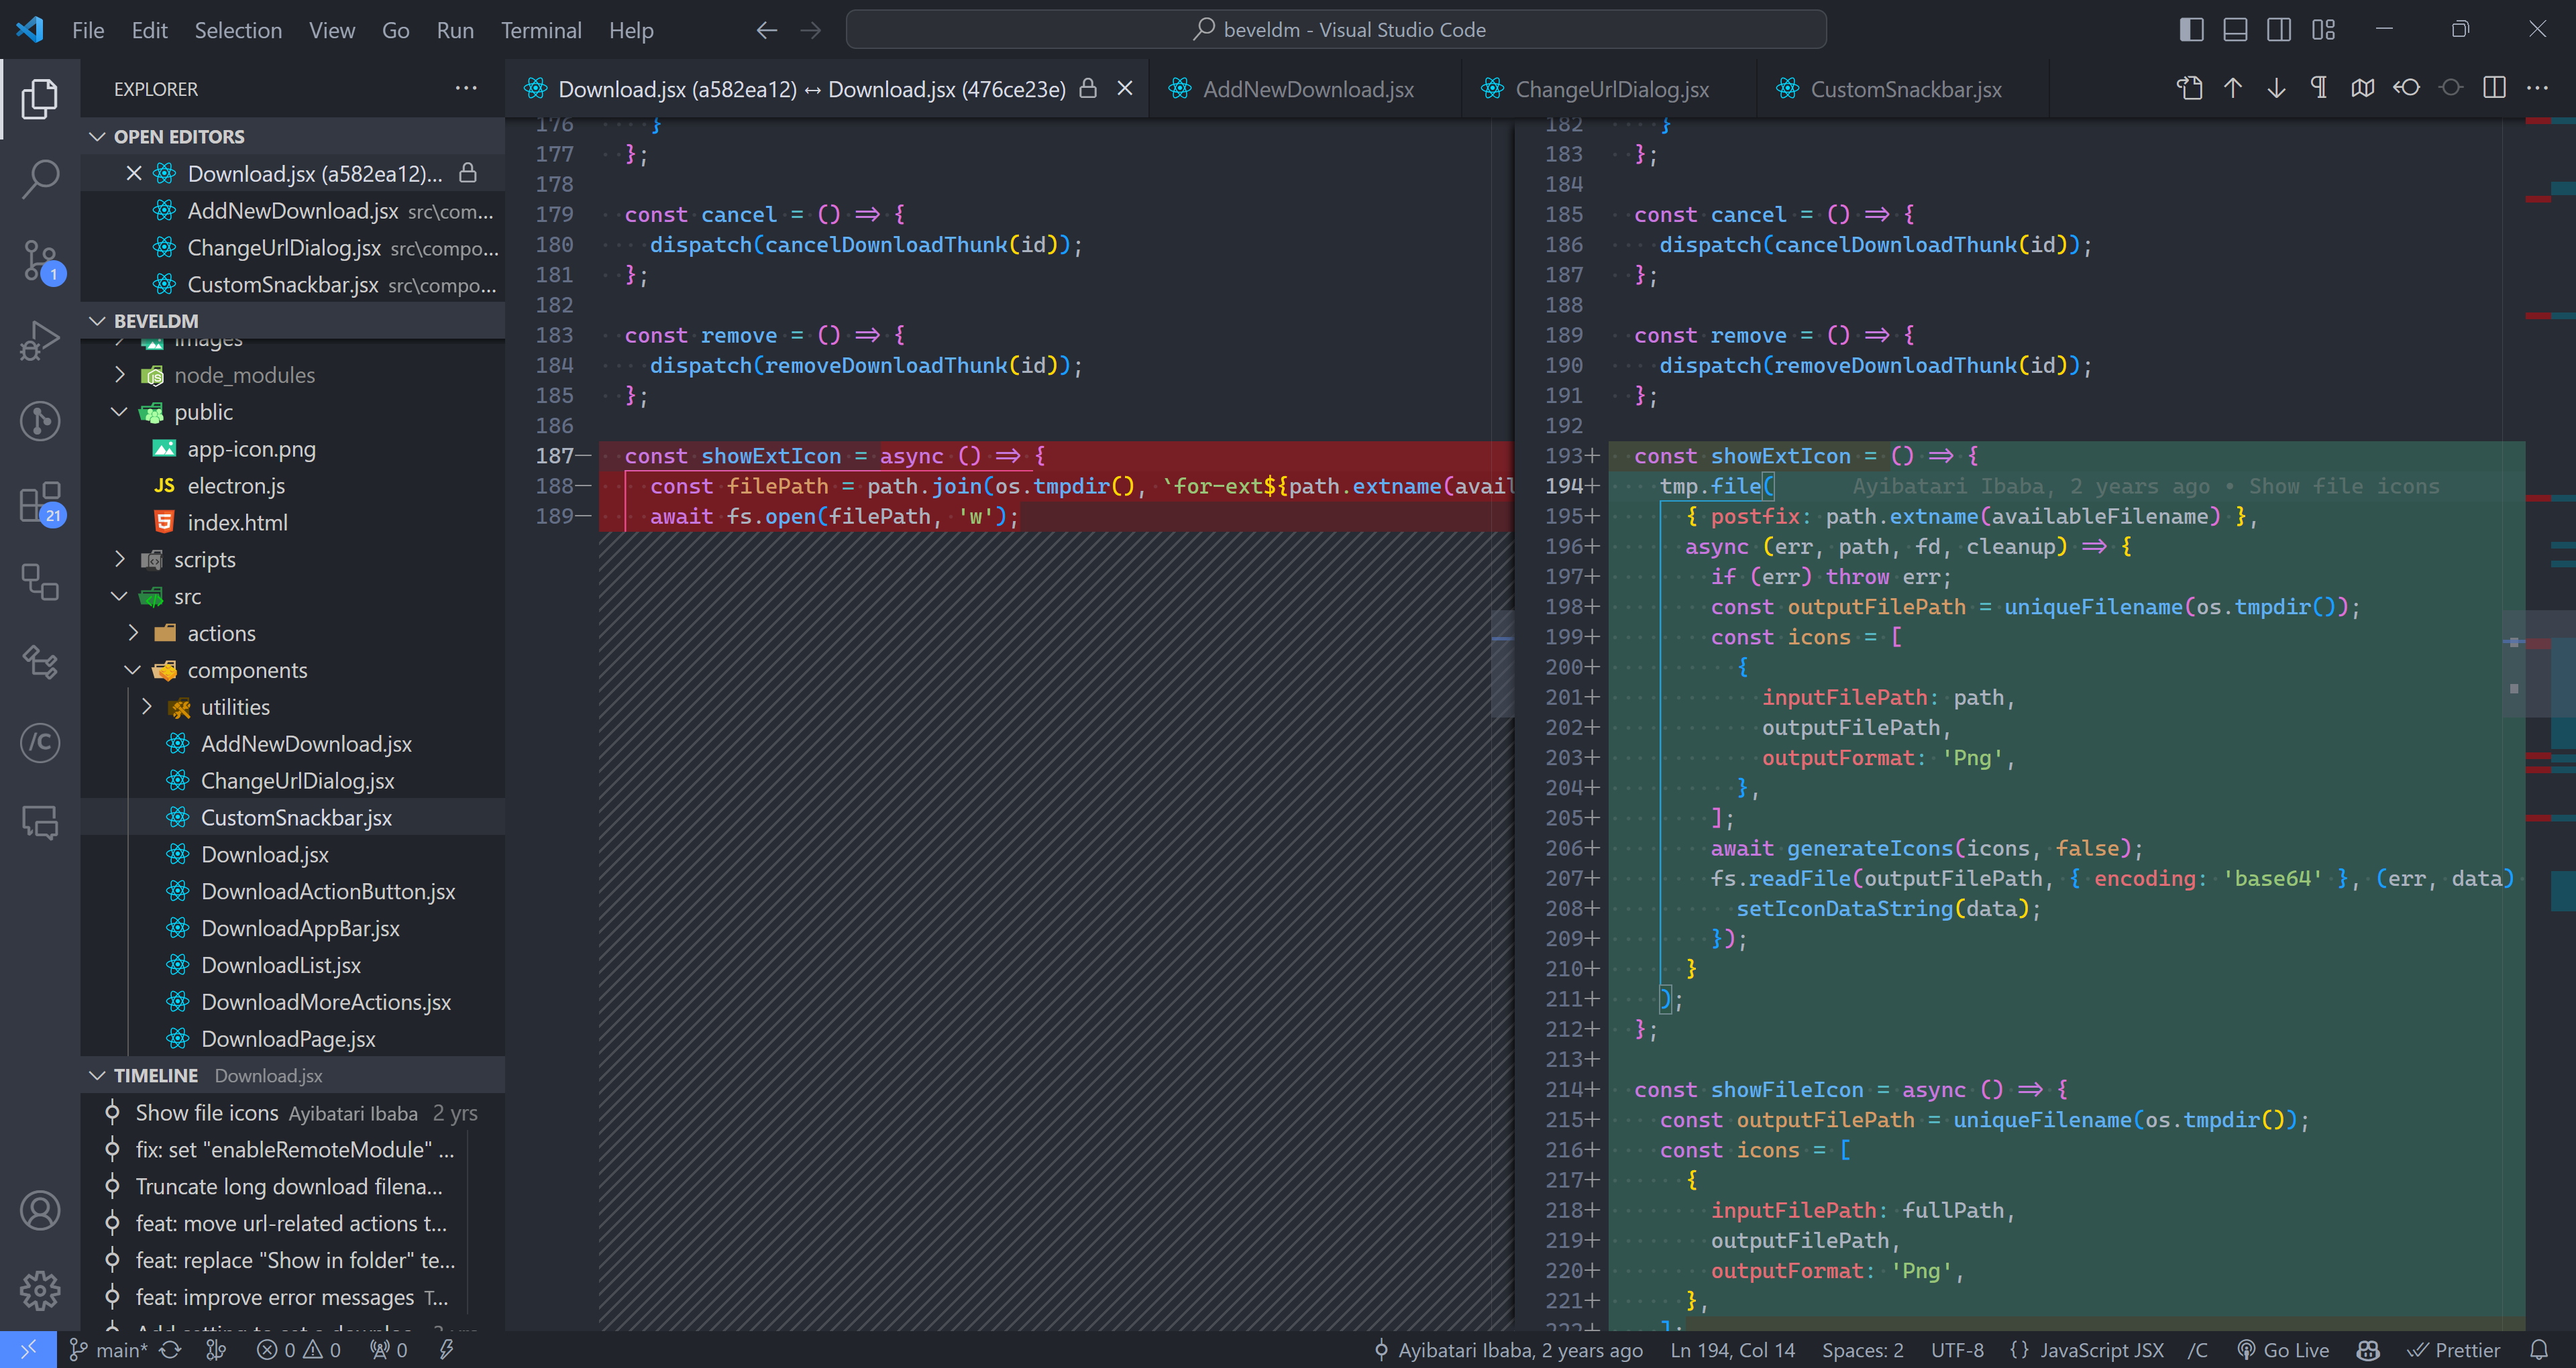
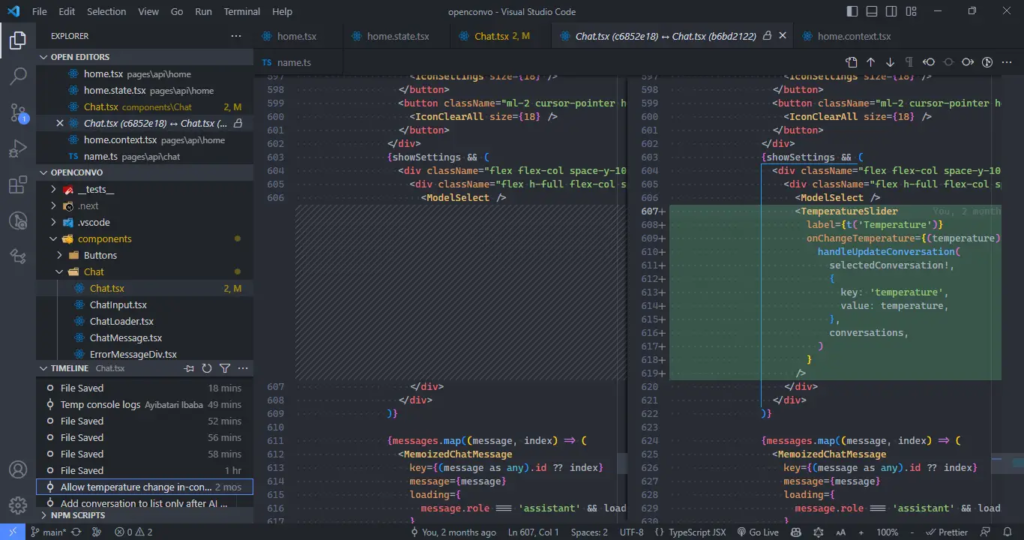
VS Code also uses this split view to show changes between different file versions saved in the Timeline view or source control.
4. Rapidly copy any line
Please don’t tell me you still drag your mouse over the line and Ctrl + C.
Look, copying a line is super easy in VS Code.
It’s not like most other text editors; it’s a clean productivity beast! It had to be to get a permanent spot on my taskbar.
Just put the cursor on the line — anywhere — and Ctrl + C.
Whenever you do need to highlight the line you can always use Ctrl + L:
Press it again to highlight more lines below.
And when you just want part of the line you can use Shift + Left / Right to highlight one way or the other.
You can also use Ctrl + X to quickly cut the line where the cursor is without any highlighting.
5. Move line up and down
But if you’re cutting just to paste somewhere else in the same file, then there’s no need to pollute the clipboard.
Simply use the Alt + Up/Down to move the line to wherever you want:
You can even move large selections of multiple lines up and down.
Including code folds:
6. Code folding for monstrous files
I found this invaluable for those gigantic files with tons of functions and methods. Or a huge Flutter or JSX component with unbelievable amounts of deep nesting.
Why some people hate Flutter/Dart
By clicking those down-facing arrows you can easily collapse various segments of the code you’re not currently working with.
Better still the Ctrl + Shift + [ has us covered.
And Ctrl + Shift + [ has us uncovered.
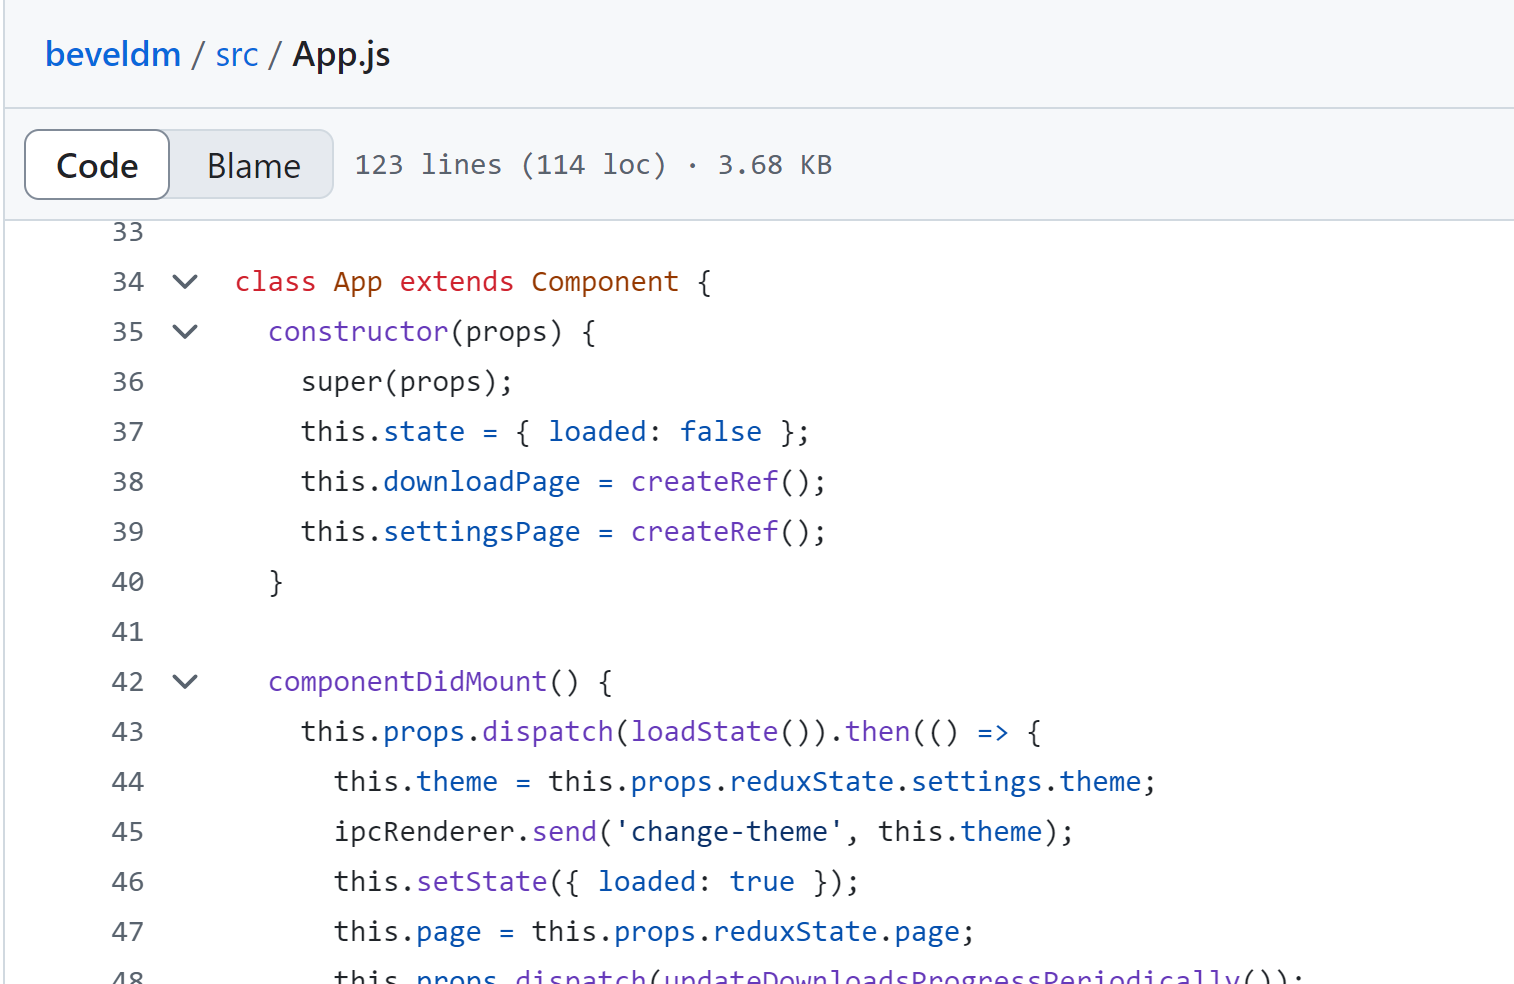
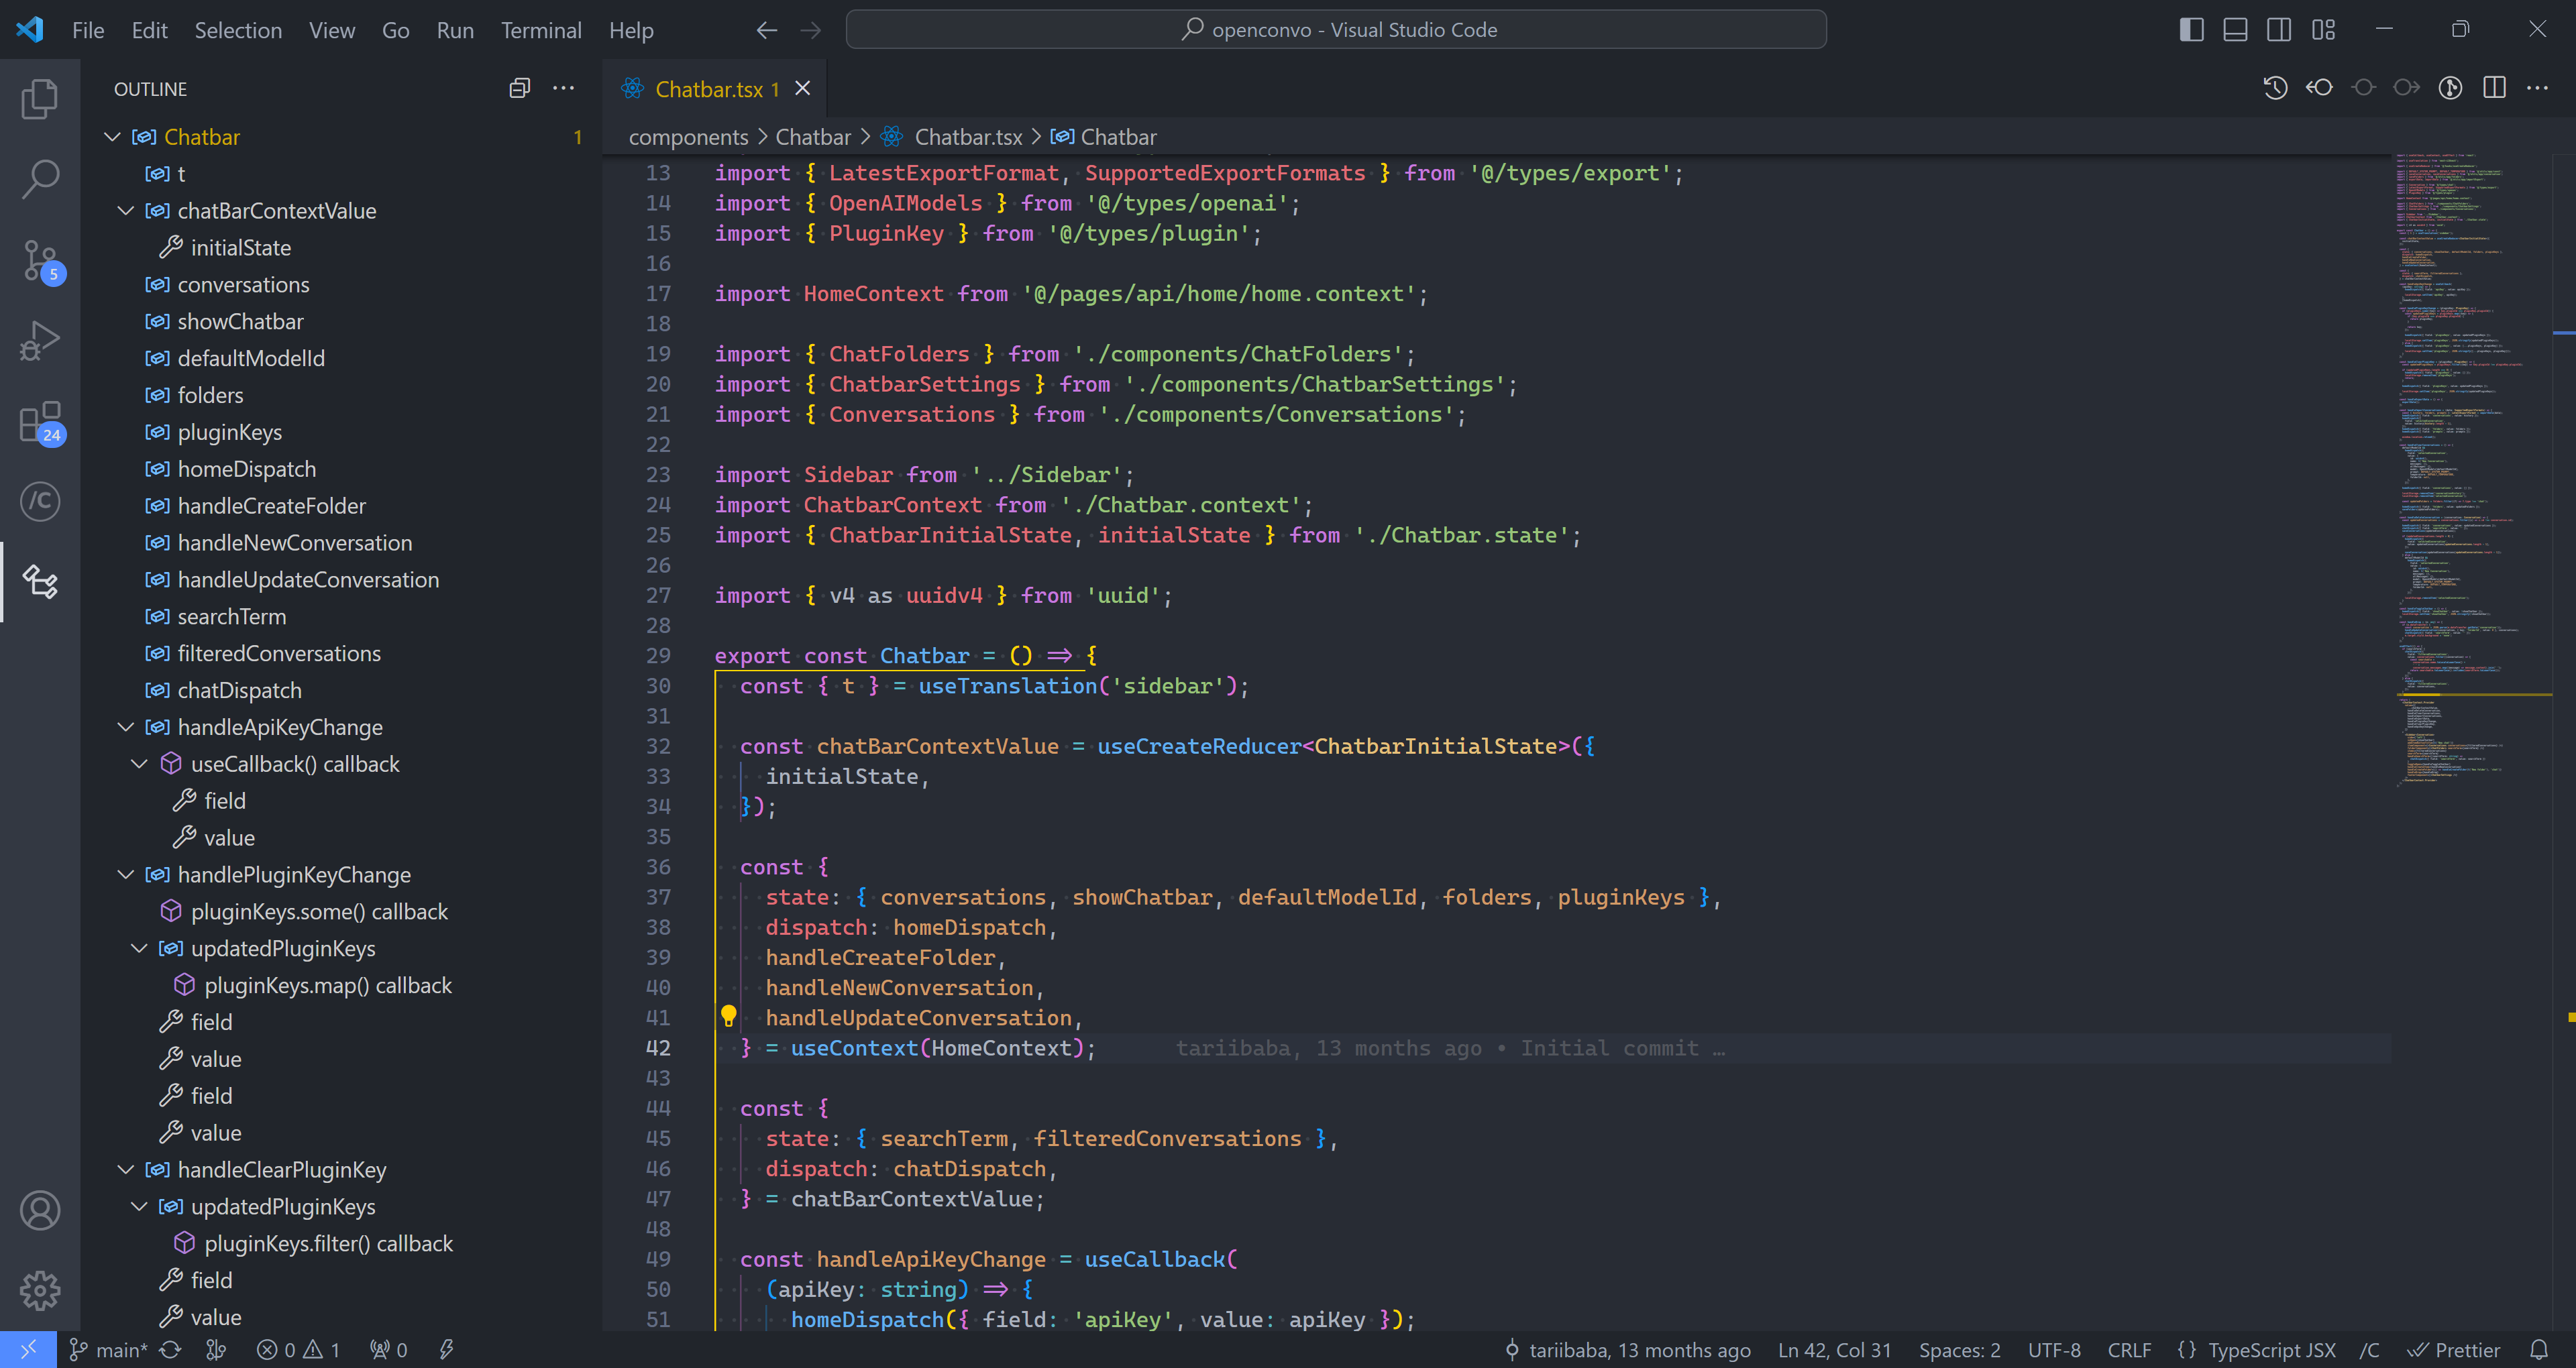
7. Bird’s eye with Outline view
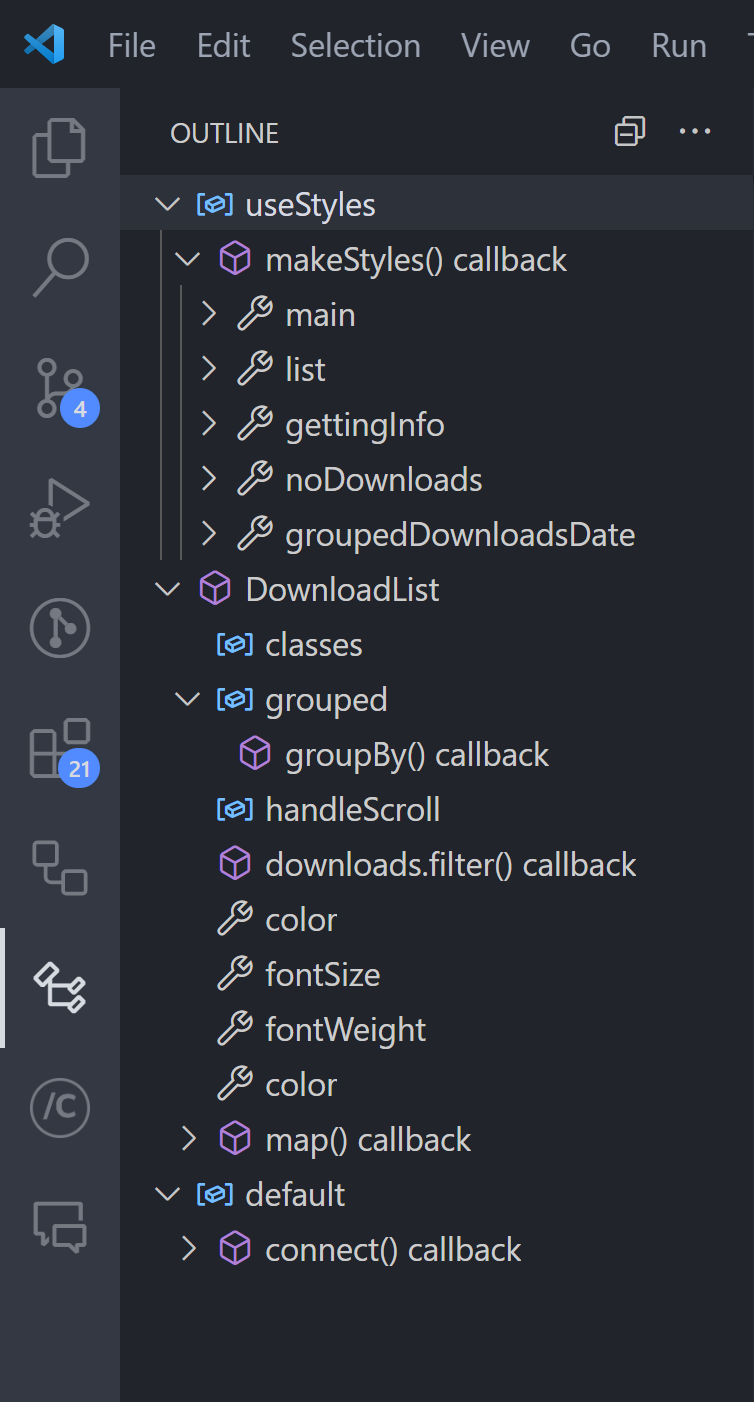
The Outline View is another brilliant way to keep track of large code files.
This feature gives a broad overview of all the symbols and nested symbols in the file: variables, classes, functions… you name it.
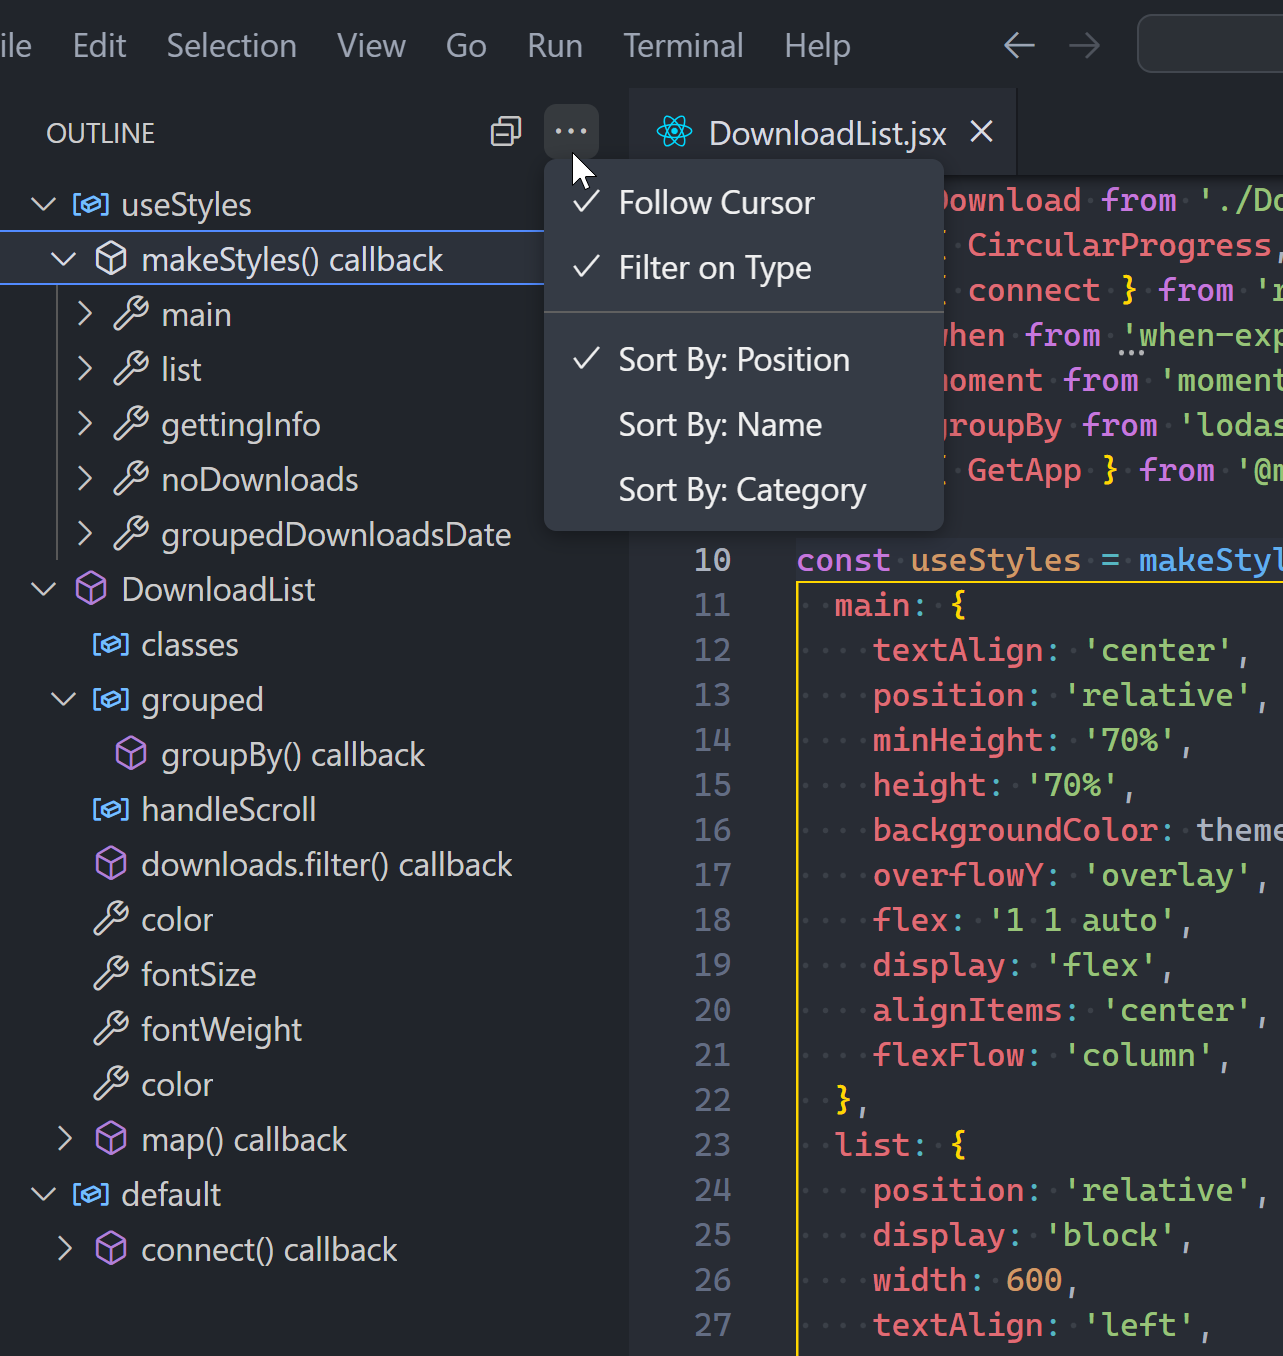
You can sort the top-level symbols shown by their position, name, or type.
And when you’re moving around a lot you probably want to keep the Follow Cursor option turned on, to make the selected symbol in the outline match the selected symbol in the file:
Normally you’ll find this view in the File Explorer pane along with Open Editors and Timeline, but as I started using them more often for my own monstrous files I moved it to a separate pane:
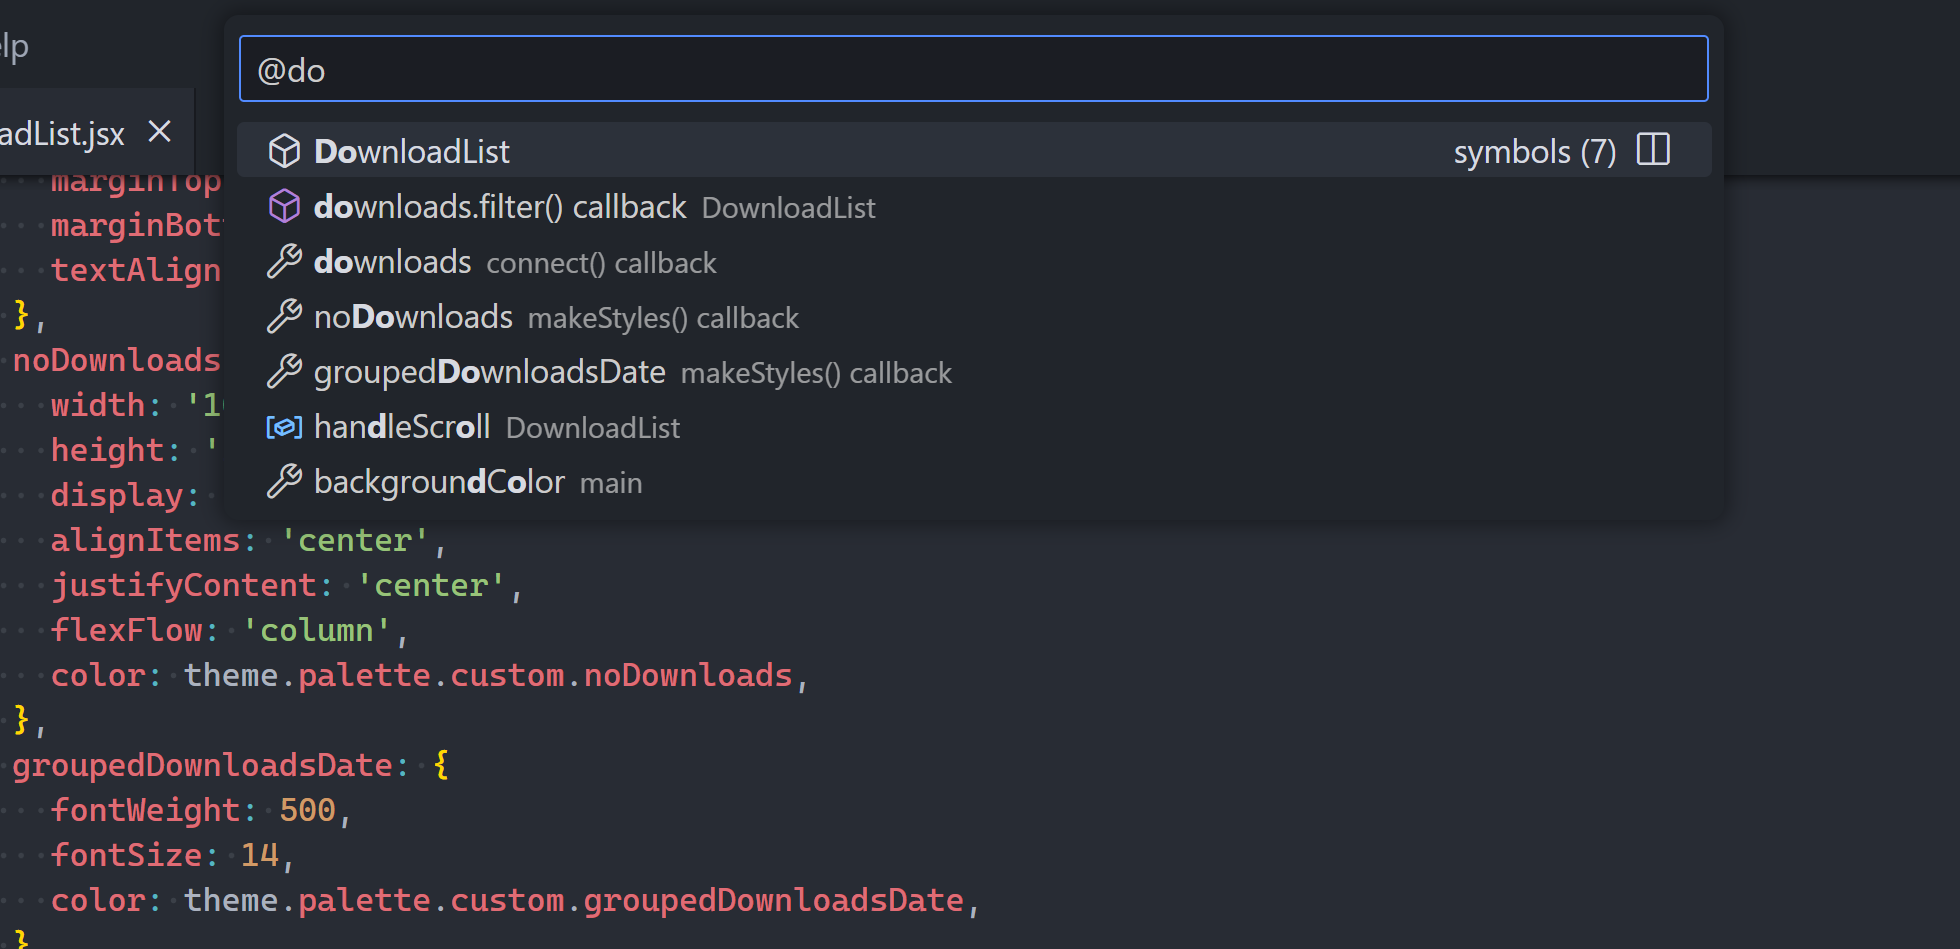
8. Go to symbol quickly
And when we stubbornly refuse to split up the file and it gets HUGE; so huge that navigating through the *outline* is becoming a chore, then it’s time to: Go To Symbol.
With the Ctrl + P, @ shortcuts.
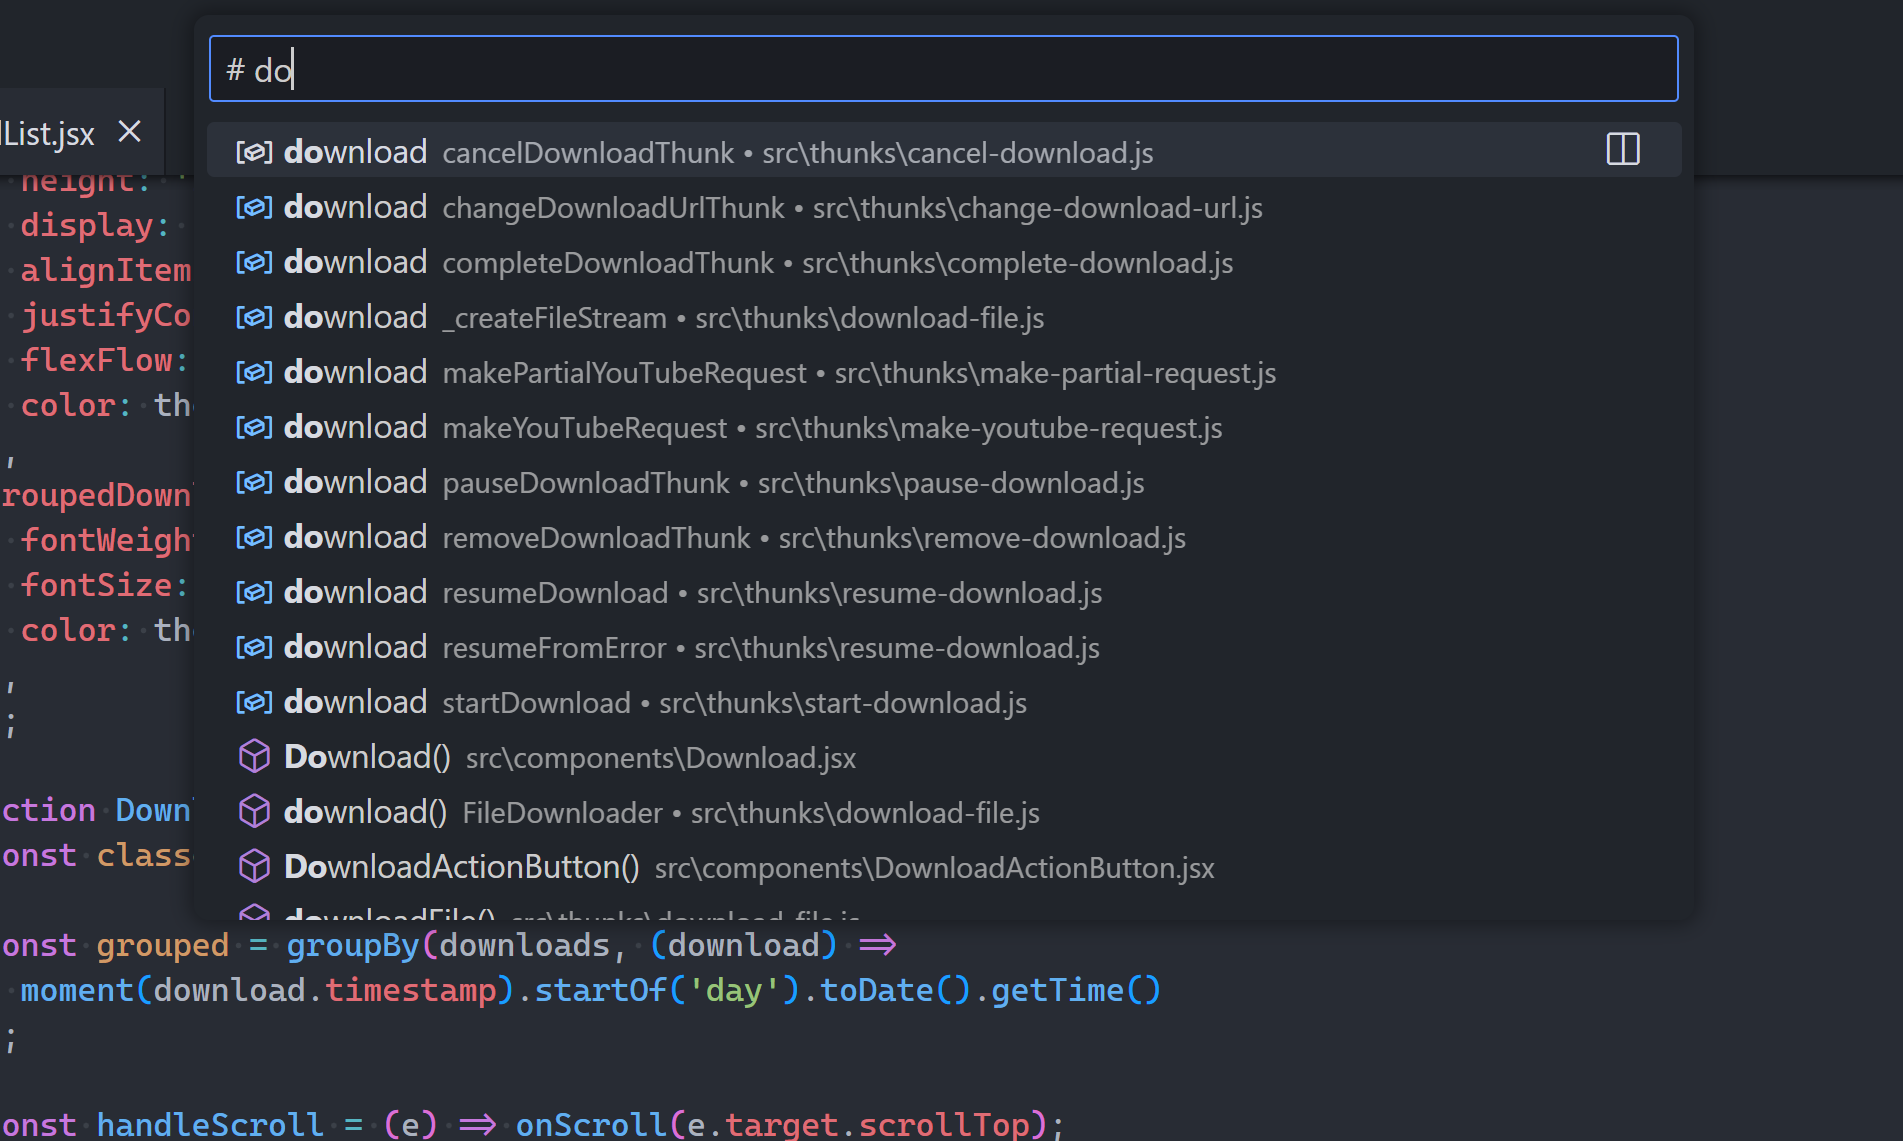
And when we finally do the sensible thing and break up the file, we can still search across all those files and more, with Ctrl + T:
9. Go to definition
And once you get to a symbol, you can easily view the definition with Alt + Click or F12:
Double-click the definition popup to fully open the file:
10. Undo cursor quickly
After going to a symbol or viewing its definition we’ll probably want to return to where we were just a few moments prior.
Instead of wasting time relying on short-term memory, you can rest assured that the Ctrl + U keyboard will take you to exactly where you were before.
This is also essential when you go to a line by Ctrl + G.
These 10 powerful tips will elevate your efficiency and make day-to-day coding life easier and more enjoyable.
Key takeaways
Create and publish a GitHub repo in seconds from the Source Control Panel (open with Ctrl + Shift + G G).
Manage multiple folders in a workspace with File> Add Folder to Workspace....
Code with multiple files at once with the View > Split Editor....
Quickly copy a line with Ctrl + C.
Move a line or up or down with Alt + Up / Down.
Collapse code blocks and nested JSX with Ctrl + Shift [.
View all symbols in a file at once with Outline View
Search all symbols in the file with Ctrl + P, @, search in workspace with Ctrl + T
Go to where a symbol was definite with Ctrl + Click or F12.
10 breathtaking themes to upgrade your dev quality of life and coding enjoyment.
1. Night Owl
Night Owl is here for all your late-night coding drills.
Easy on the eyes with a cool color palette:
Sit in a dark room and code all night long.
And there’s a different variant, for those who hate the italics:
And when the morning comes around again:
No italics:
2. Atom One Theme
My absolute favorite.
The signature color scheme from the Atom editor that GitHub killed.
I find dark themes annoying in the day with bright light all around me — so thankfully this also has a light counterpart.
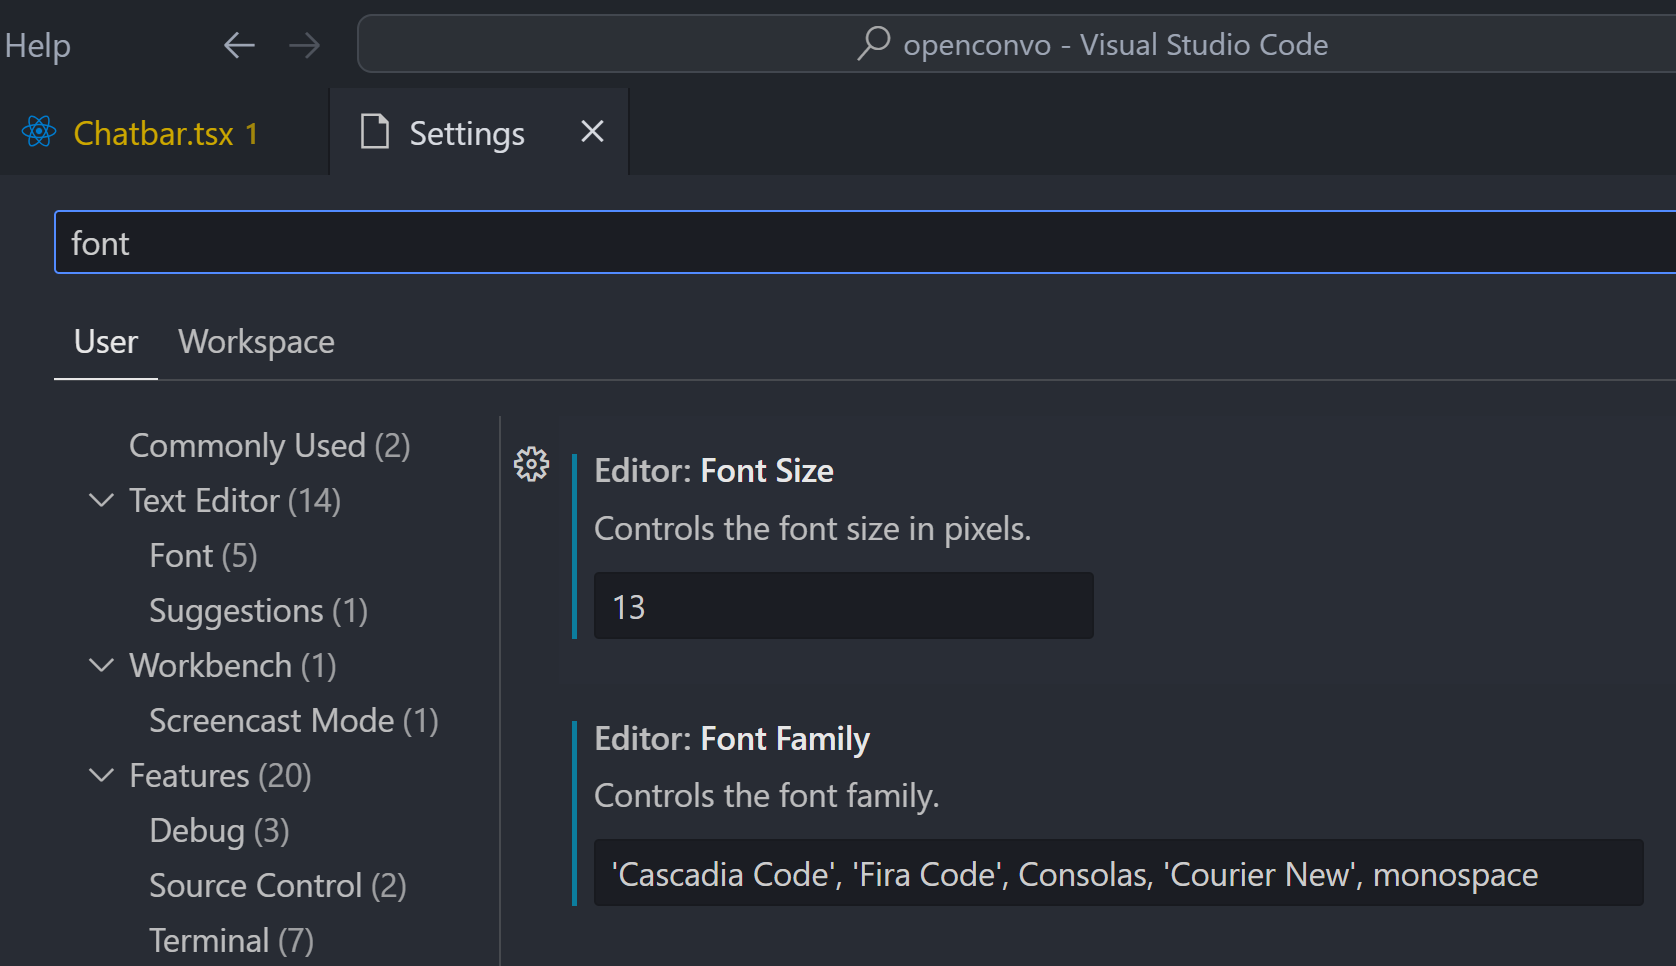
3. GitHub Theme
Speaking of GitHub: Their official theme for VS Code:
Look familiar? No? How about this:
Reduce the font size and change it to Consolas and you have a perfect replica of the theme at github.com.
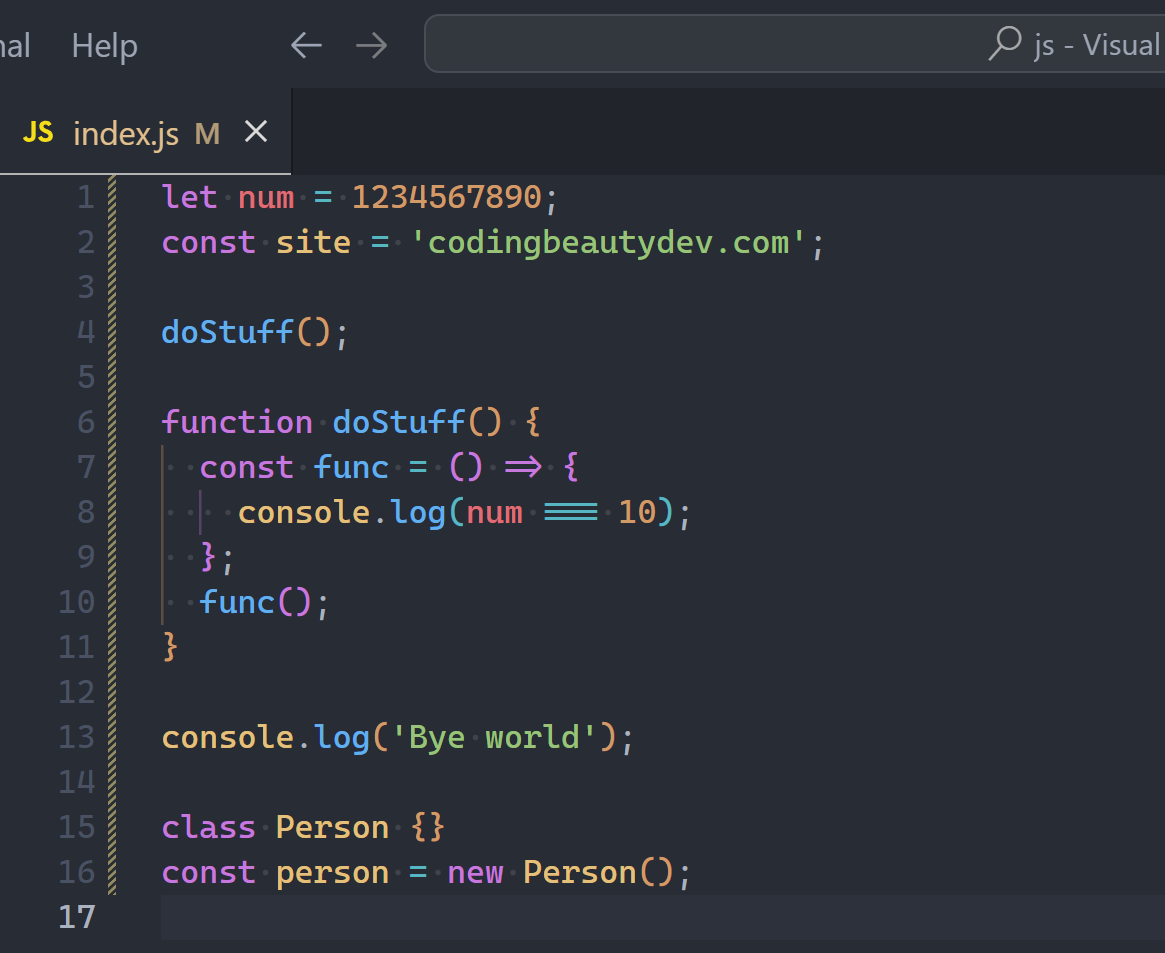
4. One Dark Pro
The biggest difference from Atom One Dark is the variable color.
It’s got a vibrant yellow compared to the gray of the former.
Essentially all the rainbow colors now — can’t get much more colorful than that.
Especially when you sprinkle bracket pair colorization.
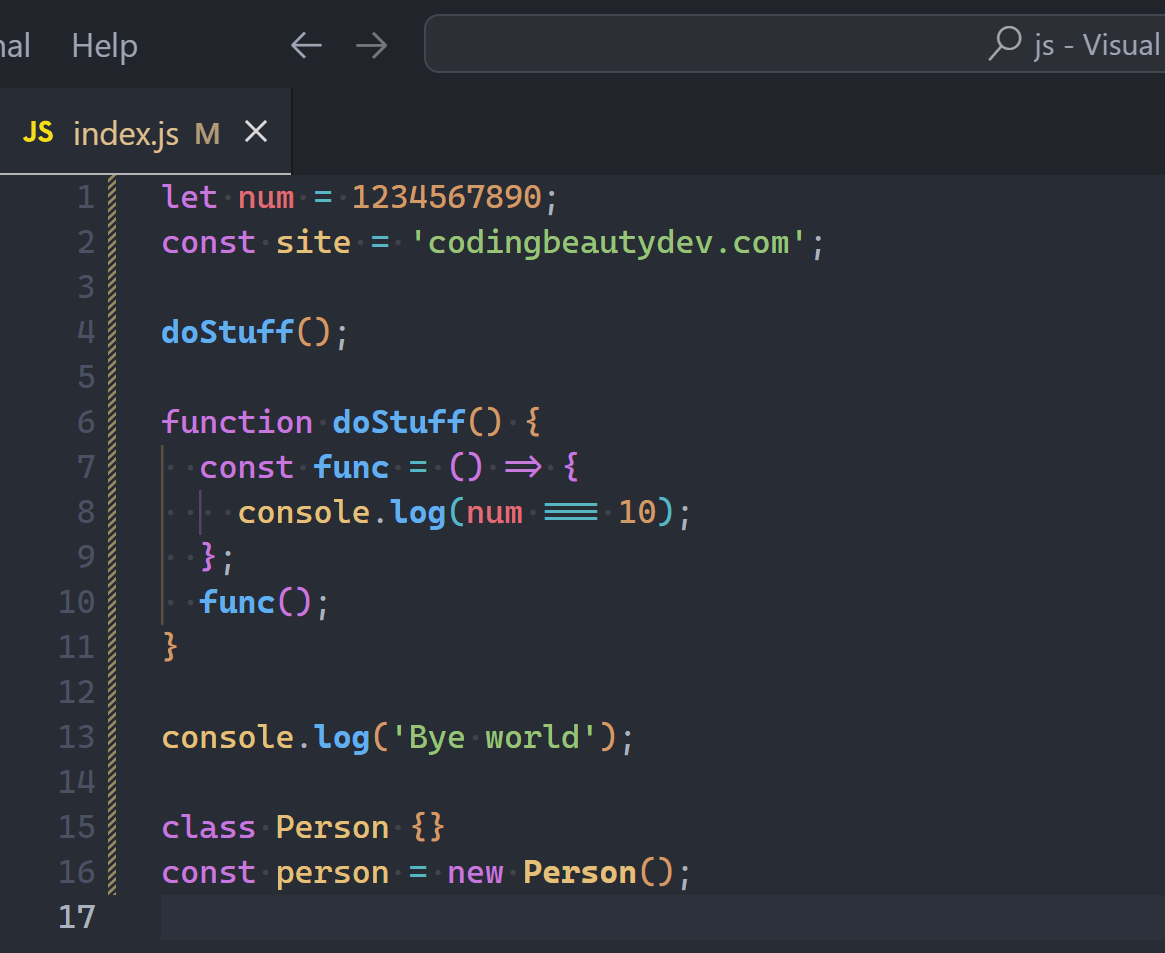
And One Dark Pro also has some nice variants you may want to try: Check out One Dark Pro Mix.
It’s got a slightly darker background with a pleasant bold color for the function blue.
No light theme though.
5. Monokai
A visually stunning theme with strikingly vibrant colors and excellent readability.
Look at the alluring contrast between the green and the pink, and the purple too. All with a nice brownish background.
There’s also Monokai Pro for a lesser contrast and a more sophisticated feel.
The extension also comes with a beautiful file icon theme with multiple variants:
6. Dracula Theme
Dark and dramatic — that’s Dracula.
It’s a purple-centric theme with a mysterious vibe.
Not surprising it doesn’t have a light theme — that’s Dracula.
7. Material Theme
A popular theme packed with sleek, modern colors.
Comes with gorgeous color variants, like Material Theme Ocean:
Material Theme also has its own icon set:
8. Quiet Light
Minimalistic theme with a clean interface:
Purple purple purple.
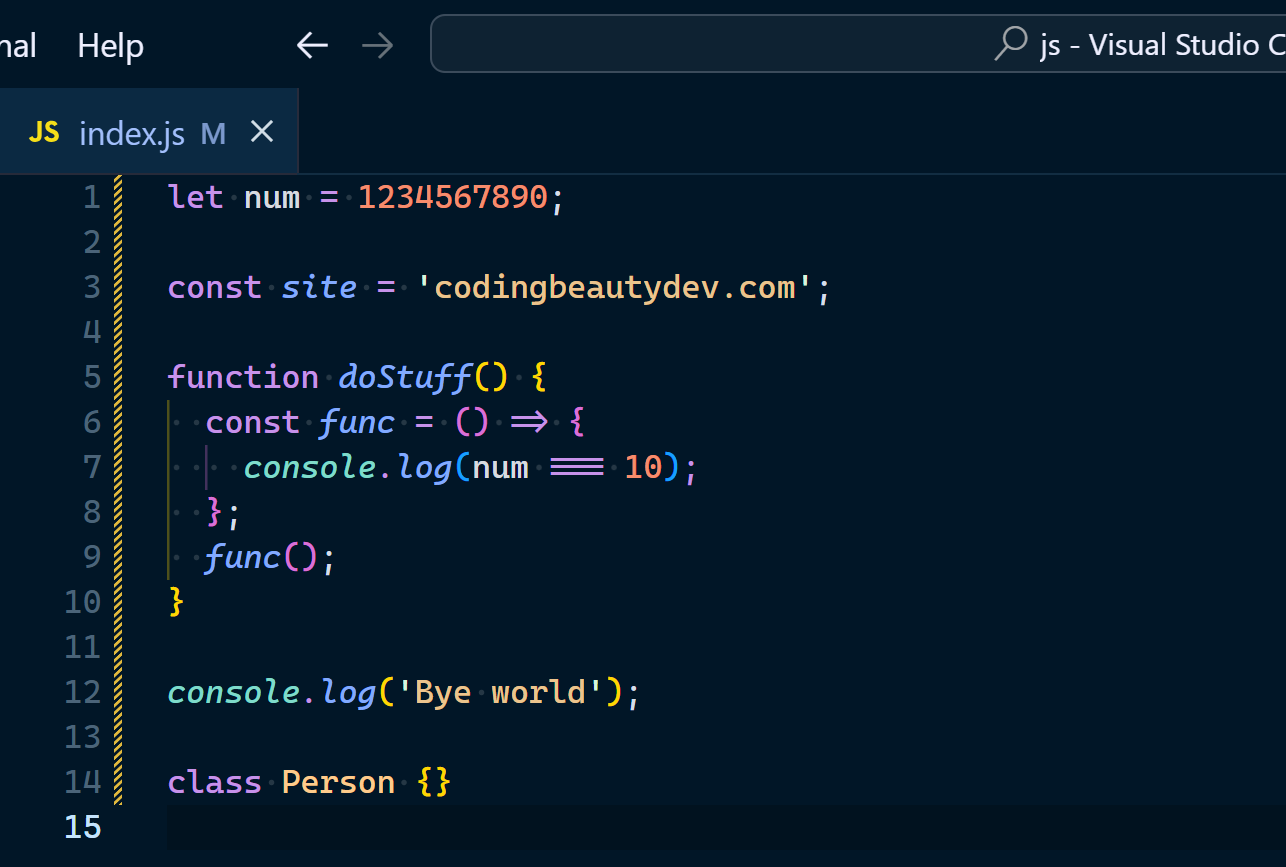
9. Winter Is Coming
Lovely night-friendly theme cool blue hues:
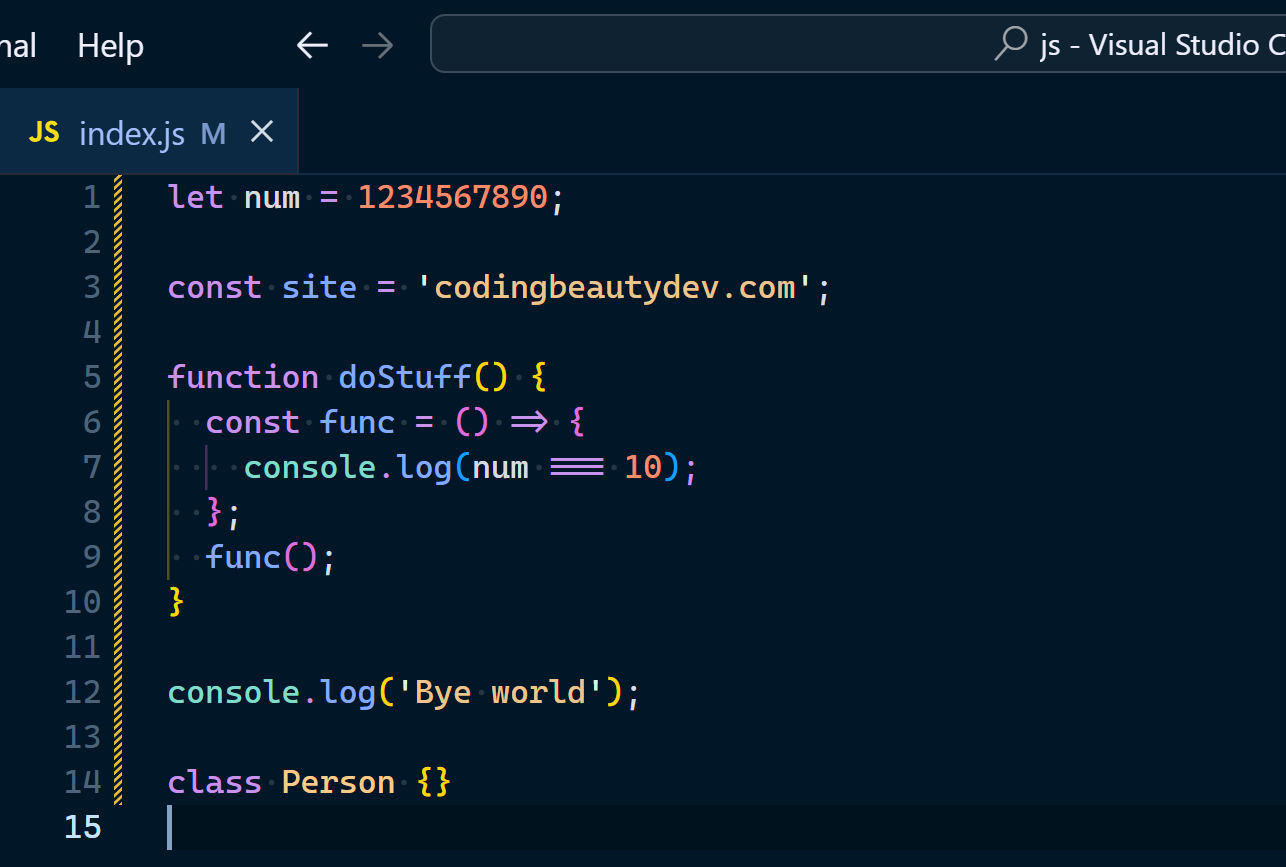
If you’re not a big fan of the dark blue background, then dark black should help.
And it’s only fitting for it to have a light counterpart — it’s Winter after all.
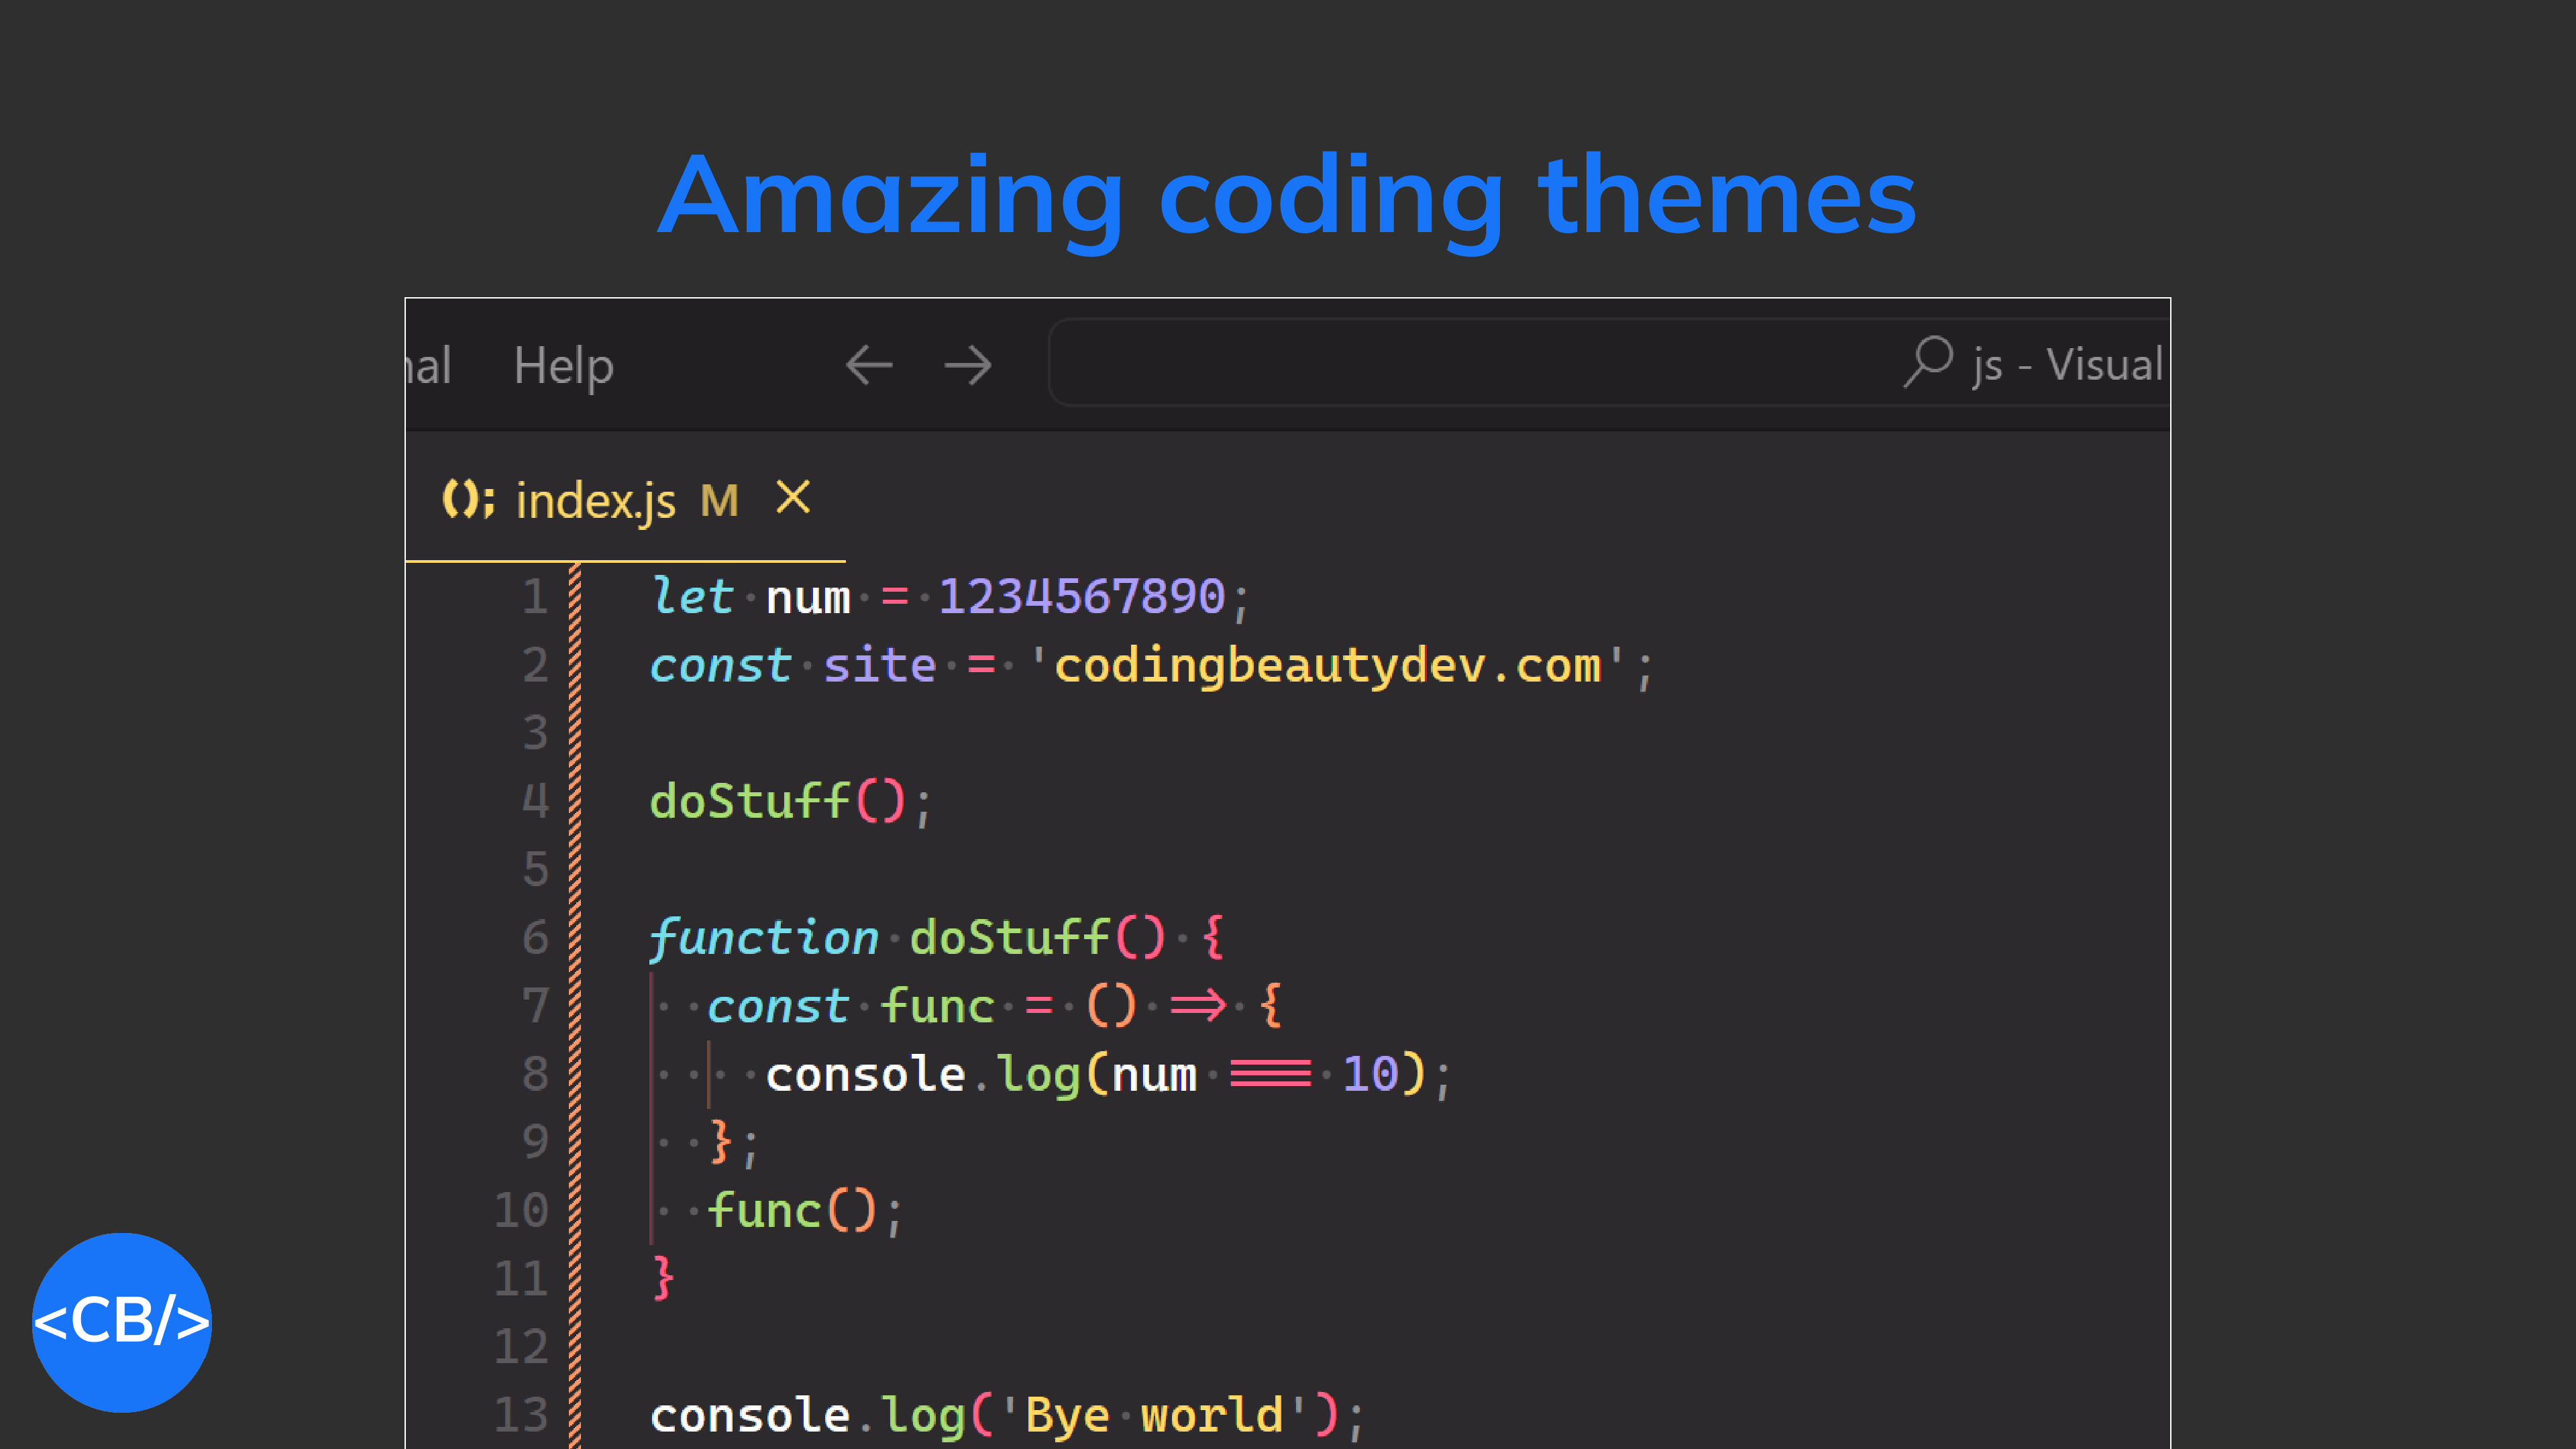
10. Visual Studio Theme
For those with Visual Studio nostalgia.
Instantly recognizable with the blue variables and red strings.
Final thoughts
There’s a theme here for every developer’s taste – all clear and breathtaking to upgrade your coding experience.
Whether you prefer dark modes for late-night coding or bright themes for daytime clarity, the right theme can make all the difference in how comfortable and productive you are as you work.
Explore these options, find the one that resonates with your style, and take your coding sessions to the next level.
Did you know that 73% of developers worldwide rely on the same code editor?
Yes, the 2023 Stack Overflow Developer Survey results are in, and yet again, Visual Studio Code was by far the most used development environment.
“Visual Studio Code remains the preferred IDE across all developers, increasing its use among those learning to code compared to professional developers”, survey.stackoverflow.co/2023
And we all know why: it’s awesome.
But are we fully exploring its potential? In this article, we unfold some compelling VS Code features that enhance productivity with local source control, animated typing, and rapid line deletion, amongst others. Let us start using them to achieve our coding goals faster than ever.
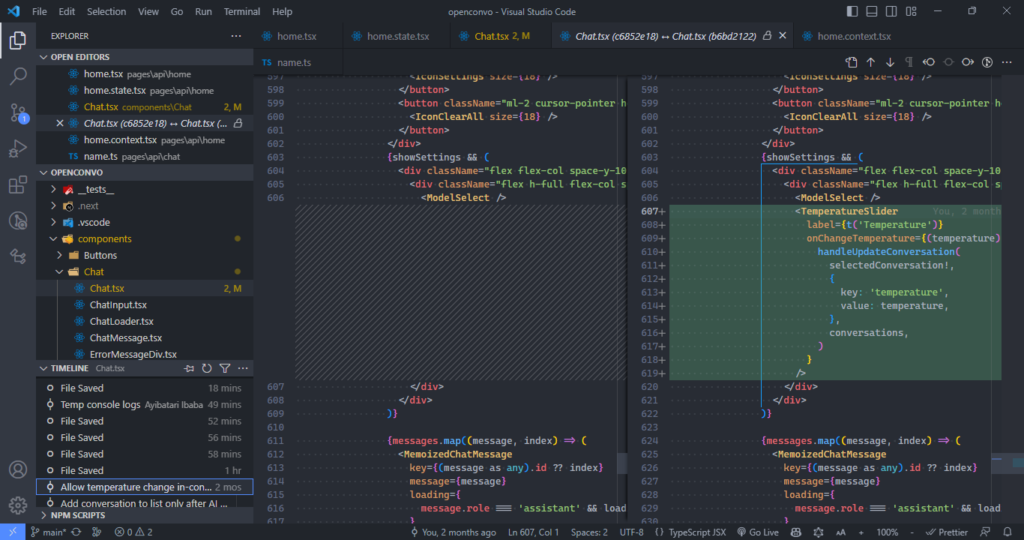
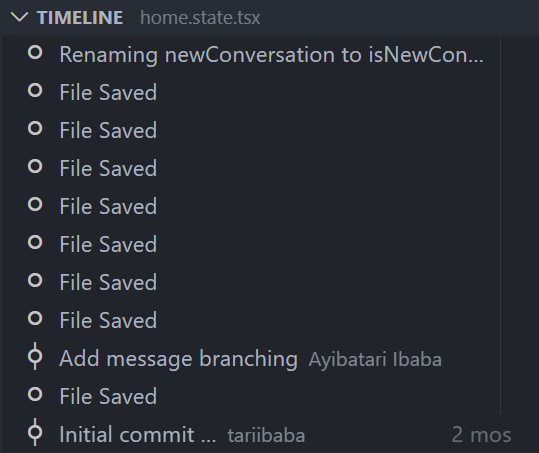
1. Timeline view: local source control
The Timeline view gives us local source control.
Many of us know how useful Git and other source control tools are, helping us easily track file changes and revert back to a previous point when needed.
So the Timeline view in VS Code provides an automatically updated timeline of important events related to a file, such as Git commits, file saves, and test runs.
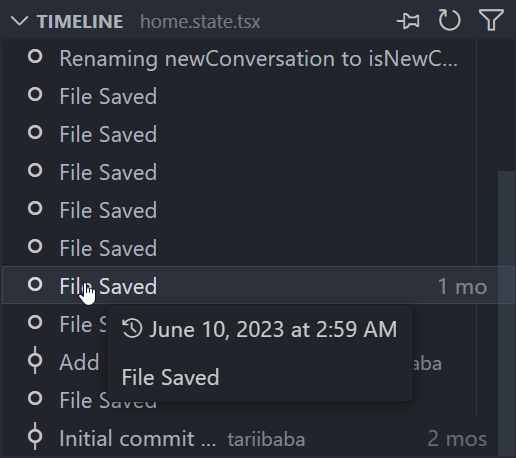
Expand this view to see a list of snapshot of events related to the current file. Here it’s file saves, but also Git commits where the file was staged.
Hover over the snapshot item to view the date and time when VS Code made the snapshot.
Select a snapshot item to see a diff view showing the changes between the file at the snapshot time and the file presently.
2. Autosave: no more Ctrl + S
Can you count how many times you’ve used this shortcut? You probably do it unconsciously now.
The Autosave feature automatically saves files as we work on them, removing the need for manual saving. With autosave, we eliminate Ctrl + S fatigue, save time, and gain certainty of always working with the latest changes to the files.
It’s not perfect though, and it’s up to you to weigh the pros and cons – which we comprehensively cover here.
No autosave.Autosave enabled – the unsaved indicator no longer shows.
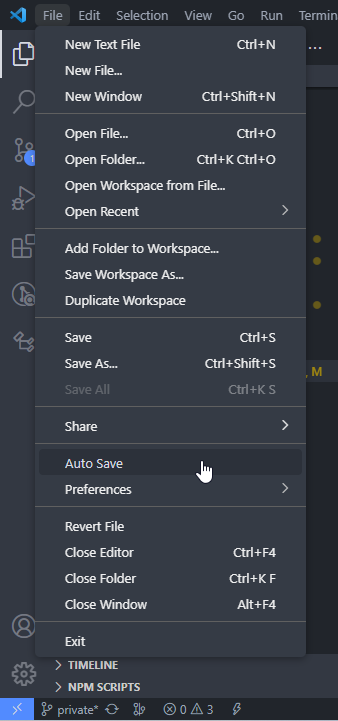
Use File > Auto Save to enable the feature easily.
3. Do anything with Command Palette
Almost anything you do in VS Code apart from typing is a “Command”.
Commands let us accomplish tasks within the editor, and they include file-related commands, navigation commands, editing commands, and terminal commands, each optimally designed to enhance different aspects of your editing experience.
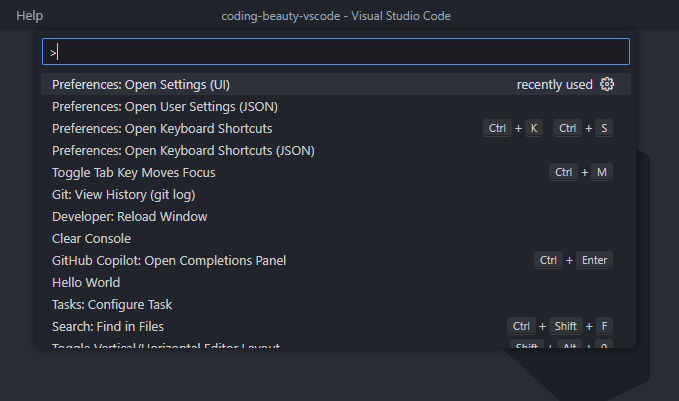
So with Command Palette we simply search for a command and select to perform the associated action.
To open the Command Palette, use this keyboard shortcut:
Windows/Linux: Ctrl + Shift + P
Mac: Shift + Command+ P
As you guessed correctly, those keyboard shortcuts to the right are a faster way to run the commands with the keyboard.
The key benefit of the Command Palette over shortcuts is when there’s a command without a shortcut, or you’re looking for a command you’re not sure exists.
4. Go to file quickly
The mouse is too slow.
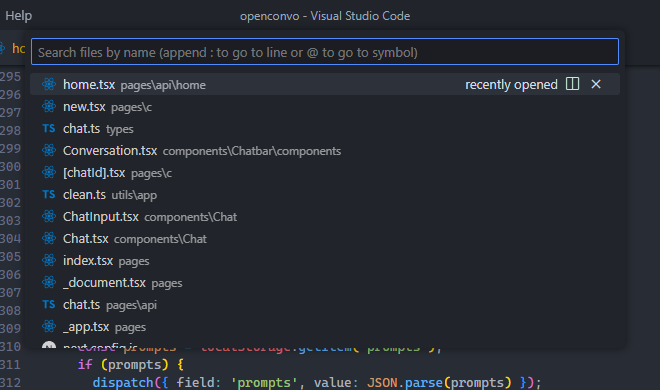
Yes, you can click on the file in the Explorer pane, but for a much faster alternative use Ctrl + P to search for and open a specific file in your project.
Hold Ctrl and press Tab to cycle through the list of files currently open in an editor instance.
You can even use Alt + Left and Alt + Right to quickly navigate between these open files.
All these are much faster ways to get to a file than using the cursor.
5. Go to line quickly
Jump, don’t scroll.
Quickly navigating to a line is invaluable during debugging when you need to encounter errors at specific line numbers. By jumping to those lines, you can examine the code in that particular context, evaluate variables, and troubleshoot the issue.
Use the Ctrl + G keyboard shortcut for this.
6. Delete line quickly
You’ve got to the line now, what if you want to delete it?
Will you drag and drag to highlight and then press Delete? Will you tirelessly press Backspace until every character is gone?
Or, will you use the Ctrl + Shift + K shortcut to rapidly delete that and dozens more lines in a matter of seconds?
7. Enjoy typing with smooth cursor
VS Code has this smooth cursor feature that animates the cursor as it moves, like in MS Word. This makes typing feel more fluid and polished, as well as giving us a smoother and more natural feel as we navigate through the lines of code and place the cursor at different points.
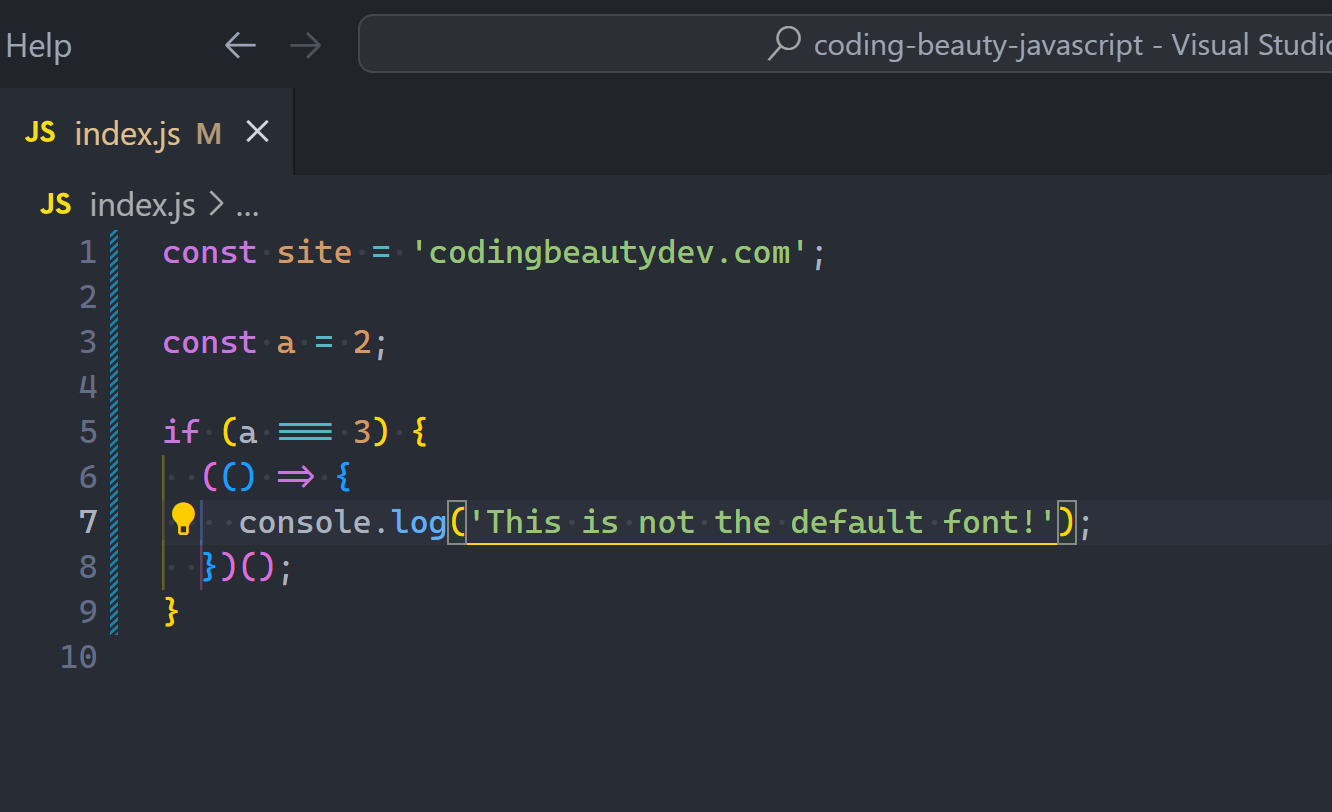
Smooth typing in VS Code! 💡
Enhance your typing experience with this delightful cursor animation 😊
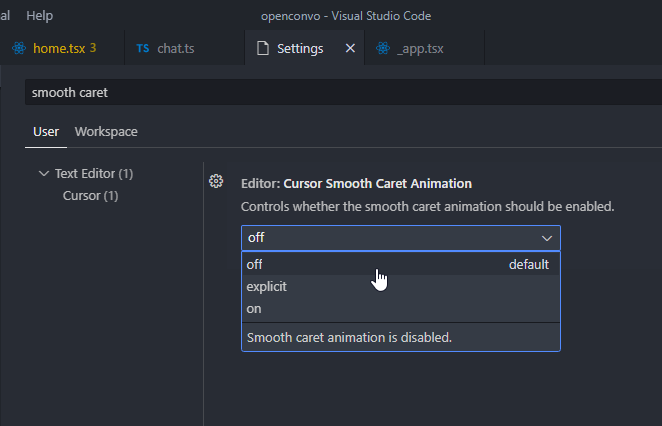
To turn it on, opens Settings UI in the Command Palette and search for “smoot caret”.
We are looking for Editor: Cursor Smooth Caret Animation setting, which has 3 possible options:
off: No smooth cursor animation
explicit: Only animates the cursor when we explicitly place it somewhere in the code.
on: Smooth cursor animation is always enabled – including when typing.
Set it to on to get the full visual experience.
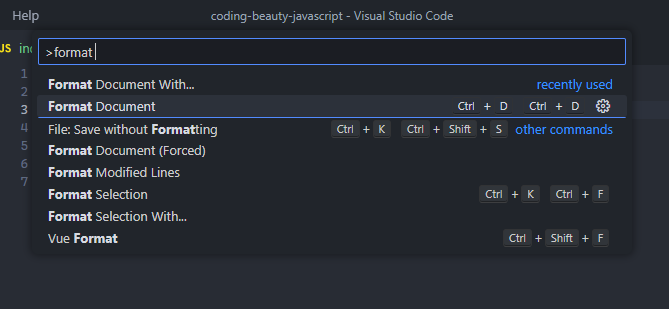
8. Format code rapidly
Formatting is all about improving code readability by organizing it in a structured and consistent manner.
And if you’ve been doing this manually, you need to know that there’s a better way.
Yes, you need to start formatting code automatically with the Format Document command, easily accessible in the Command Palette. Depending on the current file’s language, a particular “default” formatter will be used to format the code using various rules of indentation, line length, braces and brackets, etc.
While there’s a pretty decent built-in JS/TS formatter, for a more robust solution, I highly recommend the Prettier extension.
After installing, you’ll set it as your default formatter.
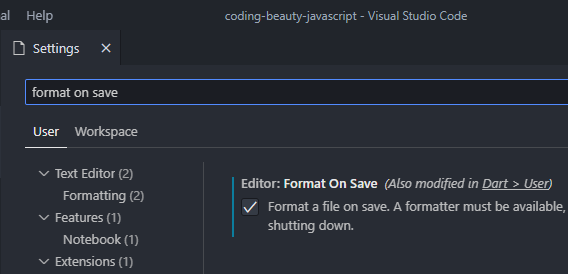
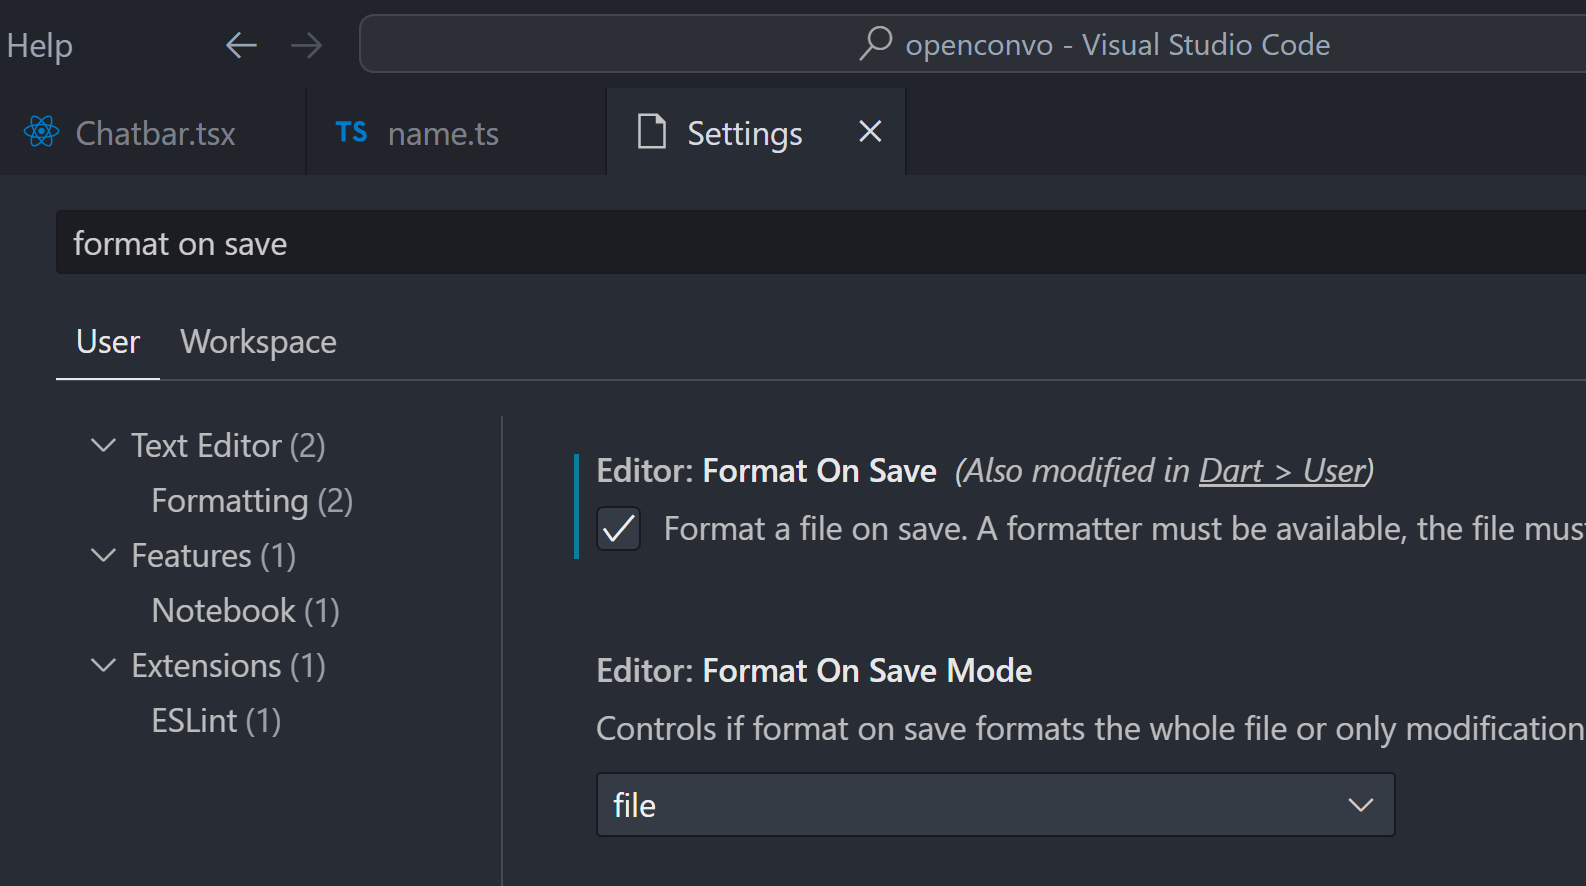
When you use manual over autosave, there’s a feature you should enable to make formatting a bit easier:
Editor: Format On Save: “Format a file on save. A formatter must be available, the file must not be saved after delay, and the editor must be shutting down”. It is disabled by default.
So with this setting on, VS Code will automatically format your code with the current default formatter when you save the file with Ctrl + S, as you saw in the above demo.
When you do autosave, it can get tedious to continuously open the Command Palette when you’re formatting every now and then. And that’s what keyboard shortcuts are for:
Windows: Shift + Alt + F
Mac: Shift + Option + F
Linux: Ctrl + Shift + I
I’m on Windows and personally, I don’t like this default keyboard shortcut; autosave makes me format every now and then, and Shift + Alt + F got agonizing after a while.
So I changed it to Ctrl + D, Ctrl + D – a keyboard shortcut chord that’s much easier to press and remember, and has no conflicting keybinding. I recommend you do the same.
9. Save time with multi-cursor editing
One of the wow moments in my earliest VS Code days, the multi-cursor editing lets you place multiple cursors at different points, and delete or insert the same text multiple times. This speeds up editing time and boosts productivity greatly, as we get repetitive tasks done efficiently with rapid code creation.
Of course, when editing, there’s always at least one cursor. Use Alt + Click to add more.
You can also easily add a cursor directly above or below the current line, with Ctrl + Alt + Down or Ctrl + Alt + Up.
These shortcuts call the Add Cursor Below and Add Cursor Above commands respectively.
10. Create new folder / file quickly
There’s no serious project where we don’t create new folders and files, and if there was a way to accelerate file/folder creation, all the time saved would add up to give us a significant productivity enhancement.
If you’ve been creating new files and folders in VS Code with the new file and new folder button, then yes, there is a way.
Yeah, don’t do this.
Instead of constantly moving your mouse to locate those small buttons, did you know you can just double-click on the Explorer panel to create a new file?
How about a new folder? Well, folders are nothing without files, and when you’re creating a new file, you can easily use the / character to indicate a hierarchy and create new folders and sub-folders to contain that file.
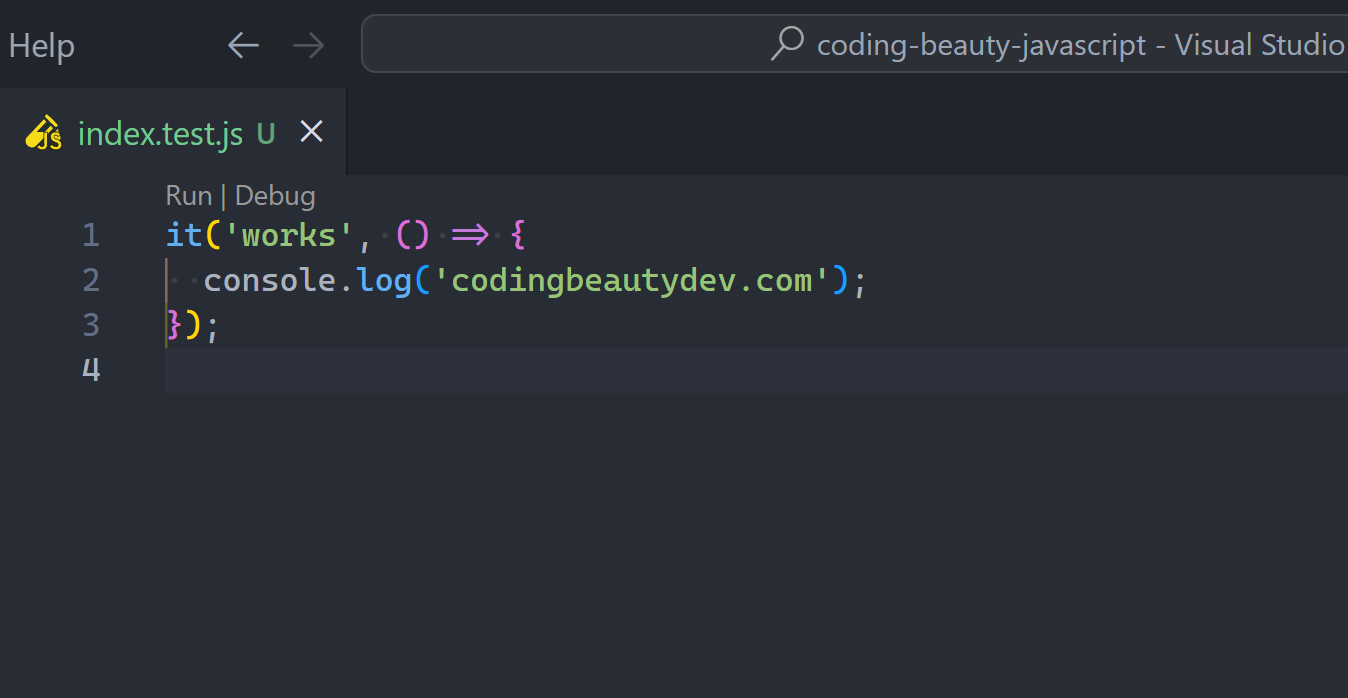
The utils folder is created to contain index.js.
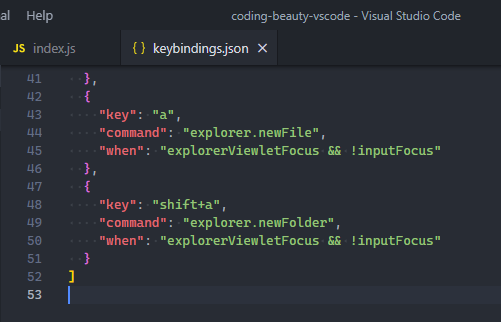
It would be even more efficient to use keyboard shortcuts, which is what I did.
As a former Atom fan, I had quickly gotten used to the A and Shift + A shortcuts for creating new files and folder respectively; I knew what I had to do.
Since A and Shift + A are obviously keys used to code, I included the when values here to make sure they only create a new file/folder when the Explorer pane has focus and there’s no active cursor in the current editor.
So to use these shortcuts when typing, you’ll have to focus on the explorer pane first; click on it, or use Ctrl/Command + Shift + E.
Key takeaways
Enable local source control with Timeline view; available in Explorer pane by default.
Autosave files with File > Autosave.
Run commands in Command Palette with Ctrl + Shift + P or Shift + Command + P.
Go to a file with Ctrl + P, navigate between open files with Alt + Left/Right or Ctrl + Tab.
Go to a line with Ctrl + G.
Delete a line with Ctrl + Shift + K
Enable smooth typing with Editor: Cursor Smooth Caret Animation setting.
Format code with Format Document command, use Prettier, change shortcut to Ctrl + D, Ctrl + D
Use multiple cursors at once with Alt + Click, Ctrl + Alt + Up/Down adds one above/below
Move a line up or down with Alt/Option + Up/Down in Windows/Mac
Create a new file by double-clicking the Explorer pane or set a custom keyboard shortcut. Create a new file in a new folder with “folder/file.ext“
Visual Studio Code is more than just a text editor—it’s a powerful tool that, when mastered, can significantly boost your productivity and streamline your coding workflow. The ten tips and tricks we’ve explored are just the tip of the iceberg. As you continue to navigate through VS Code, you will discover a myriad of other features and shortcuts that will further enhance your coding experience. So, keep exploring, keep learning, and remember: the key to efficient coding lies not just in the code itself, but also in the tools you use to write it.
VS Code’s multi-cursor editing feature makes this even more powerful — with Ctrl + Alt + Down I easily select all the new elements to add text to all of them at the same time:
10. Lorem Ipsum
Lorem Ipsum is the standard placeholder text for designing UIs, and Emmet makes it effortless to add it for visual testing.
Just type lorem in VS Code and you’ll instantly a full paragraph of the stuff:
Type lorem again to expand the text — it intelligently continues from where it stopped:
Final thoughts
Use these 10 powerful Emmet syntax tips to write HTML and JSX faster than ever.
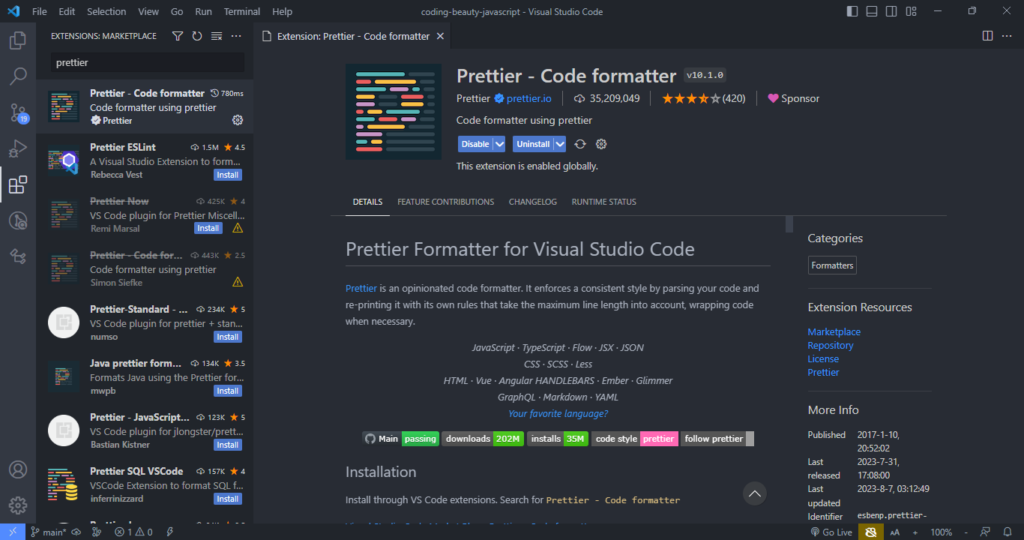
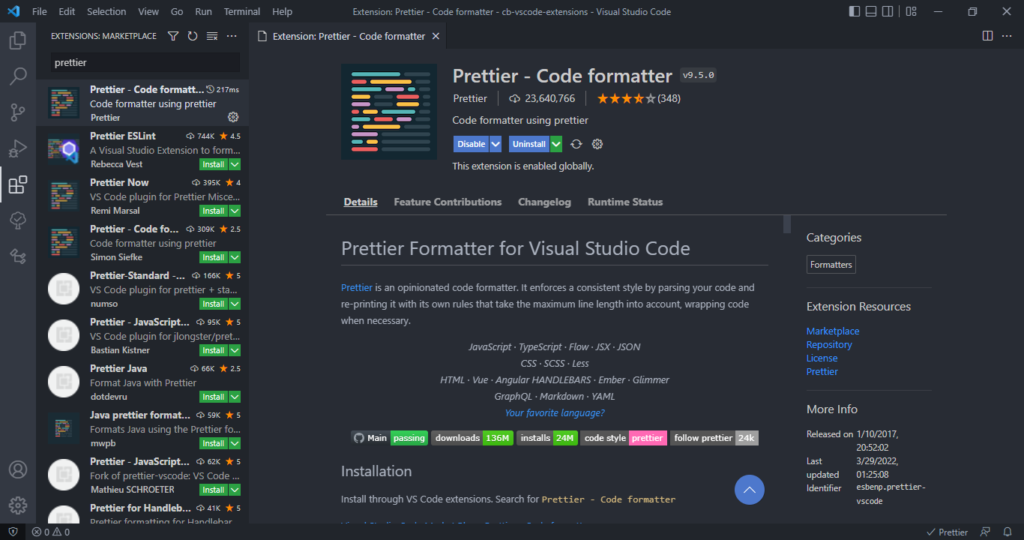
Prettier is a pretty😏 useful tool that automatically formats your code using opinionated and customizable rules.
It ensures that all your code has a consistent format and can help enforce a specific styling convention in a collaborative project involving multiple developers.
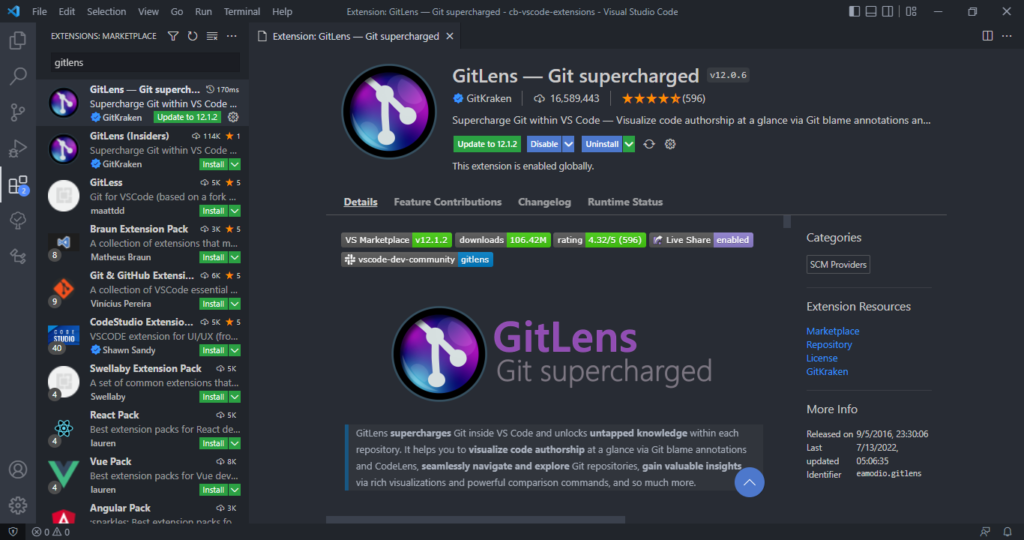
The Prettier extension for Visual Studio Code brings about a seamless integration between the code editor and Prettier, allowing you to easily format code using a keyboard shortcut, or immediately after saving the file.
Watch Prettier in action:
Pretter instantly formats the code after the file is saved.
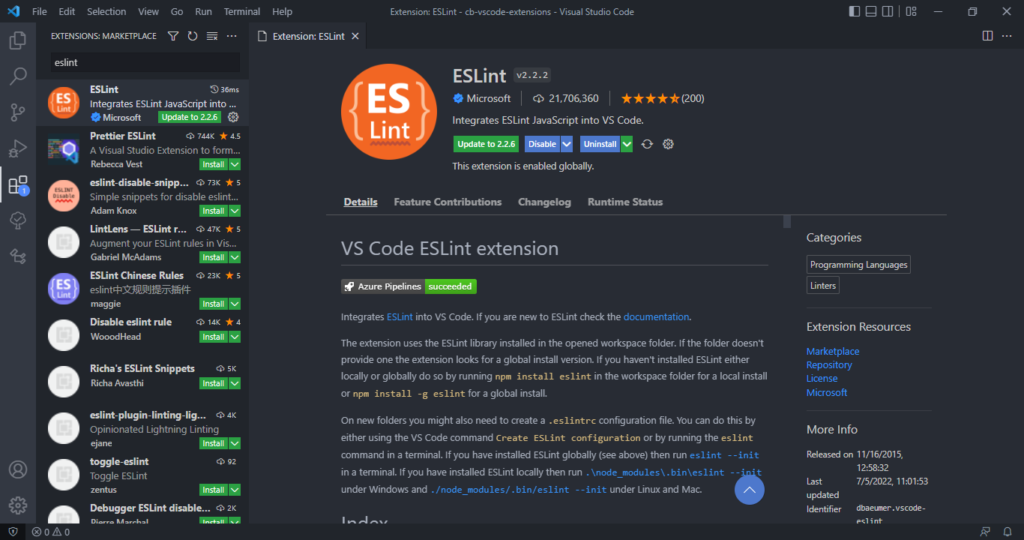
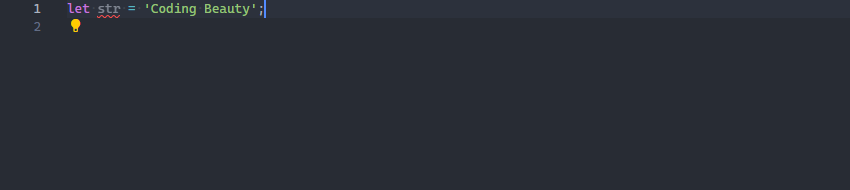
ESLint is a tool that finds and fixes problems in your JavaScript code.
It deals with both code quality and coding style issues, helping to identify programming patterns that are likely to produce tricky bugs.
The ESLint extension for Visual Studio Code enables integration between ESLint and the code editor. This integration allows ESLint to notify you of problems right in the editor.
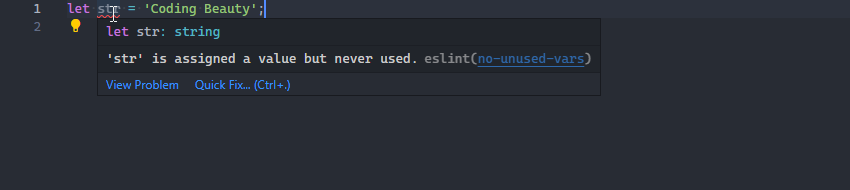
For instance, it can use a red wavy line to notify of errors:
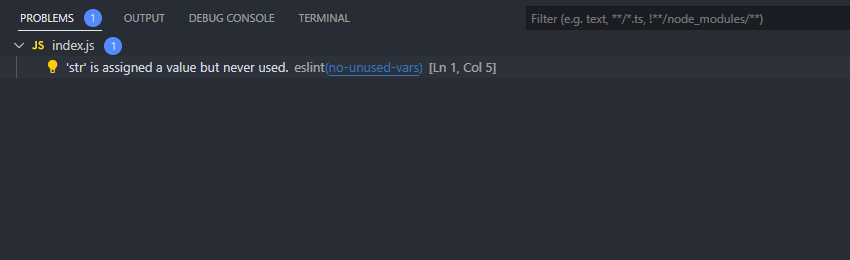
We can view details on the error by hovering over the red line:
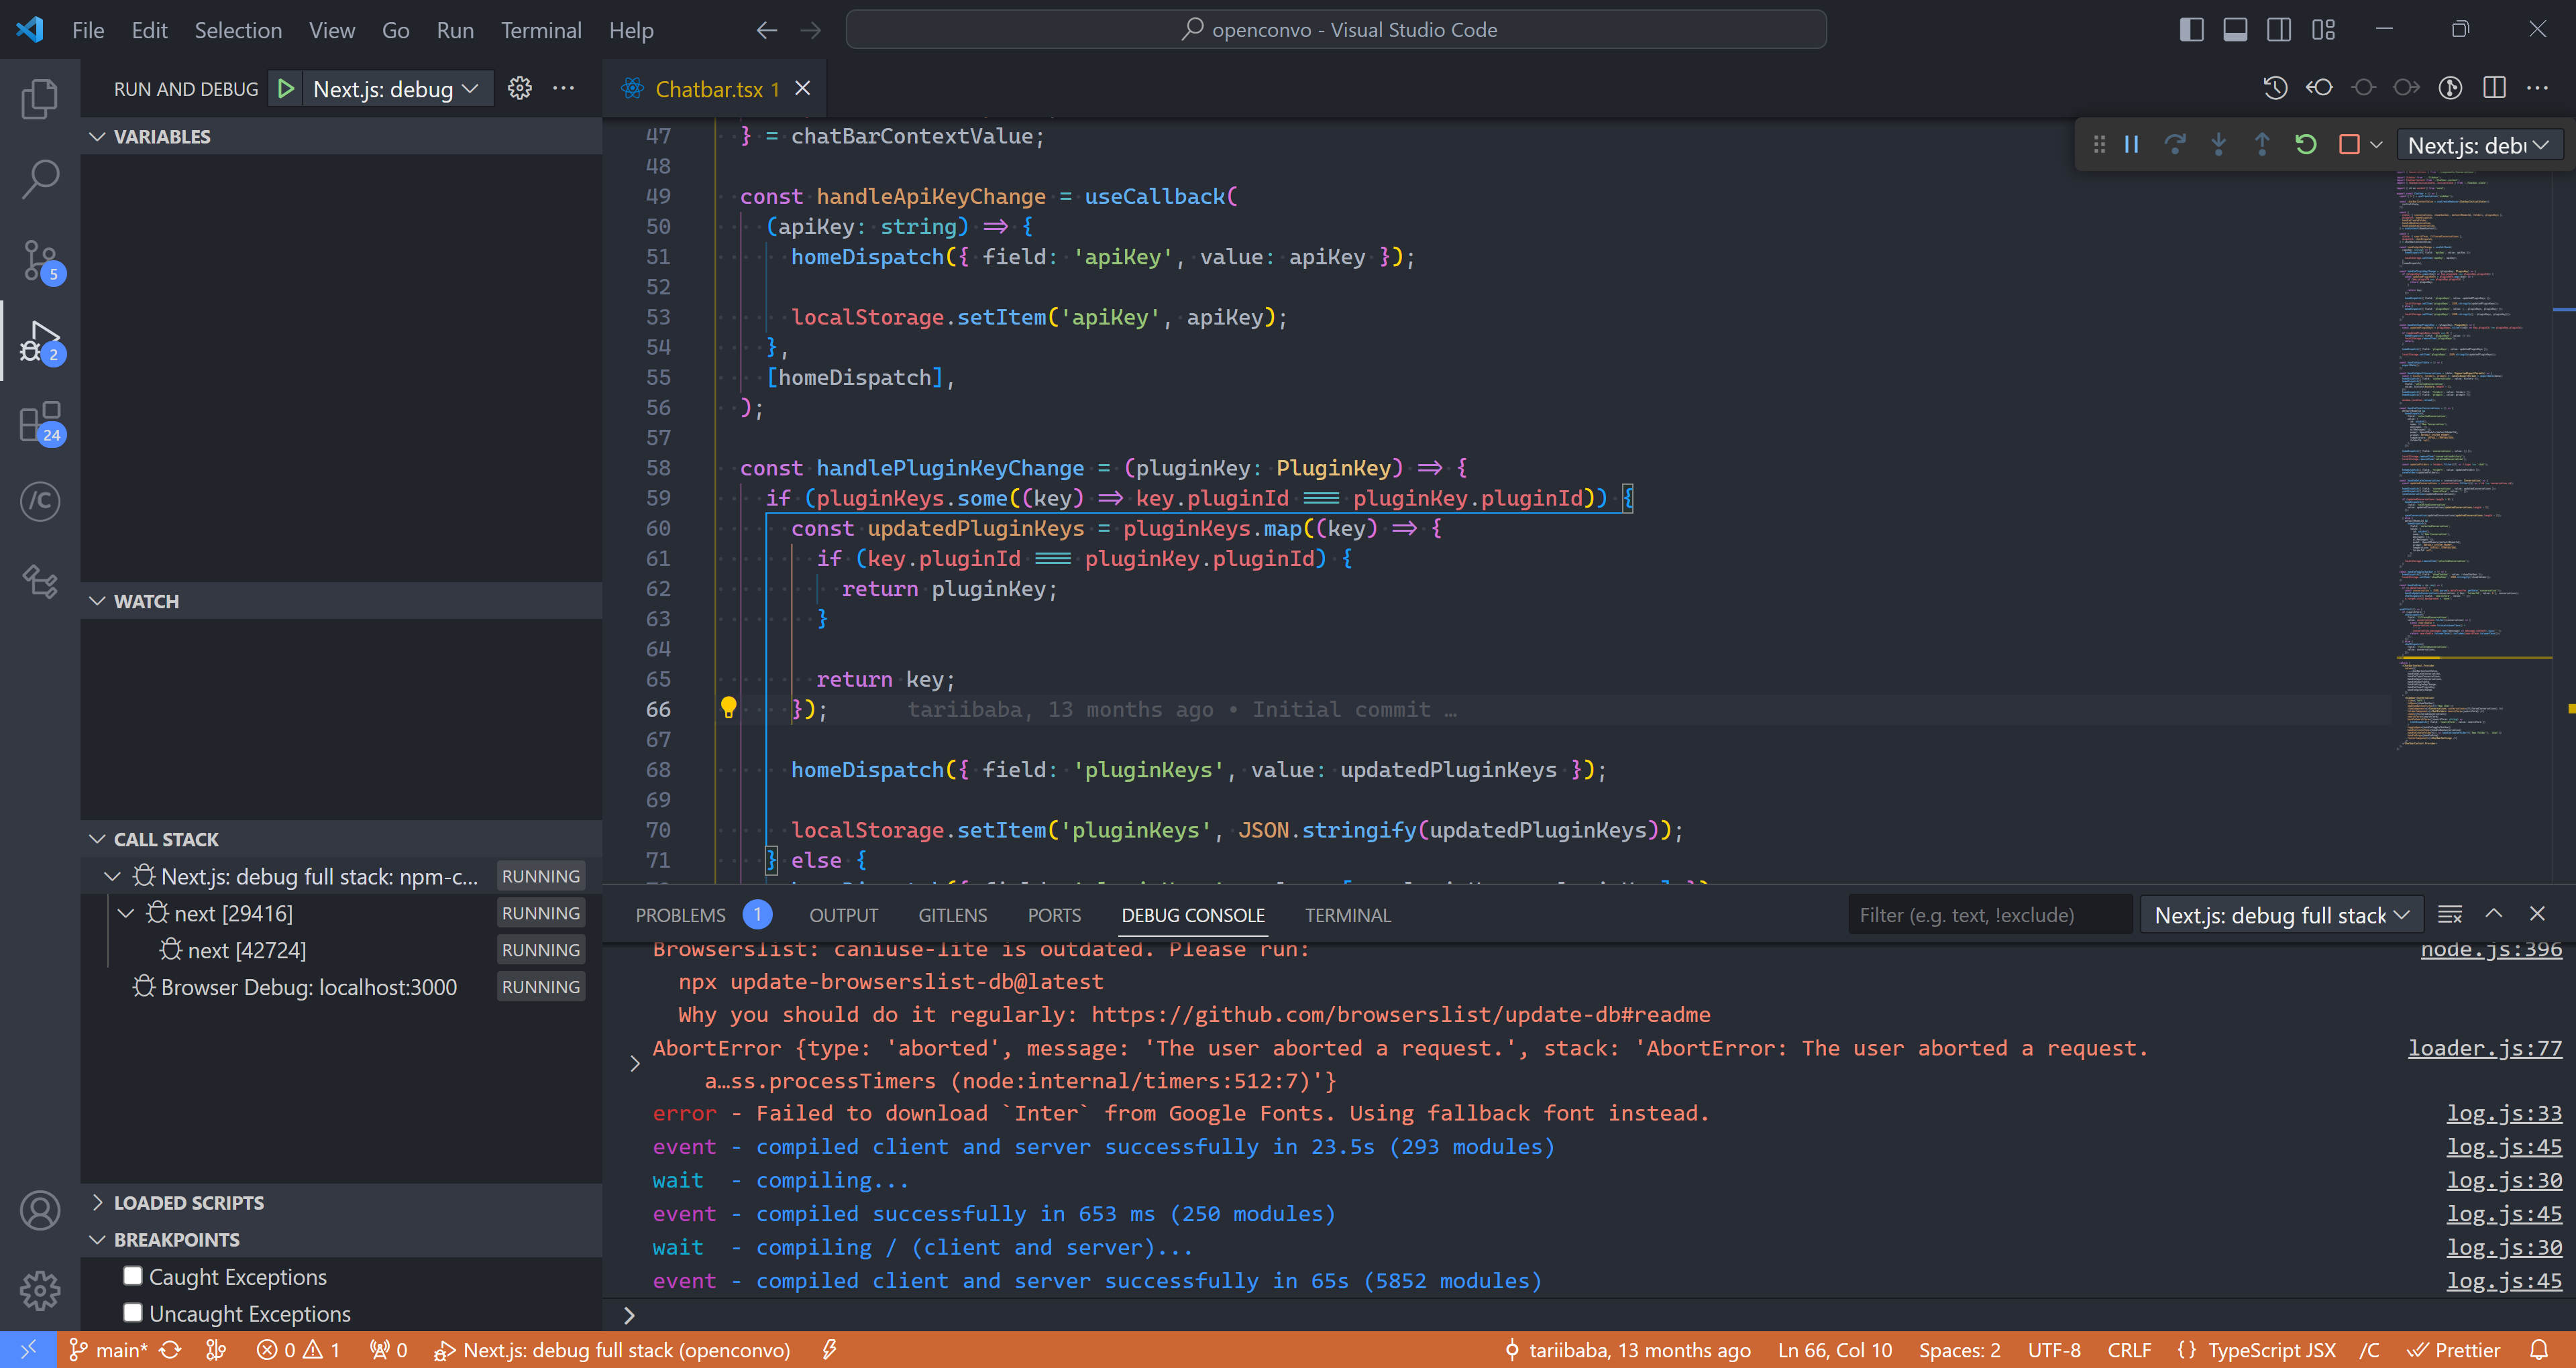
We can also use the Problems tab to view all errors in every file in the current VS Code workspace.
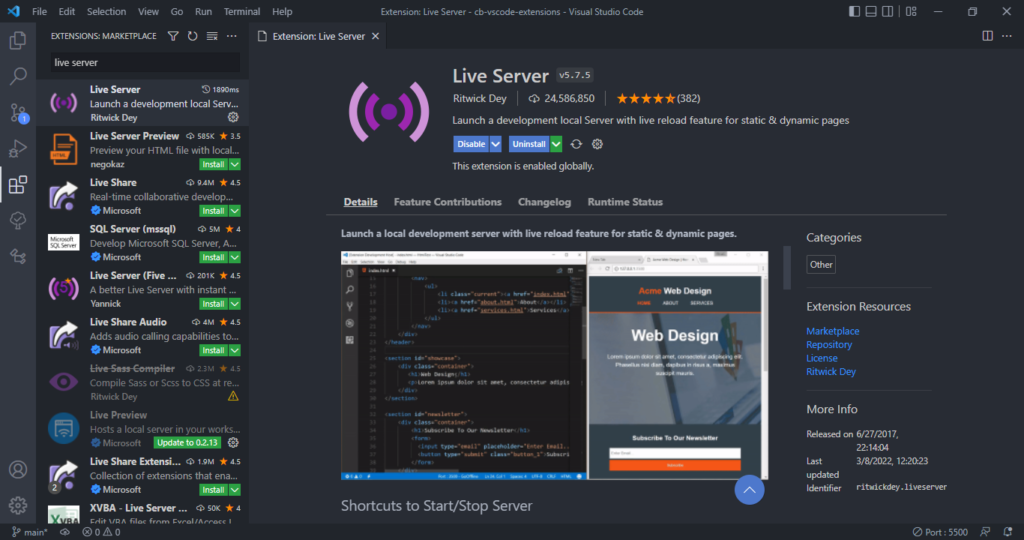
The Live Server extension for VS Code starts a local server that serves pages using the contents of files in the workspace. The server will automatically reload when an associated file is changed.
In the demo below, a new server is launched quickly to display the contents of the index.html file. Modifying index.html and saving the file reloads the server instantly. This saves you from having to manually reload the page in the browser every time you make a change.
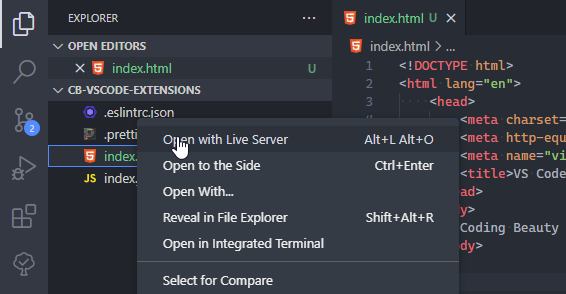
As you saw in the demo, you can easily launch a new server using the Open with Live Server item in the right-click context menu for a file in the VS Code Explorer.
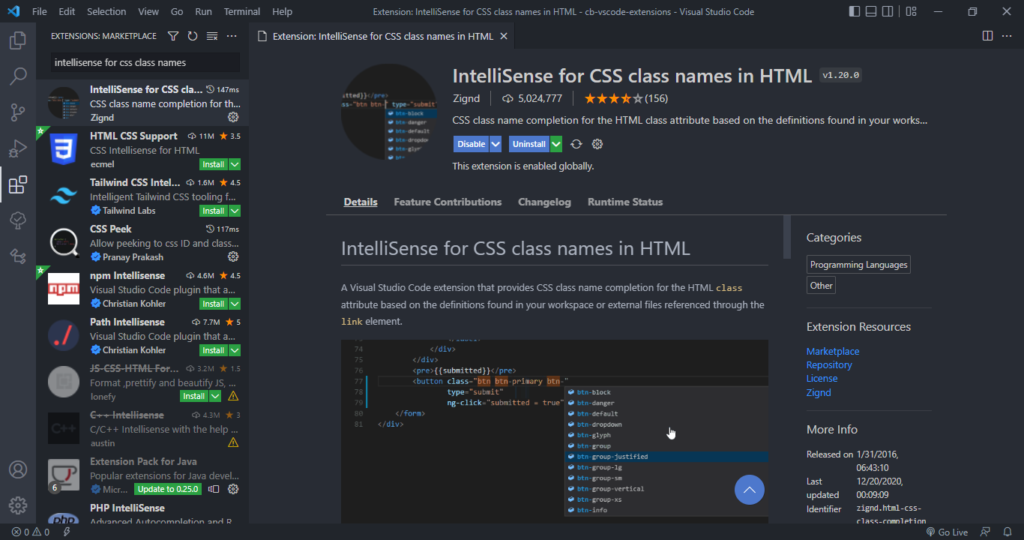
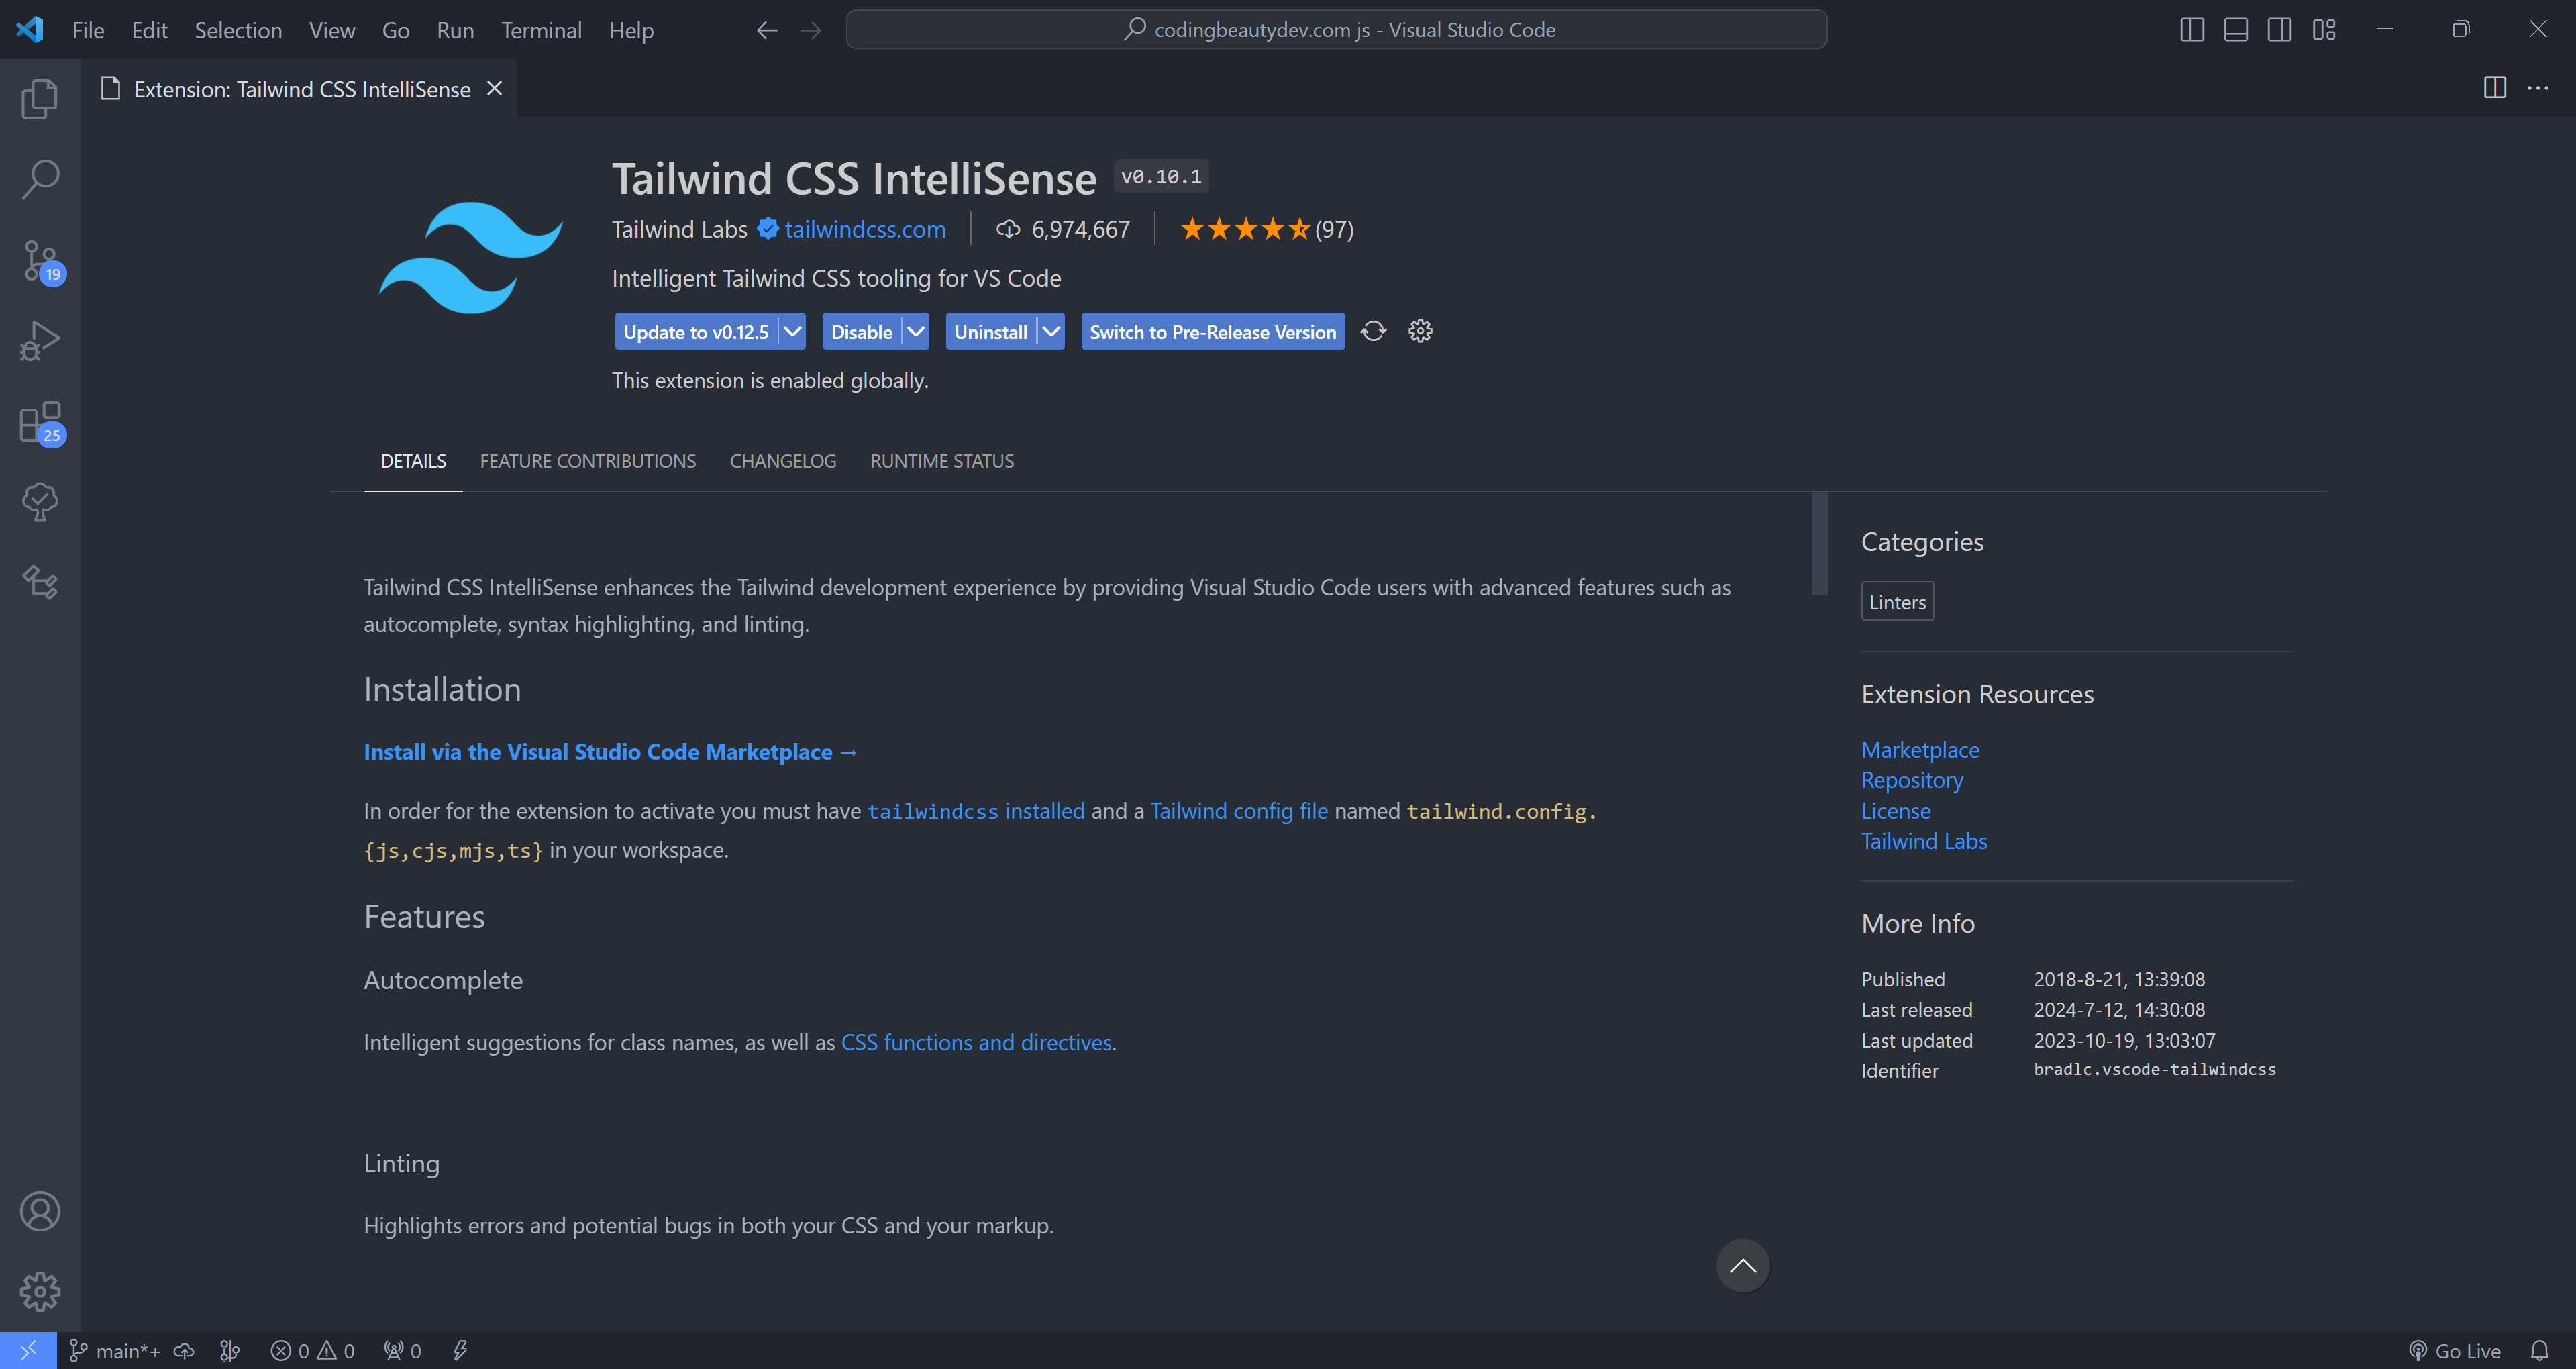
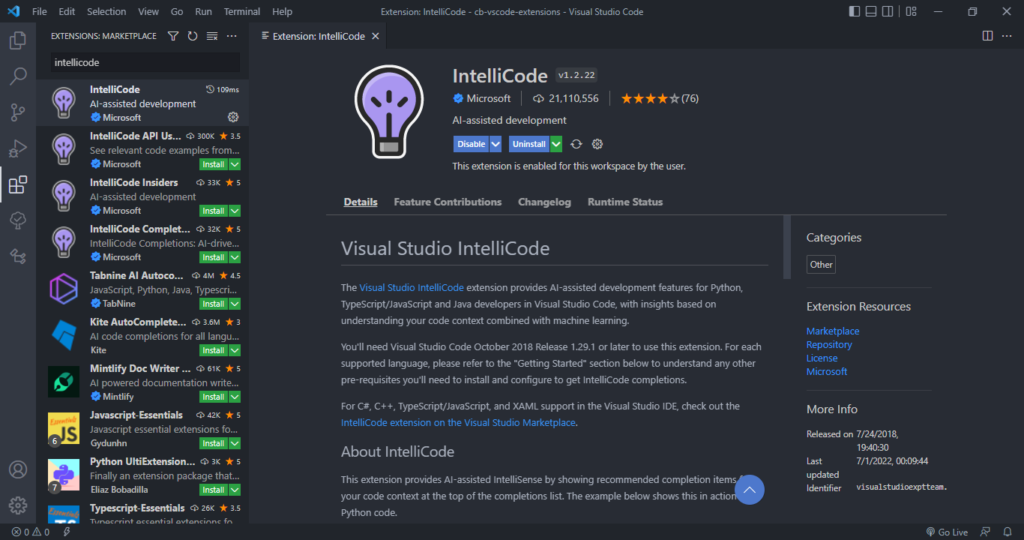
IntelliCode is another powerful AI tool that produces smart code completion recommendations that make sense in the current code context.
It does this using an AI model that has been trained on thousands of popular open-source projects on GitHub.
When you type the . character to access an object method or fields, IntelliCode will suggest a list of members that are likely to be used in the present scenario. The items in the list are denoted using a star symbol, as shown in the following demo.
IntelliCode is available for JavaScript, TypeScript, Python, and several other languages.
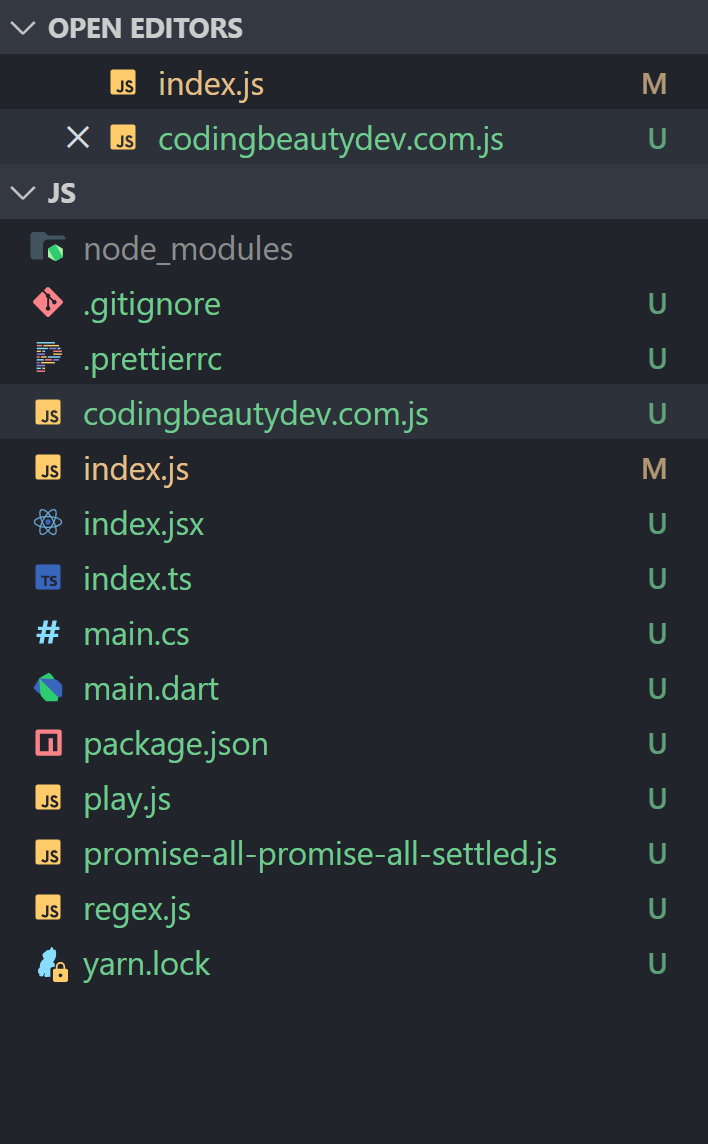
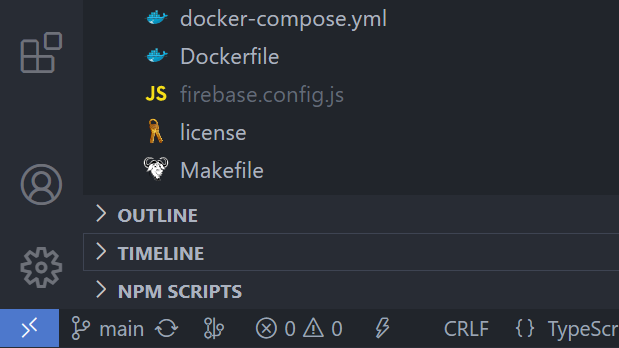
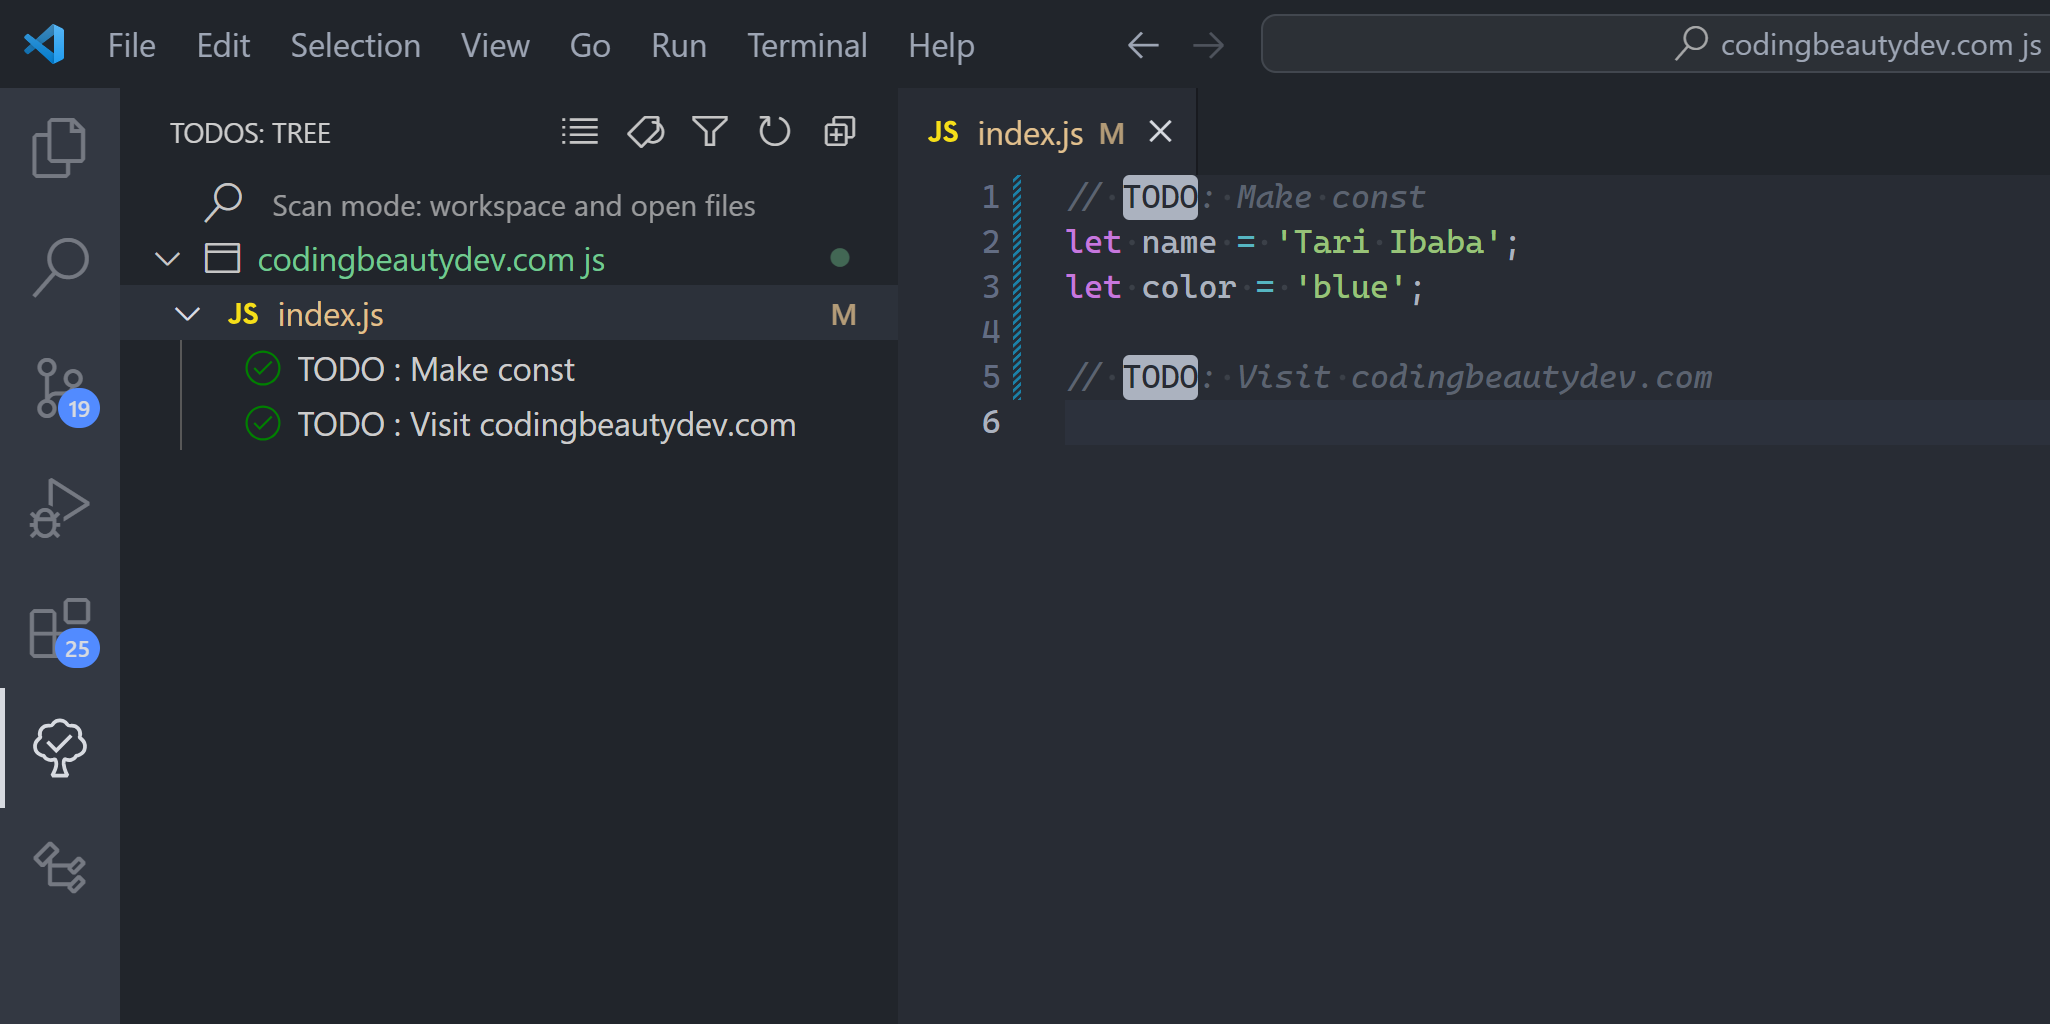
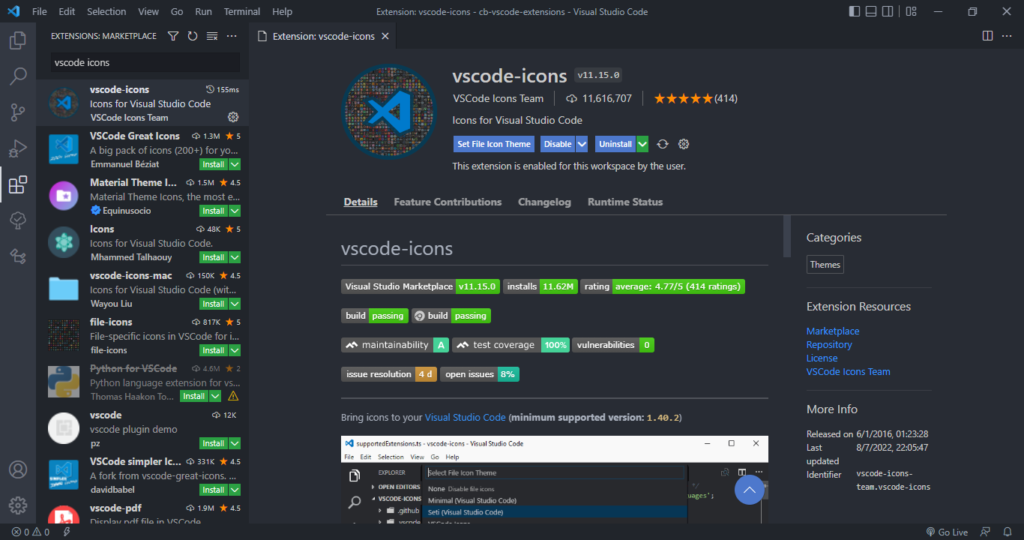
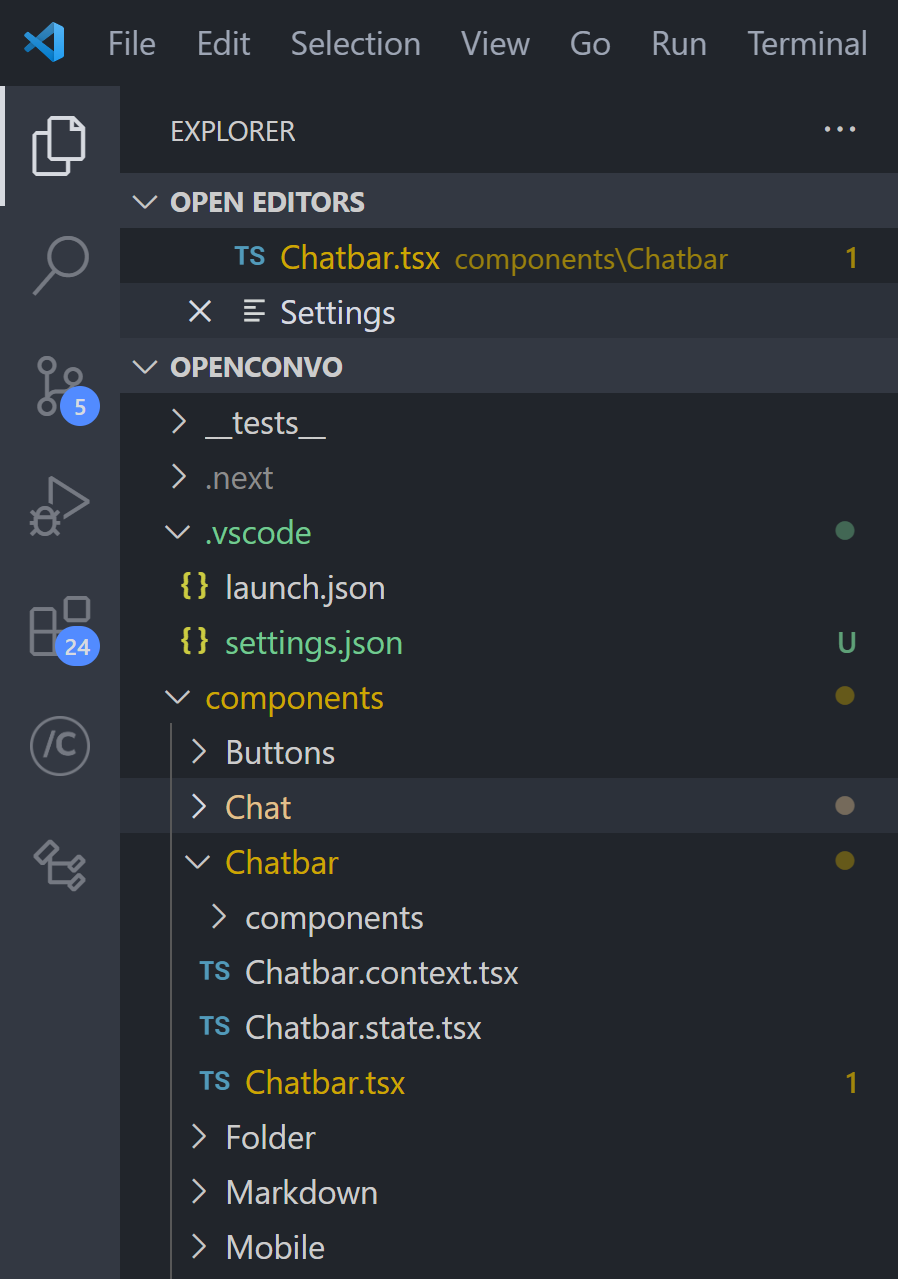
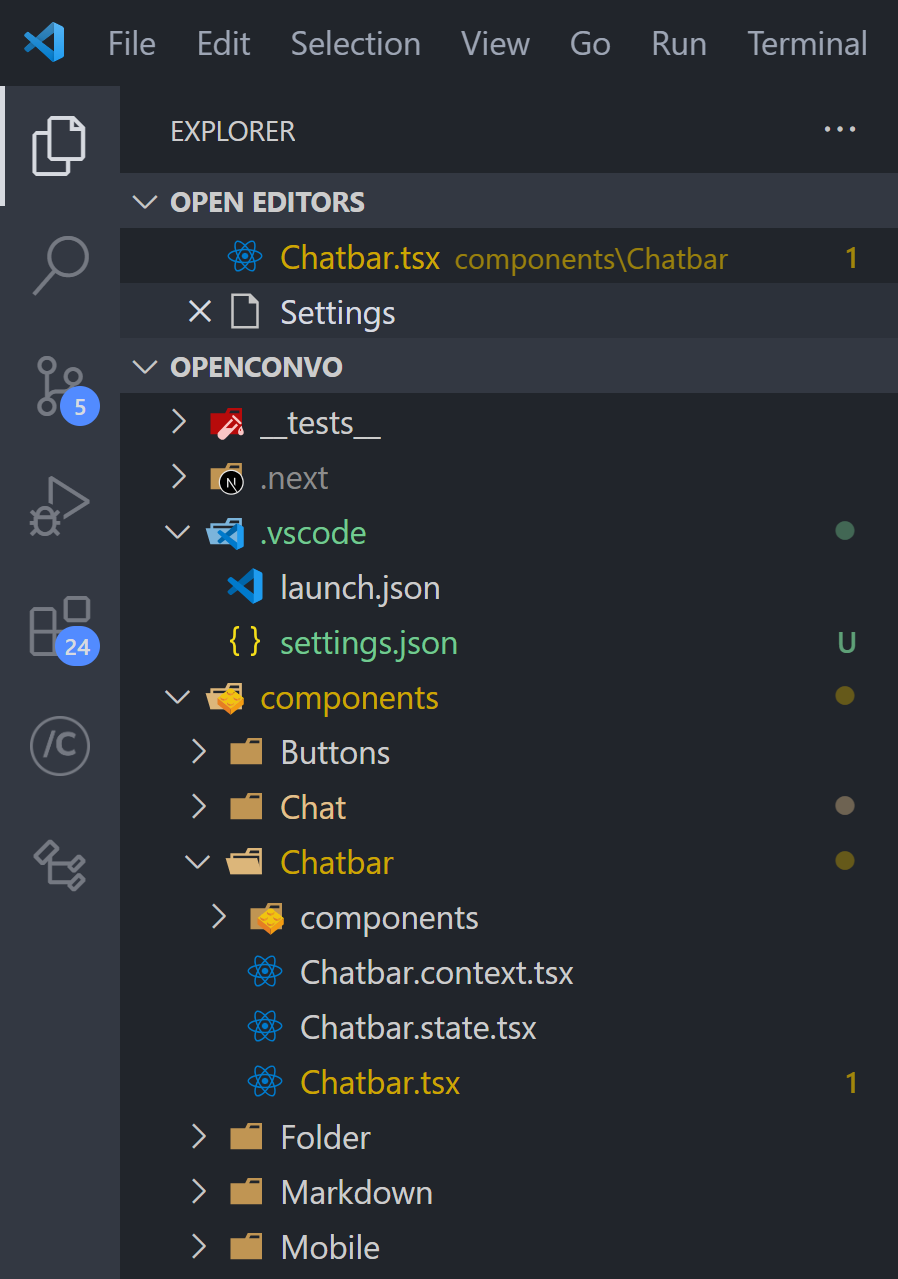
Icon packs are available to customize the look of files of different types in Visual Studio Code. They enhance the look of the application and make it easier to identify and distinguish files of various sorts.
VSCode Icons is one the most popular icon pack extensions, boasting a highly comprehensive set of icons and over 11 million downloads.
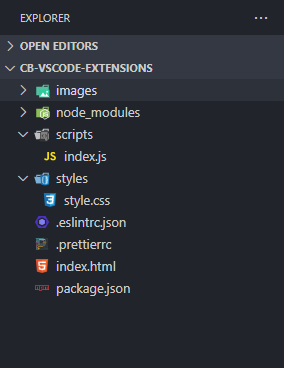
It goes beyond file extension differentiation, to provide distinct icons for files and folders with specific names, including package.json, node_modules and .prettierrc.
Final thoughts
These are 10 essential extensions that aid web development in Visual Studio Code. Install them now to boost your developer productivity and raise your quality of life as a web developer.
95% of developers are just wasting the potential of VS Code.
It has so many hidden gems that upgrade your productivity and quality of life — but they’re not using them.
Use these 10 solid tips to gradually supercharge VS Code and code faster: with powerful extensions, little-known keyboard shortcuts, beautiful fonts & colors, and so much more.
1. First things first
Starting with the essentials.
Learn important keyboard shortcuts
You will code so much faster once you learn these
Copy line with Ctrl + C
Highlight code left & right with Shift + Left / Right
Move line up / down with Alt + Up / Down
Delete line with Ctrl + K
Close file with Ctrl + W
Close all files with Ctrl + K, W
Enable autosave
To save your files automatically.
I’ve talked about why I dislike autosave before, but it’s a great feature to stop the constant Ctrl + S’s.
Set up outline view
The Outline View gives you a quick overview of all the symbols in your active file from the File Explorer Pane:
But I recommend you move to a separate pane to have more space:
2. Set up source control
You need to set up integrations for Git to easily track your changes.
Init repo with VS Code
Use the Source Control Pane to initialize a new local repo.
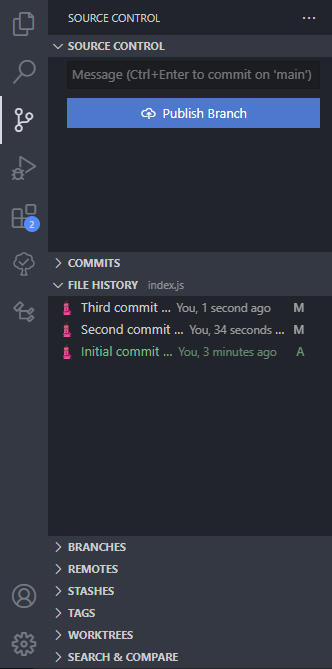
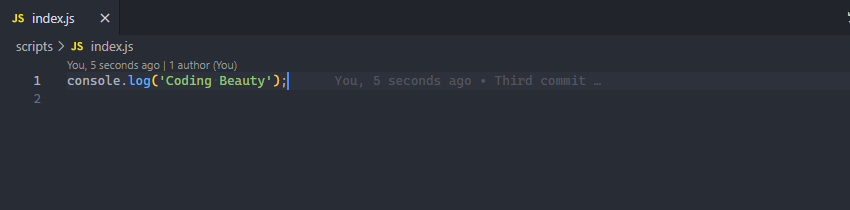
Commit changes
You can quickly stage your files and press Ctrl + Enter anytime you need to commit:
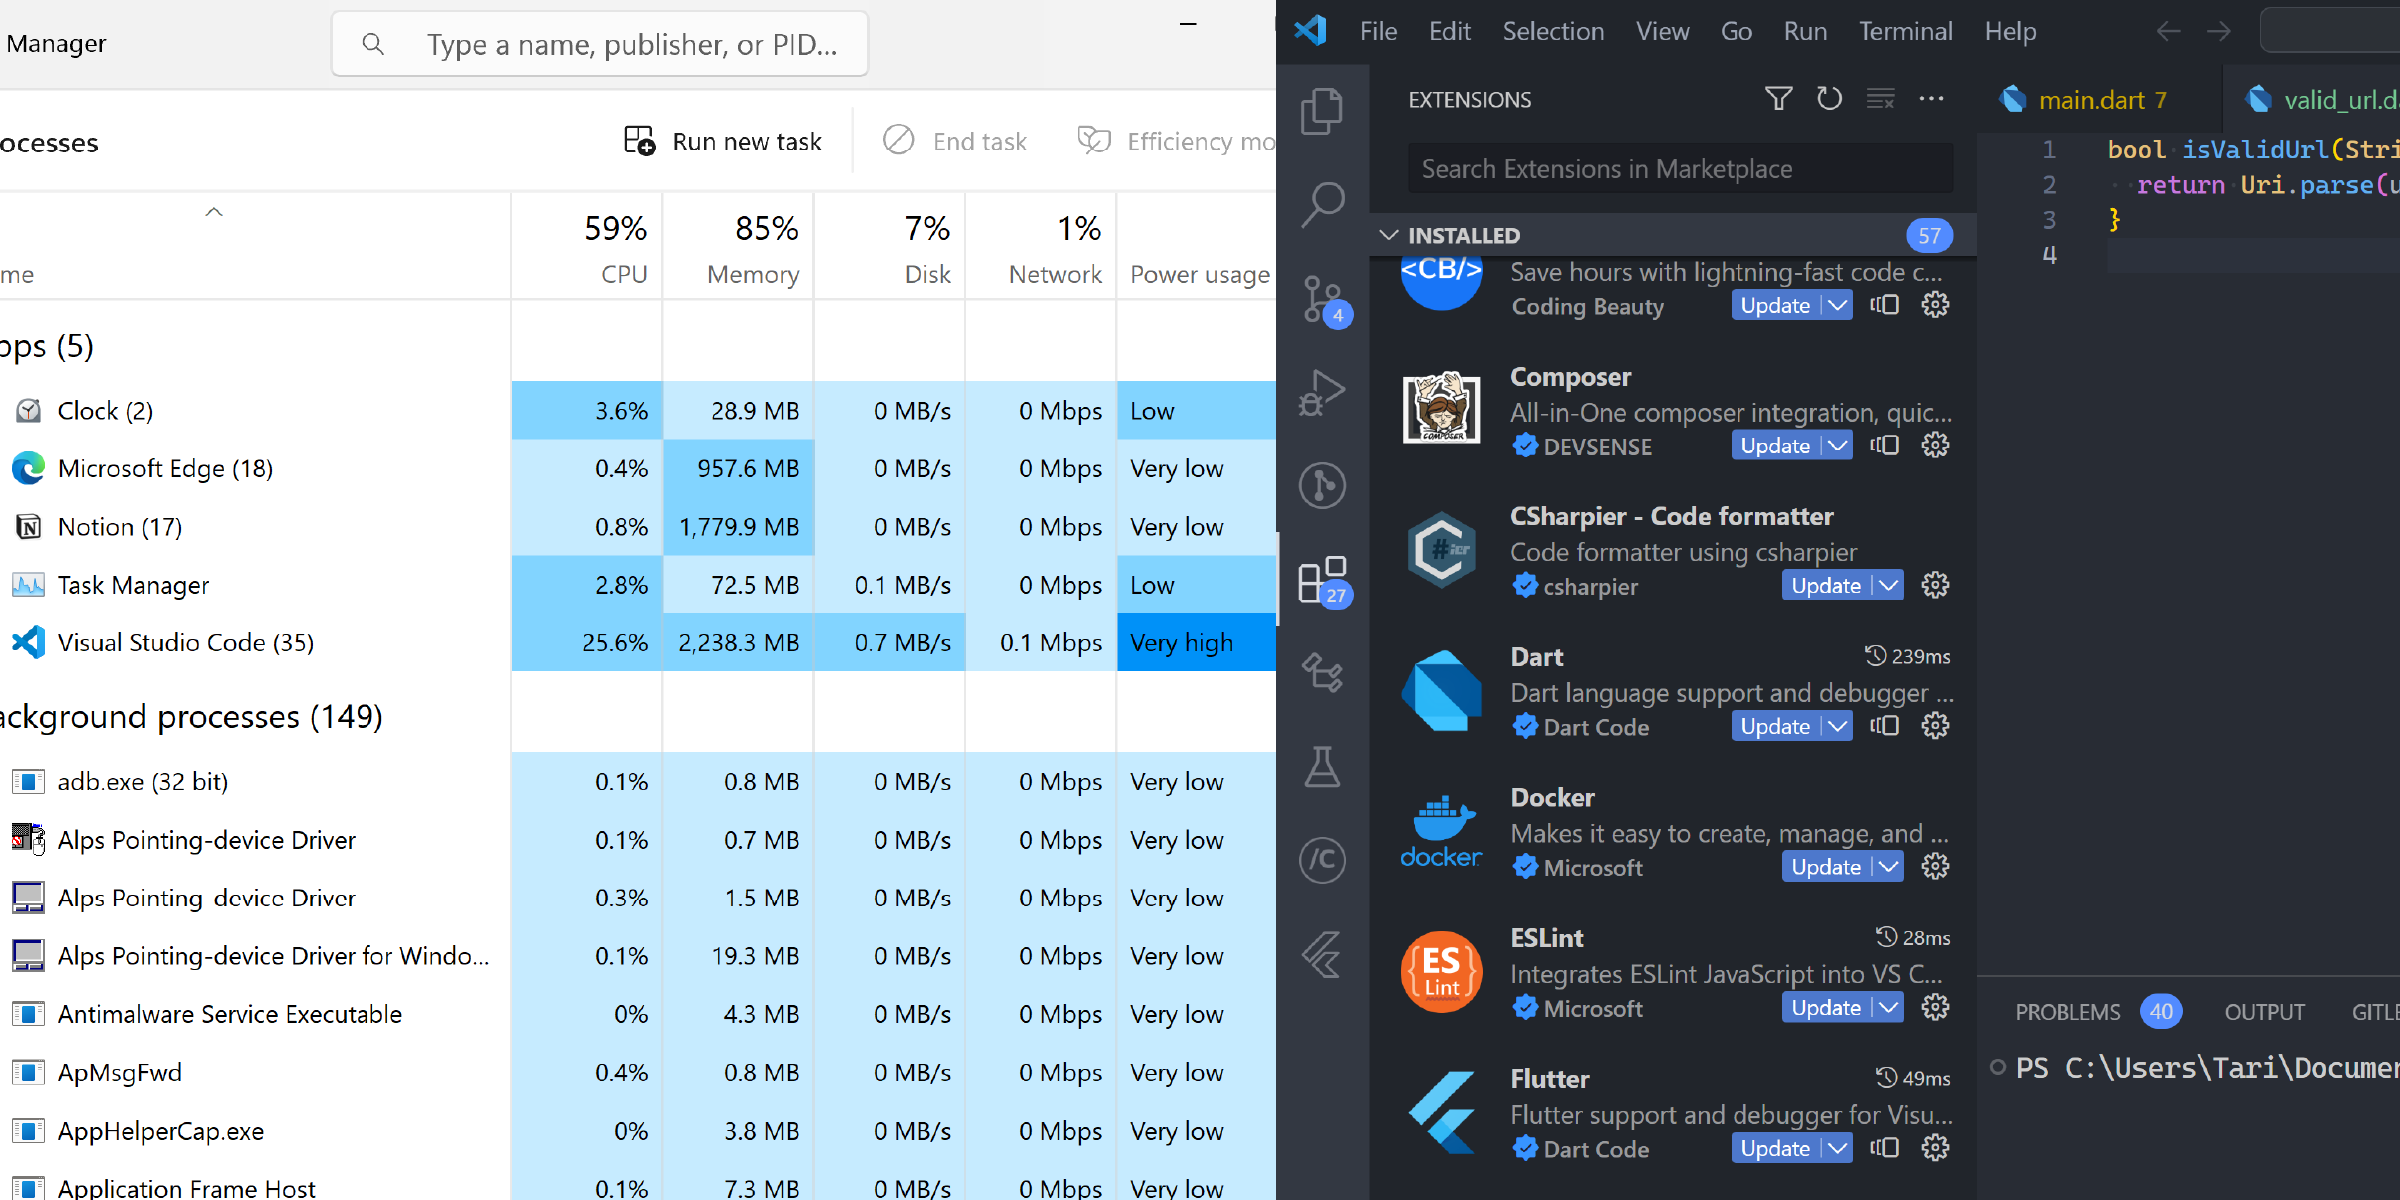
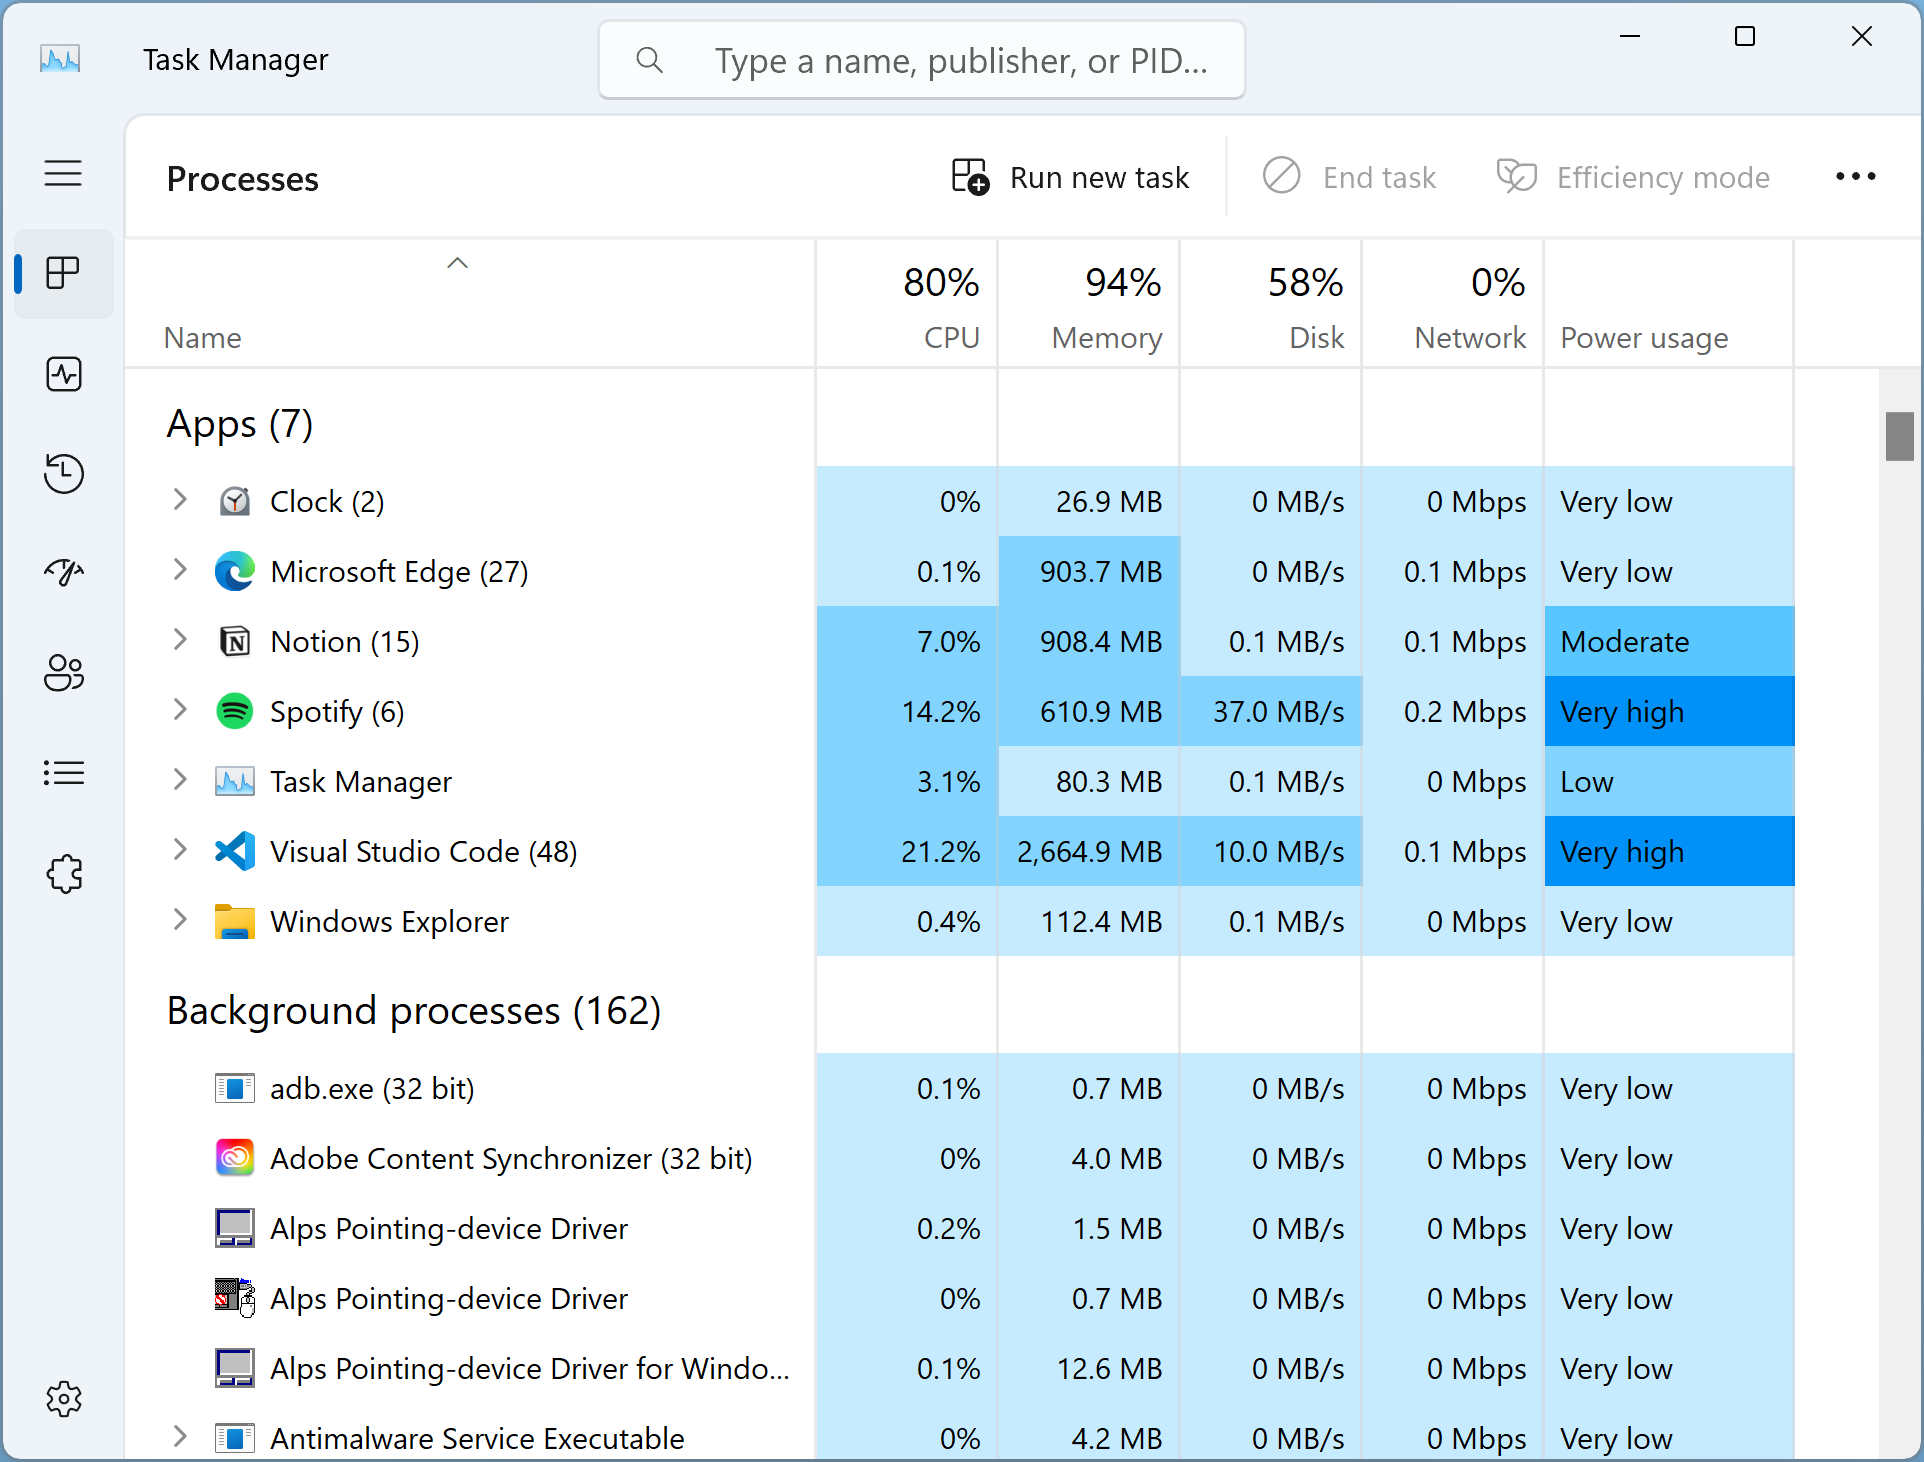
EVERY new extension you add to VS Code increases the memory and CPU power it gobbles up:
We need to keep this number as low as possible to minimize this resource usage — and stop these extensions from clashing with one another or with native functionality.
And you know, there’s a significant number of extensions in the Marketplace that provide functionality VSCode already has built-in.
Usually they were made when the feature wasn’t added yet; but once that happened they became largely redundant additions.
So below, I cover a list of these integrated VSCode features and extensions that provide them. Uninstalling these now dispensable extensions will increase your editor’s performance and efficiency.
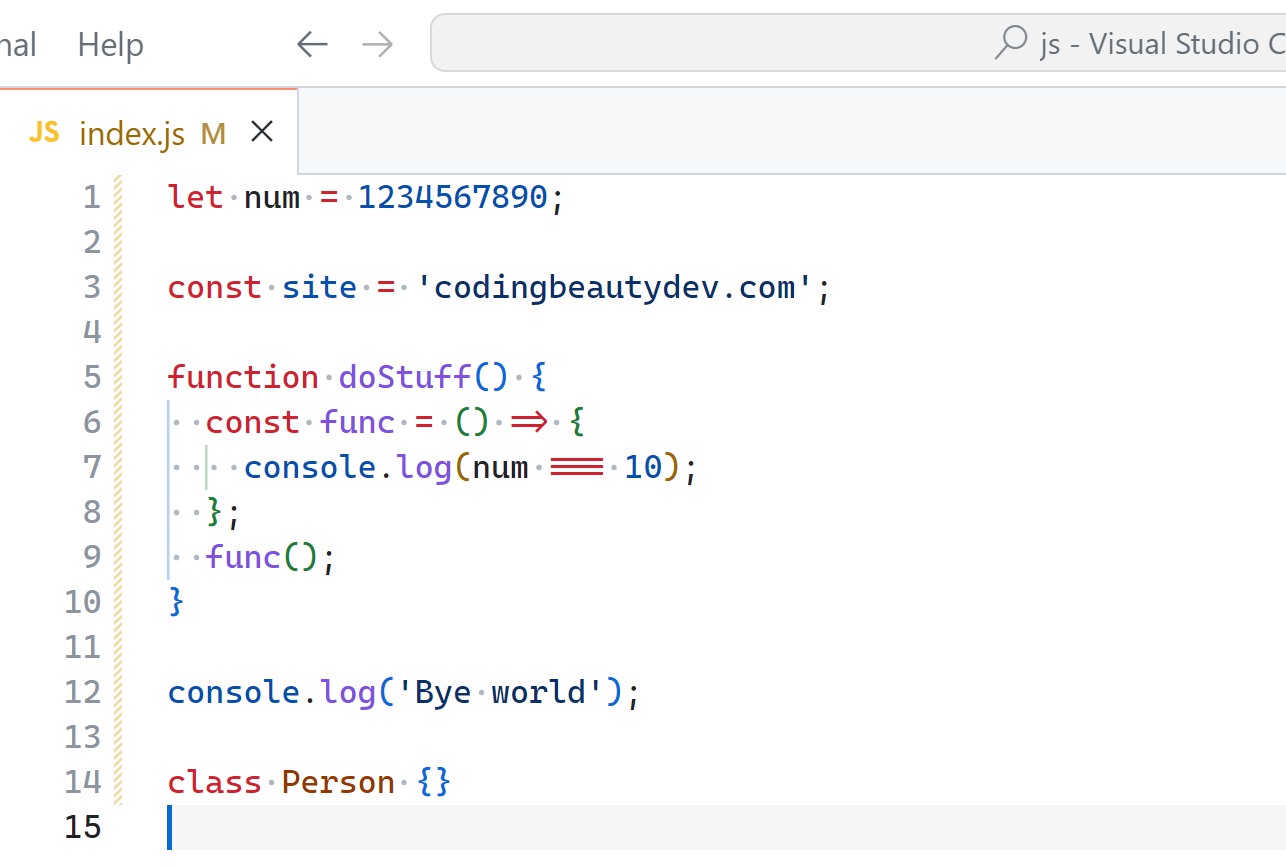
1. HTML tag auto-renaming
A powerful feature I didn’t discover for months after I started using VS Code!
You just start editing the starting tag and the ending tag auto-updates to match:
Extensions for this
Auto Rename Tag (17.7M downloads): “Automatically rename paired HTML/XML tag, same as Visual Studio IDE does”.
But feature already built-in
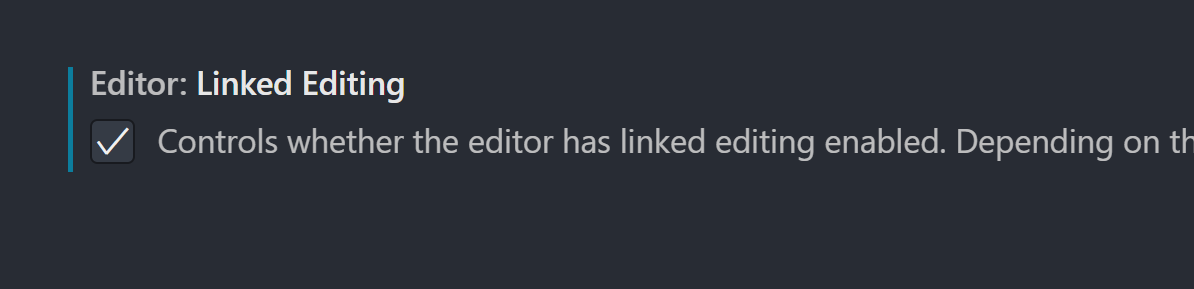
I use this setting to easily get tag auto-rename without installing anything:
Editor: Linked Editing: “Controls whether the editor has linked editing enabled. Depending on the language, related symbols e.g. HTML tags, are updated while editing.” Default is false“
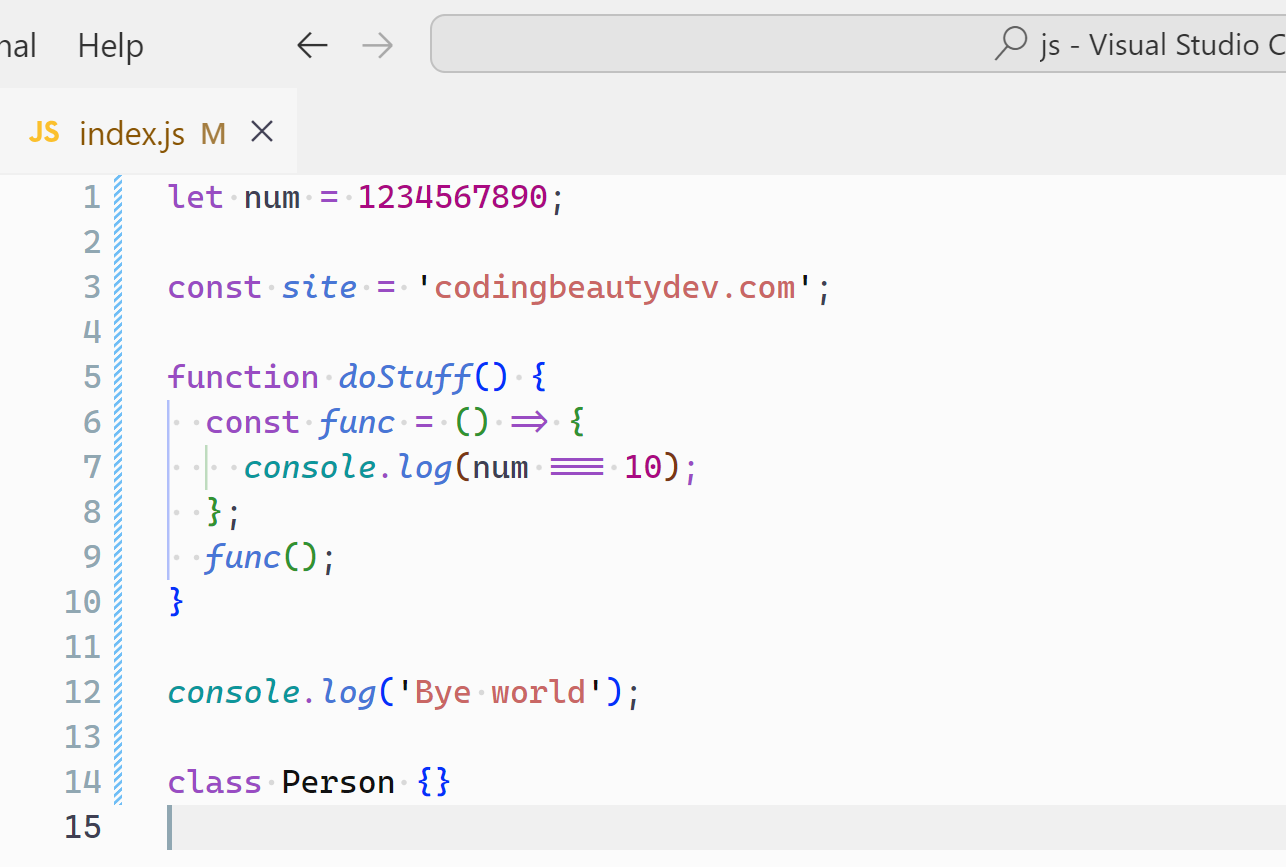
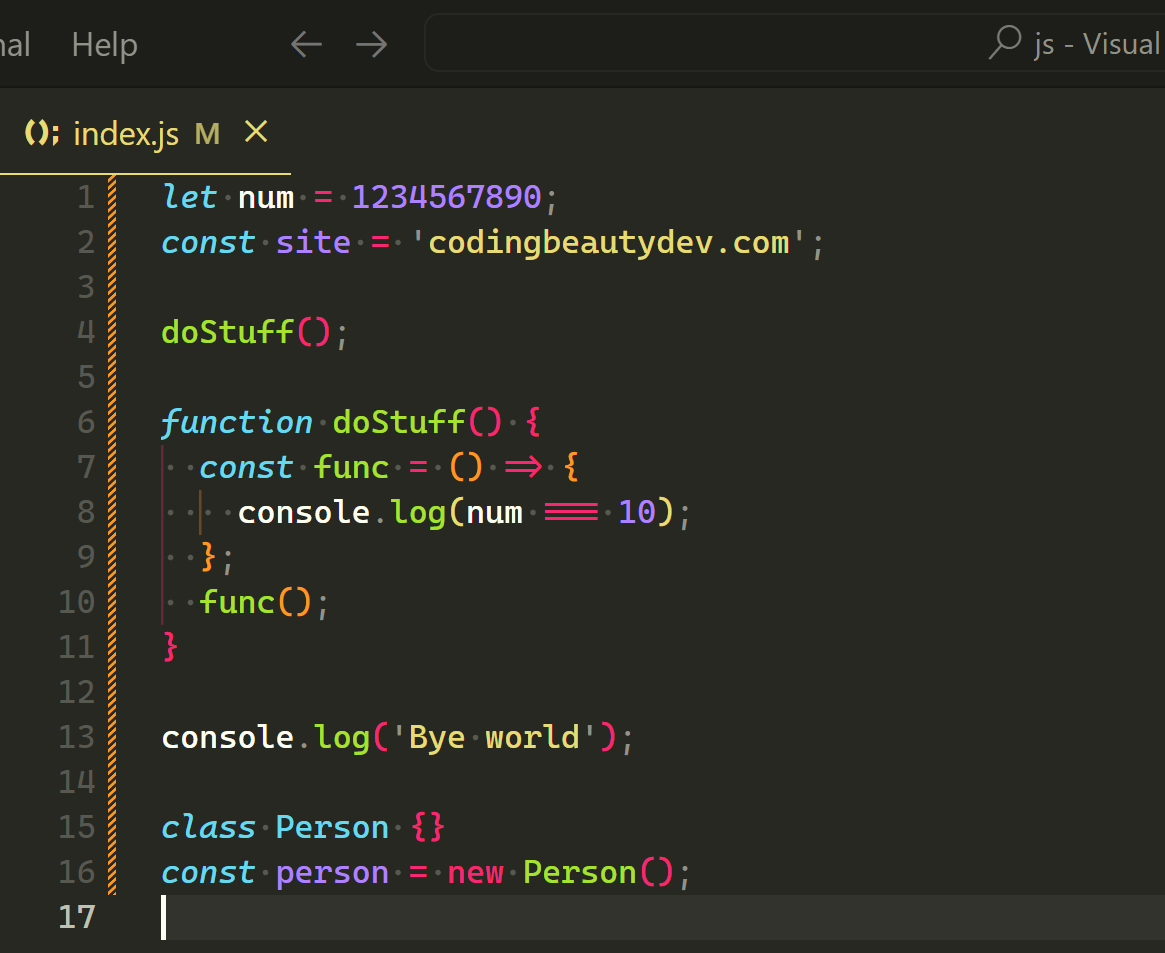
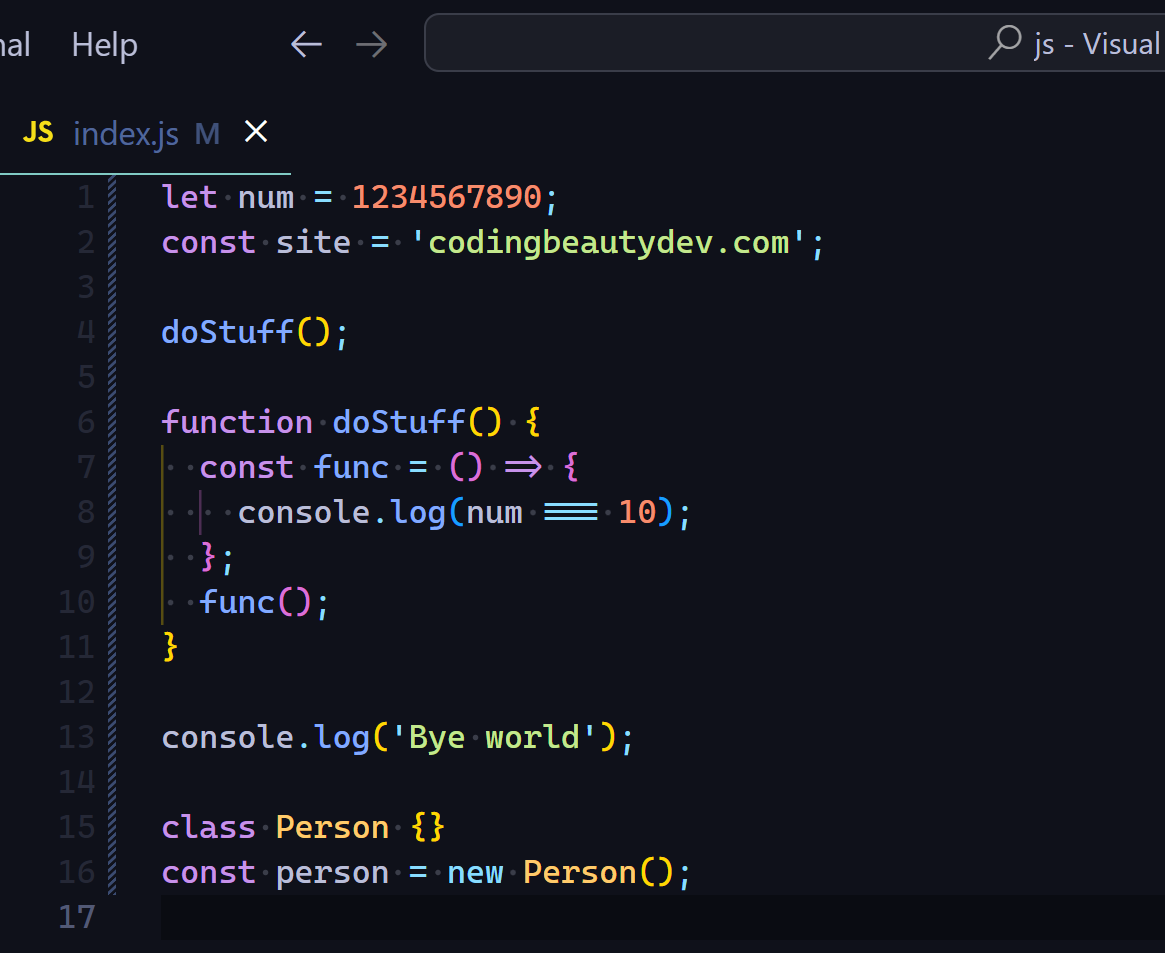
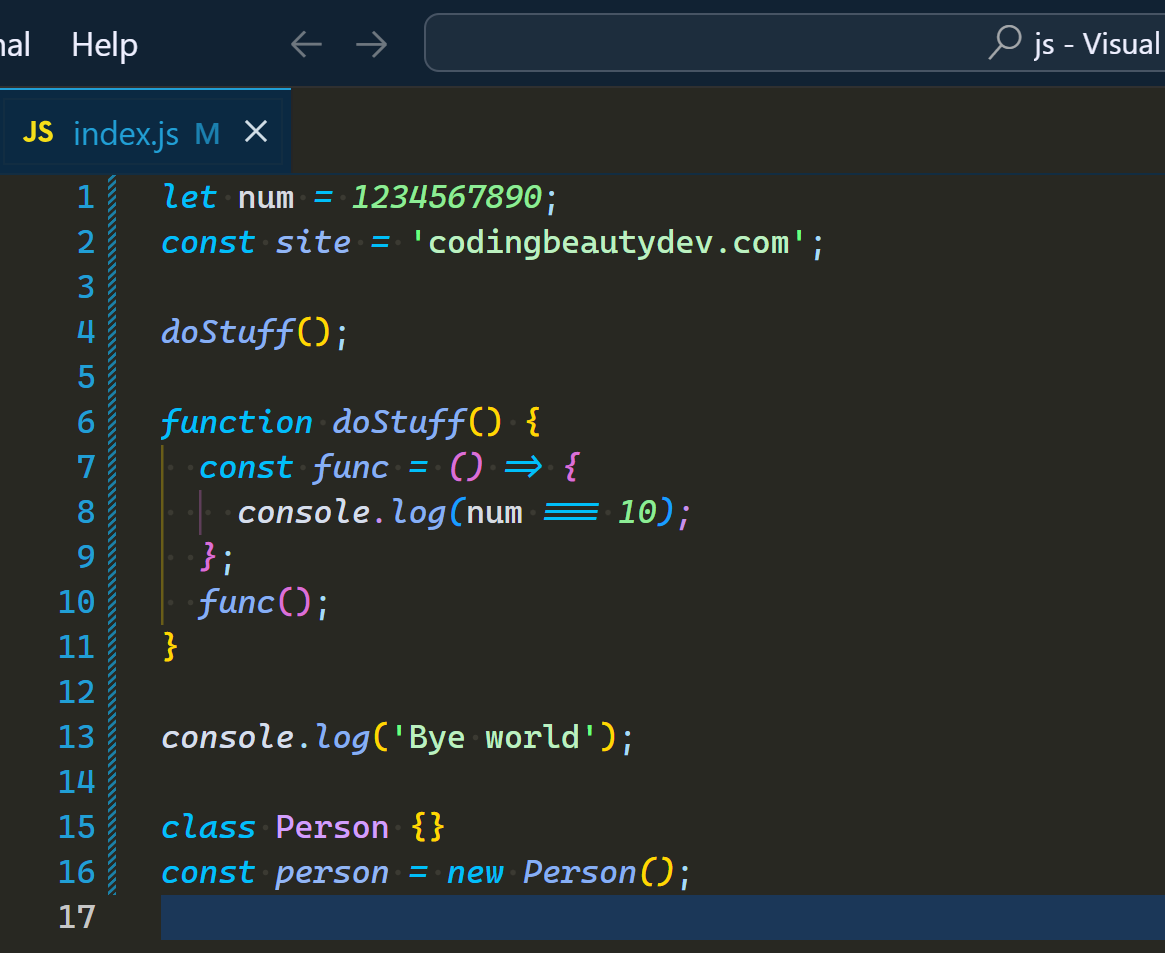
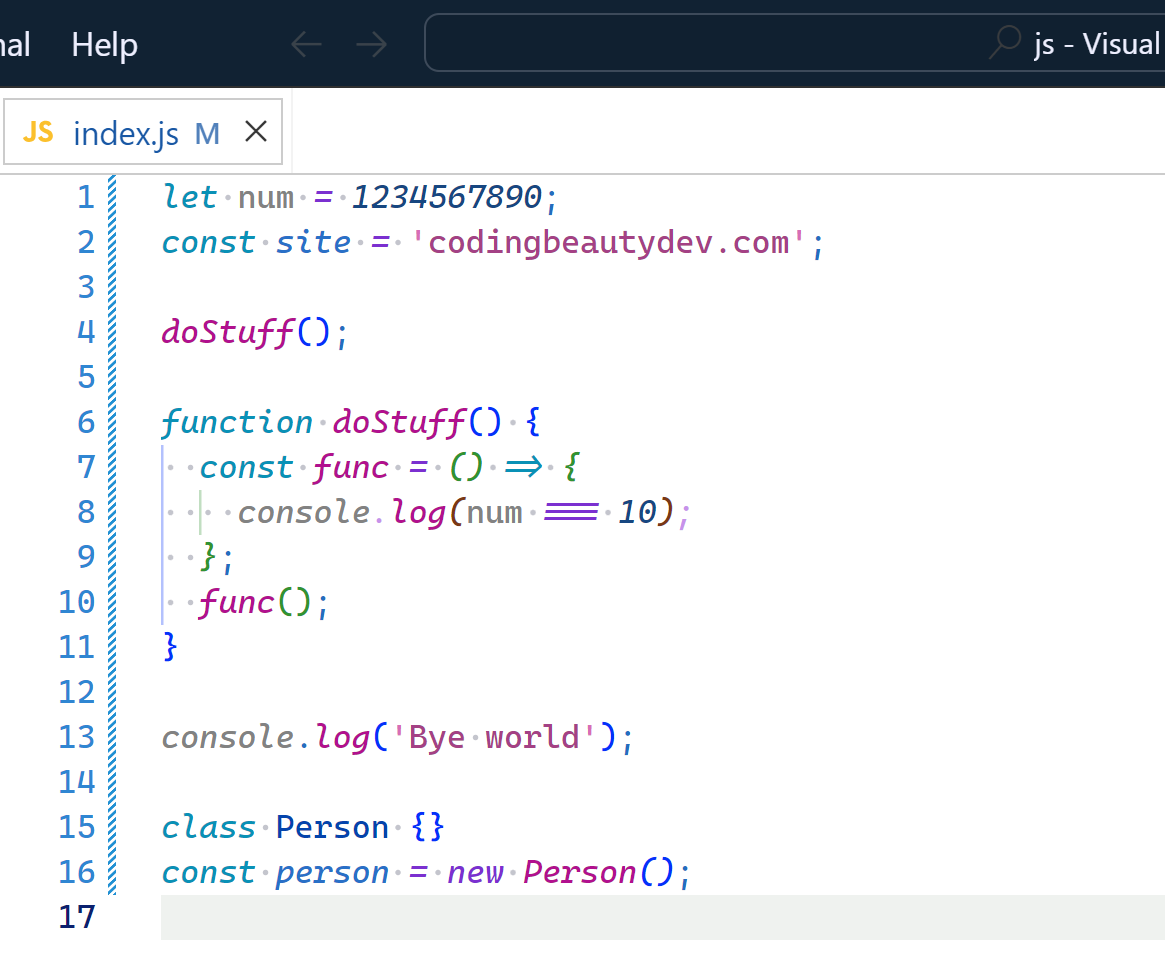
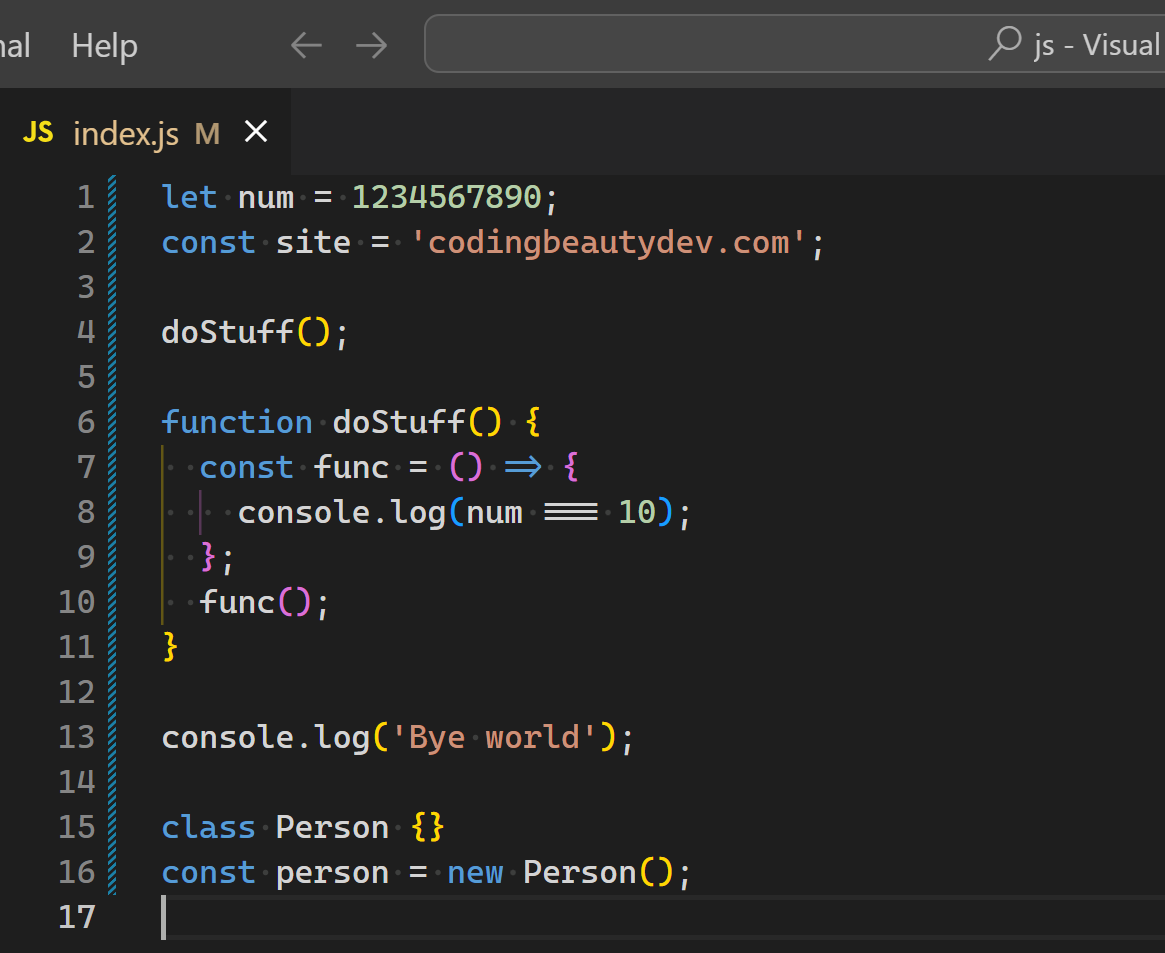
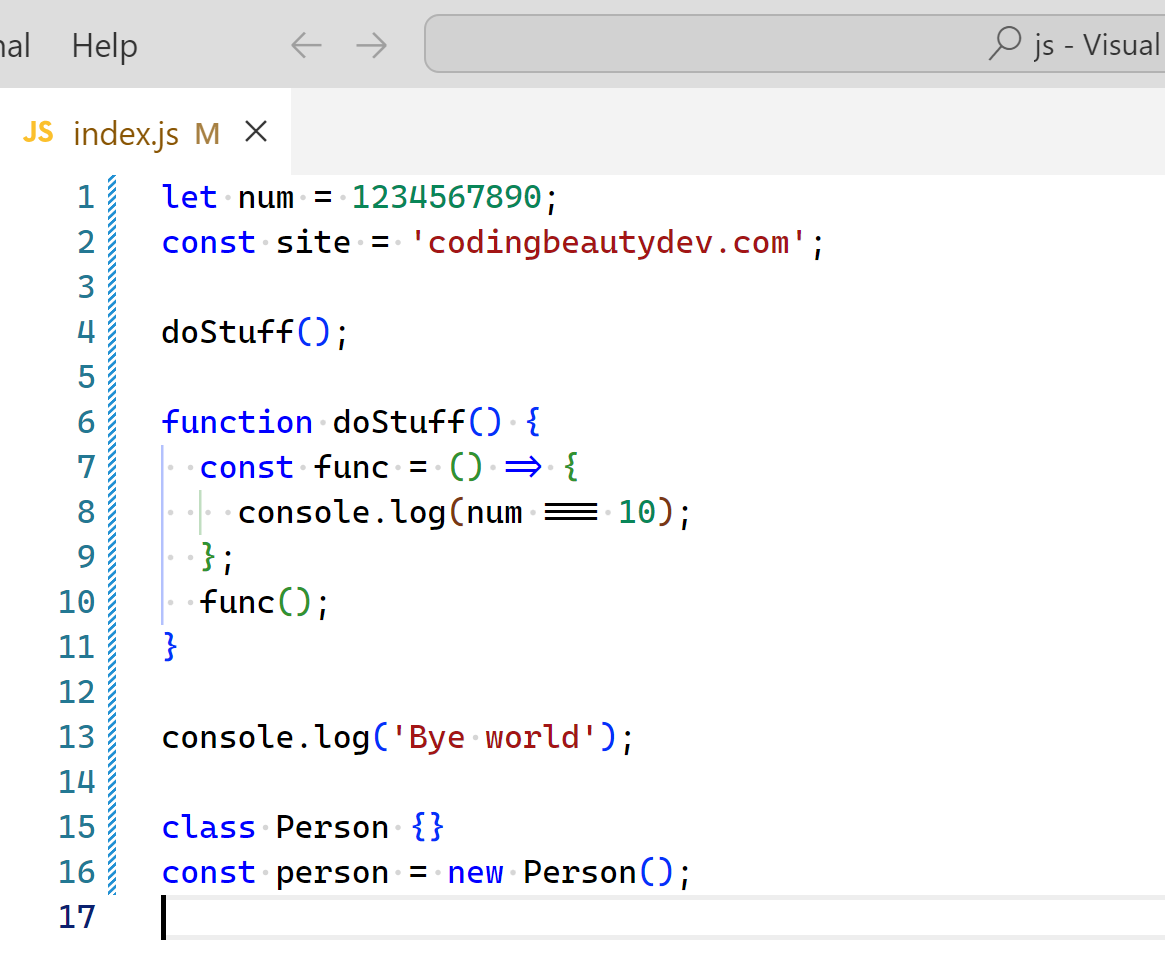
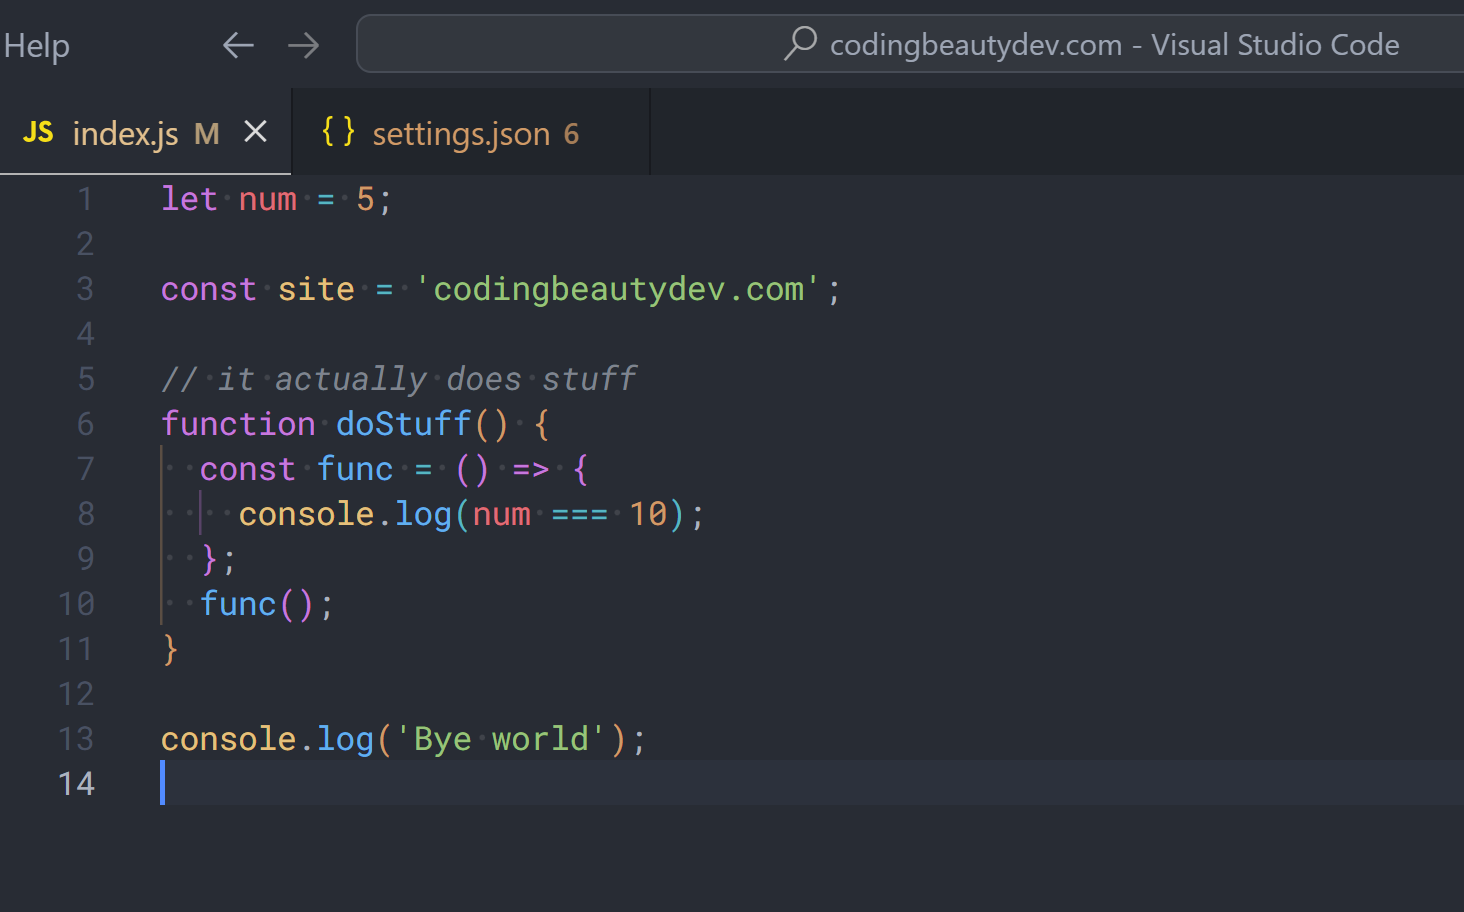
2. Auto-trim trailing spaces
This handy feature removes ending whitespace from all the lines of your file to maintain consistent formatting.
Extensions for this
Trailing Spaces (2.0M downloads): “Highlight trailing spaces and delete them in a flash!”.
AutoTrim (35.4K downloads): “Trailing whitespace often exists after editing lines of code, deleting trailing words, and so forth. This extension tracks the line numbers where a cursor is active, and removes trailing tabs and spaces from those lines when they no longer have an active cursor”.
But feature already built-in
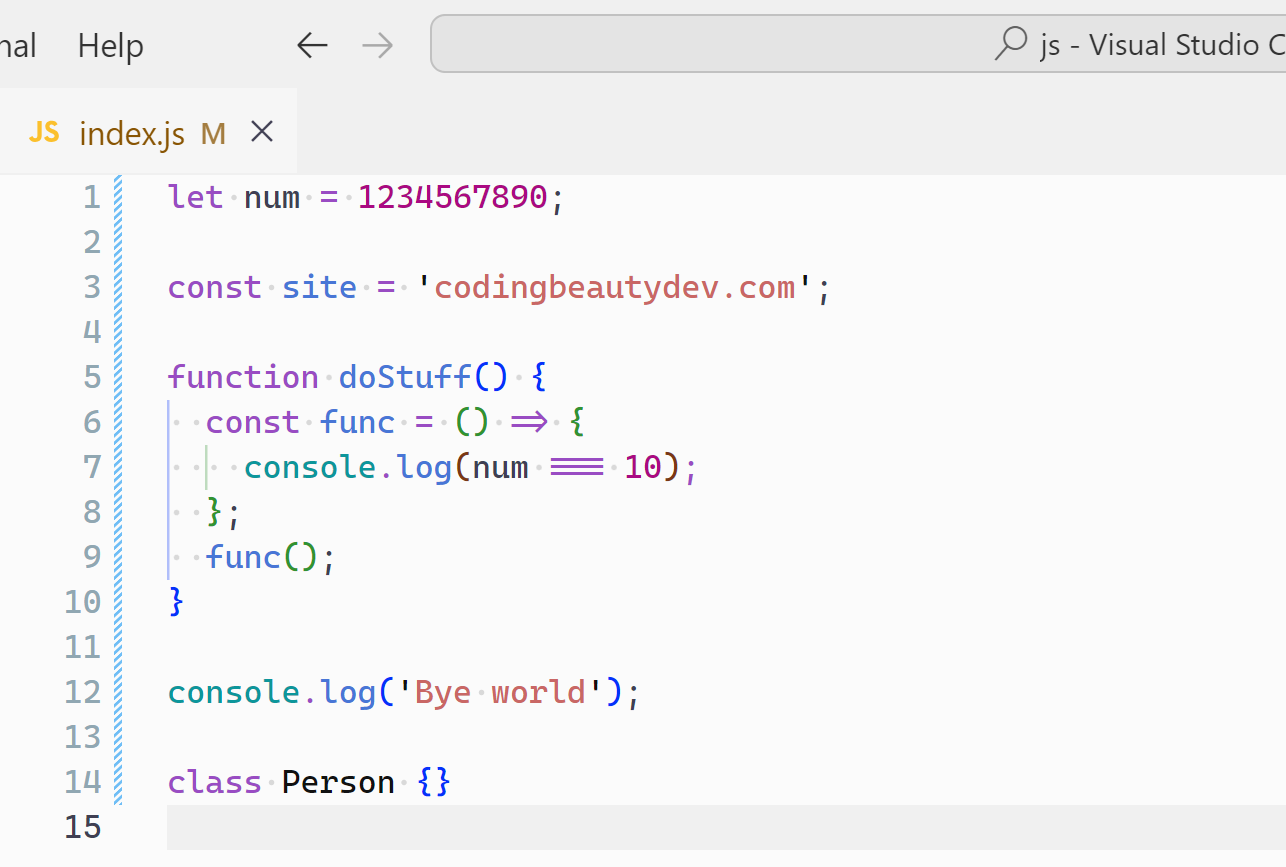
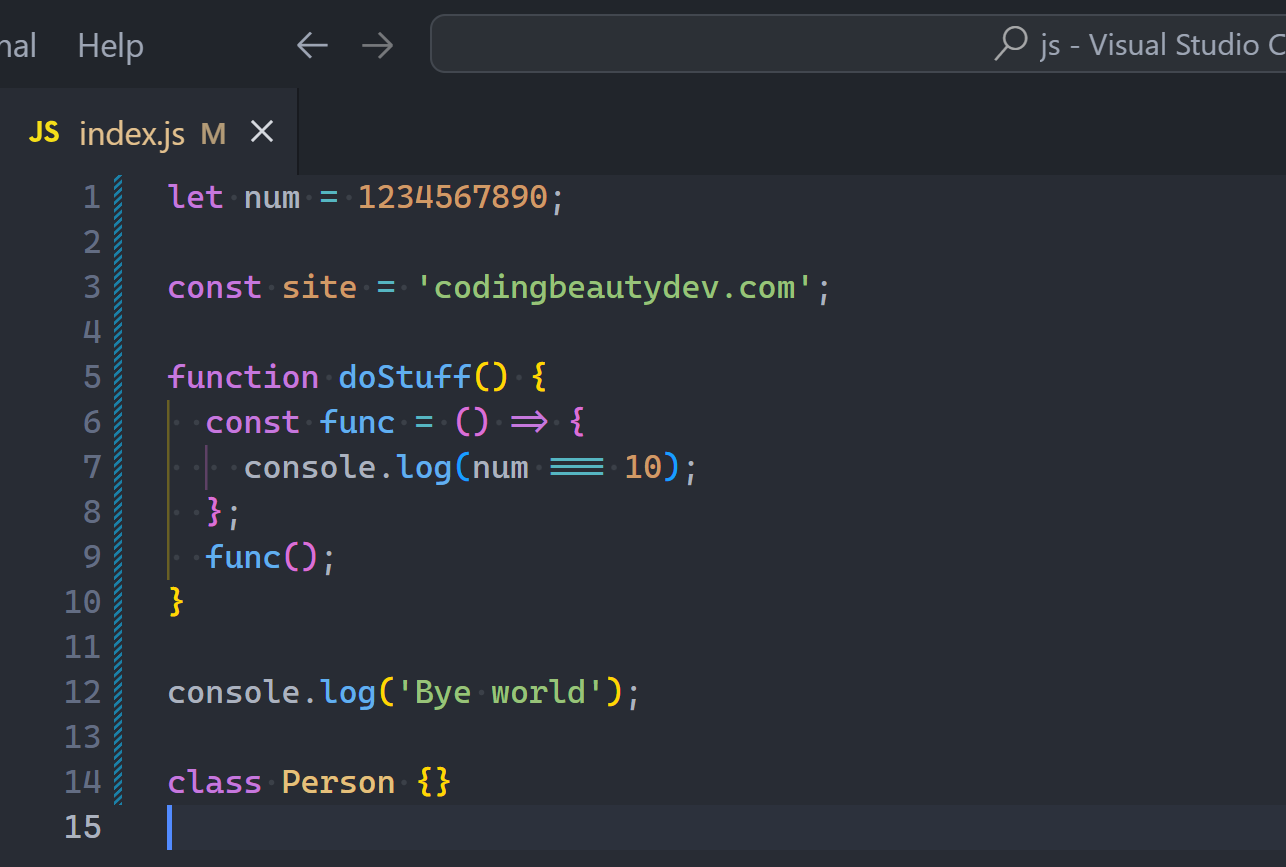
VSCode has a built-in setting that can automatically remove trailing spaces from a file.
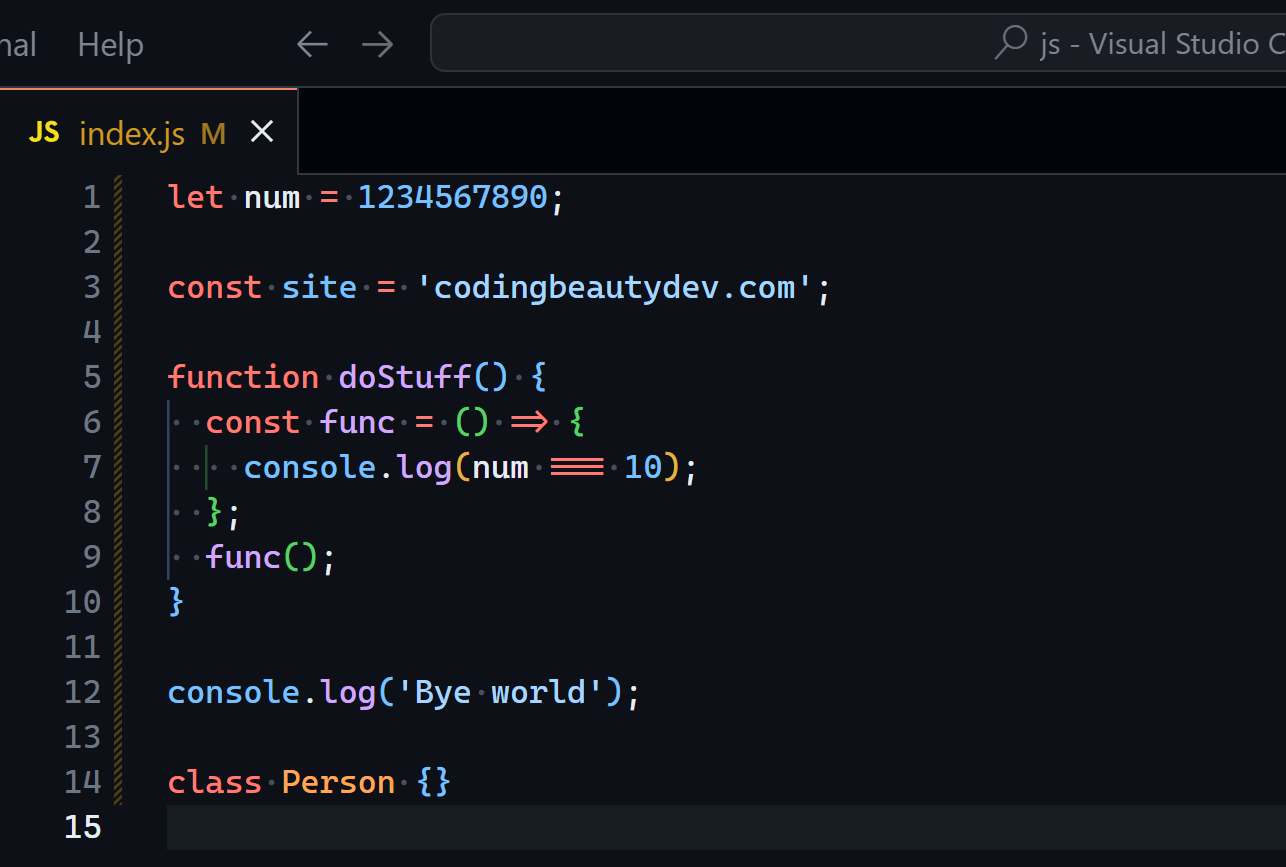
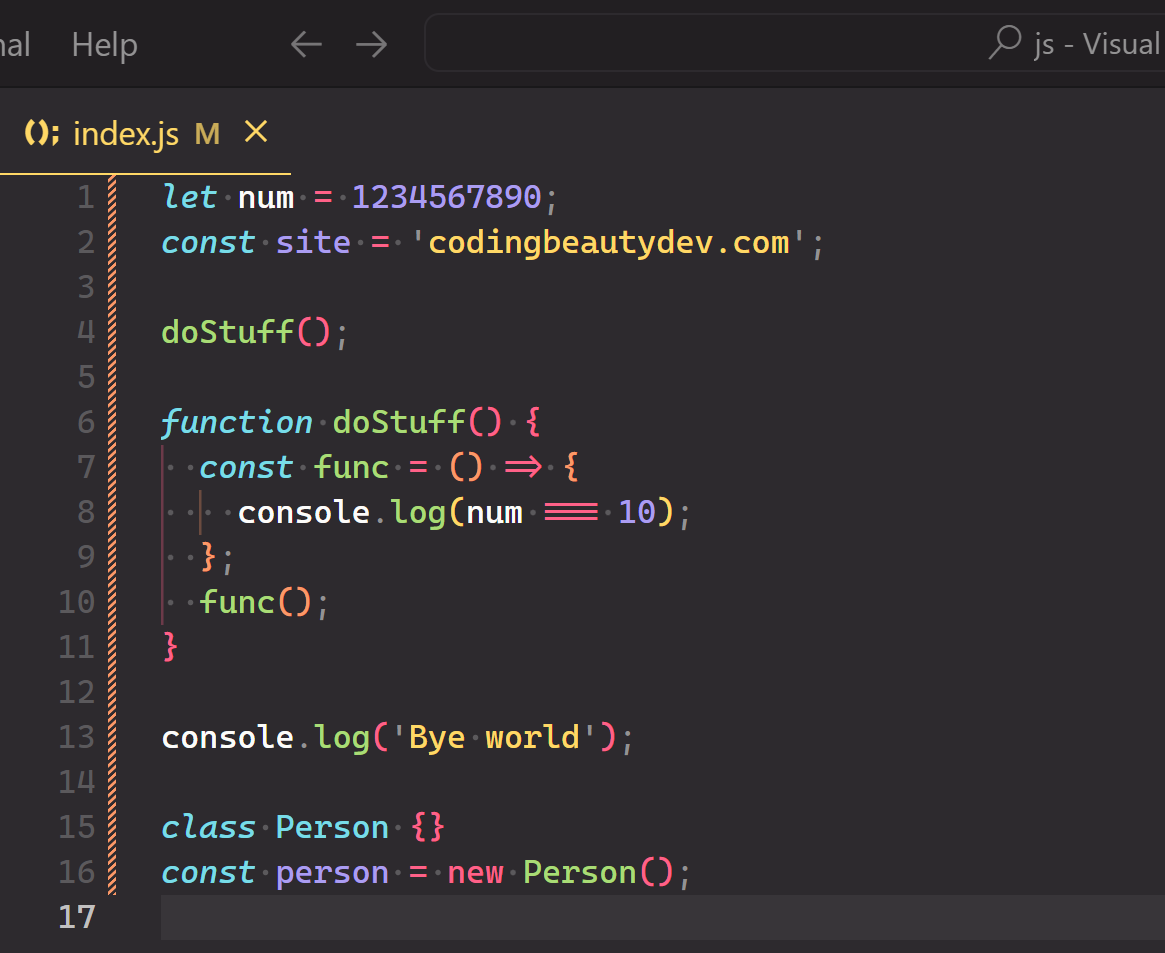
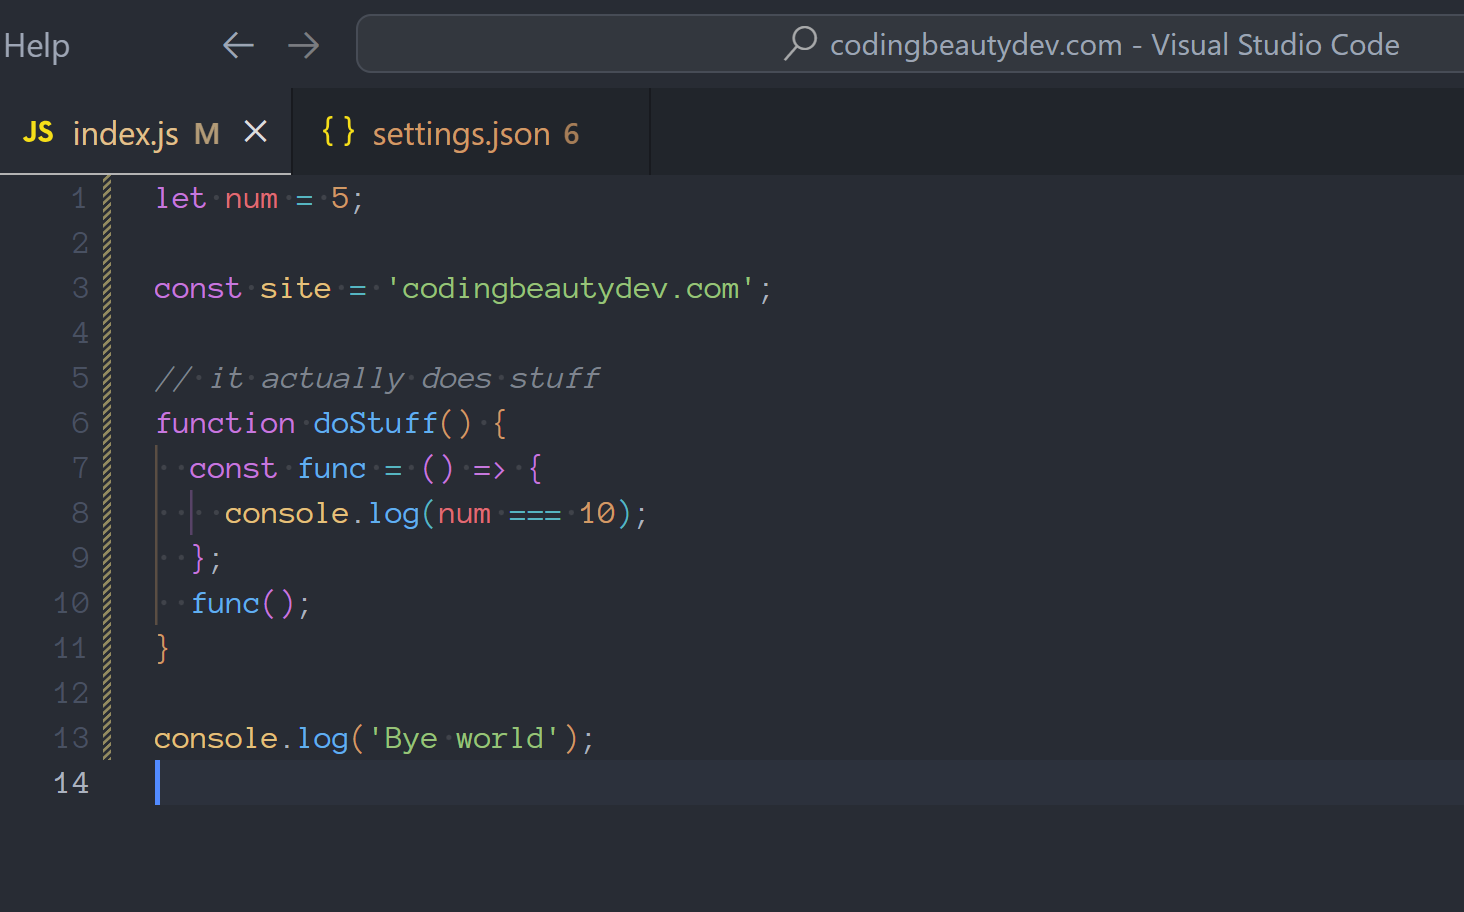
It automatically trims the file when it is saved, making it a background operation you no longer have to think about.
Trailing spaces are removed from the file on save.
Here’s the setting:
Files: Trim Trailing Whitespace: “When enabled, will trim trailing whitespace when saving a file”. It’s false by default.
The auto trimming setting in the Settings UI.
Add this to your settings.json file to enable auto trimming:
settings.json
JavaScriptCopied!
{
  "files.trimTrailingWhitespace": true,
}
You might want to turn this setting off for Markdown files since you have to put two or more spaces at the end of a line to create a hard line break in the output, as stated in the CommonMark specification. Add this to your settings.json file to do so.
Alternatively, you can simply use a backslash (\) instead of spaces to create a hard line break.
3. HTML tag auto-wrapping
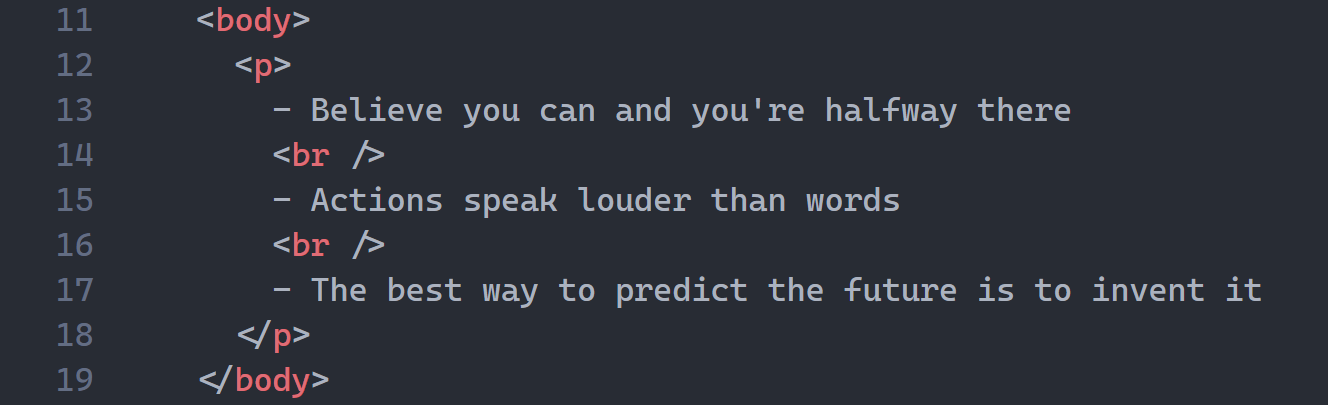
I can’t count how many times I’ve needed to wrap one HTML element in a new one — usually a div.
With this feature I can instantly wrap the <p> tag in a <div> without painfully inserting one <div> above and one </div> below.
Extensions for this
htmltagwrap (674K downloads): “Wraps selected code with HTML tags”.
html tag wrapper (458K downloads): “wrap selected html tag by press ctrl+i, you can change the wrapper tag name simply too”.
But feature already built-in
Thanks to the built-in Wrap with Abbreviation command I can rapidly wrap a tag in any tag type.
Did you see how the new wrapper’s name changed according to your input?
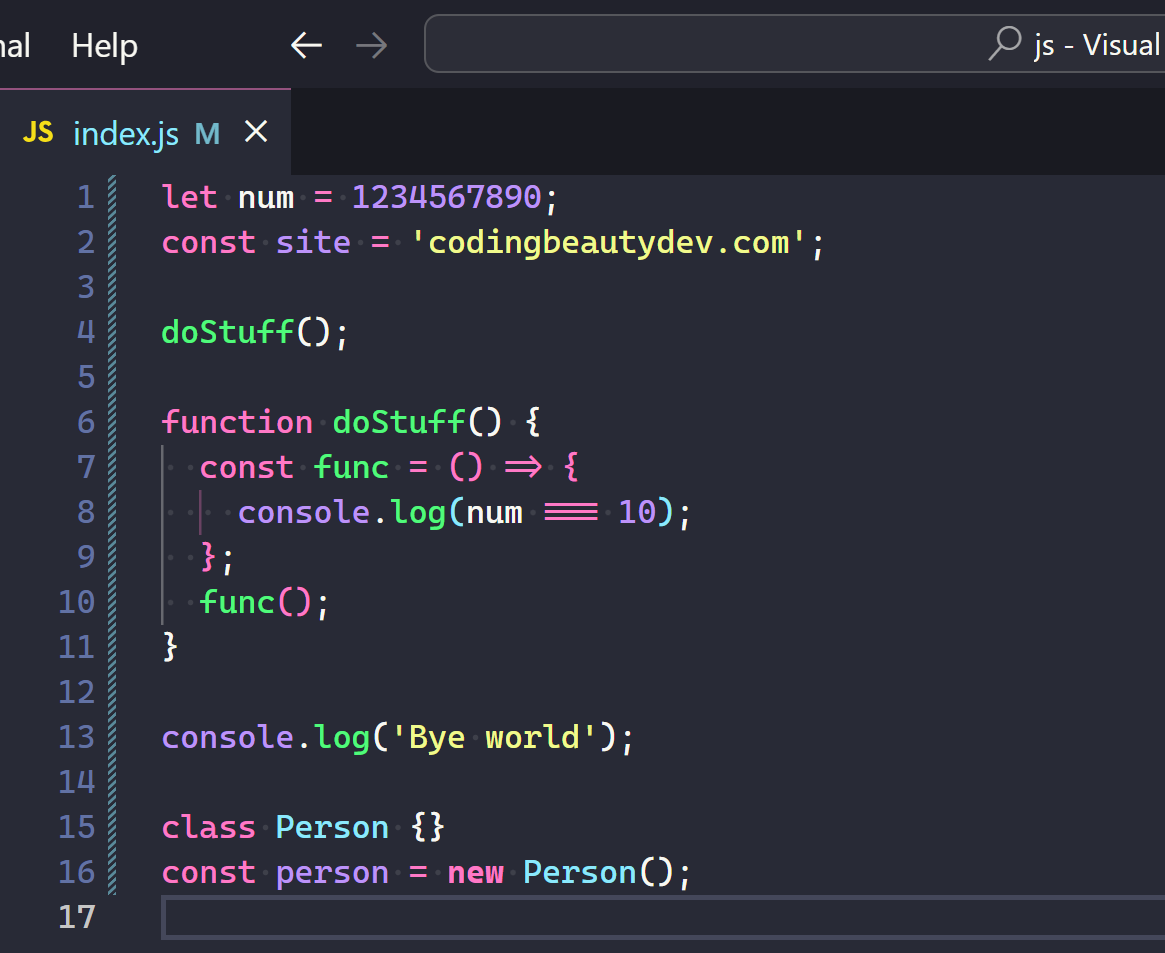
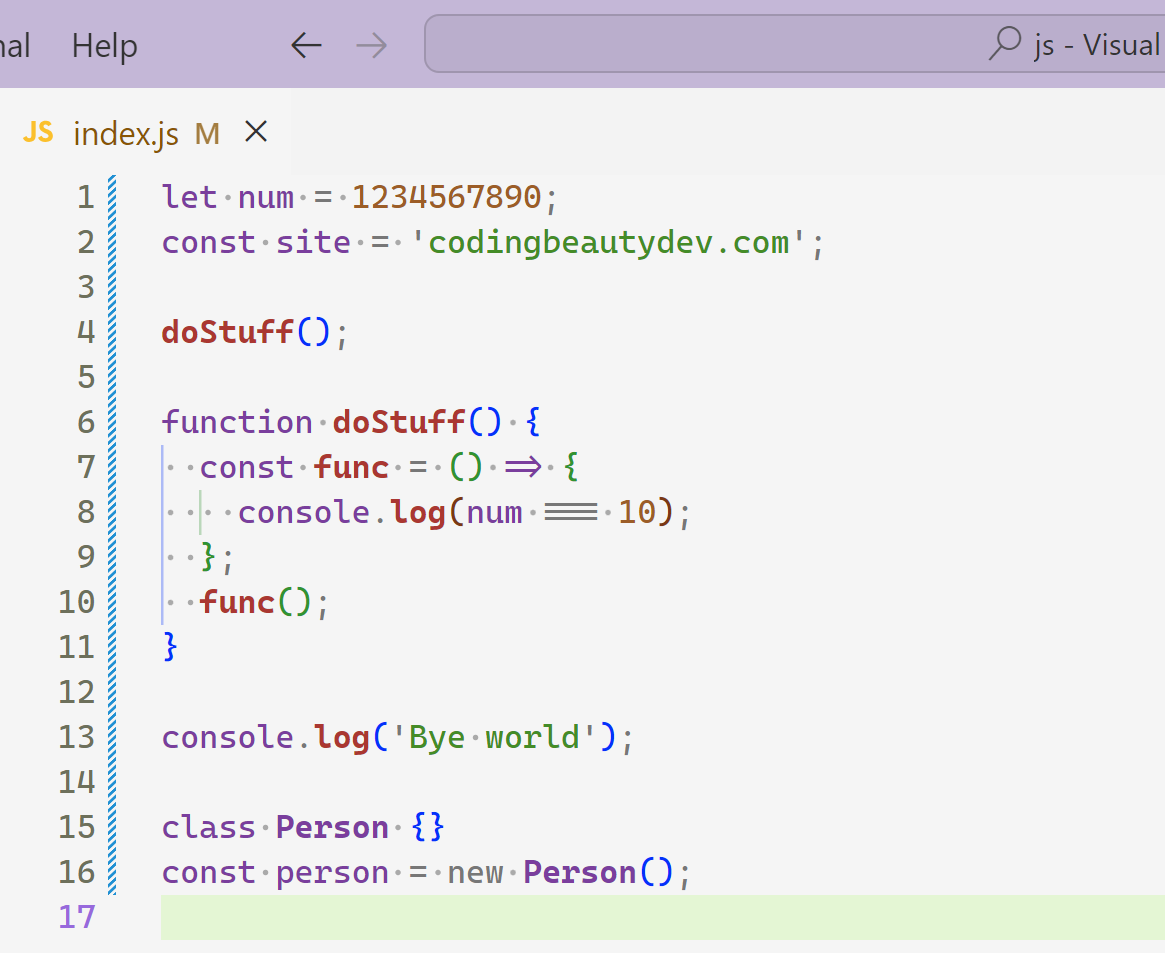
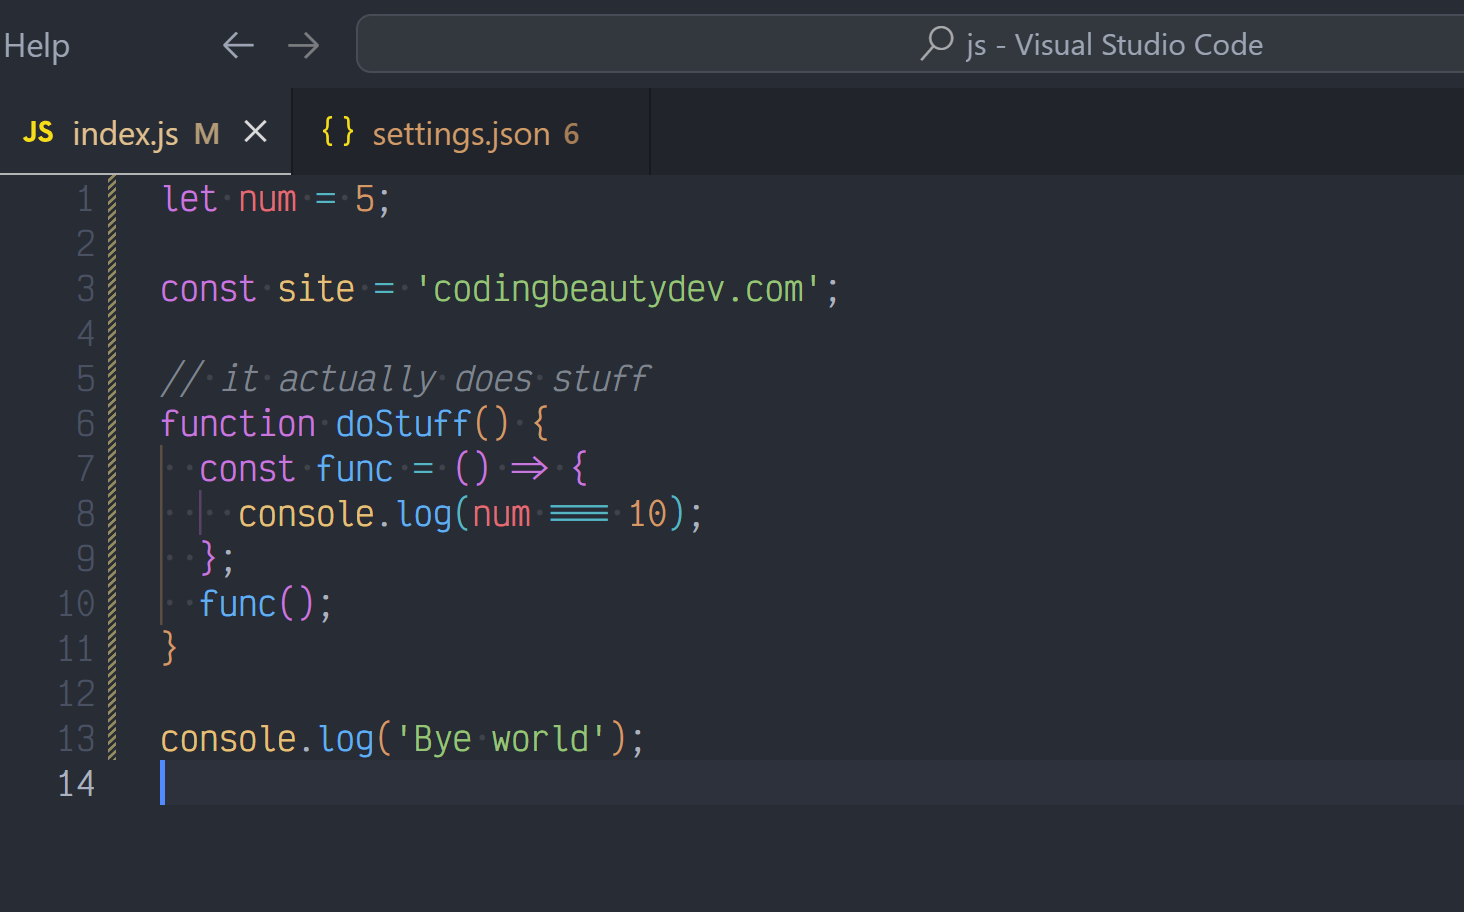
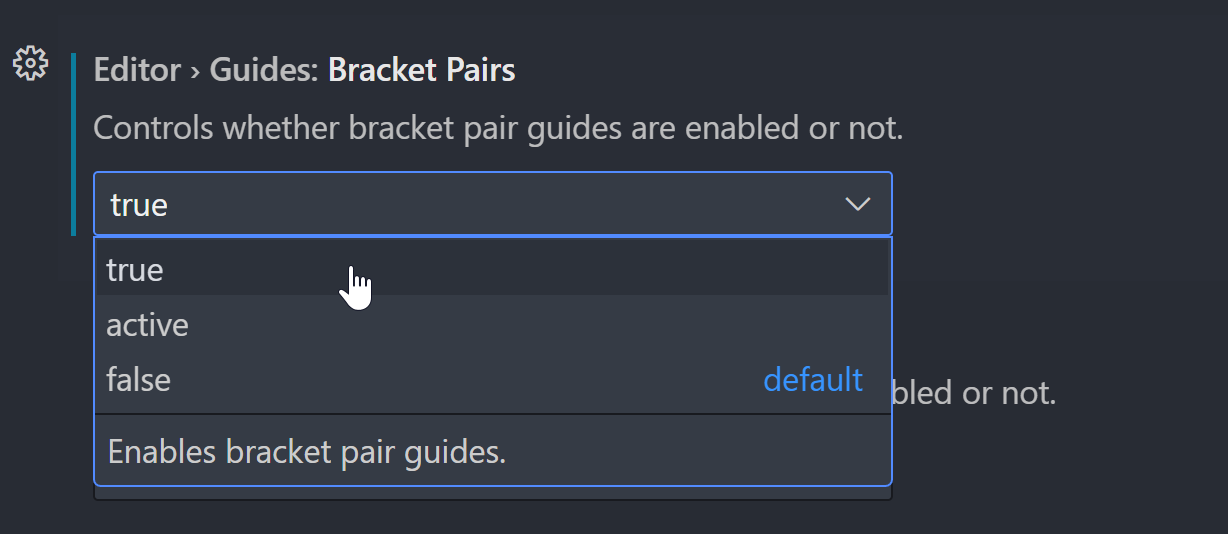
4. Colorful indentation
Indentation guides make it much easier for you to trace out the different indentation levels in your code.
Extensions for this
Indent Rainbow: “This extension colorizes the indentation in front of your text, alternating four different colors on each step”
But feature already built-in
So yeah, once again VS Code has this as a built-in feature.
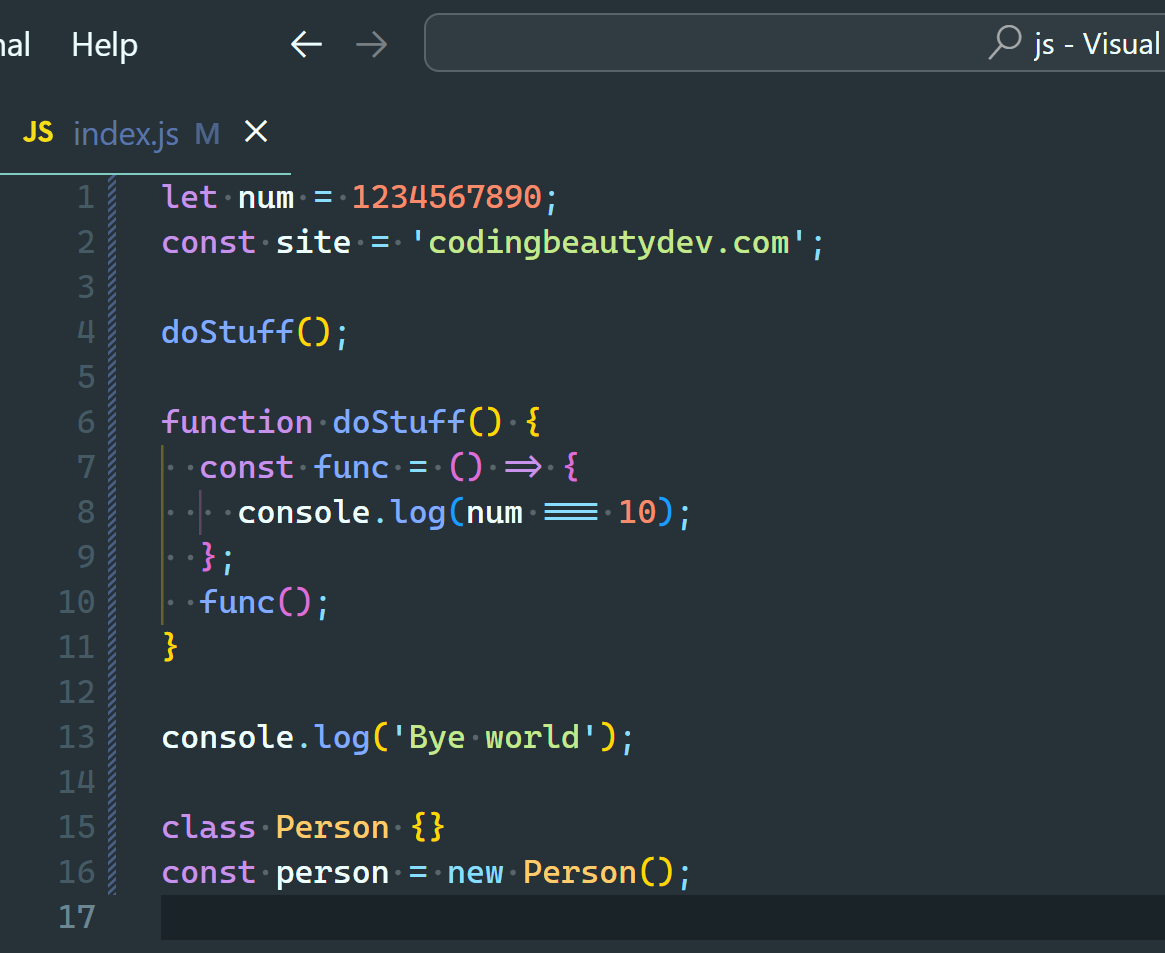
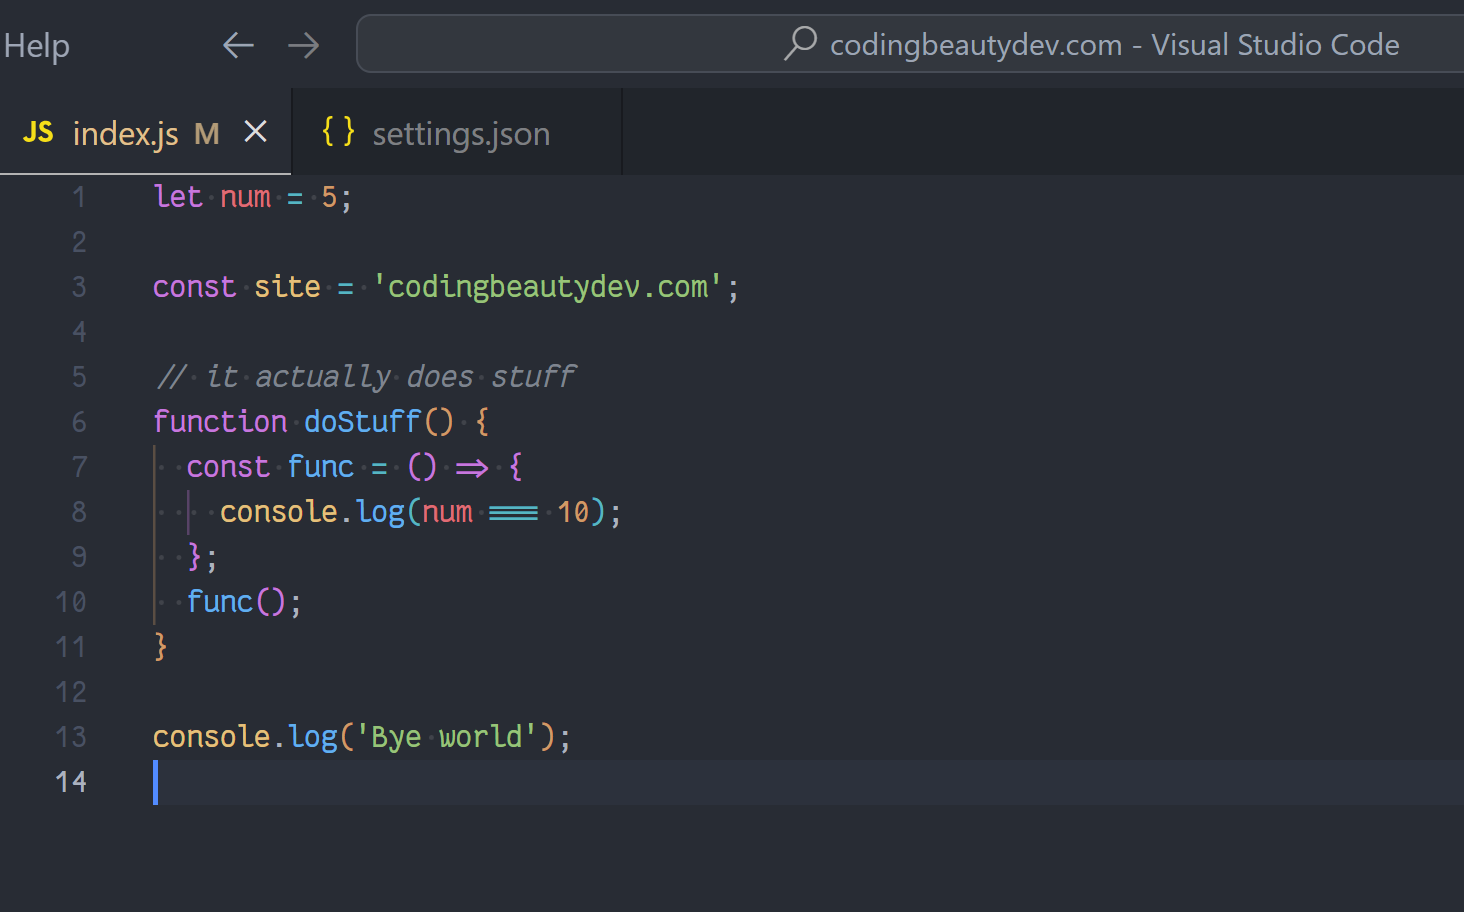
We just change the Editor > Guides: Bracket Pairs setting from active to always show the colorful indents.
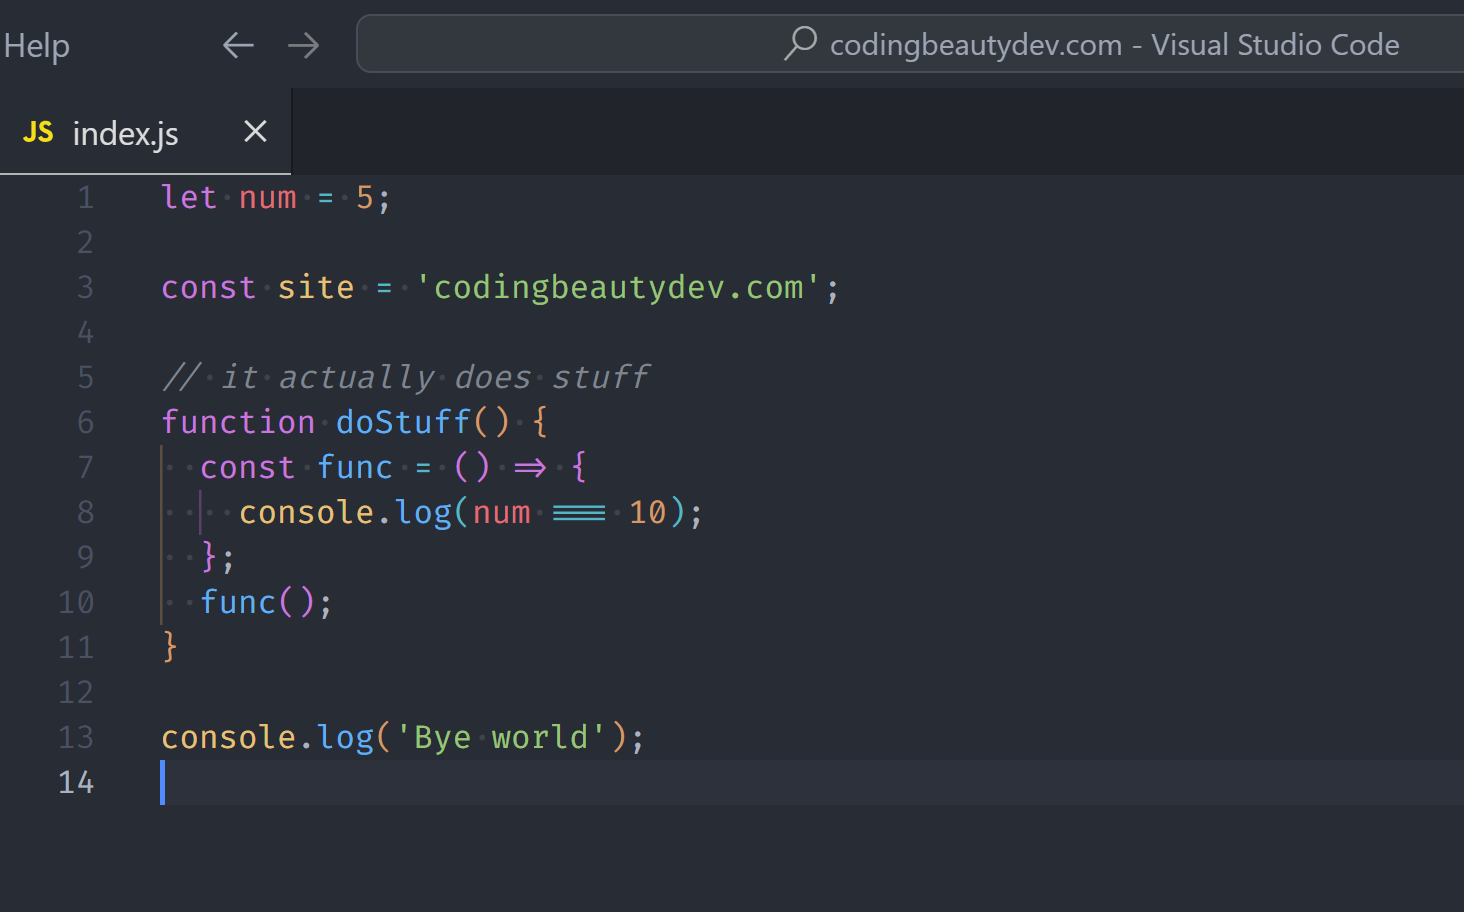
To go from this:
To this✅:
Beautiful.
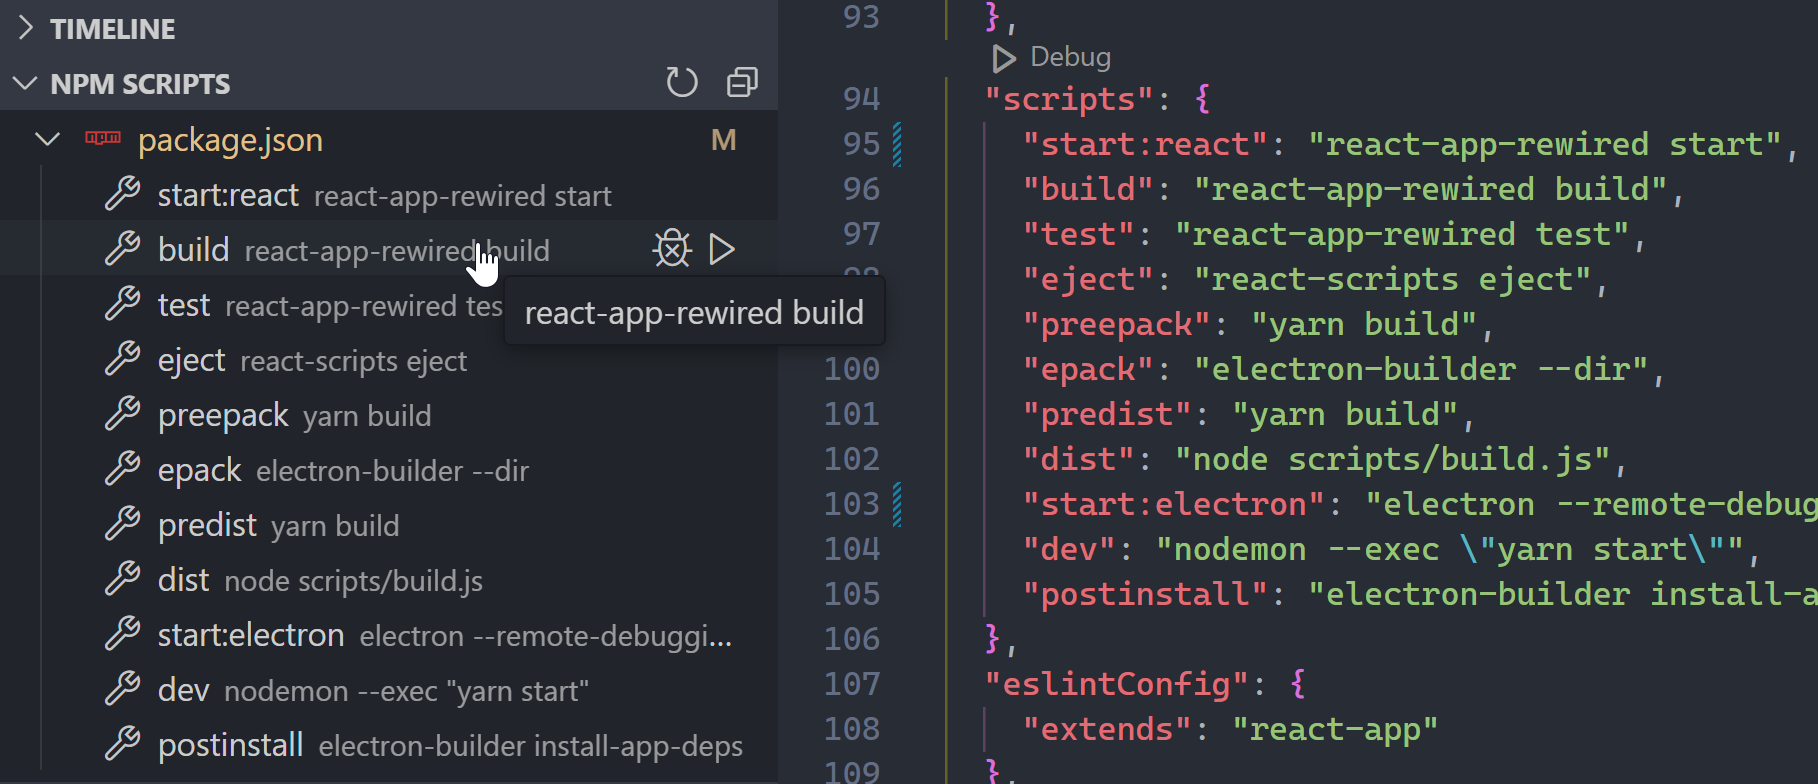
5. NPM integration
In every serious project you’ll probably have tools to automate testing, linting, building, and other tasks.
So this feature makes it easier to start those tasks with as little as the click of a button. No need to switch context whatsoever.
Extensions for this
NPM (6.8M installs): “This extension supports running npm scripts defined in the package.json file”. I always saw this as a recommended extension after opening any project with package.json
But feature already built-in
With the built-in NPM scripts view I can easily see all the scripts in my project’s package.json and run any I want:
Ugh, but now you have to drag your mouse all the way over there just to run a simple task.
So much better to go with the Tasks: Run Task command:
“Tari it’s still too slow!!”
Alright fine, if you know the exact script you want, then just Ctrl + ` to open the built-in terminal and feed your CLI desires:
Final thoughts
These extensions might have served a crucial purpose in the past, but not anymore for the most part, as much of the functionality they provide have been added as built-in VSCode features. Remove them to reduce the bloat and increase the efficiency of Visual Studio Code.