How to Fix the “Cannot read property ‘addEventListener’ of null” Error in JavaScript
The “cannot read property ‘addEventListener’ of null” error occurs in JavaScript when you try to call the addEventListener() method on an element that cannot be found in the DOM. This happens for two main reasons:
- Accessing the
addEventListener()method on an element absent from the DOM. - Inserting the
scripttag referencing the JavaScript file at a point above the declaration of the DOM element in the HTML.
We’ll learn how to handle the error for these two scenarios in this article.

Cause 1: Accessing addEventListener() on an element not present in the DOM
index.js
const btn = document.getElementById('does-not-exist');

console.log(btn); // null

// ❌ Cannot read property 'addEventListener' of null
btn.addEventListener('click', () => {
  alert('You clicked the button');
});
When a method like getElementById() or querySelector() method is used to search for an element that doesn’t exist in the DOM, it returns null. And attempting to call the addEventListener() method on a null value will cause the error.
Solve: Ensure correct selector
To fix the “cannot read property ‘addEventListener’ of null” error, make sure the selector used the access the element is properly defined. Ensure that there are no mistakes in the ID or class name, and the correct symbols are used.
Solve: Check for null
To fix the “cannot read property ‘addEventListener’ of null” error, check that the element is not null before calling the addEventListener() method on it.
We can do this with an if statement:
const btn = document.getElementById('does-not-exist');

console.log(btn); // null

// ✅ Check if element exists before calling addEventListener()
if (btn) {
  // Not called
  btn.addEventListener('click', () => {
    alert('You clicked the button');
  });
}
When a value is placed in between the brackets of an if statement, it is coerced to a Boolean before being evaluated, i.e., truthy values become true, and falsy values become false. null is a falsy value, so it is coerced to false and the code in the if statement block is never run.
Note: In JavaScript, there are six falsy values: undefined, null, NaN, 0, '' (empty string) and false. Every other value is truthy.
We can also use the optional chaining operator (?.) to check if the element is null.
const btn = document.getElementById('does-not-exist');

console.log(btn); // null

// ✅ Check if element exists before calling addEventListener()

// Not called
btn?.addEventListener('click', () => {
  alert('You clicked the button');
});
The optional chaining operator (?.) is null-safe way of accessing a property or calling a method of an object. If the object is nullish (null or undefined), the operator prevents the member access and returns undefined instead of throwing an error.
Cause 2: Inserting the script tag above the DOM element
Another common cause of this error is placing the <script> tag referencing the JavaScript file at a point above where the target element is declared.
For example, in this HTML markup:
index.html
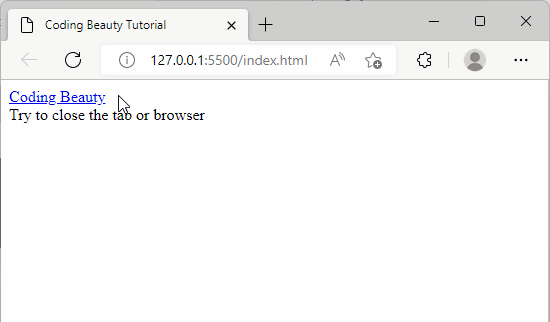
<!DOCTYPE html>
<html lang="en">
  <head>
    <title>Coding Beauty Tutorial</title>
    <!-- ❌ Script is run before button is declared -->
    <script src="index.js"></script>
  </head>
  <body>
    <button id="btn">Sign up</button>
  </body>
</html>
the script tag is placed in the head tag, above where the button element is declared, so the index.js file will not be able to access the button element.
index.js
const btn = document.getElementById('btn');

console.log(btn); // null

// ❌ TypeError: Cannot read properties of null
btn.addEventListener('click', () => {
  alert('You clicked the button');
});
Solve: Move script tag to bottom of body
To fix the error in this case, move the script tag to the bottom of the body, after all the HTML elements have been declared.
index.html
<!DOCTYPE html>
<html lang="en">
  <head>
    <title>Coding Beauty Tutorial</title>
  </head>
  <body>
    <button id="btn">Sign up</button>

    <!-- ✅ Script is run after button is declared -->
    <script src="index.js"></script>
  </body>
</html>
Now the index.js script file will have access to the button element and all the other HTML elements, because they would have already been declared when the script is run.
index.js
const btn = document.getElementById('btn');

console.log(btn); // HTMLButtonElement object

// ✅ Works as expected
btn.addEventListener('click', () => {
  alert('You clicked the button');
});
Solve: Access element in DOMContentLoaded event listener
Another way to fix the “cannot read property ‘addEventListener’ of null” error in JavaScript is to add a DOMContentLoaded event listener to the document, and access the element in this listener. With this approach it won’t matter where we place the script in the HTML.
index.html
<!DOCTYPE html>
<html lang="en">
  <head>
    <title>Coding Beauty Tutorial</title>

    <!-- Script placed above element accessed -->
    <script src="index.js"></script>
  </head>
  <body>
    <button id="btn">Sign up</button>
  </body>
</html>
The DOMContentLoaded event is fired when the browser has fully loaded the HTML, and the DOM tree has been built, but external resources like images and stylesheets may not have loaded. So regardless of where we place the script, the code in the listener is only called after all the declared HTML elements have been added to the DOM.
index.js
document.addEventListener('DOMContentLoaded', () => {
  const btn = document.getElementById('btn');

  console.log(btn); // HTMLButtonElement object

  // ✅ Works as expected
  btn.addEventListener('click', () => {
    alert('You clicked the button');
  });
});
Conclusion
We can fix the “cannot read property addEventListener’ of null” error in JavaScript by ensuring that the correct selector is defined, adding a null check to the element before calling addEventListener(), moving the script tag to the bottom of the body, or accessing the element in a DOMContentLoaded event listener added to the document.