I can’t believe what Anthropic just did to Clawdbot
“Clawdbot” is gone forever — and all thanks to Anthrophic.
Go to the original GitHub Clawdbot repo and what do you see? There is nothing there.

One day it was Clawdbot. The next day it wasn’t..
Over the last week, a fast-rising open-source AI project quietly changed its name to Moltbot after trademark pressure from Anthropic.
❌ Before:

✅ After:
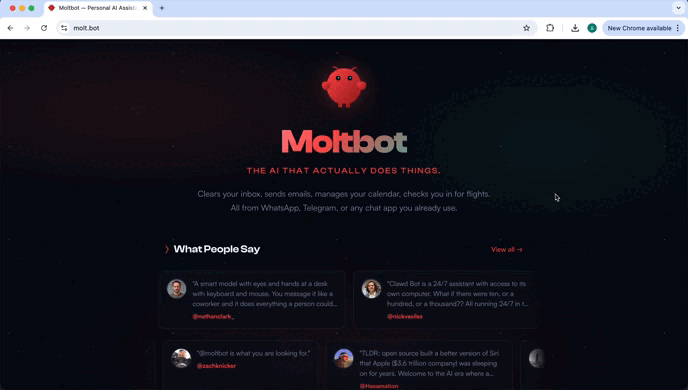
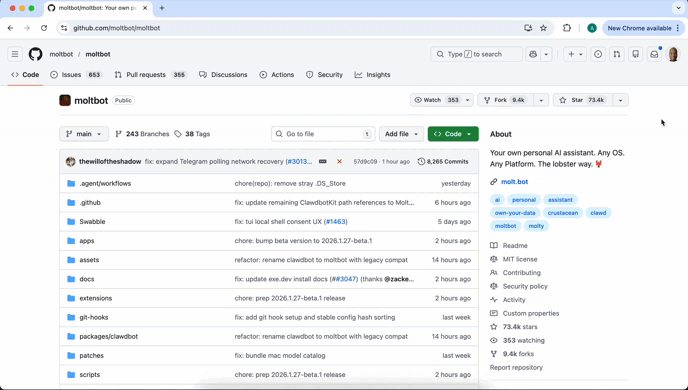
The new Moltbot repo:
What looked like a simple rebrand turned into a drama about AI agents, naming rights, and what happens when an indie project goes viral a little too fast.
What Clawdbot was — and why people cared
It was everywhere. It could actually do things — and all under your control, all on your machine.
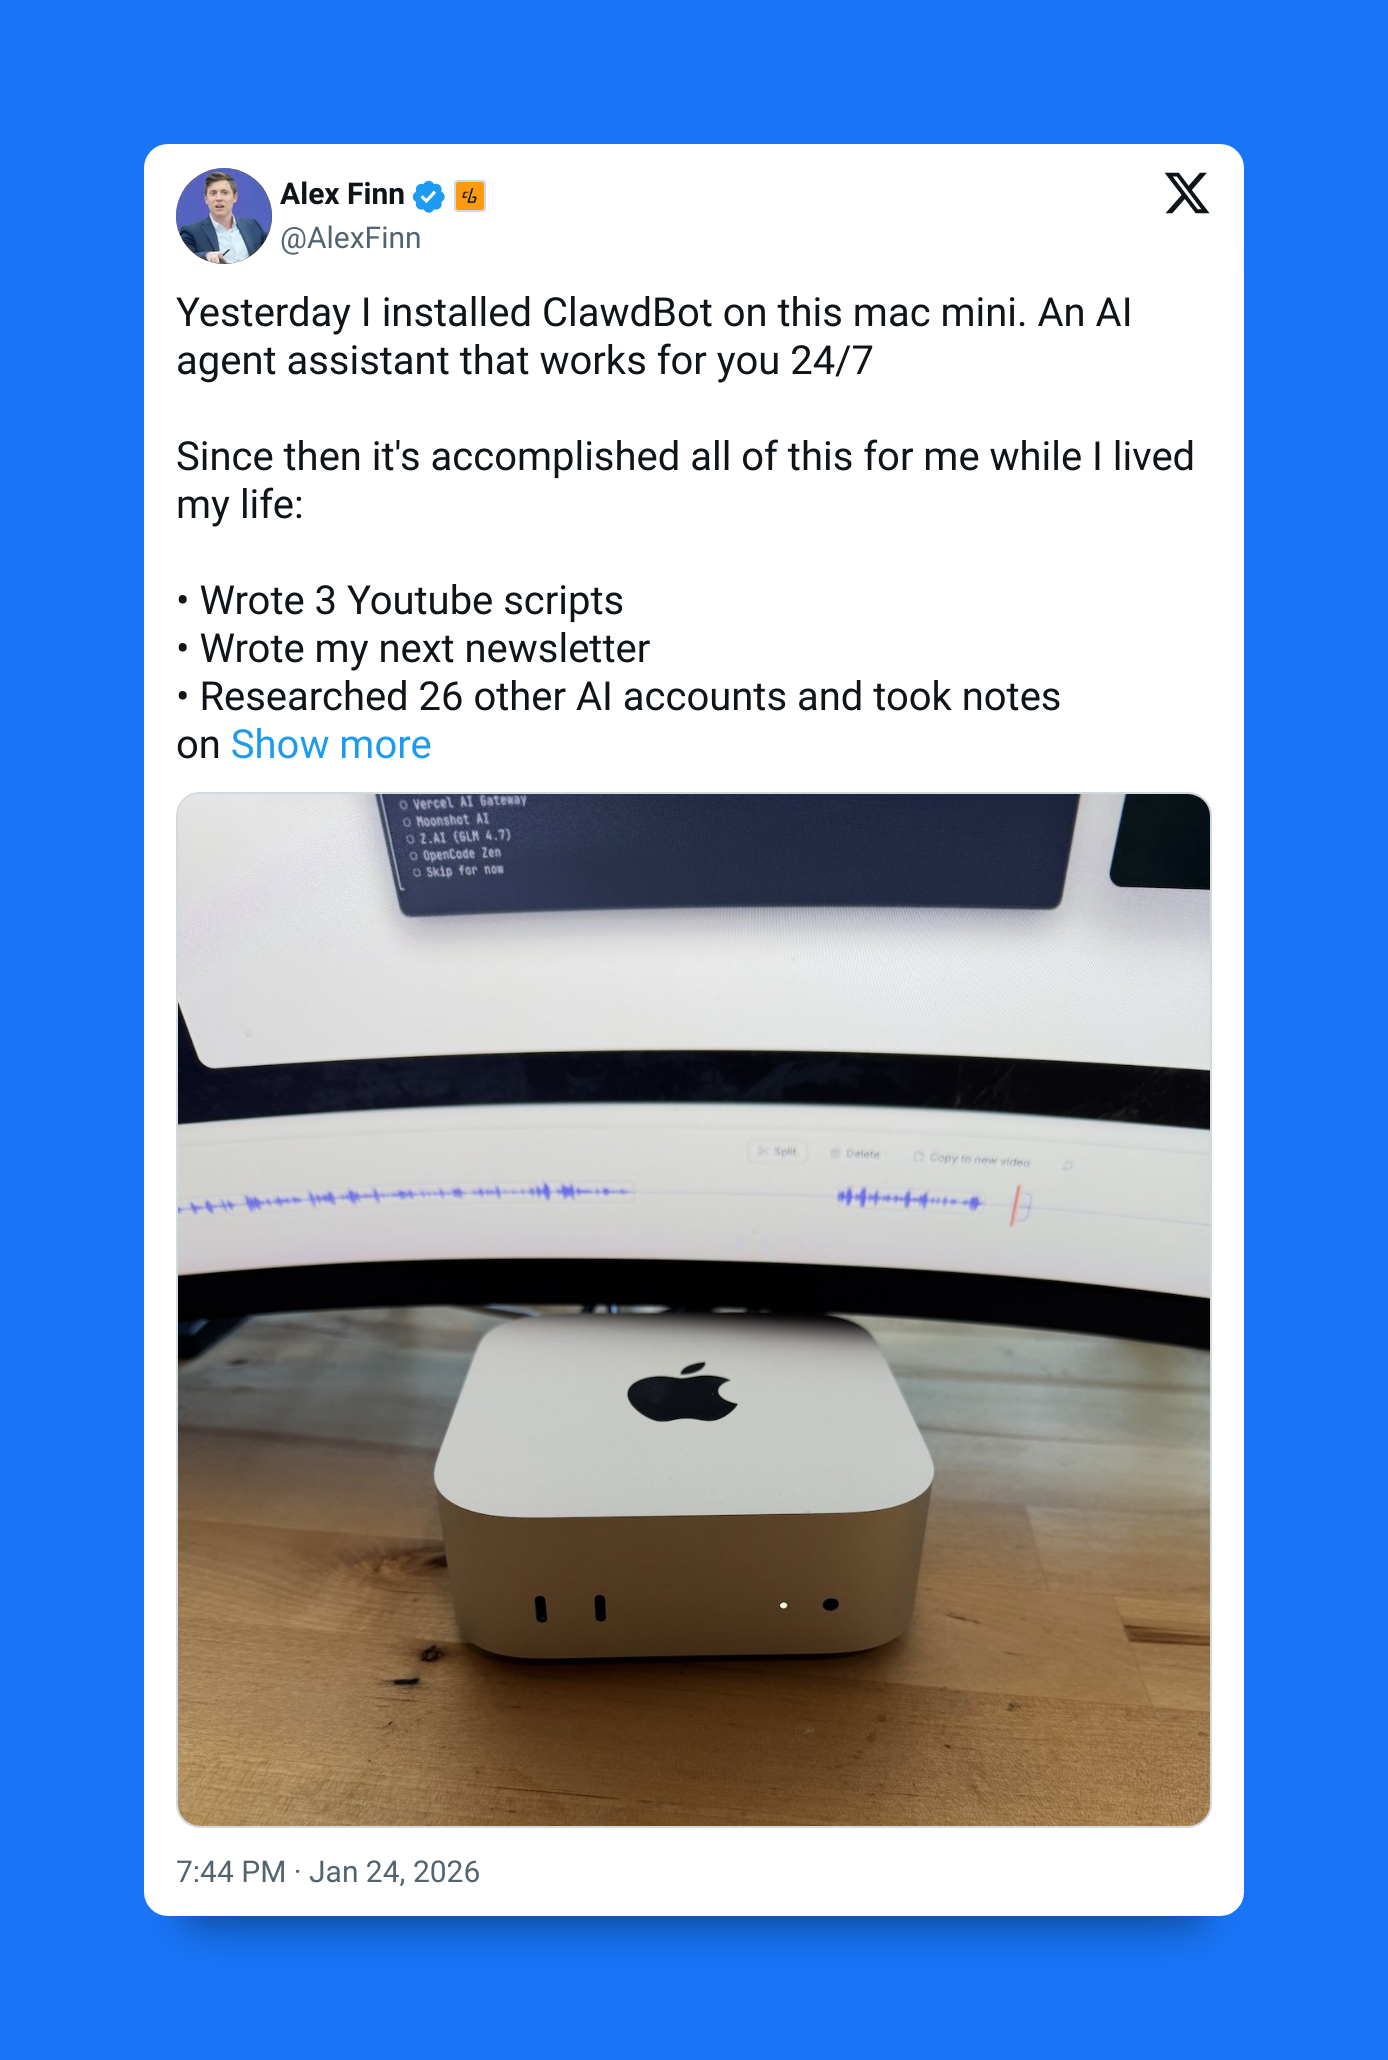
Clawdbot caught attention because it wasn’t just another chatbot. It was an AI agent designed to run locally and actually do things on your behalf — all on your machine.
Instead of chatting in a browser, users could talk to it through familiar apps like iMessage, WhatsApp, Telegram, Signal, or Discord.
From there, the bot could handle tasks like sending messages, managing reminders, interacting with calendars, and automating workflows across apps.
That local-first setup was a big part of the appeal.

People weren’t just testing it — they were setting it up as a persistent assistant, sometimes even dedicating always-on machines like Mac minis to keep it running.
It felt useful, powerful, and a little bit dangerous — which is exactly why it spread so quickly.
Anthropic wasn’t having it
The problem wasn’t the software. It was the name.
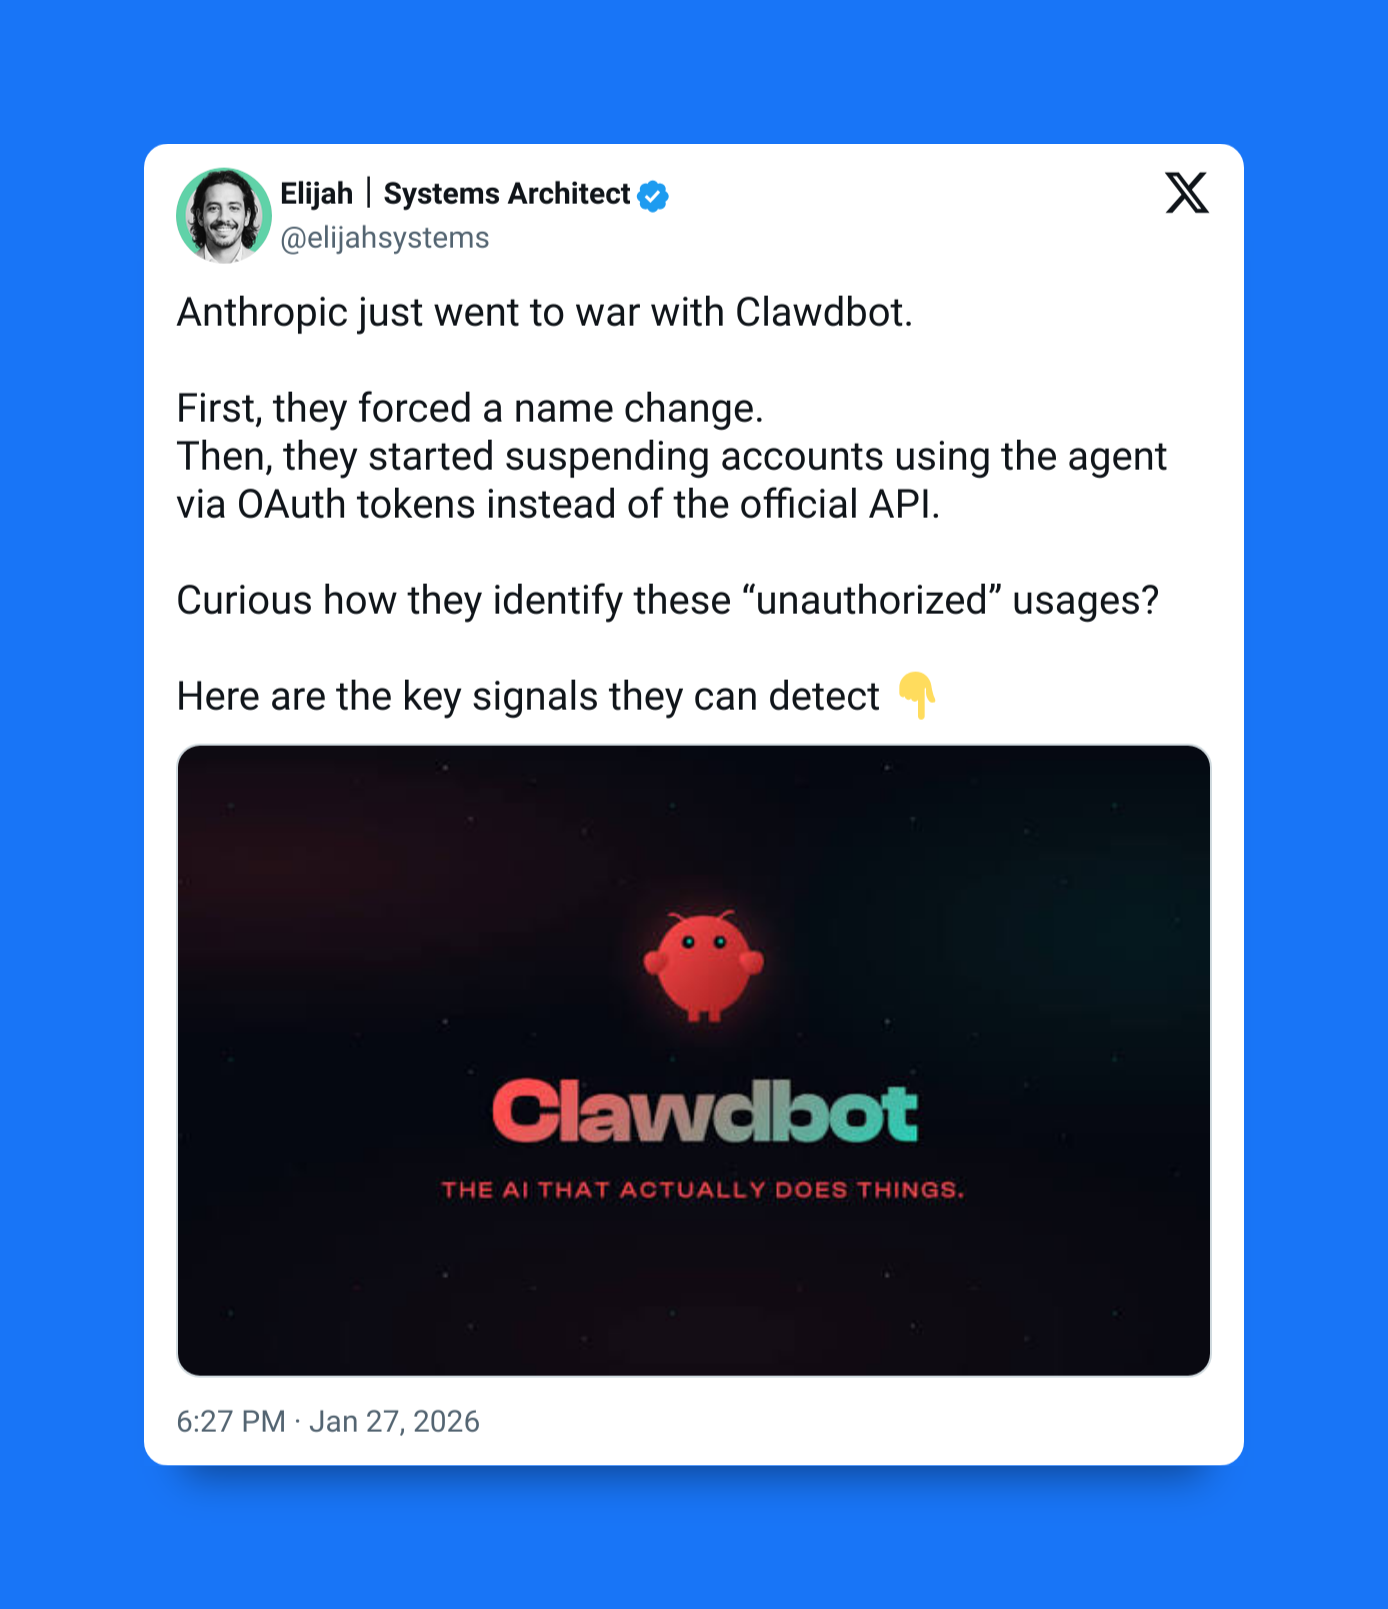
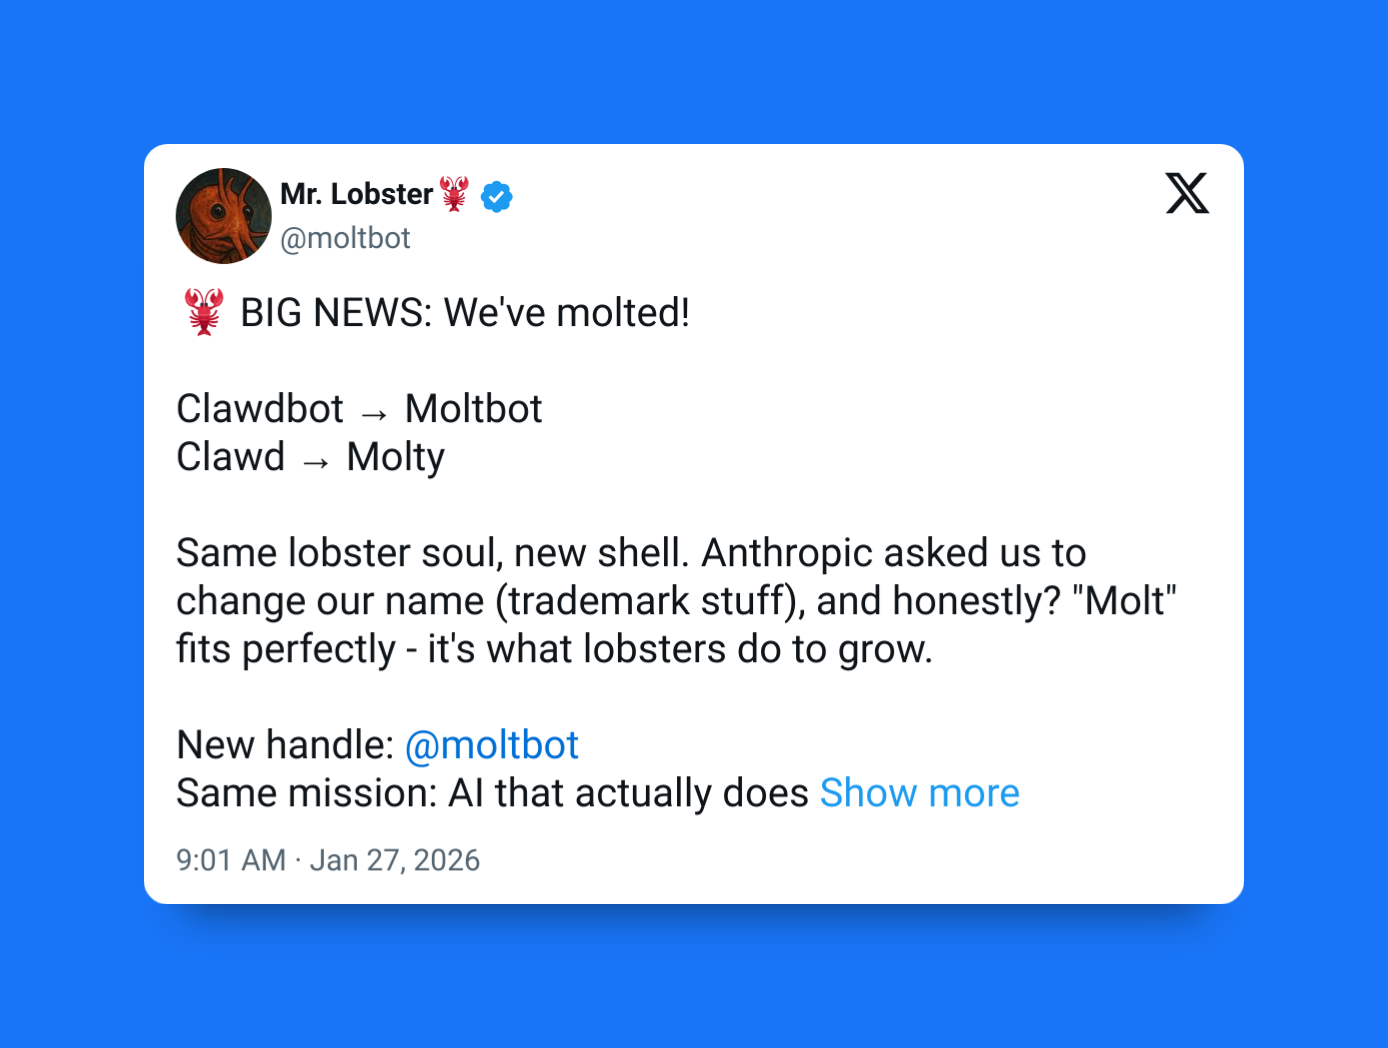
“Clawdbot” — and its lobster-style mascot “Clawd” — sounded and looked uncomfortably close to Claude, the flagship AI model from Anthropic. According to the project’s creator, Anthropic raised trademark concerns and asked that the name be changed.
This wasn’t framed as a suggestion. The creator publicly said the rename wasn’t his choice.
From Anthropic’s point of view, this was standard trademark behavior. Companies are often required to enforce their marks once there’s a real chance of confusion — especially when a project using a similar name starts getting widespread attention.
Why the name couldn’t just be tweaked
A lot of people asked the obvious question:
Why not just rename it something like “Clawbot” and move on?
Apparently, that wasn’t allowed either.
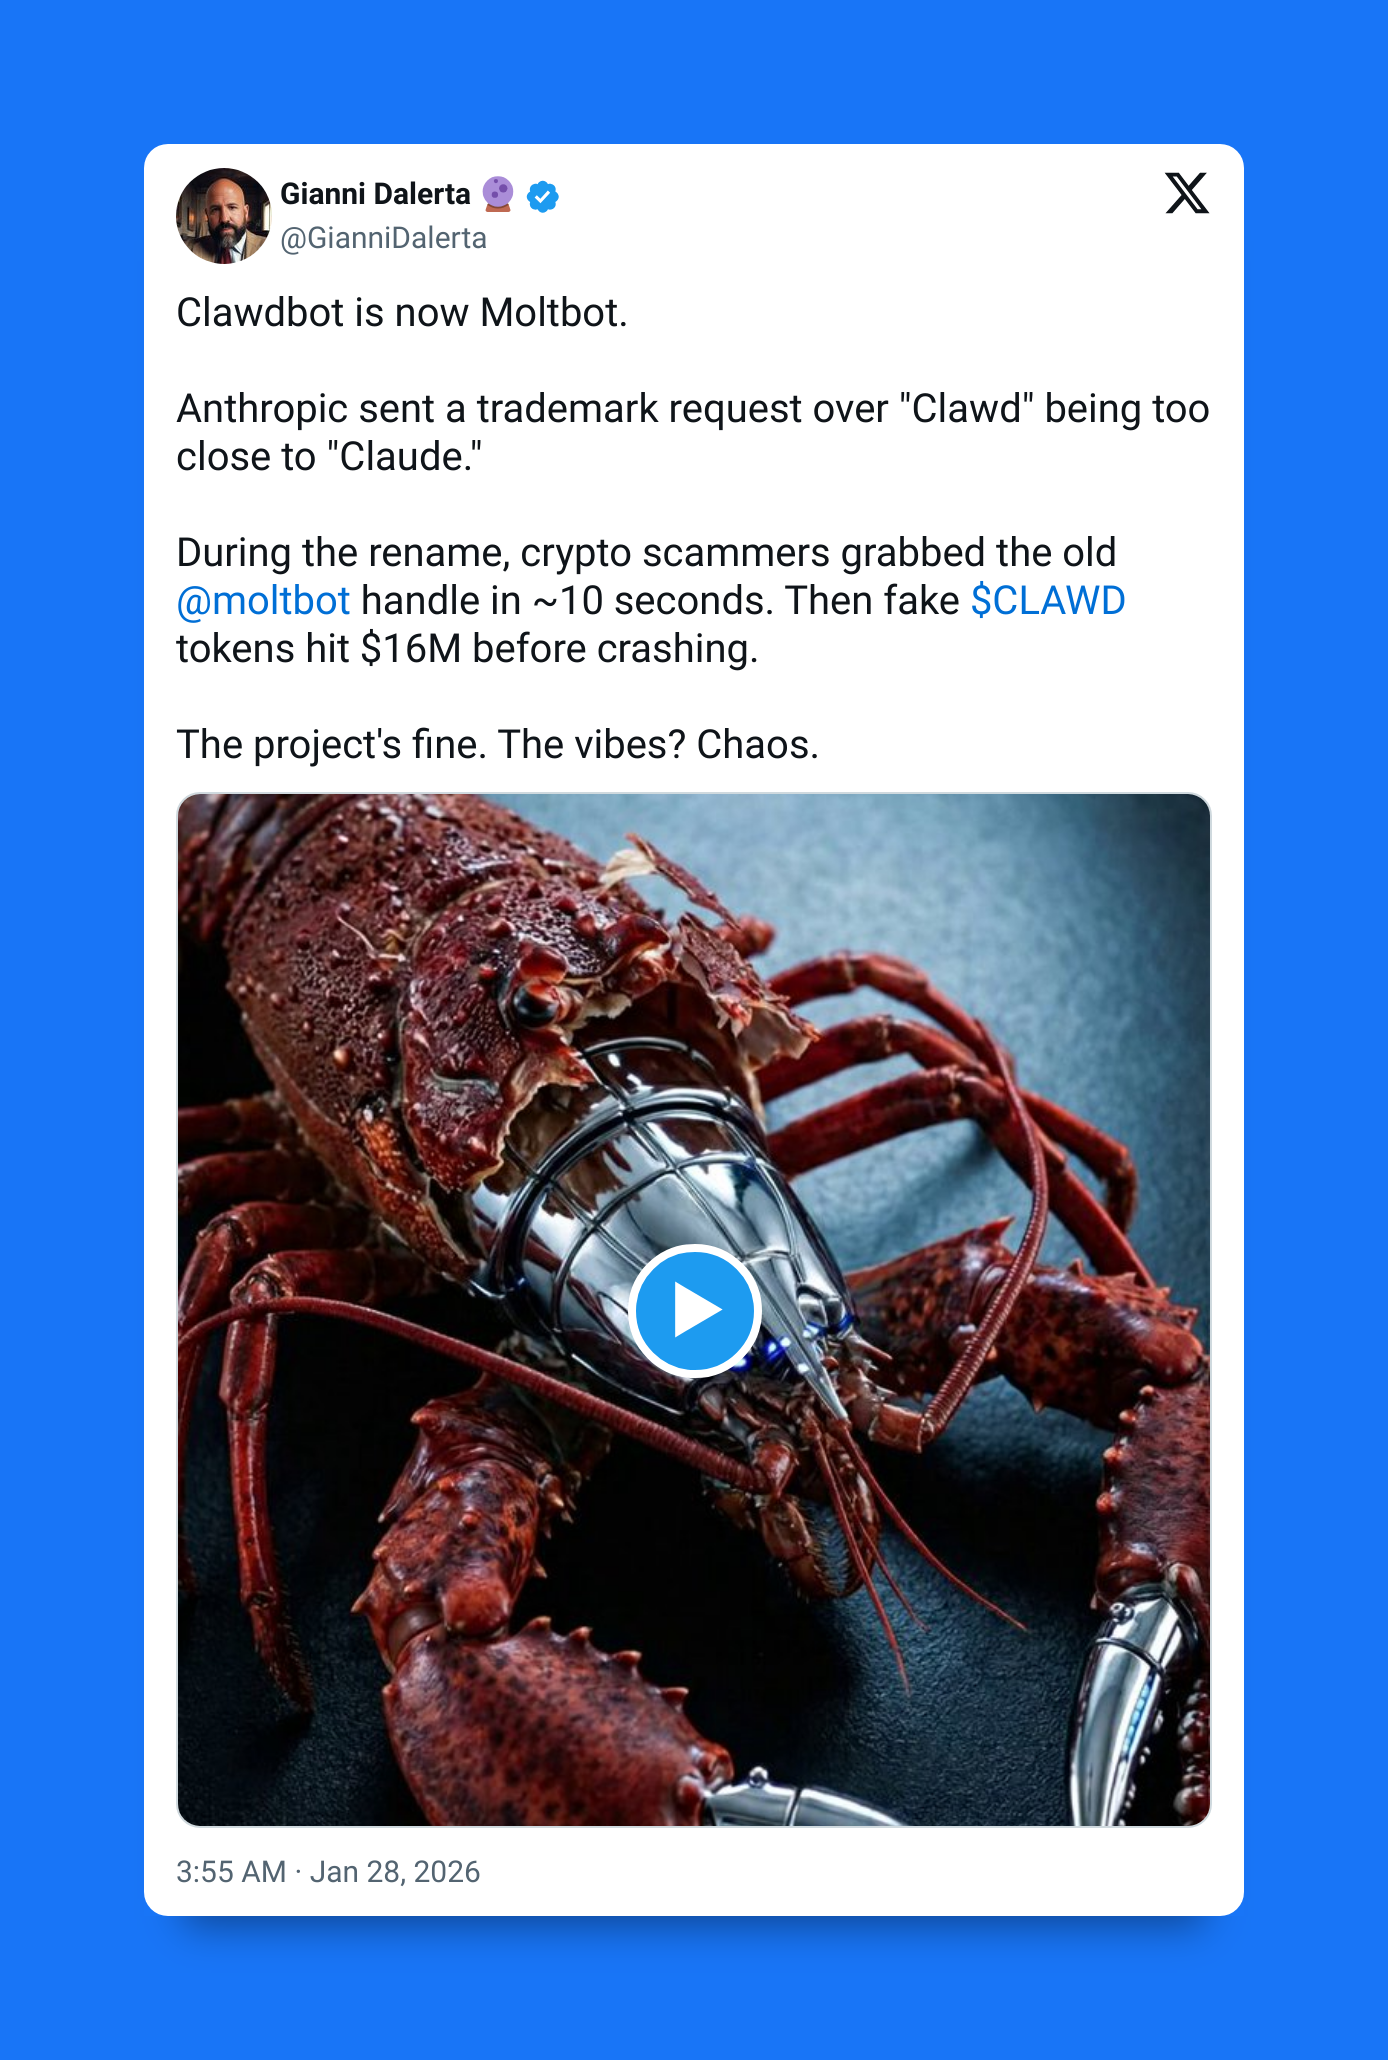
So the project went with Moltbot, keeping the crustacean theme but dropping anything that could plausibly be linked back to Claude. The mascot followed suit: Clawd became Molty.
It was fast, clean, and legally safer — but the timing couldn’t have been worse.
The rebrand fallout: confusion, scams, and noise
The rename landed right in the middle of peak hype, which created a perfect storm.
Suddenly there were new repo names, new social handles, people unsure which accounts were official, and opportunists rushing in. Fake tokens appeared. Crypto scammers tried to capitalize on the confusion.
The creator even said his personal GitHub account was briefly compromised, though the project itself wasn’t affected.
At the same time, he was asking people to stop pinging and harassing him — not because of criticism, but because the sheer volume of attention was becoming disruptive.
This is the ugly side of open-source virality: once a project breaks containment, it attracts everyone — including people who have nothing to do with the software.
The bigger conversation Moltbot kicked off
Even without the naming drama, Moltbot raises real questions.
Unlike a chat-only AI, an agent that can read messages, interact with apps, and take actions on your behalf comes with serious security implications.
If something goes wrong — or if an attacker figures out how to manipulate it — the blast radius is much larger.
That doesn’t make Moltbot reckless or irresponsible. It just means it sits right at the edge of where “cool demo” turns into “this needs careful thought.”
And that’s part of why the project blew up so fast. It’s why MCP blew up so fat:
People are hungry for AI that acts, not just talks.
It’s a telling moment we’re in
Open-source AI projects can now gain massive attention almost overnight. When they do, they immediately run into the same forces big companies deal with: trademarks, security concerns, bad actors, and public scrutiny.
Moltbot now clearly states that it’s independent and not affiliated with Anthropic. The software didn’t change — just the name. But the episode is a reminder that in today’s AI ecosystem, even naming something can have real consequences.
The agent era is arriving fast.
And sometimes, it starts with a lobster losing its claws.