10 rare HTML tags that nobody ever uses
There’s way more to HTML than <div>, <a>, and <p>.
So much more sophisticated and powerful tags that you’ve probably never used.
From modern list visualization to 🎨 colorful highlights, let’s look at 10 little-known but capable HTML tags.
1. abbr
The <abbr> tag defines an abbreviation or acronym, like HTML, CSS, and JS.
And LOL too – though that’s more of a standalone word these days.
I'm reading about
<abbr title="Hypertext Markup Language">HTML</abbr>
tags at
<abbr title="Coding Beauty">CB</abbr>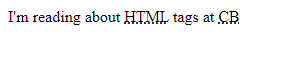
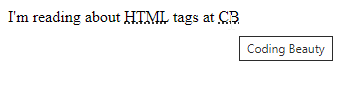
We use the title attribute of the <abbr> tag to show the description of the abbreviation/acronym when you hover over the element:
Hover over <abbr> to show the full form:
2. q
The <q> tag indicates that the text inside of it is a short inline quotation.
<q>Coding creates informative tutorials on Web Development technologies</q>Modern browsers typically implement this tag by wrapping the enclosed text in quotation marks:

3. s
<s> strikes through.
To correct without destroying the change history.
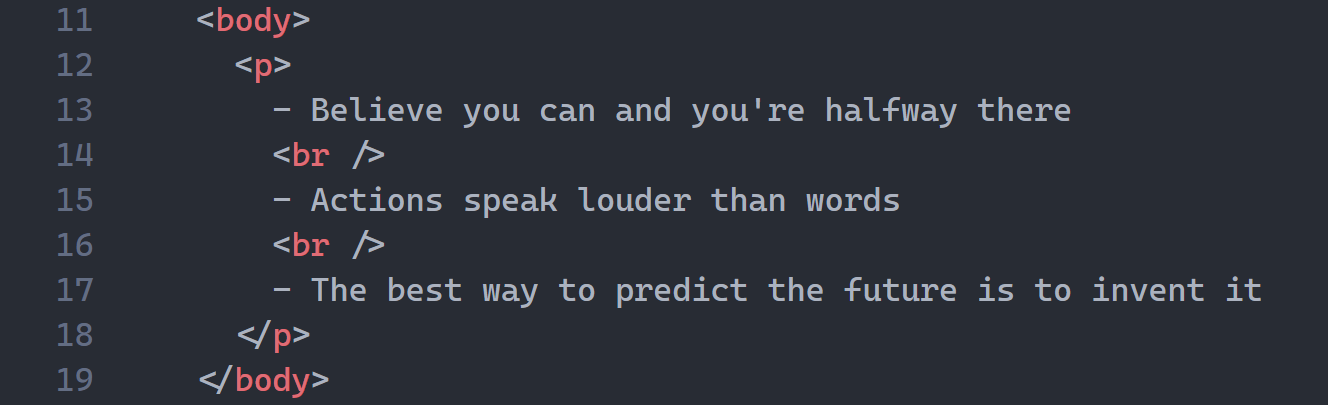
Buy for <s>$200</s> $100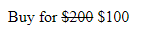
The <del> and <ins> pair are similar but semantically meant for document updates instead of corrections.
<!DOCTYPE html>
<html lang="en">
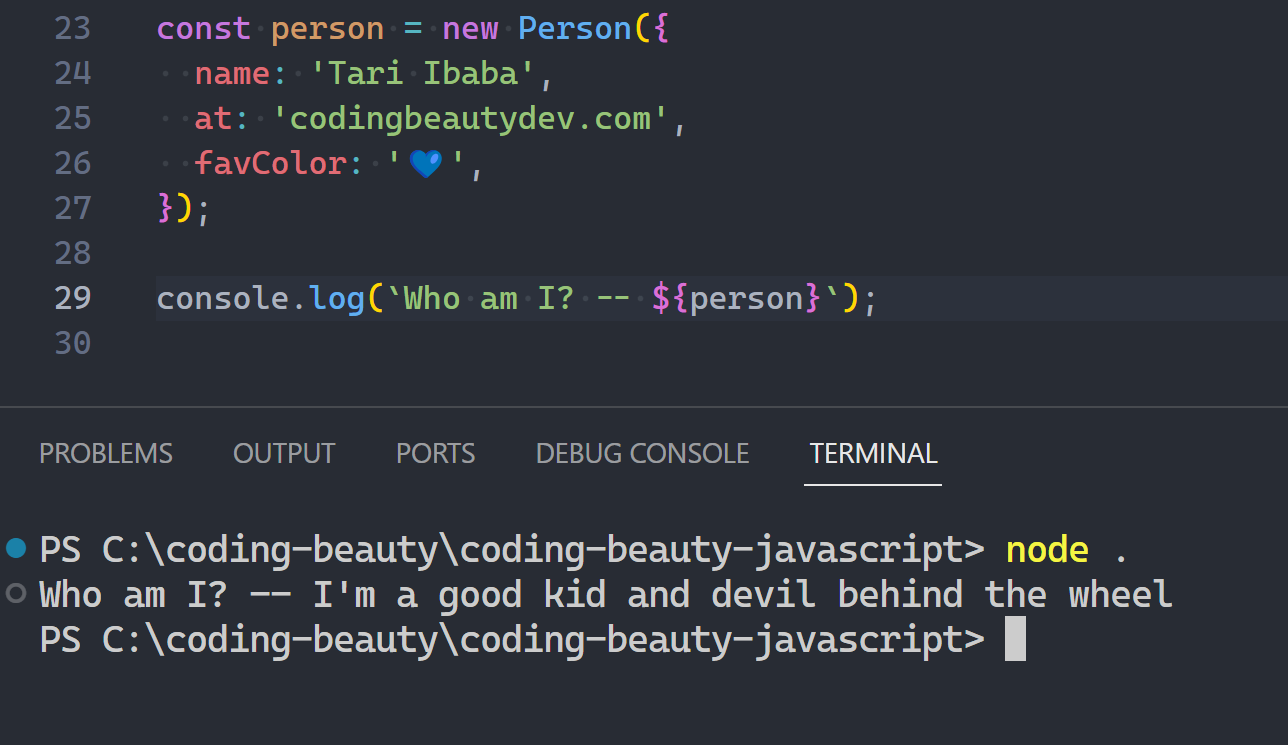
<head>
<style>
del {
background-color: lightsalmon;
}
ins {
text-decoration: none;
background-color: lightgreen;
}
</style>
</head>
<body>
My favorite programming language is <del>JavaScript</del>
<ins>TypeScript</ins>
</body>
</html>

<del> and <ins> tags.4. mark
Marks or highlights text.
Coding <mark>Beauty</mark> WebsiteYellow background color by default:
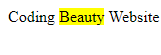
Like how browsers show search results.
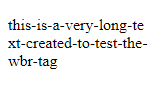
5. wbr
<wbr> tells browser, “You can only break text here and there”
So the browser doesn’t get lousy and start break crucial words all over the place.
That’s why it’s wbr — Word BReak Opportunity
<p>this-is-a-very-long-text-created-to-test-the-wbr-tag</p>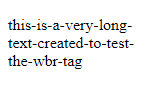
But now with <wbr />
<p>this-is-a-very-long-te<wbr />xt-created-to-test-the-wbr-tag</p>Broken precisely after ...-te:
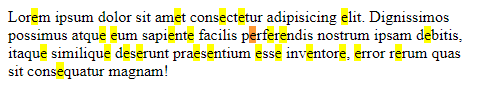
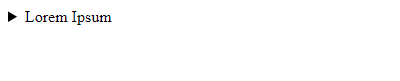
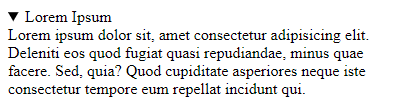
6. details
<details> is all about expanding and contracting — like the universe.
<details>
  <summary>Lorem Ipsum</summary>
  Lorem ipsum dolor sit, amet consectetur adipisicing elit. Deleniti eos
  quod fugiat quasi repudiandae, minus quae facere. Sed, quia? Quod
  cupiditate asperiores neque iste consectetur tempore eum repellat incidunt
  qui.
</details>
Contract:
Expand:
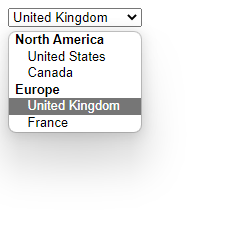
7. optgroup
The name says it all — grouping options.
You can usually group gigantic option lists into clear hierarchies, and <outgroup> is here to help.
<select name="country" id="countries">
  <optgroup label="North America">
    <option value="us">United States</option>
    <option value="ca">Canada</option>
  </optgroup>
  <optgroup label="Europe">
    <option value="uk">United Kingdom</option>
    <option value="fr">France</option>
  </optgroup>
</select>
Countries → continents.
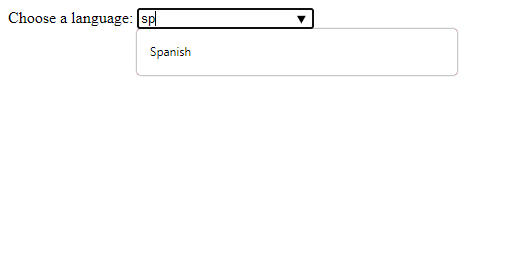
8. datalist
<datalist> is all about making inputting text effortless.
With dropdown lists for autocomplete:
<form>
<label for="lang">Choose a language:</label>
<input list="langs" name="lang" id="lang" />
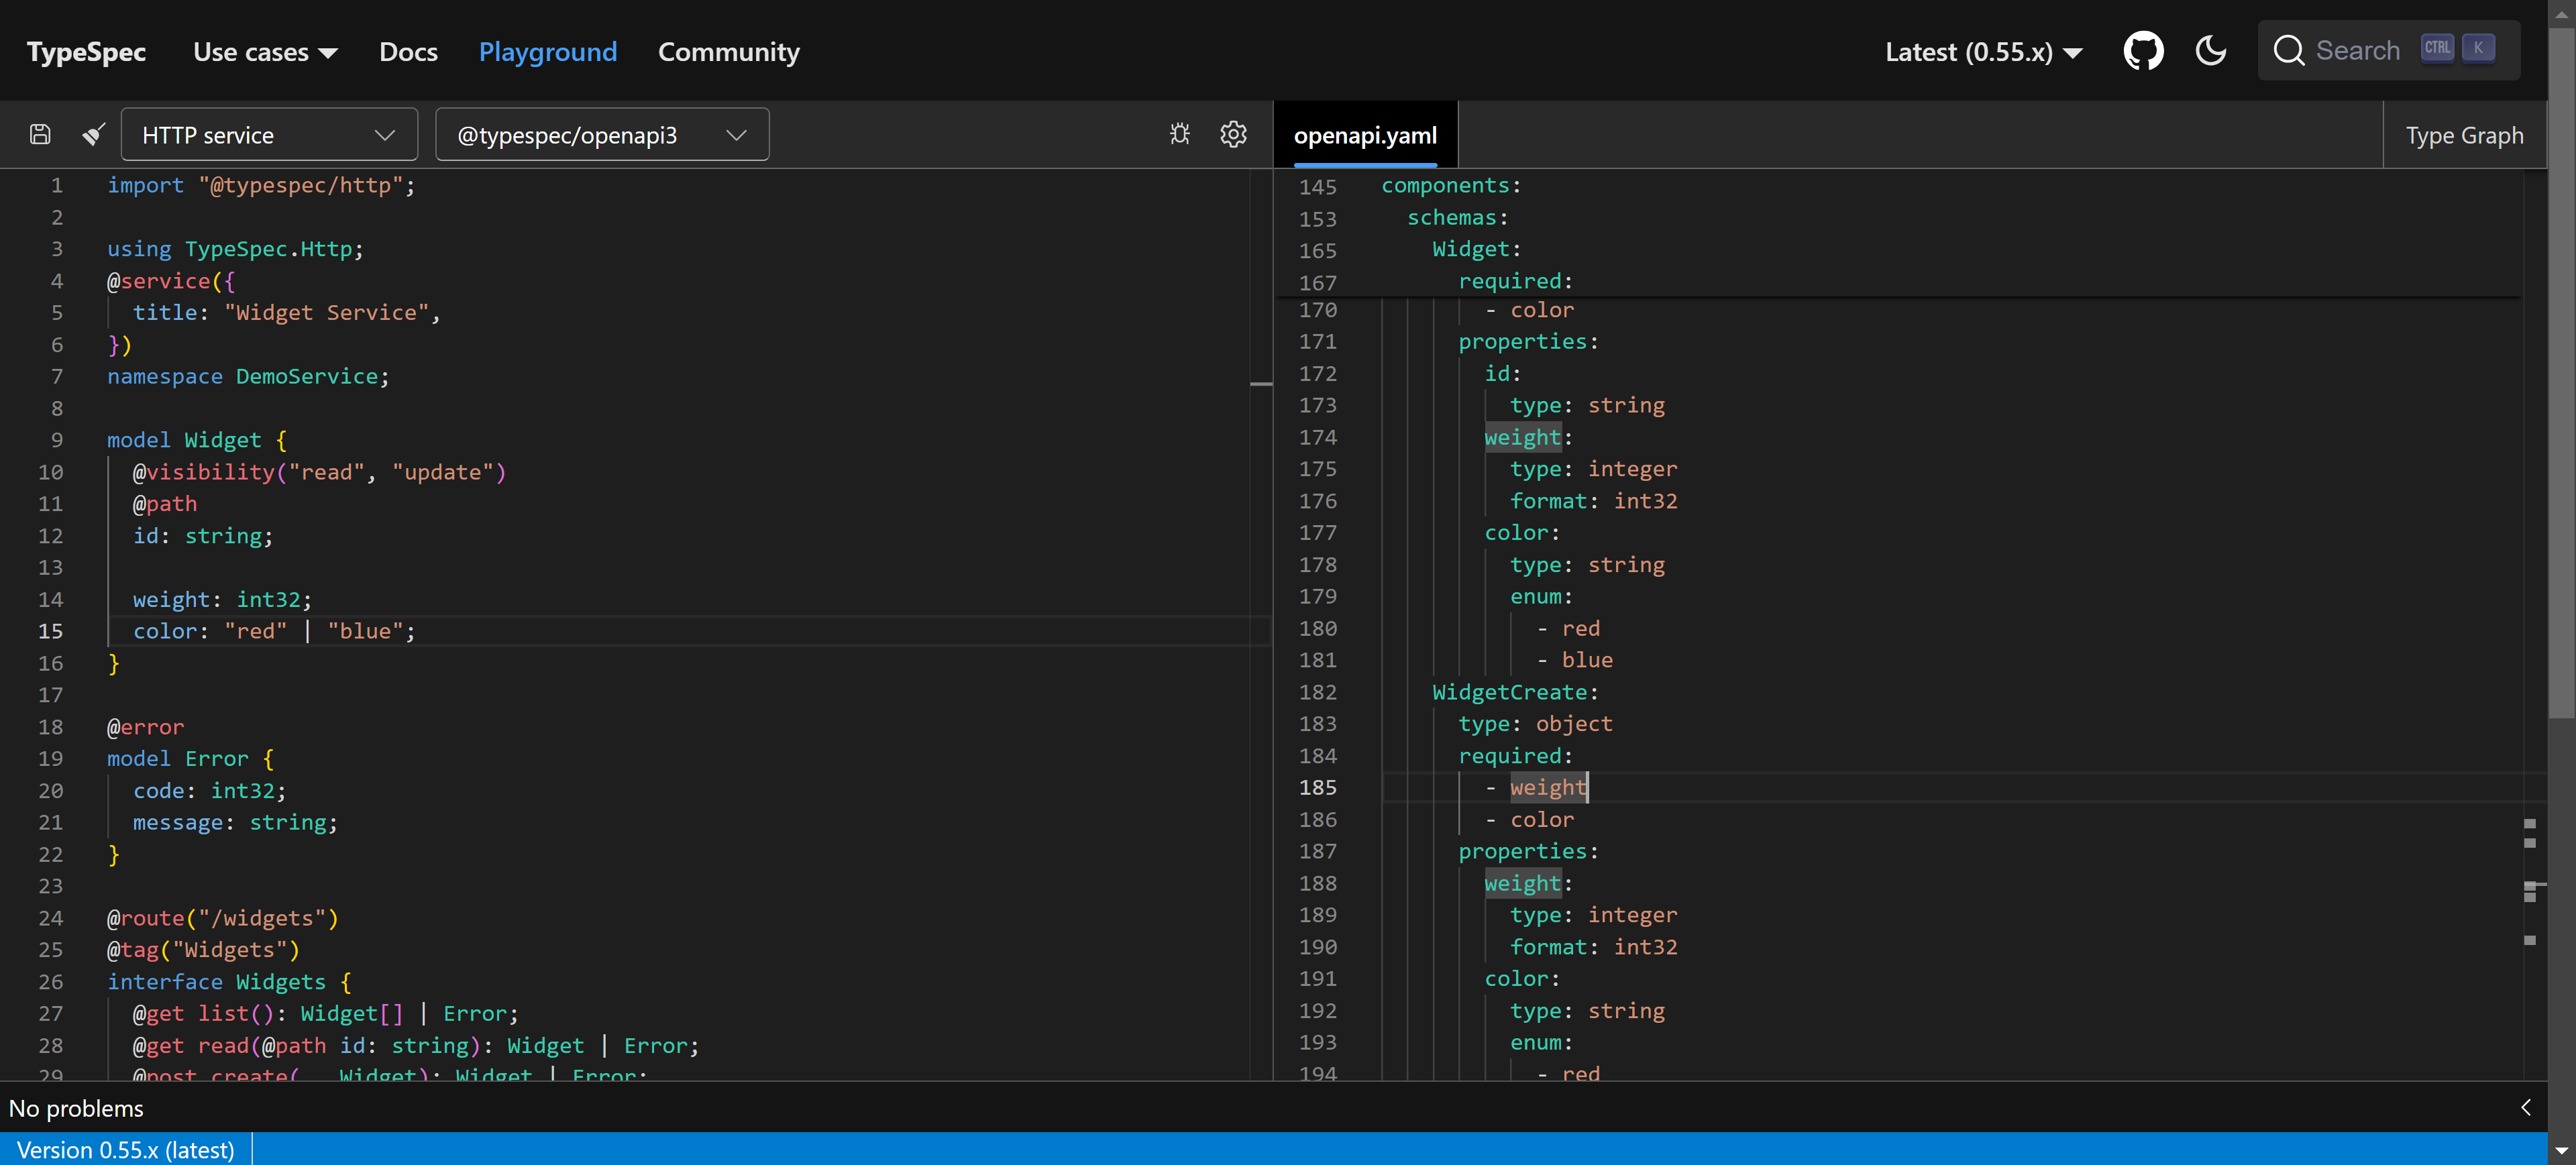
<!-- 🔗<input> list to <datalist> id -->
<datalist id="langs">
<option value="English" />
<option value="French" />
<option value="Spanish" />
<option value="Chinese" />
<option value="German" />
</datalist>
</form>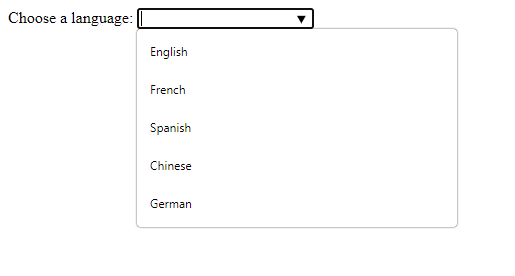
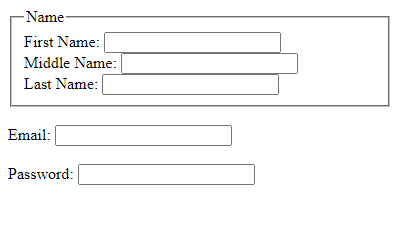
9. fieldset
A set of fields — farmers must find it useful.
Creating a clean visual separation to easily understand the forms.
<form>
  <fieldset>
    <legend>Name</legend>

    <label for="fname">First Name:</label>
    <input type="text" id="fname" name="fname" /><br />
    <label for="mname">Middle Name:</label>
    <input type="text" id="mname" name="mname" /><br />
    <label for="lname">Last Name:</label>
    <input type="text" id="lname" name="lname" />
  </fieldset>
  <br />
  <label for="email">Email:</label>
  <input type="email" id="email" name="email" />
  <br /><br />
  <label for="password">Password:</label>
  <input type="password" id="password" name="password" />
</form>
We use the <legend> tag to define a caption for the <fieldset> element.
10. sup and sub
<sup> — superscript.
<sub> — subscript.
<p>This text contains <sub>subscript</sub> text</p>
<p>This text contains <sup>superscript</sup> text</p>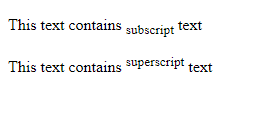
Something more intense: neutralization reaction 🧪
𝑥<sup>2</sup> - 3𝑥 - 28 = 0. Solve for 𝑥. <br />
<br />
H<sub>2</sub>SO<sub>4</sub> + NaOH → Na<sub>2</sub>SO<sub>4</sub> +
H<sub>2</sub>O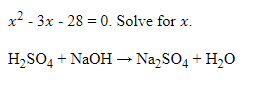
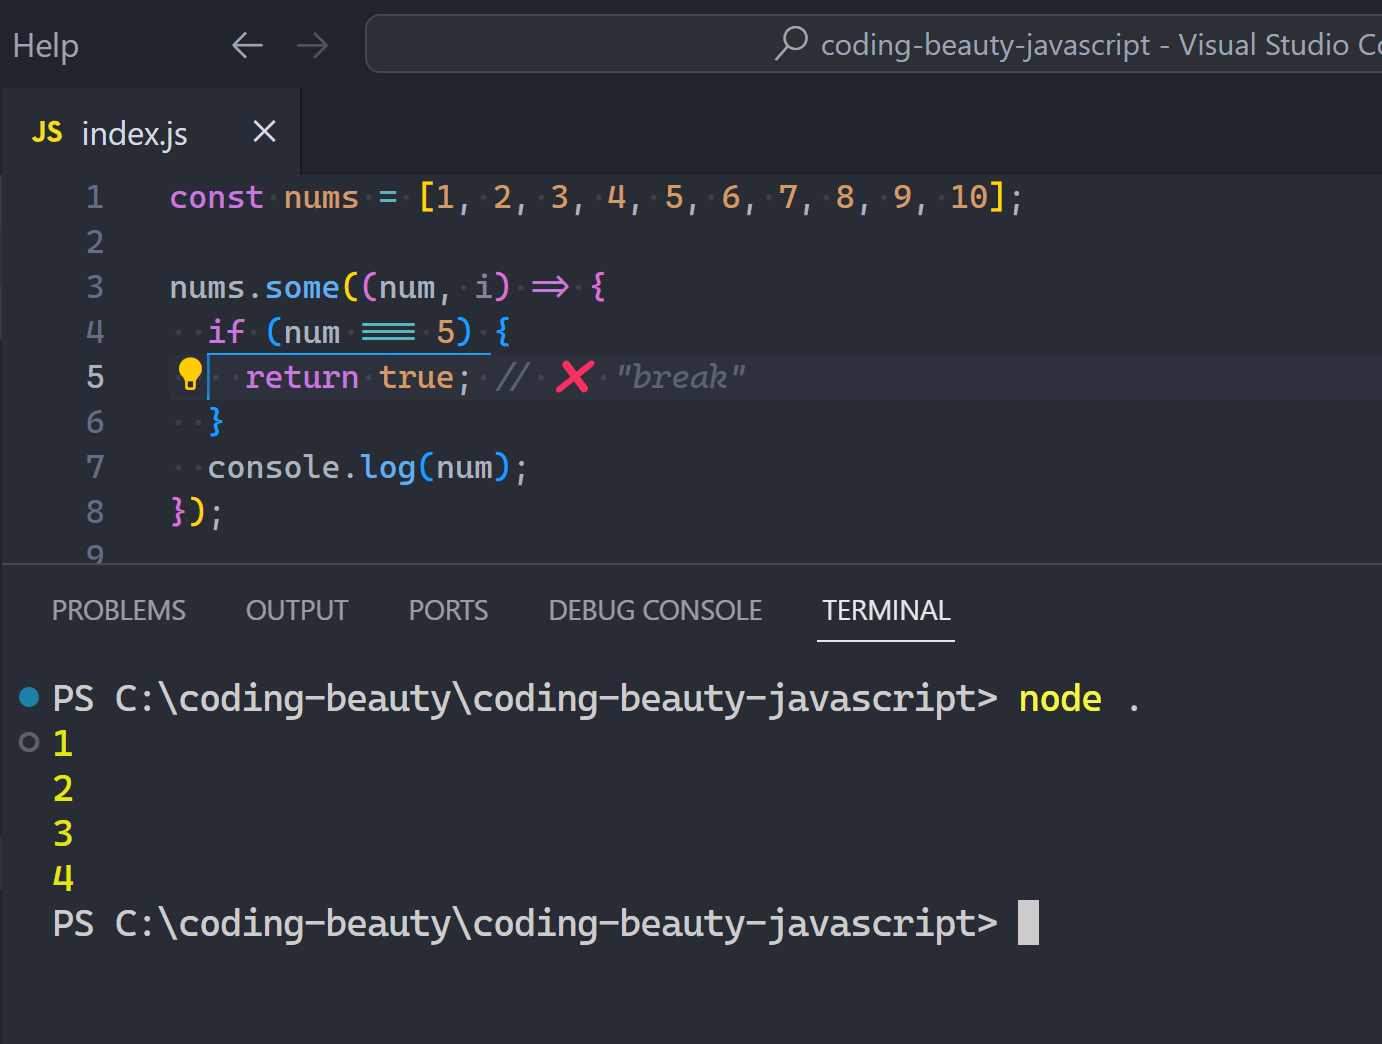
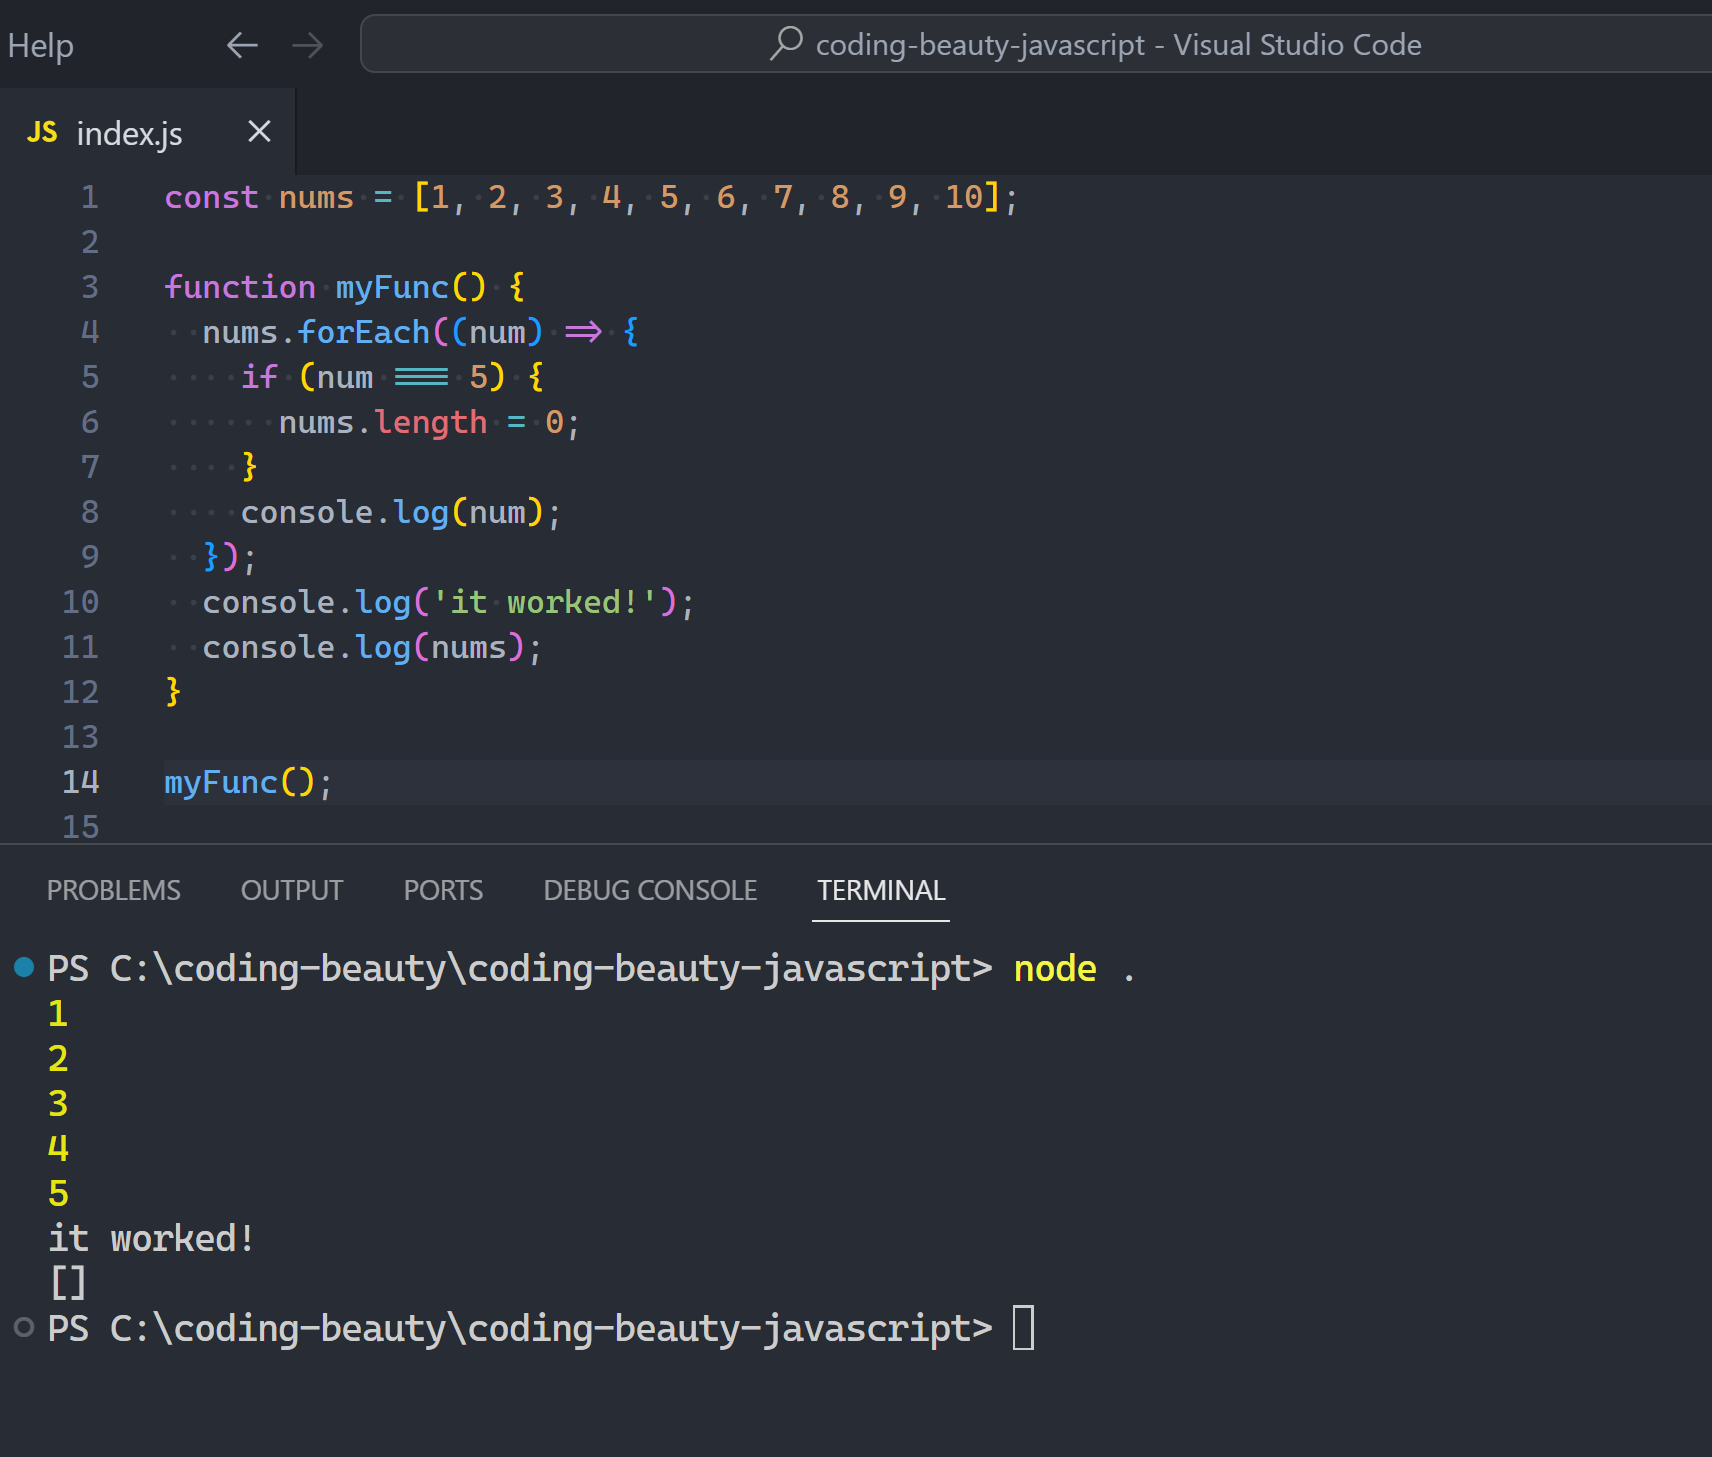
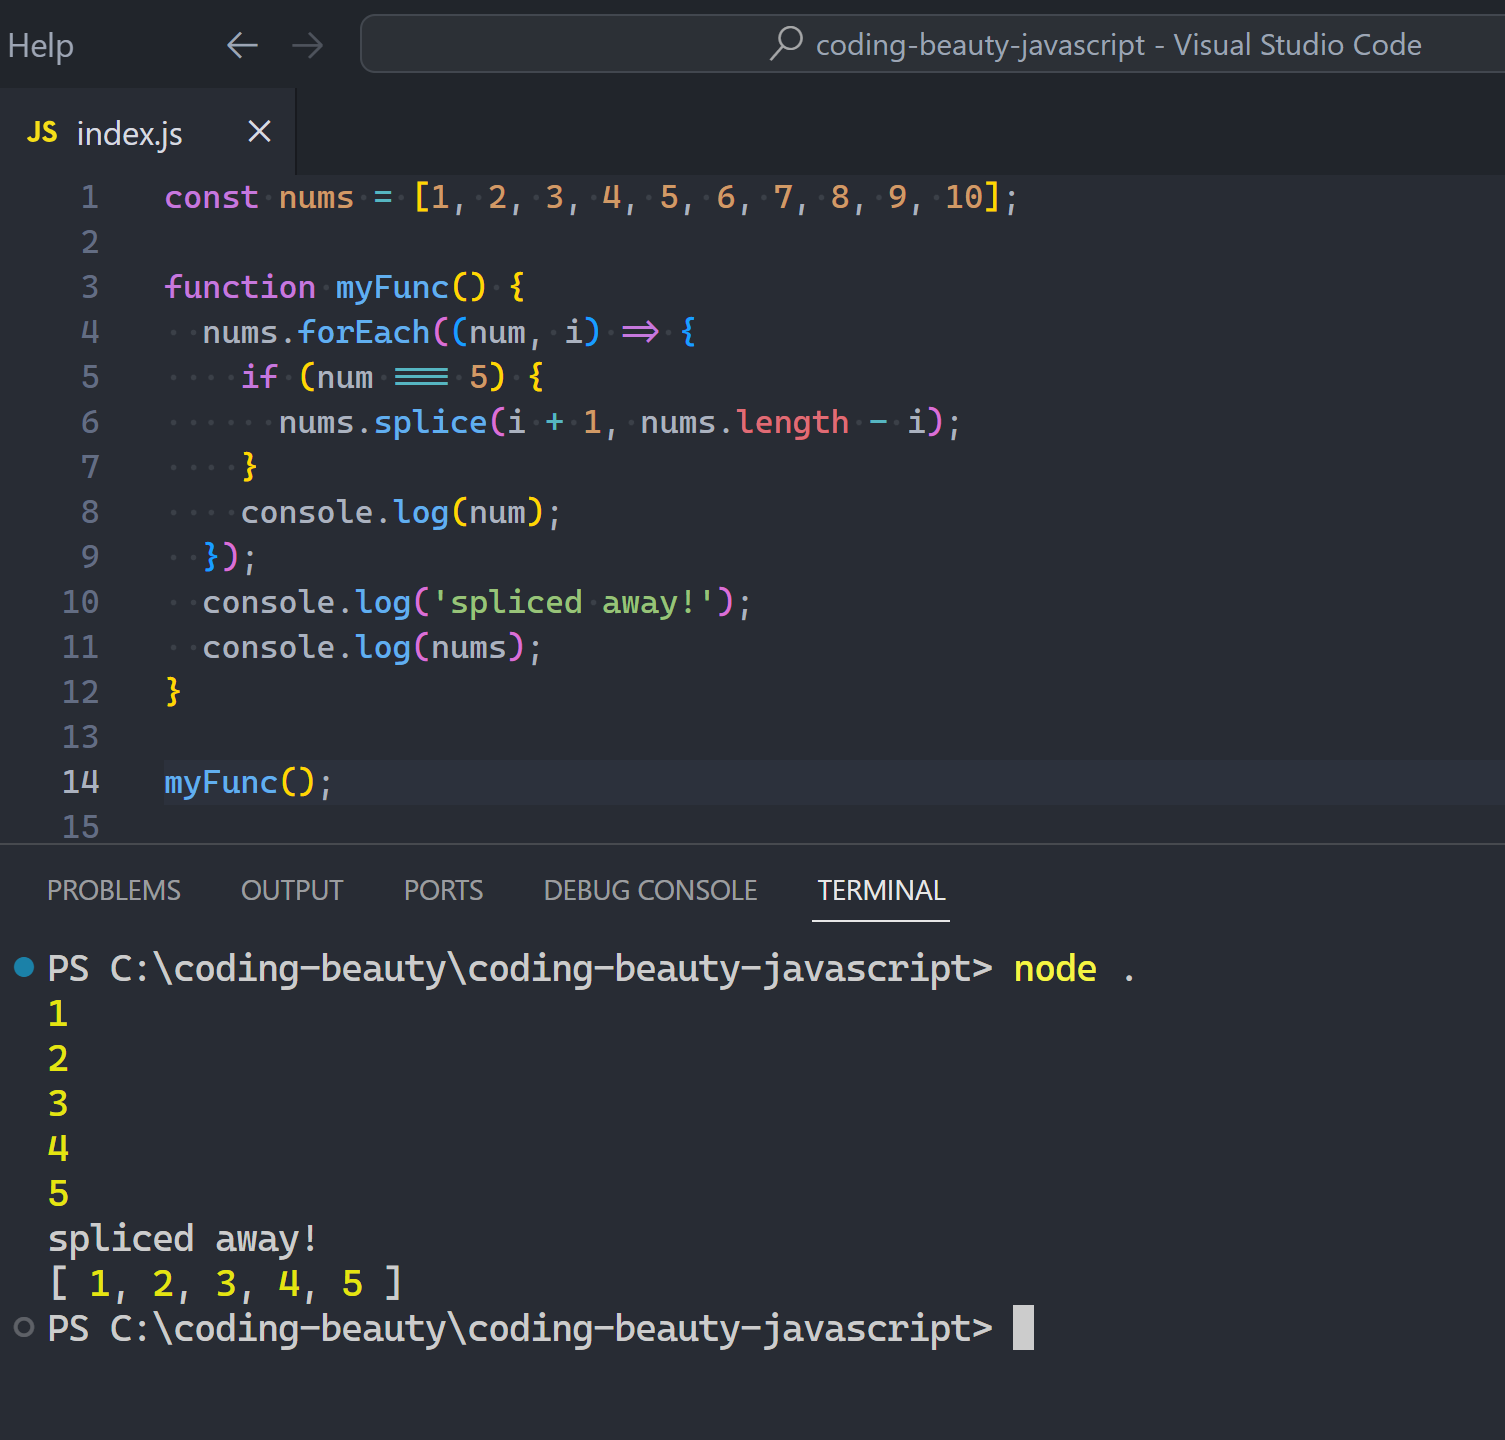
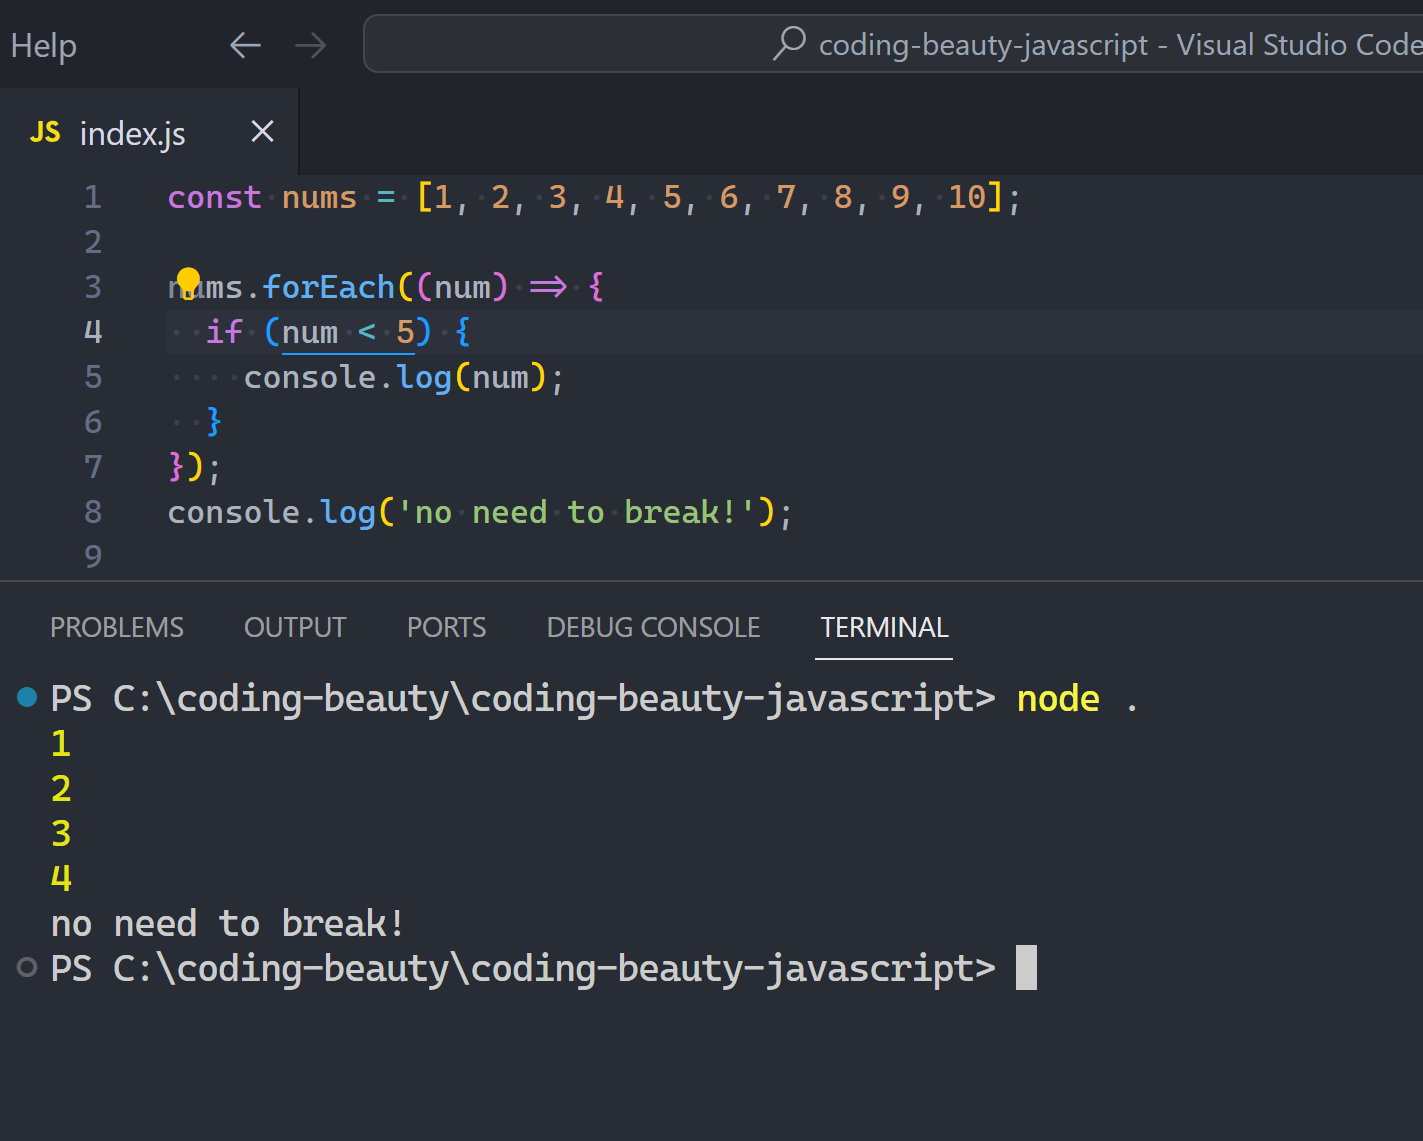
Conclusion
In this article, we explored some of the least known and utilized tags in HTML. These rare tags can be quite useful in particular situations despite their low usage.