JetBrains is working on something huge to destroy Cursor and Windsurf
The makers of WebStorm and IntelliJ have zero intentions of being left behind in the race for the ultimate coding AI IDE…
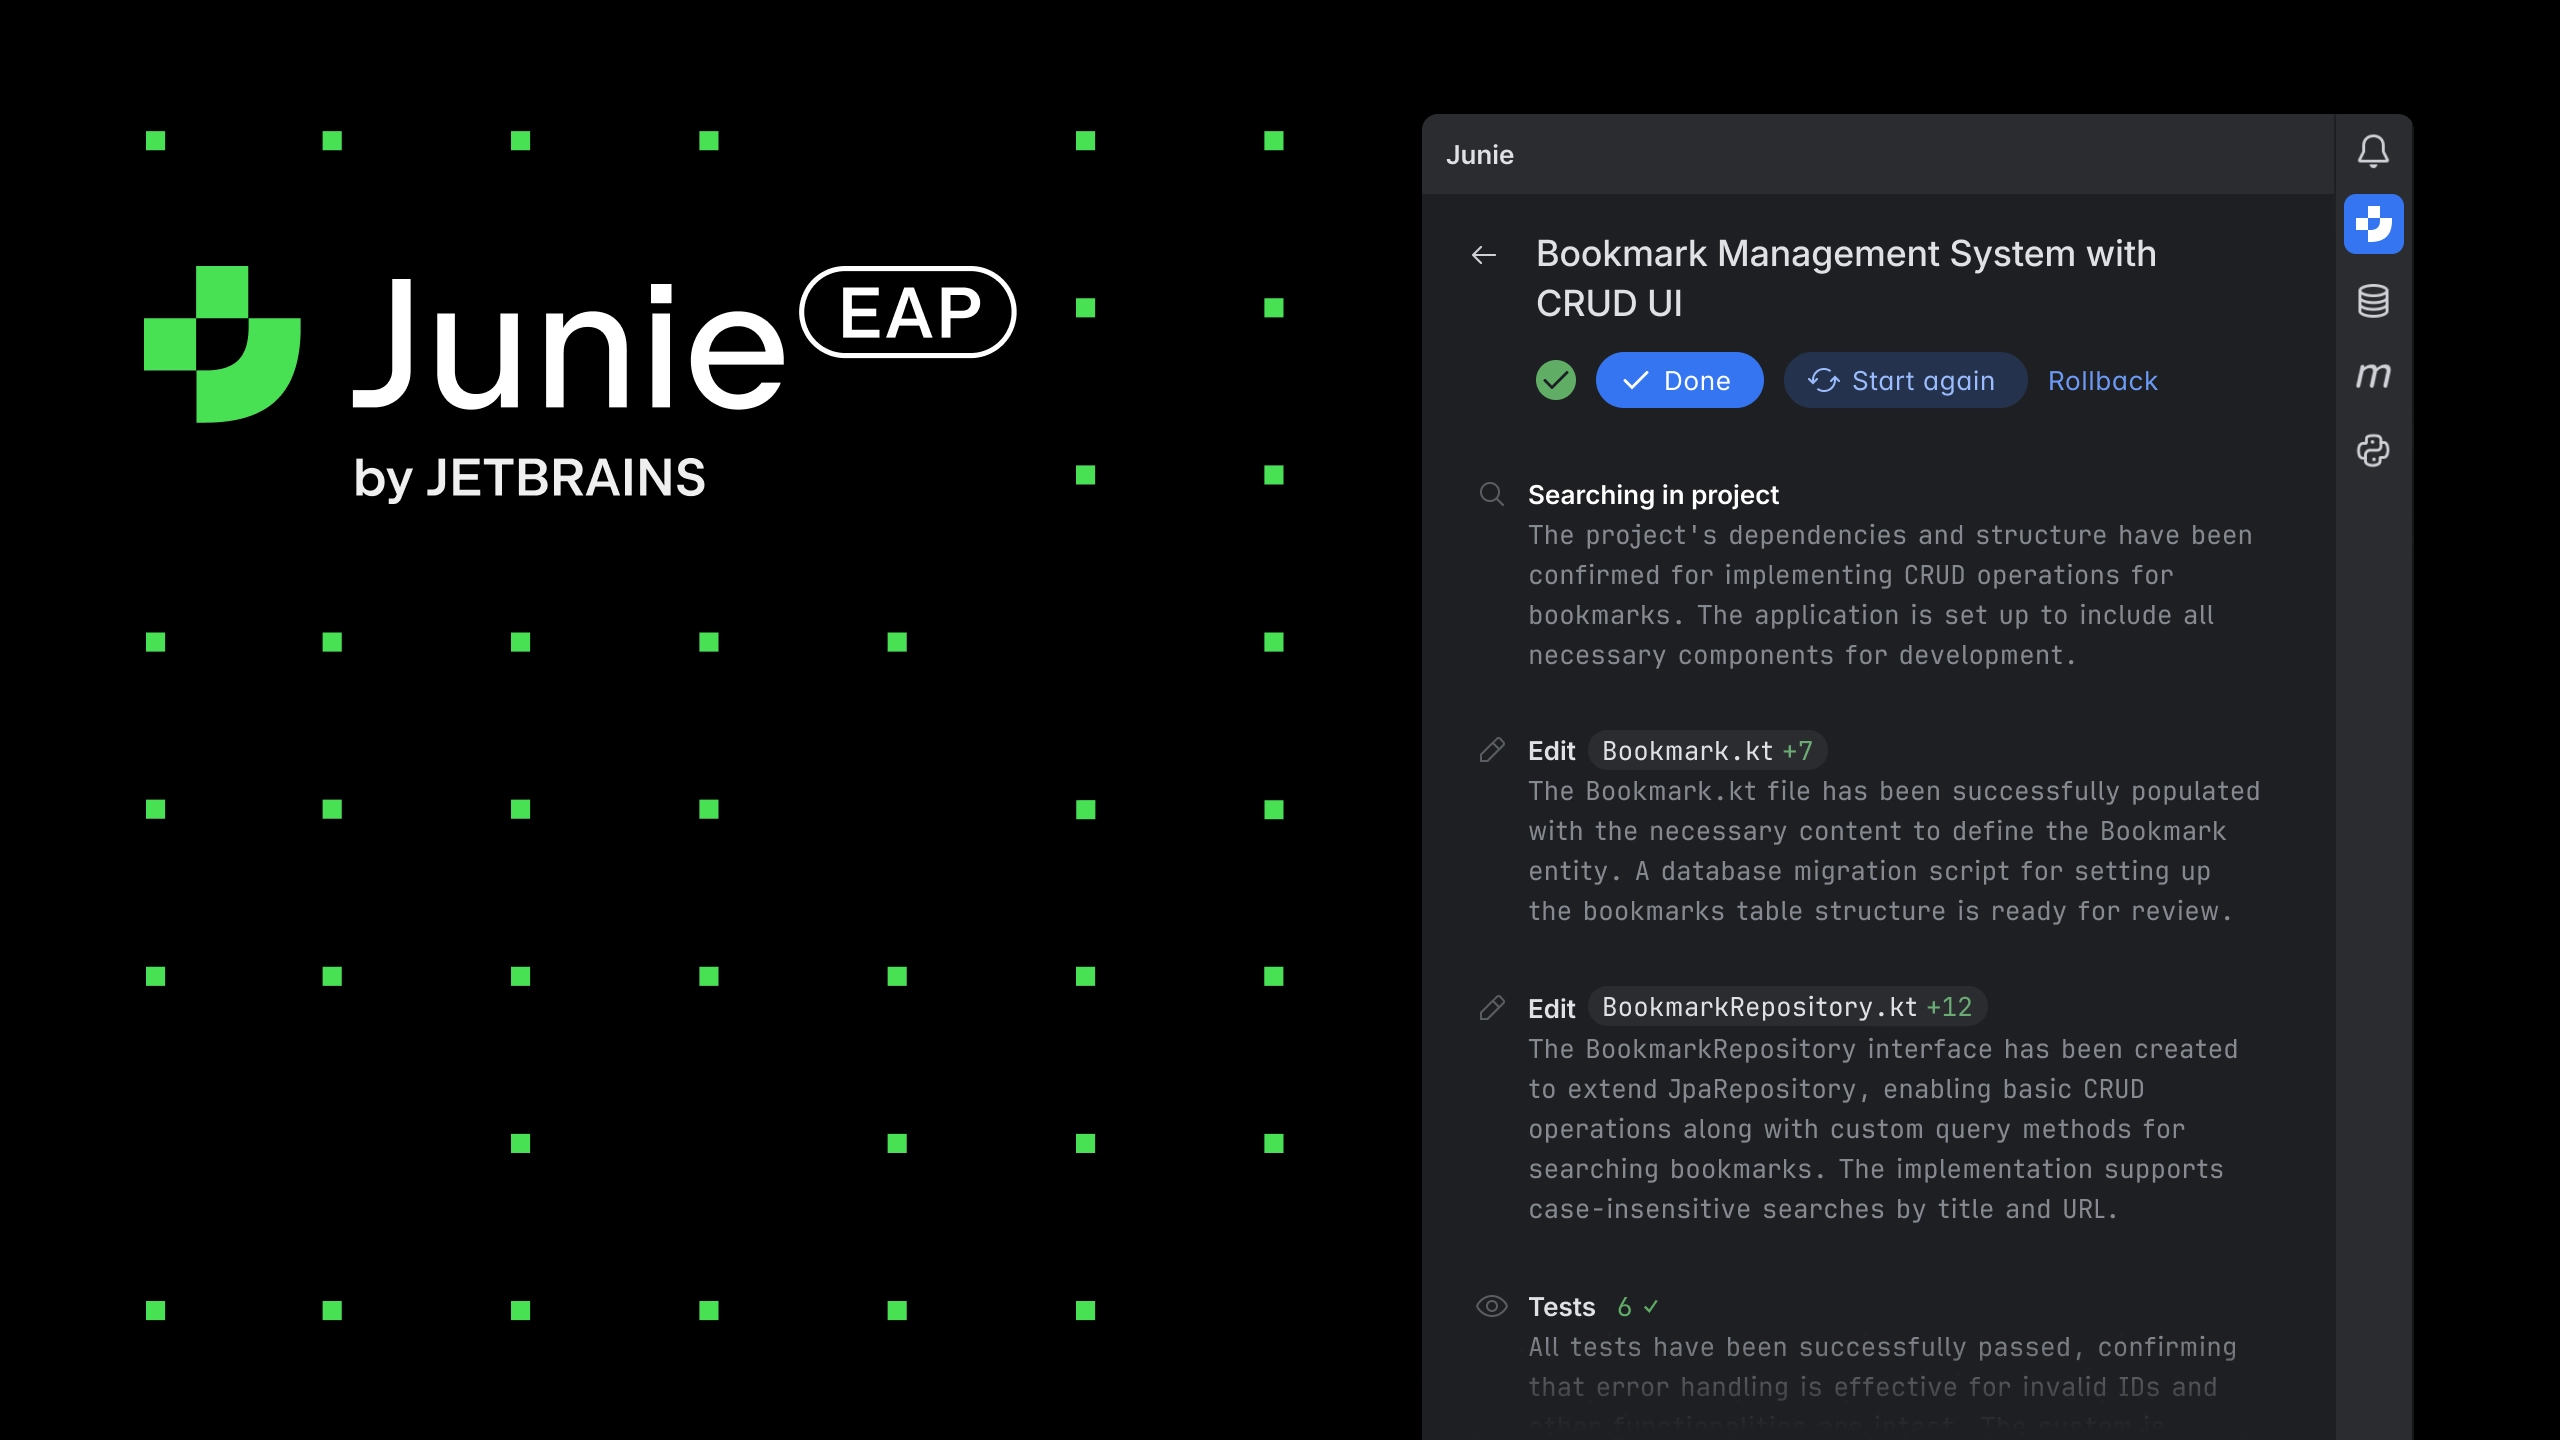
Enter Junie — an incredible upcoming coding agent (that word again) from JetBrains that could make you regret ever paying for Windsurf or Cursor (or Copilot, ha ha).

The agent will understand your code on a deep level and make high-level changes — seriously line-by-line coding is becoming a thing of the past guys…
And of course this will directly compete with the incredible Windsurf Cascade feature — and Cursor Composer.

But it looks like Junie will go even further with deep understanding of context and learning your unique coding style to keep things consistent.

It’ll even be able to automatically create and run tests for your code in a structured way.

Similar to all those testing extensions for VS Code.
But even better cause this would work for several languages.
Any time you tell it to make a change it would run the tests automatically and ensure that the changes it made are correct — something you can also verify yourself of course.
Looks like it could even create its own tests for the specific changes it makes to your code…

You see with tools like this, the developer role will shift a lot from typing and code monkey-ing, to very high-level direction and monitoring.
You may still need to learn programming languages, but mainly for keeping the AI in check and avoiding errors.
And eventually even this could be done by the AI itself.
JetBrains certainly has a key advantage here with their years of experience creating coding tools.
They also have a strong user base of over 11 million people so there’ll be instant adoption once Junie goes live.

People already familiar with the Jetbrains IDE experience would have no reason to switch to VS Code forks like Cursor and Windsurf.
I also wonder whether they’ll use their custom model or they’ll let devs switch between the big names.
All the current players have gone the latter route, so it’ll be interesting to see how that goes.

Of course this isn’t their first time jumping on the AI bandwagon.. they’ve already released an AI coding assistant before… but looks like it failed miserably.

Junie is clearly a rebrand to distance themselves from the flop, especially with the fresh new agentic abilities it’s gonna have.
Let’s see how it goes.