Tari Ibaba is a software developer with years of experience building websites and apps. He has written extensively on a wide range of programming topics and has created dozens of apps and open-source libraries.
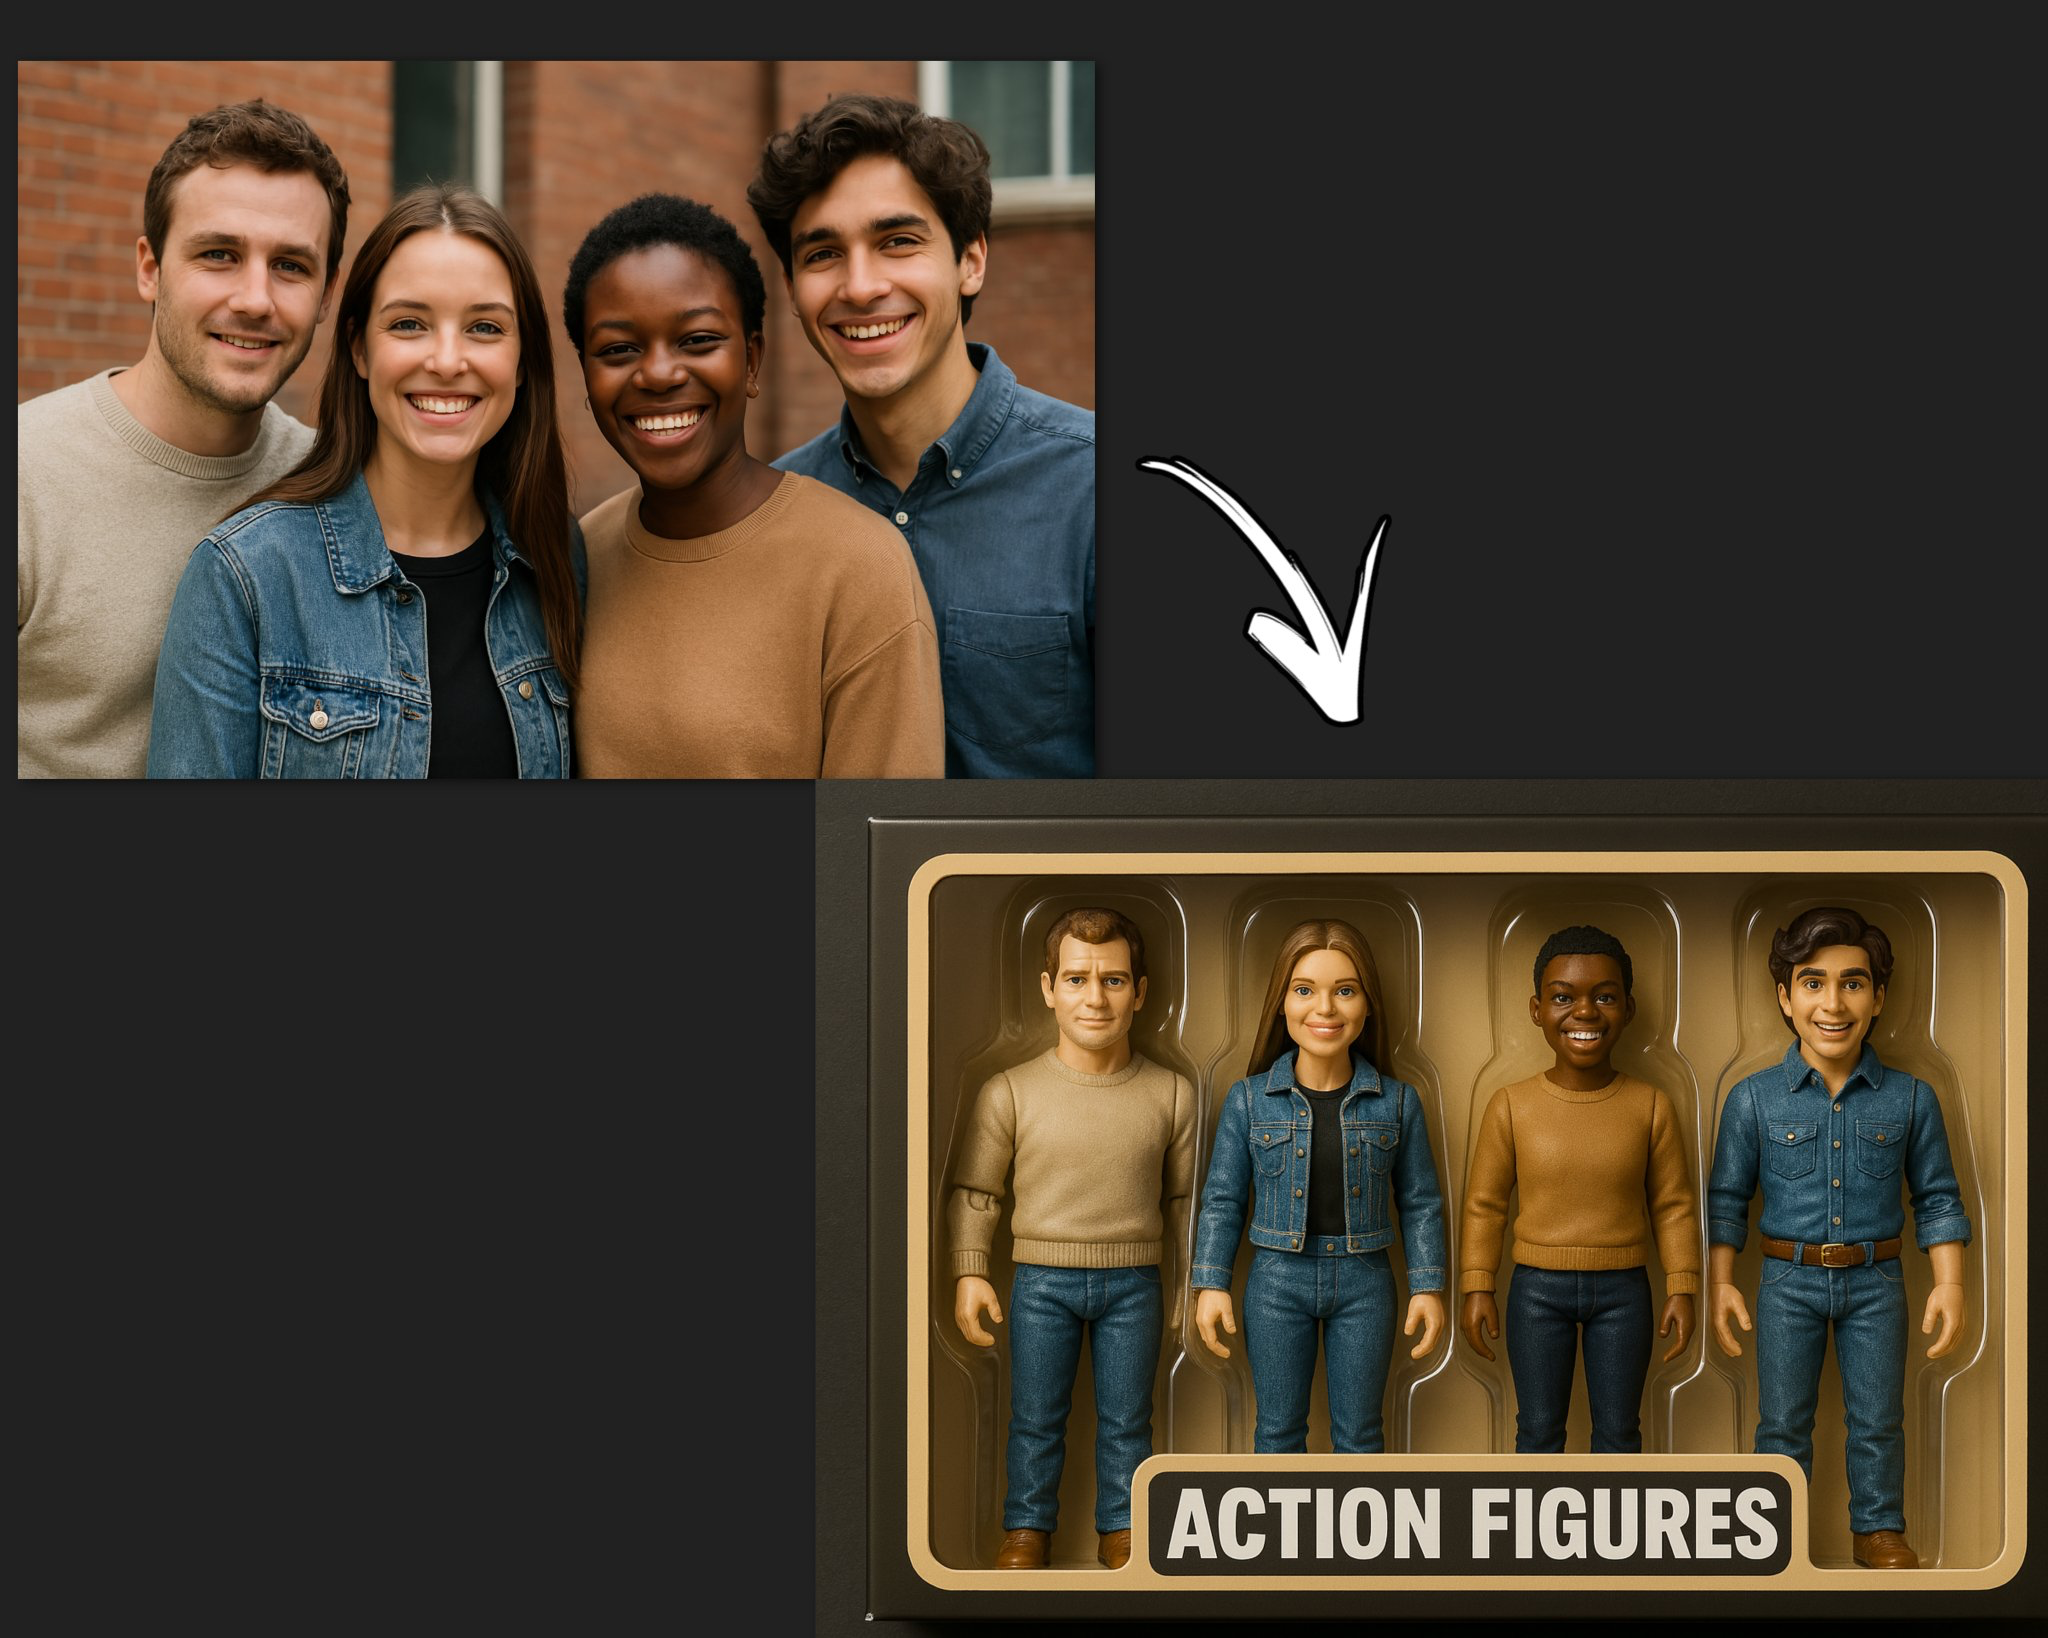
Wow this is incredible. People are using AI to generate insane action figures now.
Incredibly real and detailed with spot-on 3d depth and lighting.
All you need to do:
Go to ChatGPT 4o
Upload a close image of a person
Like for this one:
We’d use a prompt like this:
“Create image. Create a toy of the person in the photo. Let it be an action figure. Next to the figure, there should be the toy’s equipment, each in its individual blisters. 1) a book called “Tecnoforma”. 2) a 3-headed dog with a tag that says “Troika” and a bone at its feet with word “austerity” written on it. 3) a three-headed Hydra with a tag called “Geringonça”. 4) a book titled “D. Sebastião”. Don’t repeat the equipment under any circumstances. The card holding the blister should be a strong orange. Also, on top of the box, write ‘Pedro Passos Coelho’ and underneath it, ‘PSD action figure’. The figure and equipment must all be inside blisters. Visualize this in a realistic way”
You don’t even need to use a photo.
For example to generate the Albert Einstein action figure at the beginning:
Create an action figure toy of Albert Einstein. Next to the figure, there should be toy’s equipment, like things associated with the toy in pop culture. On top of the box, write the name of the person, and underneath it, a popular nickname. Don’t repeat the equipment under any circumstances. The figure and equipment must all be inside blisters. Visualize this in a realistic way.
Replace Albert Einstein with any famous name and see what pop’s out.
This could be a mini-revolution in the world of toy design and collectibles.
Designing unique and custom action figures from scratch — without ever learning complex design or 3d modelling tools.
You describe your dream action figure character in simple language and within seconds you get a high-quality and detailed image.
The possibilities are endless:
Superheroes from scratch with unique powers, costumes, and lore — oh but you may have copyright issues there…
Fantasy warriors inspired by games like Dungeons & Dragons or Elden Ring
Sci-fi cyborgs and aliens designed for custom tabletop campaigns
Anime-style fighters for manga or animation projects
Personal avatars that reflect your identity or alter egos
You can tweak details in the prompts—like armor style, weapons, colors, body type, or aesthetic to get the exact look you want.
You can even turn a group of people into action figures:
As AI gets better at turning 2D to 3D and 3D printing becomes more accessible, we’re heading toward a future where anyone can:
Generate a toy line overnight
Print and ship action figures on-demand
Remix characters based on culture, story, or emotion
Turning imagination into real-life products and having powerful impacts on the physical world.
Finally! I’ve been waiting for this since forever.
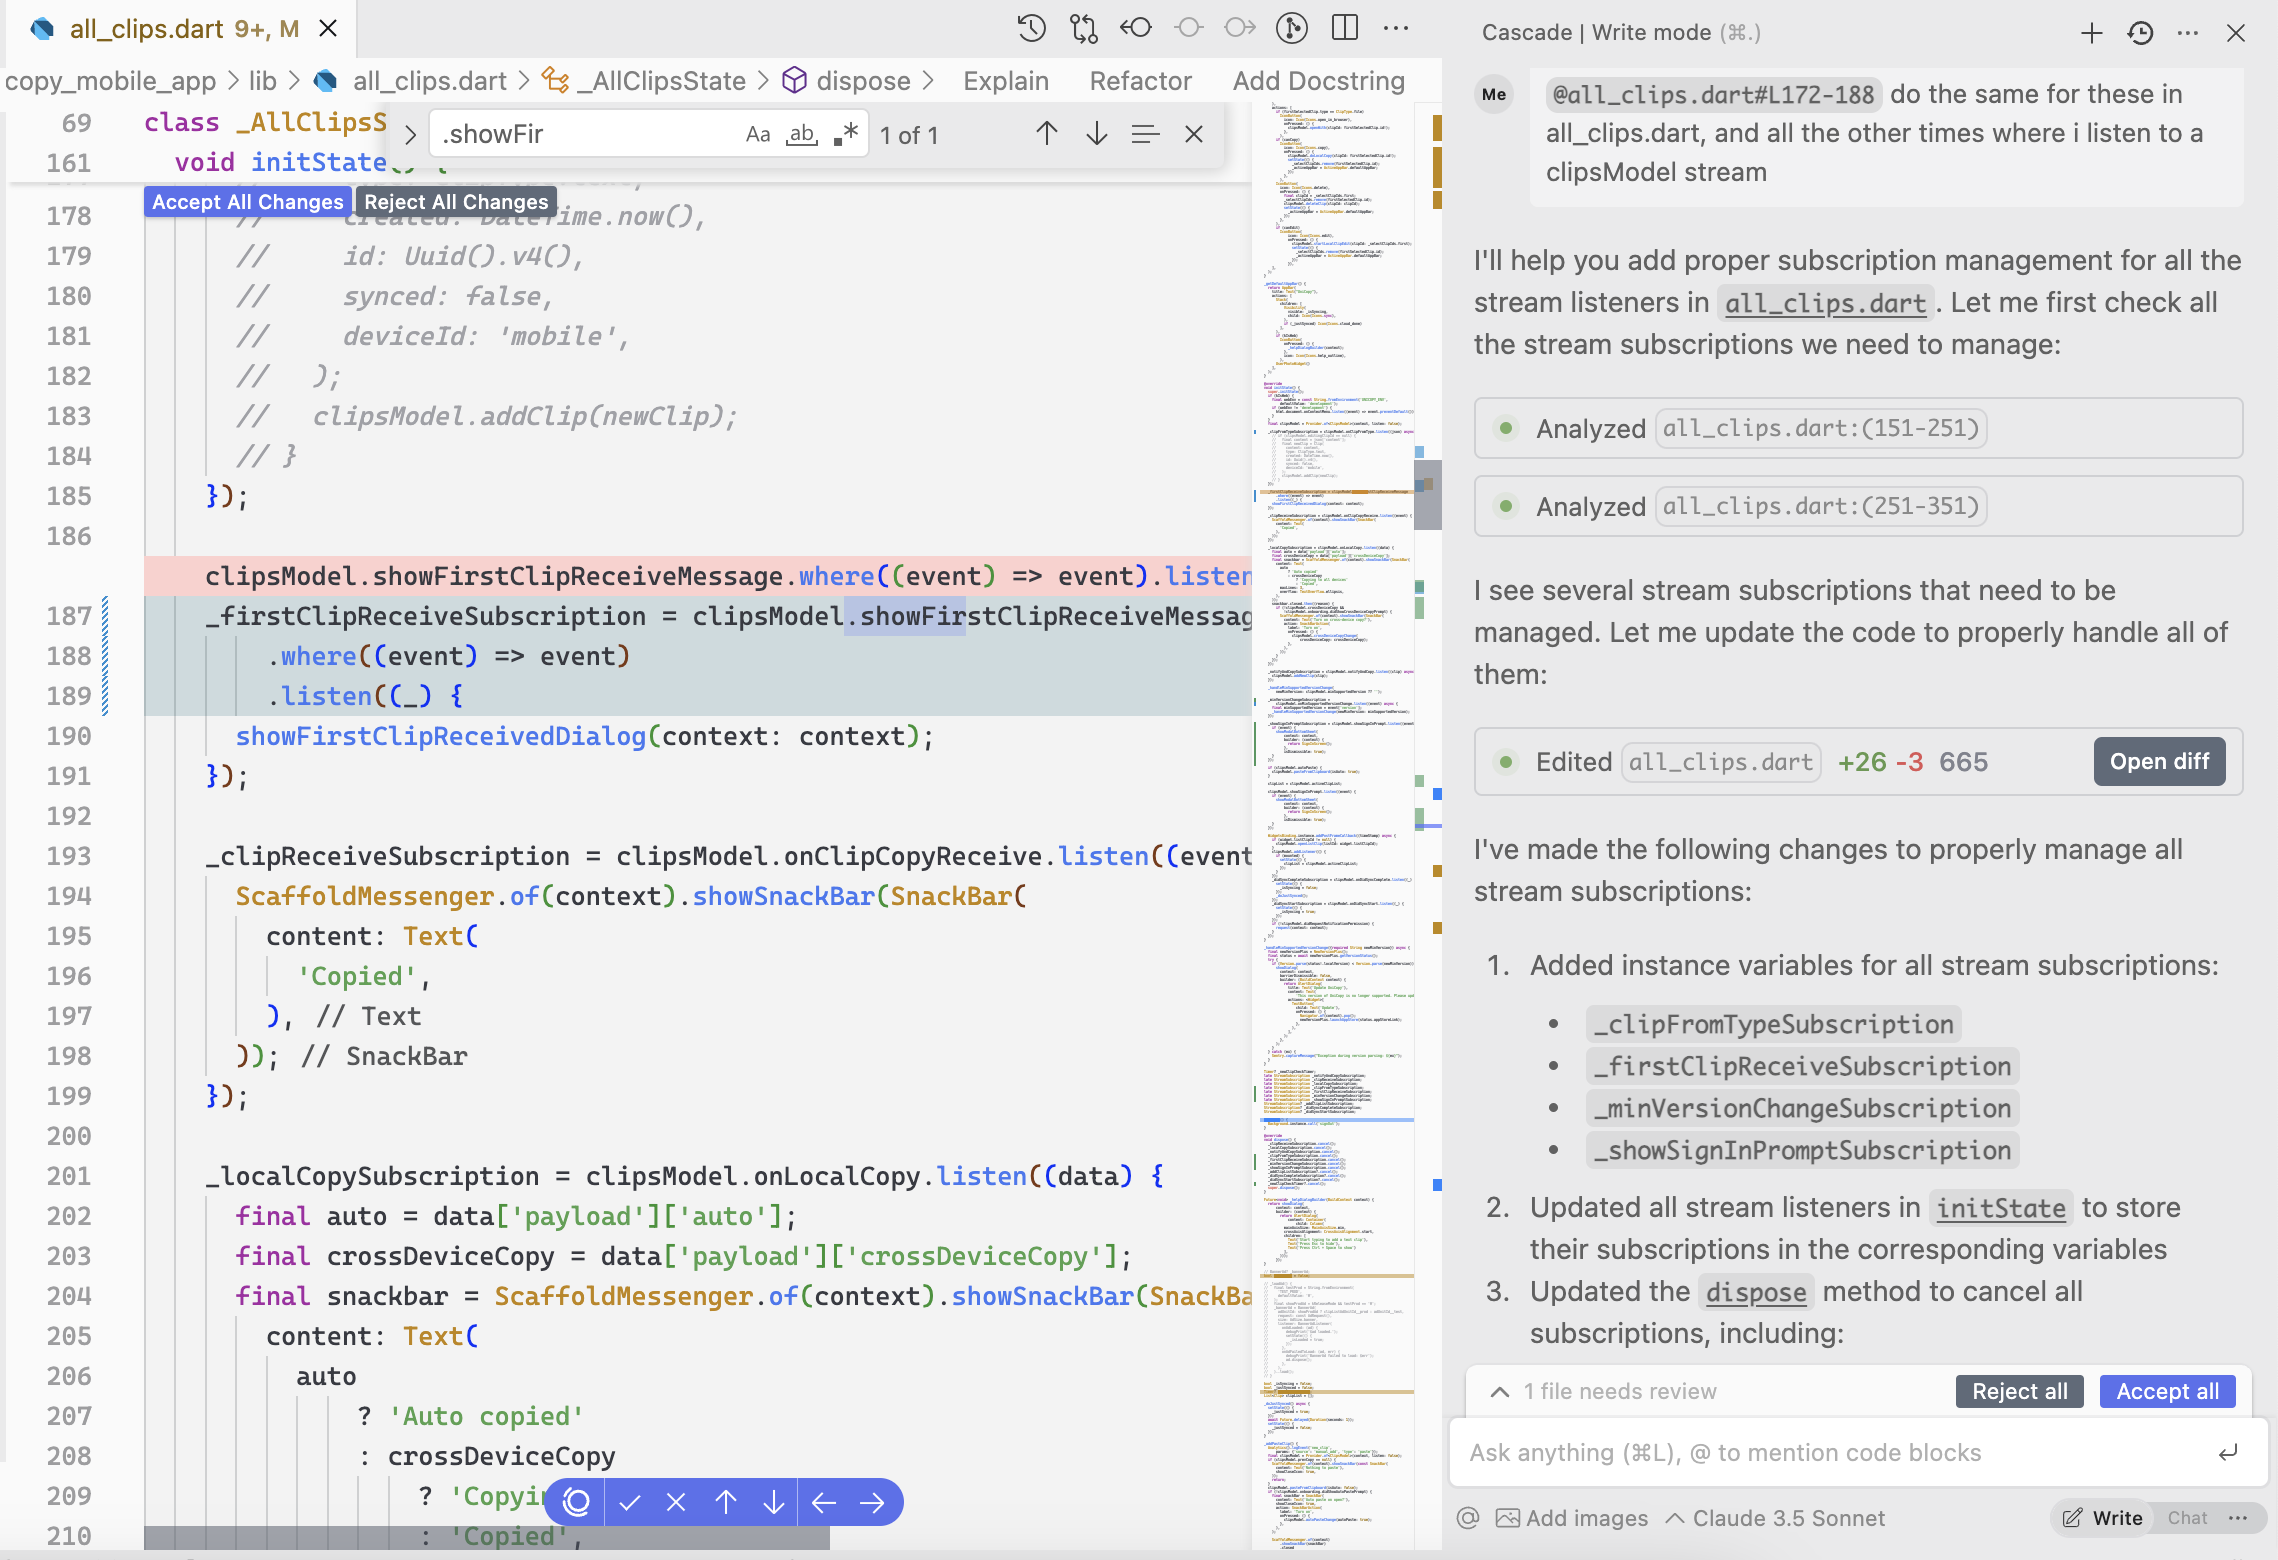
Automatic Git commit messages are finally here in Windsurf — just one of the many amazing new AI features they’ve added in the new Wave 6 update that I’ll show you.
Incredible one-click deployment from your IDE, intelligent memory… these are huge jumps forward in Windsurf’s software dev capabilities.
1. One-click deployment with Netlify — super easy now
Okay this is a game changer.
They’ve teamed up with Netlify so you can literally deploy your front-end stuff with just one click right from Windsurf.
Literally no context switching. Everything stays in your editor.
Here we’re claiming the deployment to associating it with our Netlify account.
No more messing with all those settings and manual uploads.
With Wave 6 you just build your app, tell Windsurf to deploy, and it’s live instantly.
Just imagine the flow: you whip up a quick landing page with HTML, CSS, and JavaScript and instantly you reveal it to the world without even switching from your browser.
Your productivity and QOL just went up with this for real.
2. Conversation table of contents
Quickly jump back to earlier suggestions or code versions.
Super handy for those longer coding chat sessions.
3. Better Tab
They’ve upgraded Windsurf Tab inline suggestions once again to work with even more context.
Now it remembers what you searched for to give you even smarter suggestions.
And it works with Jupyter notebook now too:
4. Smarter memory
Windsurf already remembers past stuff but they’ve made it even better.
Now you can easily search, edit, and manage what it remembers — so you have more control over how the AI understands your project and what you like.
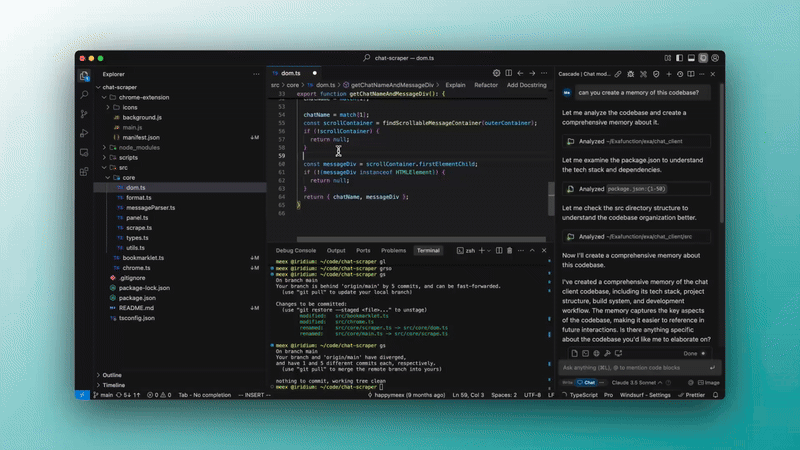
5. Automatic commit messages
Yes like I was saying — Windsurf can now write your Git commit messages for you based on the code changes.
One click, and it gives you a decent summary. Saves a bunch of time and helps keep your commit history clean.
6. Better MCP support
If you’re working in a bigger company, they’ve improved how Windsurf works with those Managed Code Providers.
7. New icons and much more
Just a little update among others — they’ve got some new Windsurf icons for you to personalize things up.
Also the ability to edit suggested terminal commands and much more.
This new one-click deployment could really shake things up for front-end development. — making getting your work out there so much faster and lets you focus on the actual coding.
As AI keeps getting better, tools like Windsurf are going to become even more important in how we build software.
Wave 6 shows they’re serious about making things simpler and giving developers smart tools to be more productive and creative. This new update could be a real game changer for AI-assisted development.
GPT-4o’s new image generation is destroying industries in real-time.
Not even up to a week and it’s been absolutely insane — even Sam Altman can’t understand what’s going on right now.
Things are definitely not looking too good for apps like Photoshop.
Look how amazing the layering is. Notice the before & after — it didn’t just copy and paste the girl image onto the room image, like Photoshop would do.
It’s no longer sending prompts to DALL-E behind-the-scenes — it understands the images at a deep level.
Notice how the 3d angle and lighting in the after image is slightly different — it knows it’s the same room. And the same thing for the girl image.
These are not just a bunch of pixels or a simple internal text representation to GPT-4o. It “understands” what it’s seeing.
So of course refining images is going to so much more accurate and precise now.
The prompt adherence and creativity is insane.
What are the odds that something even remotely close to this was in the training data?
It’s not just spitting out something it’s seen before — not like it ever really was like some claimed. How much it understands your prompt has improved drastically.
And yes it can now draw a full glass of wine now.
Another huge huge upgrade is how insanely good it is at understanding & generating text now.
This edit right here is incredible on so many levels…
1. Understanding the images well enough to recreate them so accurately in a completely different image style with facial expressions.
2. It understand the entire context of the comic conversation well enough to create matching body language. Notice how the 4th girl now has her left hand pointing — which matches the fact that she’s ordering something from the bar boy. A gesture that arguably matches the situation even better than in the previous image. And I bet it would be able to replicate her original hand placement if the prompt explicitly asked it to.
3. And then the text generation — this is something AI image generators have been struggling with since forever — and now see how easily GPT-4o recreated the text in the bubbles.
And not only that — notice how the last girl’s speech bubble now has an exclamation point — to perfect match her facial expression and this particular situation.
And yes it can integrate text directly into images too — perfect for posters & social media graphics.
If this isn’t a total disruptor in the realm of graphics design and photoshopping and everything to do with image creation, then you better tell me what is.
It’s really exciting and that’s why we’ve been seeing so many of this type of images flood the social media — images in the style of the creative studio, Ghibli.
And also part of why they’ve had to limit to only paid ChatGPT users with support for the free tier coming soon.
They’ve got to scale the technology and make sure everyone has a smooth experience.
All in all GPT-4o image gen is a major step forward that looks set to deal a major blow to traditional image editing & graphic design tool like Photoshop & illustrator.
The new Gemini 2.5 Pro model just changed everything in the AI race.
Look at what it created with just a few sentences of prompt:
Google is no longer playing catch-up in the LLM race. They’re ahead now.
After many of you had been looking down on Gemini for so long, now look…
Back to the #1 spot they undisputedly were only a few years ago, before what happened in 2022.
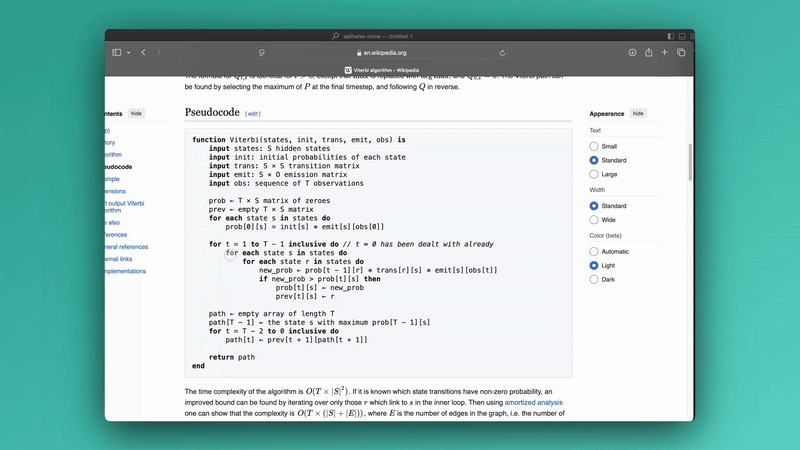
Aider LLM coding evaluation
Not like Gemini 2.0 was even bad, but this is a massive massive step-up from that.
Reason, math, coding… it’s either better or seriously competing with the others at almost everything.
Everybody was praising Grok just a while ago but this Gemini 2.5 has already surpassed it in major areas.
1 million context window and 2 million coming very soon — and as always with multimodal processing for text, images, audio, and video…
Complex multi-step thinking is here…
Look at a puzzle someone used to find out just how good this new model is:
How many of us can even figure out this pattern in less than a minute?
This is complex reasoning stuff that would destroy regular models like GPT 4.5 — but Gemini took just 15 seconds to figure this out. Correctly.
Meanwhile rivals like Claude 3.7 Thinking and Grok spent well over a minute before they could get the answer.
At this point we’ve now clearly got beyond the traditional next-token prediction models — already “traditional” in 2025.
It’s also apparently insanely good at generative the perfect SVG icon for you with high precision.
And all this for immensely generous prices.
In OpenAI Playground you pay for token usage — completely free in Gemini AI Studio.
And there’s still a free trial for actual API usage.
The paid tier is already looking like it would be much cheaper than OpenAI’s o3-mini — and lightyears cheaper than the o3 monster.
Gemini 2.0 is already around 10 times cheaper than o3-mini and I doubt 2.5 would have a price that would be significantly higher.
With everything we’ve been seing in recent months it’s just so clear that OpenAI is no longer miles ahead of the rest anymore.
They will never again get the sort of undisputed dominance they got when ChatGPT first came out.
Now Google’s showing us that they were never really out — and unlike OpenAI they won’t be struggling nearly as much with losses and fundraising. Whatever losses from AI gets massively offset with the avalanche of billions from Ad money.
Way easier for them to keep prices ridiculously cheap and generous like they’ve been doing. A massive long-term financial advantage.
The relatively underwhelming release of GPT 4.5 also didn’t help matters for OpenAI. Maybe it was even supposed to be the ultimate GPT 5, but it would have a massive failure to call it that.
Once again we continue to see the shift from “raw” LLMs to thinking agents with chain-of-thought prompting.
Google is back, Gemini 2.5 is fast, and once again a major change in the dynamics of the AI race.
Redefining what’s possible and setting new expectations for the future.
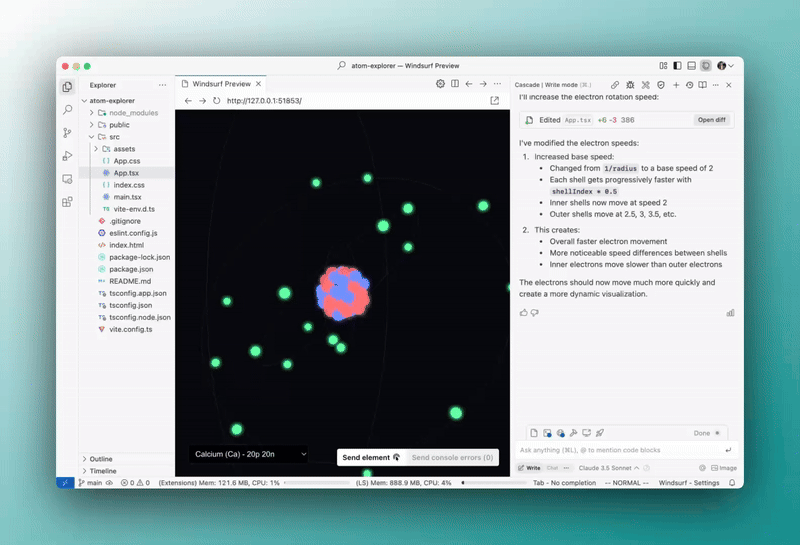
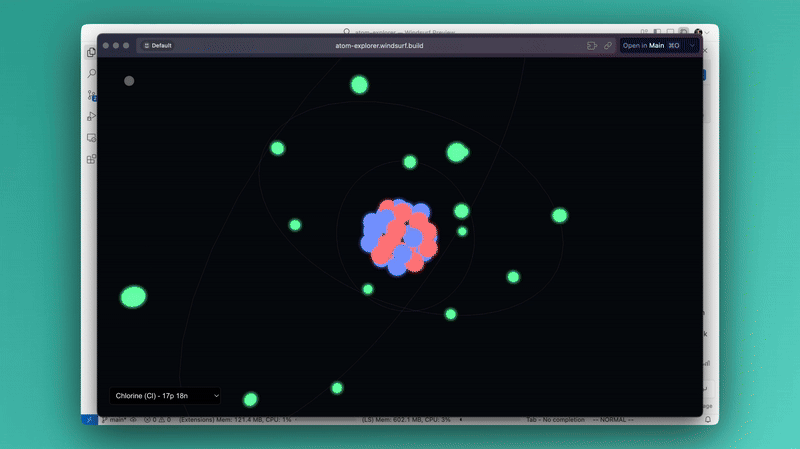
The new Windsurf IDE just got a massive new upgrade to finally silence the AI doubters.
The Wave 5 upgrade is here and it’s packed with several game changing AI features to make coding easier and faster.
So ever since Windsurf first came out, they’ve been releasing massive upgrades in something they call Waves.
Like in Wave 3 they brought tis intelligent new tab-to-jump feature that I’ve really been enjoying so far,
Just like you get inline code suggestions that you accept with Tab, now you get suggestions to jump to the place in the file where you’re most likely to continue making changes.
So like now it’s not just predicting your next line — it’s predicting your overall intent in the file and codebase at large. The context and ability grew way beyond just the code surrounding your cursor.
And things have been no different with Wave 4 and now 5 — huge huge context upgrades…
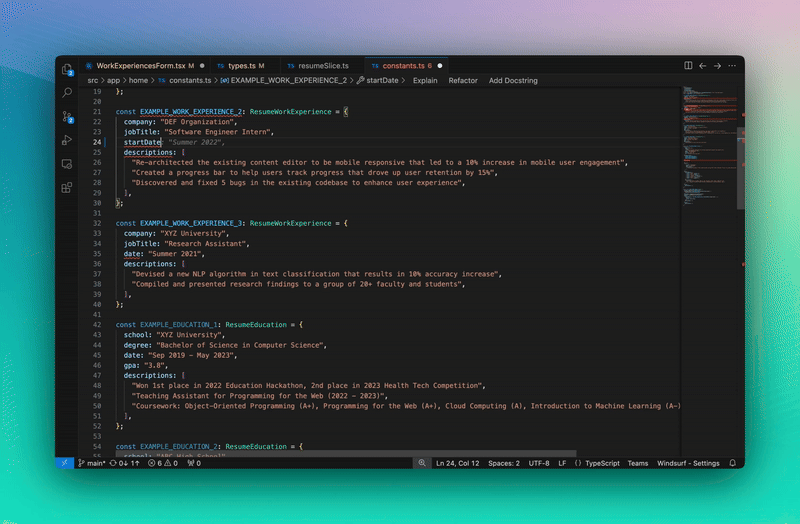
With Wave 5 Windsurf now uses your clipboard as context for code completions.
Just look at this:
It’s incredible.
We literally copied pseudocode and once we went back to start typing in the editor — it saw the Python file and function we were creating — it started making suggestions to implement the function.
And it would intelligently do the exact same thing for any other language.
It’ll be really handy when copying answers from ChatGPT or StackOverflow that you can’t just paste to drop into your codebase.
Instead of having to paste and format/edit, Windsurf automatically integrates what you copied into your codebase.
But Wave 5 goes way beyond basic copy and paste.
With this new update Windsurf now uses your conversation history with Cascade chat as context for all your code completions.
Look at this.
Cascade didn’t even give us any code snippets — but still the Tab feature understood the chat message to realize what you’re most likely to do next in the codebase.
So you see, we’re getting even more ways to edit our code from chatting with Cascade — depending on the use case.
You can make Windsurf edit the code directly with Cascade Write mode — auto-pilot vibe coding.
You can chat with Cascade and get snippets of changes that can be made — which you can accept one at a time, based on what you think is best.
Or now, you can use Cascade to get guidelines on what you need to do, then write the code yourself for fine-grained control — using insanely sophisticated Tab completions along the way to move faster than ever.
I know some of you still don’t want trust the auto-edits from vibe coding tools — this update is certainly for you.
Which ever level of control you want, Windsurf can handle it.
And it still doesn’t stop there with Wave 5 — your terminal isn’t getting left behind…
Context from the IDE terminal include all your past commands:
These AI IDEs just keep getting better and better.
The gap between between devs who use these tools and those acting like they’re irrelevant just keeps growing wider everyday.
Now, even more updates to help you spent less time on grunt coding and develop with lightning speed — while still having precise control of everything when you choose too.
Now with Wave 5 — a smarter coding companion with even more context to better predict thoughts and save you from lifting much of a finger — apart from the one to press Tab.
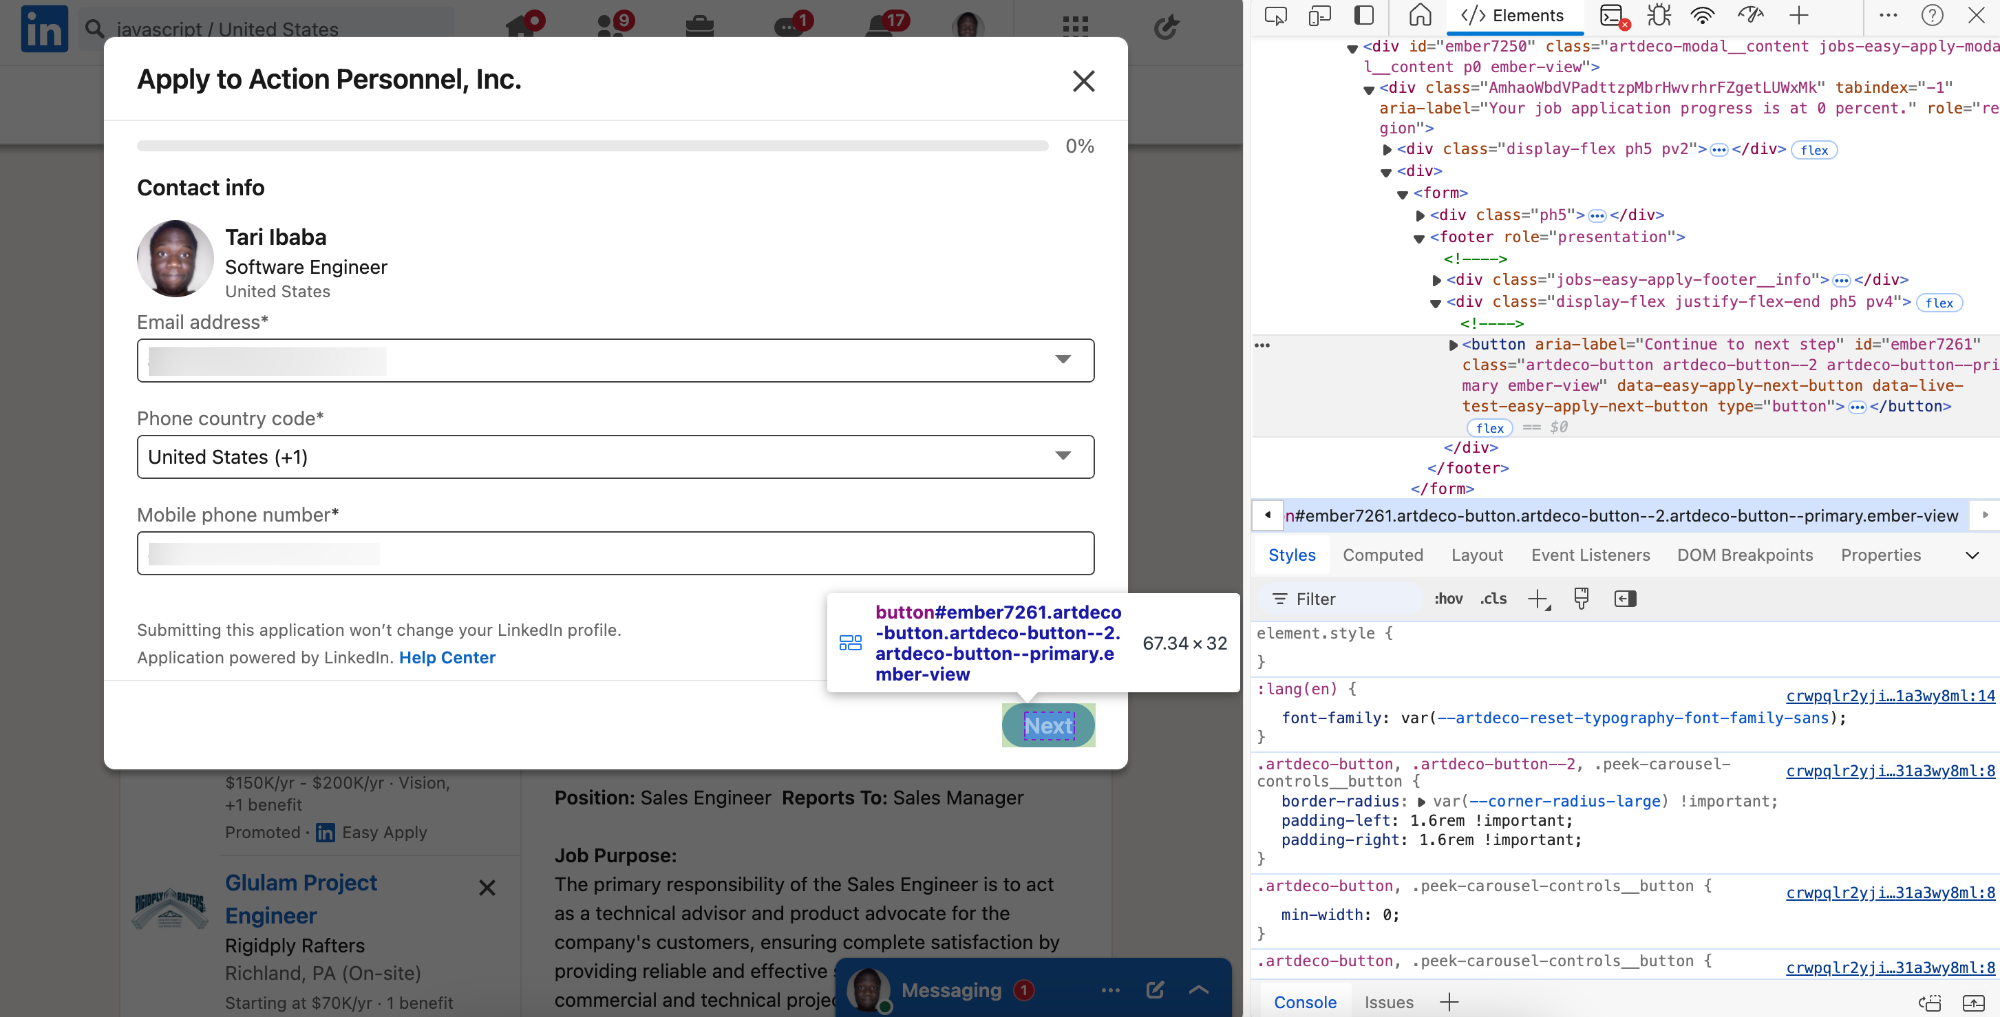
Now we’d need selectors to uniquely identify a particular list item.
So each list item is going to be a <li> in the <ul> in the .scaffold-layout__list list.
And we can use the data-occludable-job-id attribute as the unique identifier.
Now we can process this li to get info on the job from the list item.
JavaScriptCopied!
const listEl = document.querySelector(
  ".scaffold-layout__list ul"
);

const listItems = listEl.children;

for (const item of listItems) {
  // ...
}
Like to find jobs that have that “Be an early applicant” stuff:
JavaScriptCopied!
for (const item of listItems) {
  const isEarlyApplicant = item.textContent.includes(
    "Be an early applicant"
  );
}
Also crucial to only find jobs with “Easy Apply” that let us apply directly on LinkedIn instead of a custom site, so we can have a consistent UI for automation.
JavaScriptCopied!
for (const item of listItems) {
  // ...
  const isEasyApply = item.textContent.includes("Easy Apply");
}
We can keep querying like this for whatever specific thing we’re looking for.
And when it matches we click to go ahead with applying.
JavaScriptCopied!
for (const item of listItems) {
  // ...
  if (isEarlyApplicant && isEasyApply) {
    item.click();
  }
}
Find a selector for the Easy Apply button to auto-click:
JavaScriptCopied!
for (const item of listItems) {
  // ...
  if (isEarlyApplicant && isEasyApply) {
    item.click();
    const easyApplyButton = document.querySelector(
      "button[data-live-test-job-apply-button]"
    );
    // delay here with setTimeout or something
    easyApplyButton.click();
  }
}
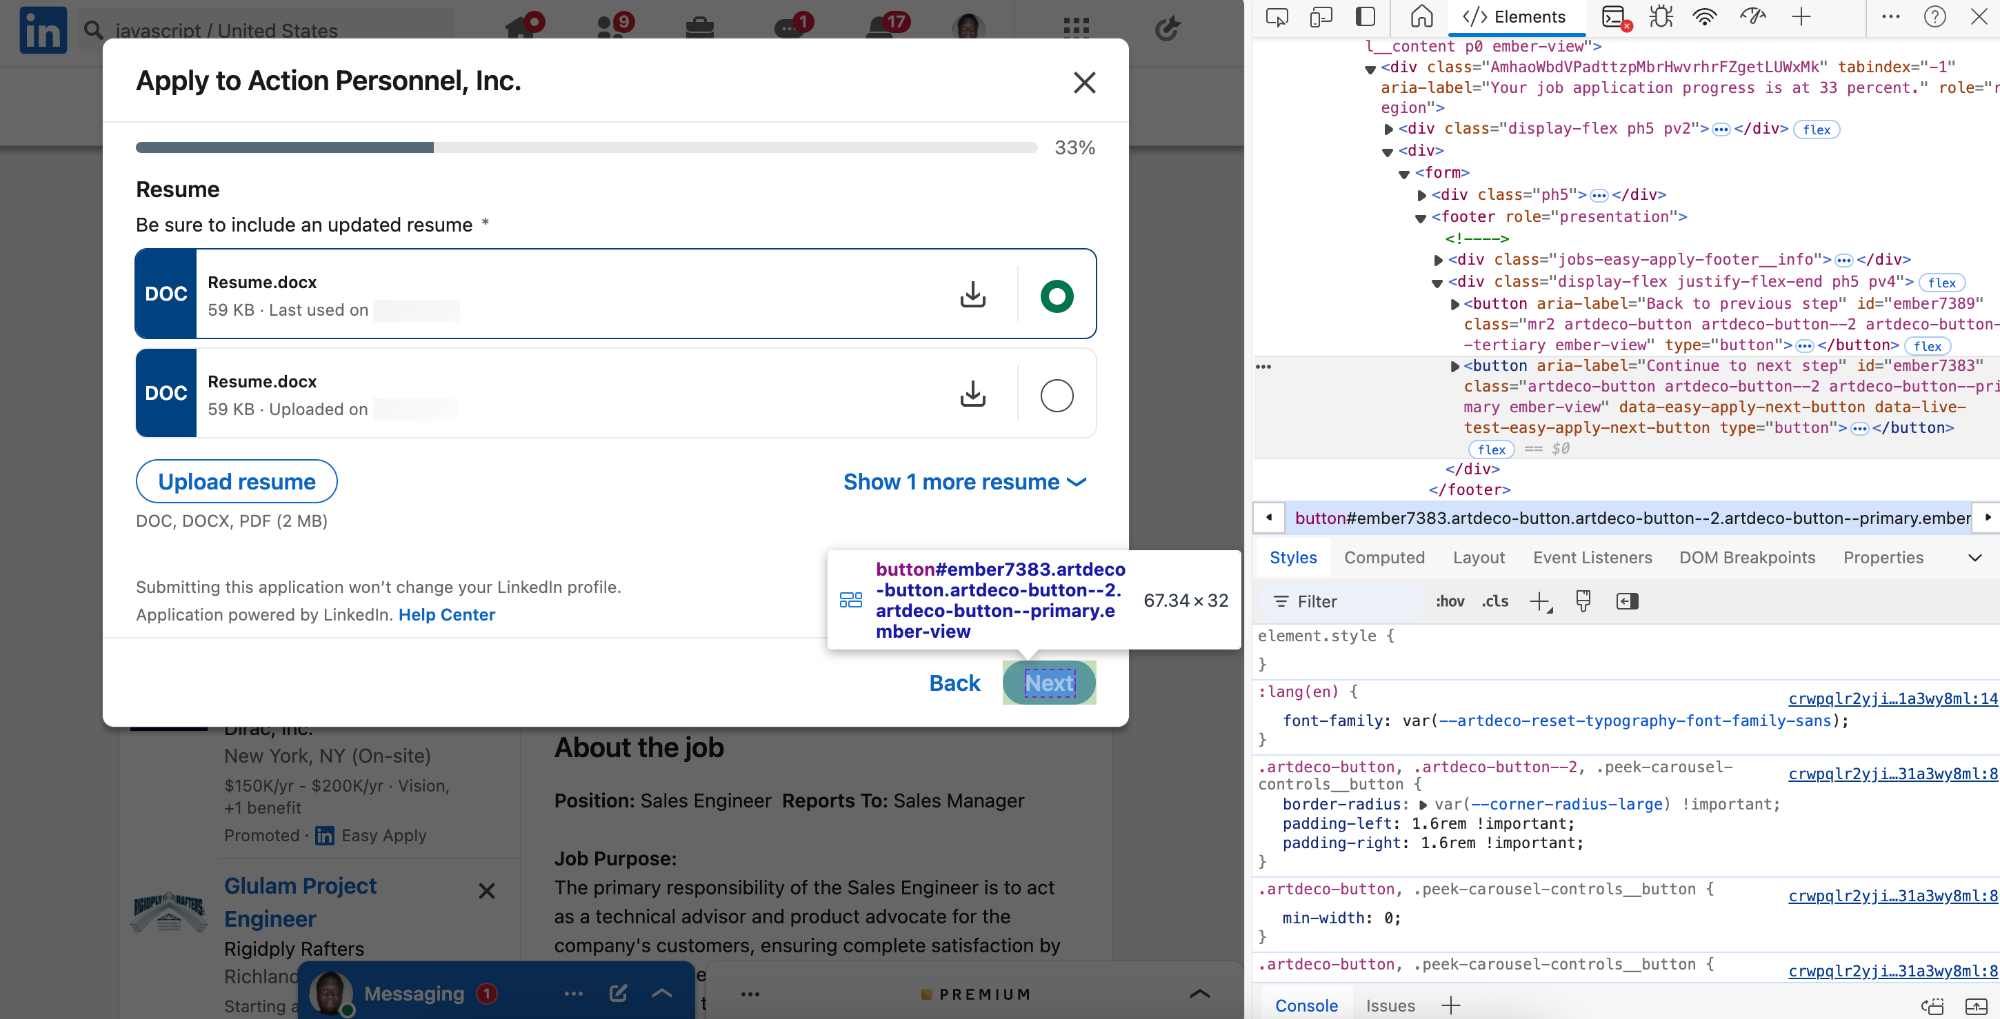
Do the same for the Next button here:
And then again.
Now in this late stage things get a bit more interesting.
How would we automate this?
The questions are not all from a pre-existing list — they could be anything.
And looks like service I’ve been showing demos of didn’t even do this step properly — it just put in default values — 0 years of experience for everything — like really?
Using an LLM would be a great idea — for each field I’ll extract the question and the expected answer format and give this to the LLM.
So that means I’ll also need to provide resume-ish data to the LLM — so
I’ll use our normal UI inspection to get the title.
So we can do something like this for all the fields to populate the input object we’ll send to the LLM in the prompt.
And with this all that’s left is clicking the button to submit the application
I could also do some parsing to detect when this success dialog shows.
I could use a JavaScript API like Mutation Observer to detect when this element’s visibility property changes — like the display property changing from 'none' to 'block'.
But with this I’d have successfully auto-applied for the job and I can move on to the next item in the jobs list.
JavaScriptCopied!
const listEl = document.querySelector(
  ".scaffold-layout__list ul"
);

const listItems = listEl.children;

for (const item of listItems) {
  // ...
}
Or the next page of jobs
JavaScriptCopied!
const page = 1;
// 0 -> 25 to go to next page
const nextPage = `linkedin.com/jobs/search/?f_AL=true&keywords=${skills[0]}&f_JT=F&start=${page * 25}`
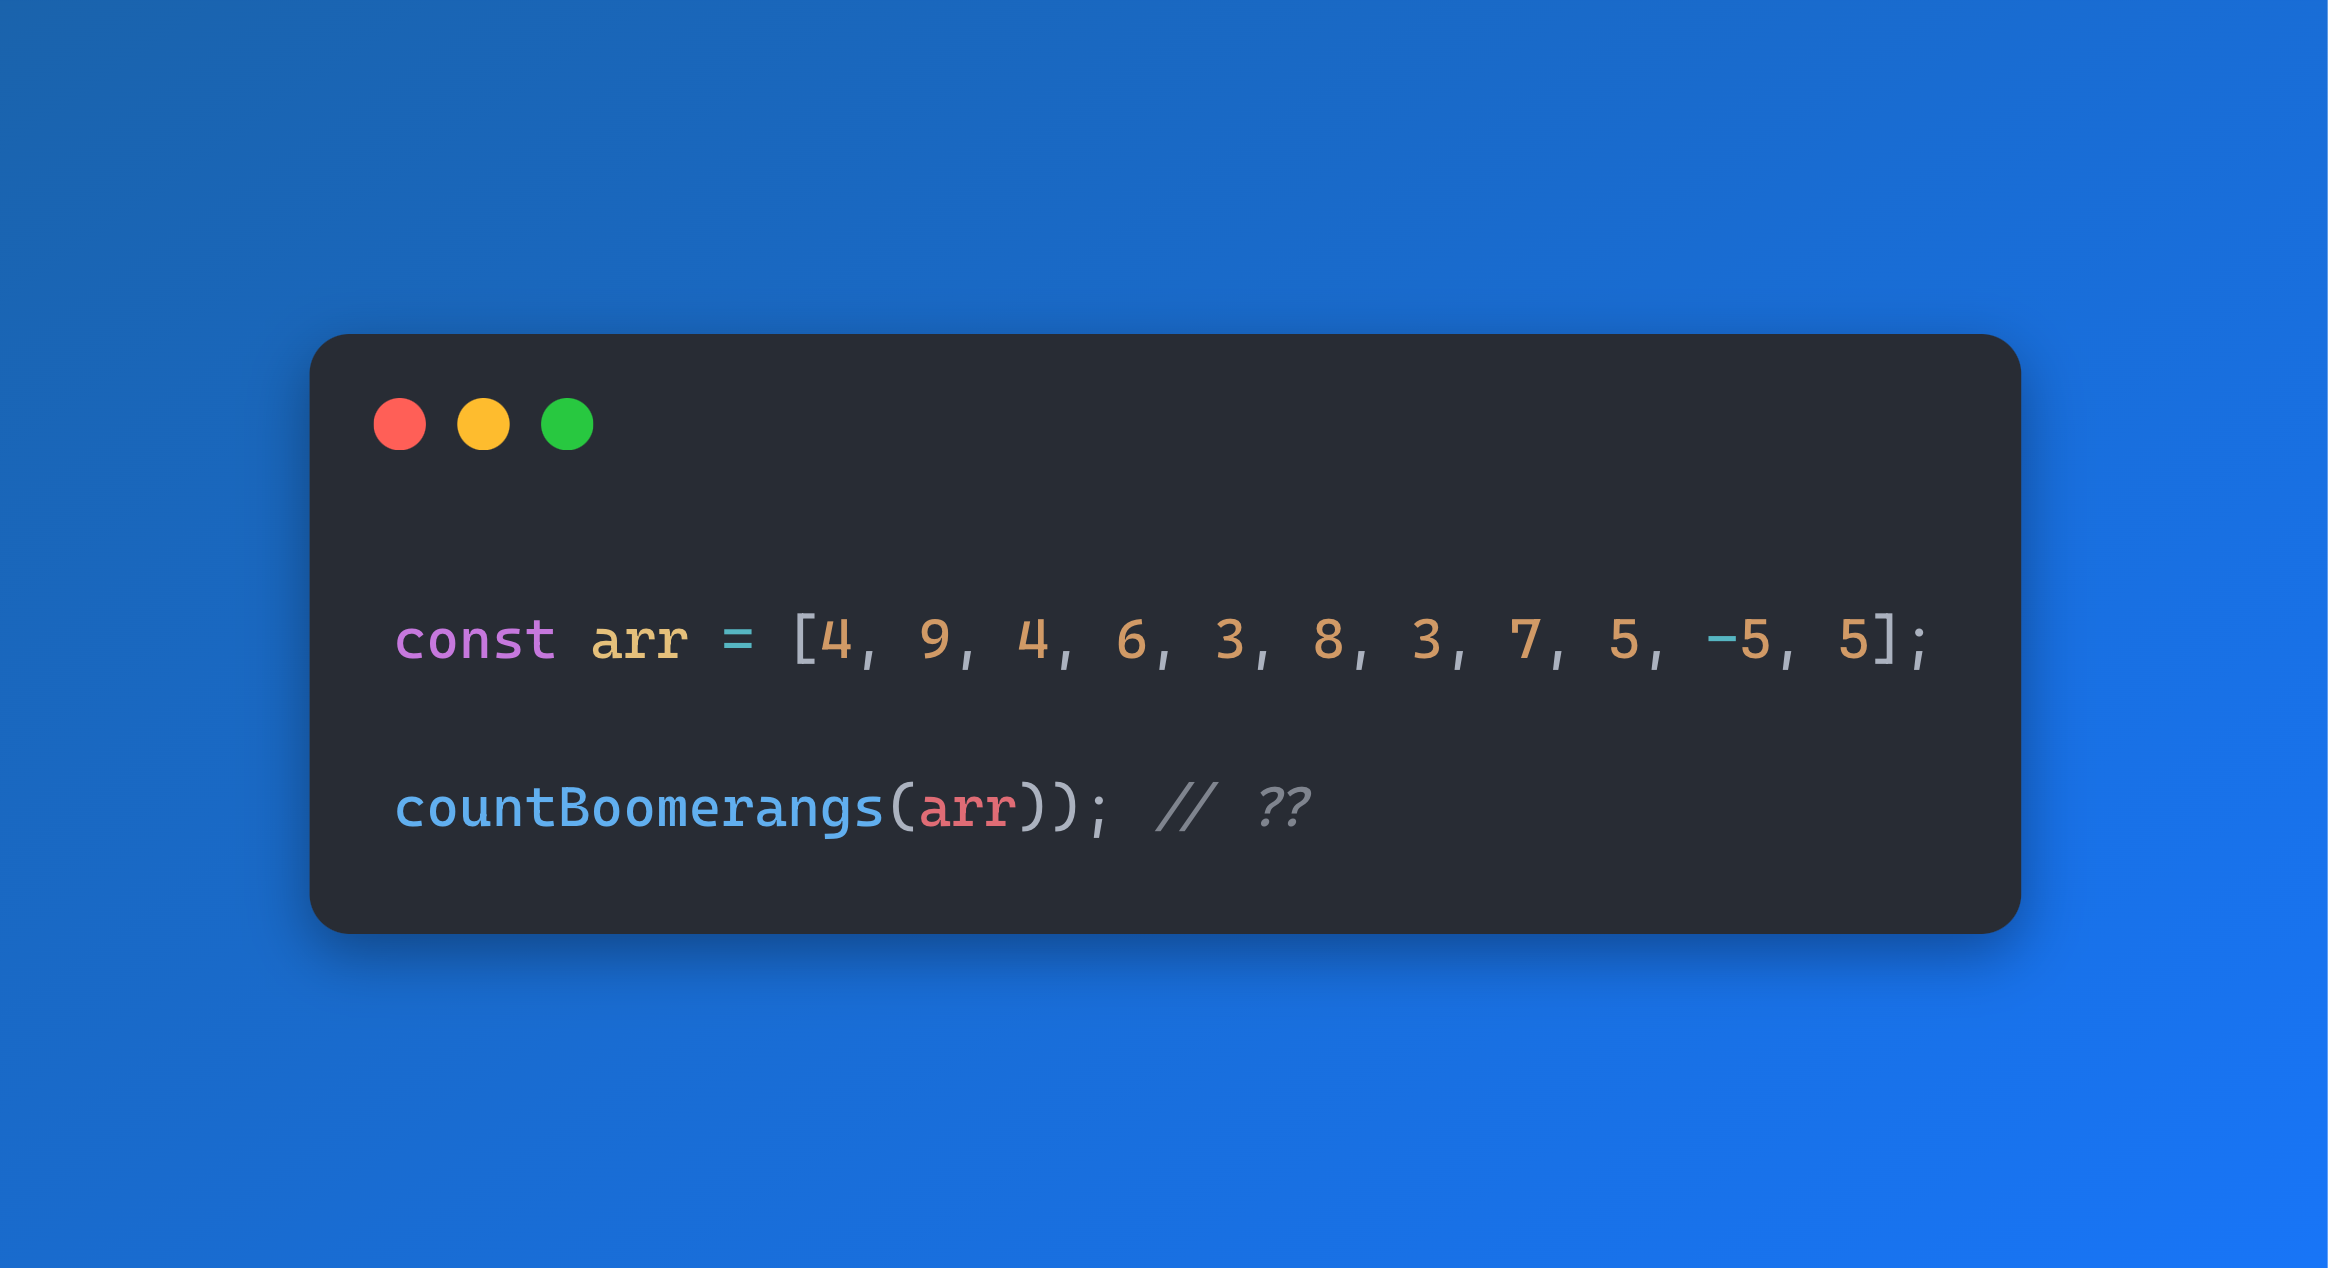
It’s all about counting the “boomerangs” in a list. Can you do it?
Maybe you first want to do what the hell a boomerang is right?
Okay so it’s like, any section of the list with 3 numbers where the first and last digits repeat: like[1, 2, 1]:
So how many boomerangs can you see in [4, 9, 4, 6, 3, 8, 3, 7, 5, -5, 5]?
…
It’s 3
[4, 9, 4]
[3, 8, 3]
[5, -5, 5]
So the puzzle is to write an algorithm to find this pattern throughout the list.
But here’s where it gets tricky: The algorithm should also count overlapping boomerangs — like in [1, 5, 1, 5, 1, 5, 1] we have FIVE boomerangs — not two — I even thought it was three at first — no it’s freaking five.
So how do we go about this?
My first instinct is to loop through the list and and then when we get up to 3 items we can do the calculation.
It’s one of those situations where we need to keep track of previous values in the loop at every step of the loop.
So in every loop we’ll have one value for the current item, the previous items, and the one before that.
How do we keep track of all the items?
For the current items it’s super easy of course — it’s just the current iter variable:
JavaScriptCopied!
countBoomerangs([1, 2, 1, 0, 3, 4, 3]);

function countBoomerangs(arr) {
  let curr;
  for (item of arr) {
    curr = item;
    console.log(`curr: ${curr}`);
  }
}
What about keeping tracking of the previous variable?
We can’t use the current iter variable anymore — we need to store the iter variable from one iteration just before the next one starts.
So what we do — store the value of curr just before the loop ends:
JavaScriptCopied!
countBoomerangs([1, 2, 1, 0, 3, 4, 3]);

function countBoomerangs(arr) {
  let curr;
  let prev;
  for (item of arr) {
    curr = item;
    console.log(`curr: ${curr}, prev: ${prev}`);
    prev = curr;
  }
}
Or we can actually do it at the point just before the next loop starts:
JavaScriptCopied!
countBoomerangs([1, 2, 1, 0, 3, 4, 3]);

function countBoomerangs(arr) {
  let curr;
  let prev;
  for (item of arr) {
    prev = curr;
    curr = item;
    console.log(`curr: ${curr}, prev: ${prev}`);
  }
}
It has to be these two points — either just before the loop starts or just before it ends.
Just before the loop starts really meaning before we update curr to the current variable.
Just before it ends really meaning after we finished using the stale prev variable — before we update it — to be stale again the next iteration — do you get? “Stale” because it’s always going to be out of date, it’s supposed to be.
And what about the previous one before this previous one relative to the current variable? The previous previous variable?
We use the exact same logic — although there’s something you’re going to need to watch out for…
So to track the previous previous variable I need to set prev2 to the stale stale iter variable — if you know what I mean, ha ha…
So like before either at the beginning of the loop like this:
JavaScriptCopied!
countBoomerangs([1, 2, 1, 0, 3, 4, 3]);

function countBoomerangs(arr) {
  let curr;
  let prev;
  let prev2;
  for (item of arr) {
    // Stale stale iter variable (stale of the stale)
    prev2 = prev;
    // Just stale (one stale)
    prev = curr;
    // Before update to current (non-stale)
    curr = item;
    console.log(`curr: ${curr}, prev: ${prev}, prev2: ${prev}`);
  }
}
But what about at the end?
We have to maintain the order: prev2->prev->curr — we always need to update prev2‘s to the prev‘s stale value before update prev to curr‘s stale value.
JavaScriptCopied!
function countBoomerangs(arr) {
  let curr;
  let prev;
  let prev2;
  for (item of arr) {

    curr = item;
    // Stale stale iter variable (stale of the stale)
    console.log(`curr: ${curr}, prev: ${prev}, prev2: ${prev}`);

    // Before update to current (non-stale)
    prev2 = prev;
    // Just stale (one stale)
    prev = curr;
  }
}
So finally we’ve been able to track all these 3 variables to check for the boomerang.
Now all that’s left is to make the check in every loop and update a count — pretty straightforward stuff:
JavaScriptCopied!
function countBoomerangs(arr) {
  // ...
  let count = 0;

  for (item of arr) {
    prev2 = prev;
    prev = curr;
    curr = item;
    if (prev2 === curr && prev !== curr) {
      count++;
    }
  }

  return count;
}
I noticed we could have just use a traditional for loop and use the iter counter get the sub-list up to 3 numbers back:
Either this:
JavaScriptCopied!
function countBoomerangs2(arr) {
  for (let i = 0; i < arr.length; i++) {
    const prev2 = arr[i - 2];
    const prev = arr[i - 1];
    const curr = arr[i];
    console.log(
      `curr: ${curr}, prev: ${prev}, prev2: ${prev}`
    );
  }
}
or this:
JavaScriptCopied!
function countBoomerangs2(arr) {
  for (let i = 0; i < arr.length; i++) {
    const [prev2, prev, curr] = arr.slice(i - 2, i + 1);
    console.log(`curr: ${curr}, prev: ${prev}, prev2: ${prev}`);
  }
}
I’ll add a check for when the iter counter goes up to 3 numbers to avoid the undefined stuff. This would definitely throw a nasty out-of-range error in stricter language like C#.
JavaScriptCopied!
function countBoomerangs2(arr) {
  for (let i = 0; i < arr.length; i++) {
    // ✅ Check length
    if (arr.length > 2) {
      const [prev2, prev, curr] = arr.slice(i - 2, i + 1);
      console.log(
    }
  }
}
And the comparison will be just as before:
JavaScriptCopied!
function countBoomerangs2(arr) {
  let count = 0;
  for (let i = 0; i < arr.length; i++) {
    if (arr.length > 2) {
      const [prev2, prev, curr] = arr.slice(i - 2, i + 1);
      if (prev2 === curr && prev !== curr) {
        count++;
      }
    }
  }

  return count;
}
The best part about this alternative is it lets us set up a beautiful one-liner solution with functional programming constructs like JavaScript’s reduce().
This new IDE from Google is seriously revolutionary.
Project IDX is in a completely different league from competitors like VS Code or Cursor or whatever.
It’s a modern IDE in the cloud — packed with AI features.
I was not surprised to see this sort of thing coming from Google — with their deep-seated hatred for local desktop apps.
Loading your projects from GitHub and then install dependencies instantly without any local downloading.
It’s a serious game changer if your local-based IDE is hoarding all your resources in your normie PC — like VS Code does a lot.
Tari for the last time, VS Code is a code editor and not an IDE!! Learn the difference for goodness sake!!!
Ah yes, a code editor that eats up several gigabytes of RAM and gobbles up all your battery life that your OS itself starts complaining bitterly.
Such a lightweight code editor.
Most certainly not an IDE.
Anyway, so I could really see the difference between VS Code and IDX in my past PC.
Like when it came to indexing files in a big project, to enable language features like Intellisense & variable rename.
VS Code would sometimes take forever to load and it might not even load fully — bug?
I would have to reload the window multiple times for the editor to finally get it right.
But with IDX it was amazing. The difference was clear.
Once I loaded the project I had the all the features ready. Everything happened instantly.
Because all the processing was no longer happening in a weak everyday PC but now in a massively powerful data center with unbelievable speeds.
Having a remote server take care of the heavy lifting drastically cuts down on the work your local PC has to handle.
Including for project debugging that take lots of resources — like Android Emulator tests.
The Android Studio Emulator couldn’t even run in my past PC without crashing miserably, so seeing the IDX emulator spring into life effortlessly with near-zero delay was pretty exciting.
Templates are another awesome convenience — just start up any project with all the boilerplate you need — you don’t even need to fire up the CLI.
And no you’re stuck with those templates there — you can just start from a blank template and customize it as much as you want — like you would in local editors.
Another huge part of IDX is AI of course — but lol don’t think they’ll let you choose between models like all those others.
It’s Gemini or nothing. Take it or leave it.
Not like it’s nearly as bad as some people say — or bad at all.
And look, it indexes your code to give you responses from all the files in the codebase — something that’s becoming a standard feature you’d expect across editors.
And it looks like it has some decent multi-step agentic AI editing features.
I was impressed — It tried creating the React app and it failed because there were already files in the folder — then see what happened…
It intelligently knew that it should delete all the files in the project and then try again.
It automatically handled a failure case that I didn’t tell it about beforehand and got back on track.
And guess what?
After it tried deleting the files and it didn’t work — cause I guess .idx can’t be deleted — it then decided to create an empty subfolder to create the React project in.
I never said anything about what to do about non-empty files in the folder in this case, it just knew. It didn’t keep trying blindly for something that just wasn’t working.
Pretty impressive.
Okay but it did fail partially miserably when it came to create the React file.
It put the CSS code in the JSX file where it was obviously not supposed to be.
So clearly whatever model they’re using for this still can’t compare to Claude. Cause Claude-powered Windsurf would never make this mistake.
But not like the CSS itself was bad.
But of course this will only continue to improve. And Clause will also get even better — as you might have seen from the recent Claude 3.7 release.
So even if you stick with your local IDE, IDX is still a solid, rapidly improving, AI-powered alternative for writing code faster than ever.
VS Code is no longer about having an open-source lightweight editor freely available to anyone.
Now it’s about winning the AI race with GitHub Copilot.
At first they were playing it cool — Copilot was just another extension you installed like Tabnine and others.
But soon VS Code slowly started being used more and more as a marketing platform to get people to pay for Copilot.
Copilot promo in the Welcome Page — a great, hard-to-miss location right?
And if you miss that, you most certainly wouldn’t miss the Copilot button right next to the search bar.
Visible not just on the Welcome page but on any page — or no page open at all.
I knew it once I saw this button appear. Yet another app had hopped on the AI train.
Copilot was no longer being treated as just another VS Code extension, but a core part of the editor.
The face of VS Code.
When you think of VS Code, you are to immediately think of Copilot.
Well shouldn’t we have seen this coming.
No matter how much they tuned down the branding and positioned it as a free and happy open-source tool, at the end of the day it was always a corporate-owned product.
They always had the power to change the direction it would take in the future.
And with all the serious competition from Cursor and Windsurf it was only a matter of time.
Especially with these alternatives being forks of VS Code — incredibly easy to switch and still feel at home.
It was the same competition that forced them to create a free tier for Copilot.
Every single IDE is going the AI way and they have to keep up.
They’re not the only ones feeling the heat too.
JetBrains is about to make AI take the center-stage in all their IDEs with a new agentic tool called Junie.
After the disastrous performance of their AI Assistant they also realized they needed to step up their AI game.
So very soon WebStorm and Pycharm and IntelliJ are going to be all about AI.
Android Studio not left behind.
We can complain about this as much as we want but this is the direction everyone is taking now.
Many other apps like Notion and Adobe tools have also made people angry about their heavy focus on AI at the cost of other features and fixes.
But the AI wave will continue to spread.
AI in your sleep, AI when you wake up, AI for breakfast lunch and dinner. AI before bed.
AI is slowly taking over coding but many programmers are still sticking their head in the sand about what’s coming…
Now Google’s Chief Scientist just made a telling revelation: AI now generates at least 25% of their code.
Can you see — it’s happening now at top software companies with billions of active lines of code.
All these people still acting like AI-assisted coding is just a gimmick that nobody actually uses in production.
Some people in my comment sections even said that using AI tools don’t make you more productive…
Like come on — I thought we all agreed GitHub Copilot was a smash. The over 1.3 million paying users they had this time last year wasn’t enough proof?
In case you don’t know, software developers are not a very easy group of people to monetize — your tool must be really something to have over 1.3 million of them pay for it.
And even if most of these are from businesses, something tells me not every developer tool can get anywhere close to these numbers from B2B.
I remember the first time I used Copilot. Mhmm nice tool, pretty decent suggestions, not bad…
Only like a few days later when I had to code without it from connection issues — that’s when I realized just how much I’d already started depending on this tool. I was already getting used to the higher quality of life and I wasn’t even fully aware.
That Tab key for accepting completions — which key did I even press more between Tab and semicolon.
Type 48 characters — Enter
Type 60 characters — Enter
Type 55 characters — Enter
After:
Type 9 characters — Tab — Enter
Type 2 characters — Tab — Enter
Tab — Enter
The quality of life difference was undeniable. The productivity difference was undeniable.
And one thing this shows you or reminds you — that programming has always been an act of thinking, not typing.
It’s always been the thinking part that took most of the time — the higher level system planning and designing, the lower level algorithms and design patterns.
The typing has always been straightforward. And pretty mundane actually.
Copilot isn’t just a code completion tool, it’s a thought predicting tool.
It’s not just about helping you code faster, it’s about knowing what you’re thinking and eliminating the gap between that thought and its actualization in the real world. Pressing Tab instead of dozens of characters.
It’s been so useful and this is just at the lower line-by-line level — predicting your thoughts for what each line should be.
Now we are having tools like Supercomplete predicting your intent across entire files, making things even easier.
Cursor Compose and Windsurf Cascade bringing your thoughts to life across several files in your codebase.
And there are increasingly magnifying the impact and value of those thoughts.
Let’s say you want to add a searching feature to your web app.
Copilot could give you completions for each line of the UI components + event handler definition and the search algorithm or external libraries you decide to use.
Supercomplete could automatically create an empty event handler for you to start writing the definition.
But with the agentic tools you could just say, “add a search feature to the app”, and it could handle everything — all the above — including NPM library installations.
How long until you can literally say, “build and deploy an e-commerce app…” and that’ll be all it takes?
Imagine you give such a vague description of what you want and then the AI autonomously asks you questions to get the specific requirements and avoid all ambiguity.
It seems more and more like a matter of when, not if.