Create React App alternative: 5 times leaner, 0 vulnerabilities
Create React App is gone.
Yes, it’s no longer the recommended tool for starting React apps. Some of us were surprised, but many of us knew it was a long time coming.
There are much faster and leaner alternatives available today.
Why shouldn’t you use Create React App anymore?
Create React App was great.
Setting up React apps become as easy as ever without any need to bother with tedious Webpack and Babel configs. But despite the convenience, it had notable issues we just couldn’t ignore:
1. Bulky and slow
Create React App is a bloated tool.
It installs an unbelievable number of packages and takes forever to finish. If you’re a long-time CRA user like me, you’ve probably gotten used to this process, but it’s far from normal.
Once you enter the command to start a new project, you will quickly realize the insane number of packages CRA needs to set up.
Look at how large the node_modules folder is for CRA compared to Vite, a superior alternative. And both folders were just newly set up.
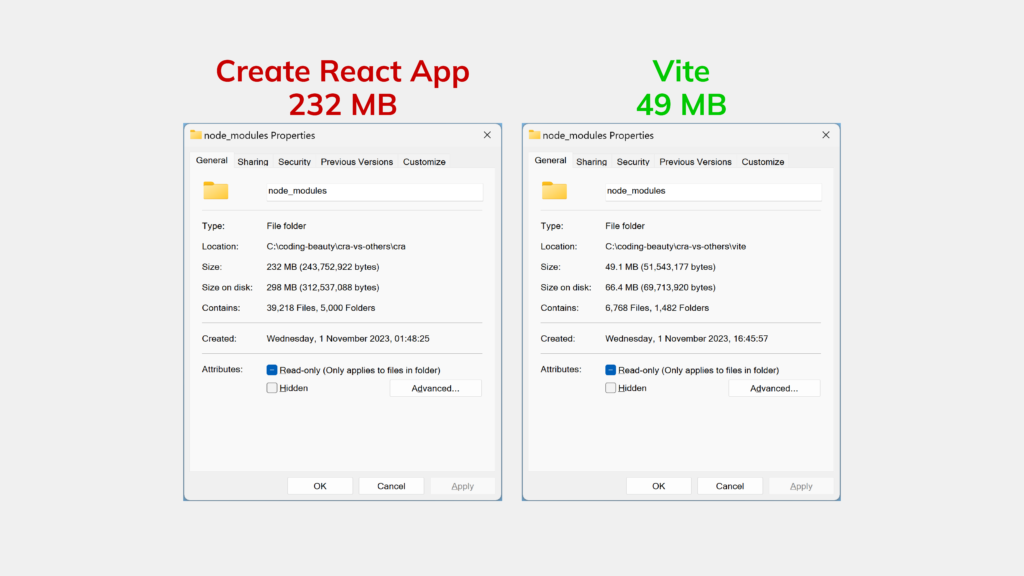
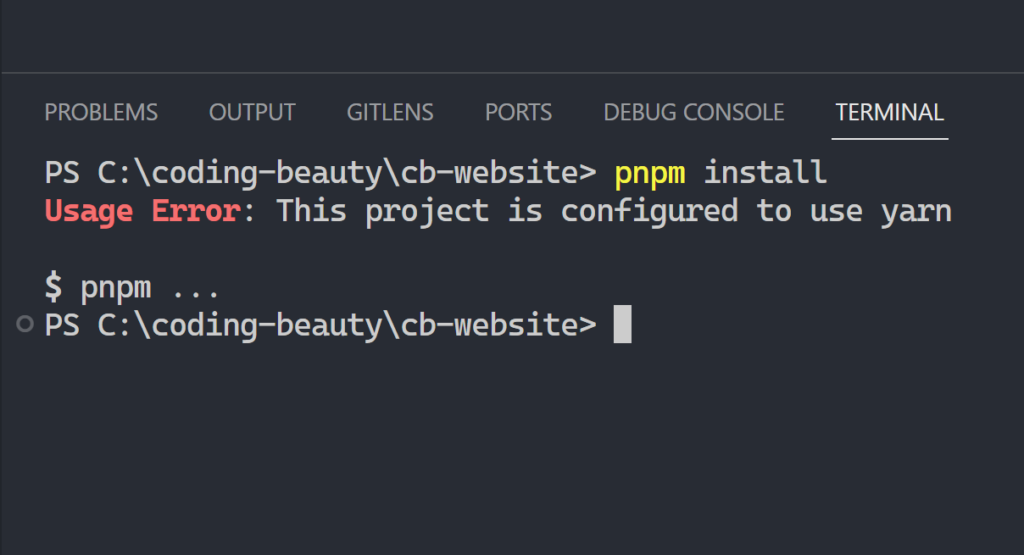
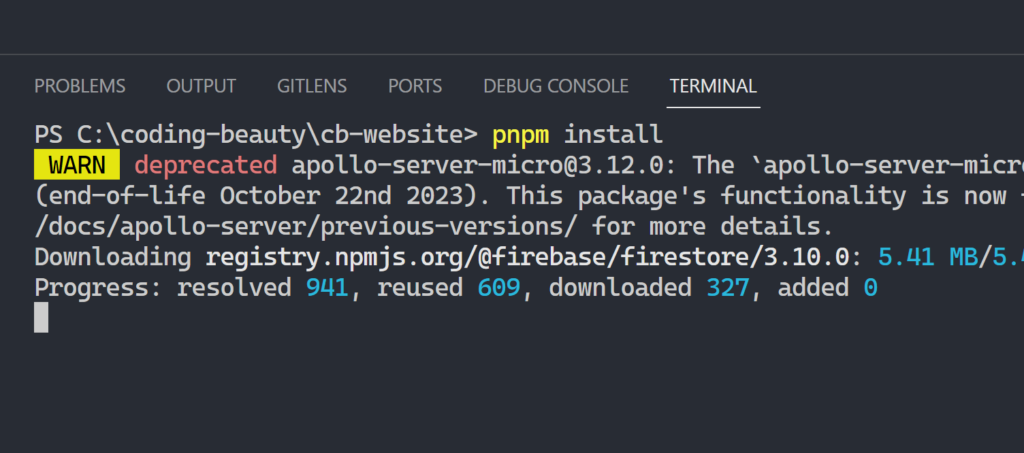
Many packages mean longer install times, even if you’re using PNPM or Yarn 2.
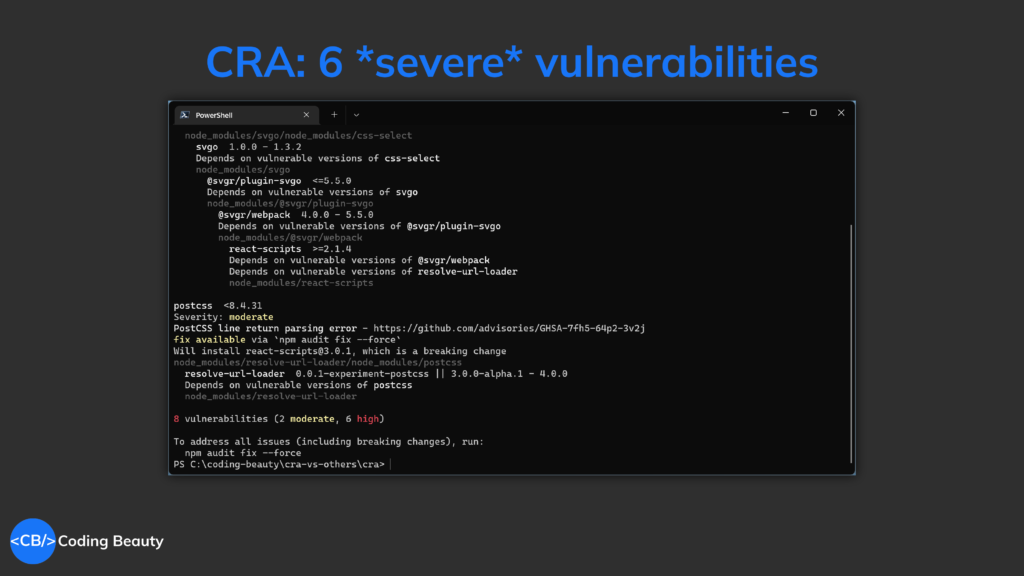
2. Insecure and outdated packages
Bundling so many packages makes it harder to keep track of them all, and many become abandoned and insecure later.
Things improved but any insecure package is something to worry about, and there are still quite a few.
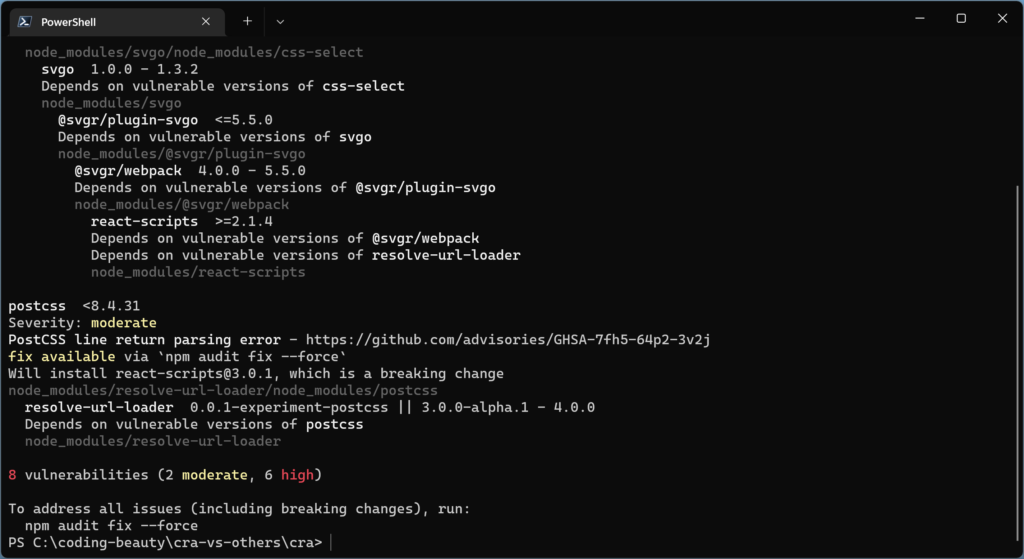
In my GitHub repos using CRA, I get several Dependabot alerts at every turn – even from one of my first GitHub projects.
And they’re almost always about security flaws in packages CRA installed.
3. Limited customization options
Create React App is a black box.
To add new libraries and customize it you usually have to depend on libraries like Craco – heck, before CRA version 5, Craco was pretty much our only way to get Tailwind CSS support.
I remember my earlier days of creating various Electron + React desktop apps, where I had to install react-app-rewired just to set the target to 'electron-renderer' to access Node modules in the React part of the app.
For total control, you can always do npm eject, but of course, then you become responsible for all the dependencies installed by CRA, which has trade-offs that may not be worth it for you.
What to use instead of Create React App
Old habits die hard, sure.
If you’ve been hesitating to switch to a superior tool, hopefully, the React team dumping CRA should finally do it for you. There are far more modern and better-maintained alternatives out there; let’s check out some of the most popular ones:
Vite
It’s a fast way to build modern web projects, designed for efficiency and smoother development.
The VueJS team is responsible for developing and maintaining Vite, so you can trust it’s a reliable tool.
- “Extremely fast” Hot Module Replacement (HMR).
- Out-of-the-box support for TypeScript.
- A lightning-fast SWC compiler.
HMR means that code changes show instantly in the browser, avoiding full-page refreshes and saving valuable time.
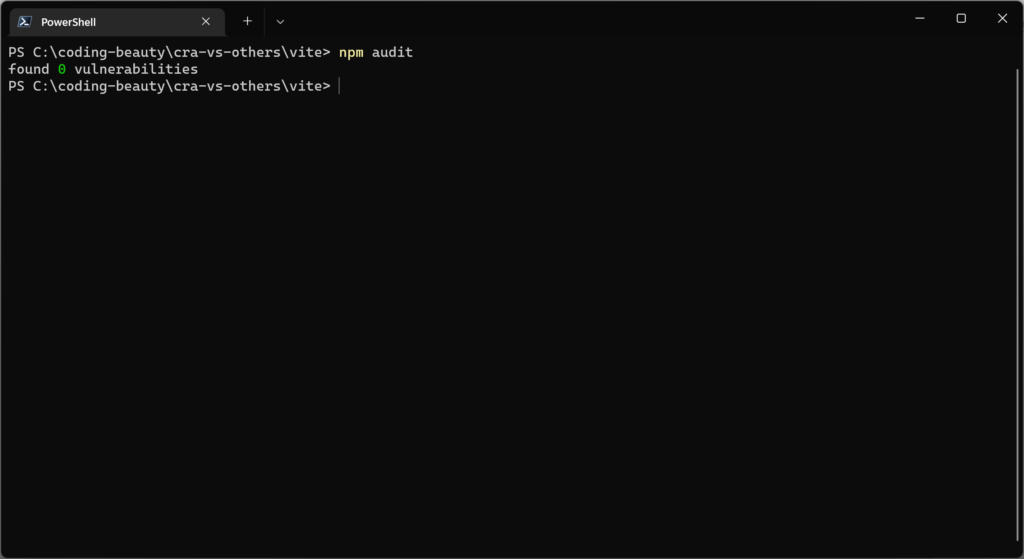
It provides just about everything CRA does – but better and without the bloat. And it’s constantly being updated.

Here you don’t worry about outdated dependencies or vulnerable packages:
Parcel
It’s a zero-config bundler with no setup required, yet it’s still more flexible than Create React App.
Parcel supports all the latest web technologies, including React, Vue, and TypeScript, and it can bundle any type of asset, from images and CSS to HTML and JavaScript.
Plus, it has excellent performance, thanks to its use of worker threads, which allows it to parallelize tasks and speed up builds.

Parcel also has HMR support and is updated often with the latest features and optimizations like Vite. You can trust the team to keep up with the latest web technologies and best practices.
And what’s the result: your projects are built with the best tools available.
Custom Webpack configuration
Webpack is still king if you know what you’re doing.
The level of control of flexibility it gives you is unmatched as there are a massive number of options you can set, far more than just path and filename.
Another benefit to note: Webpack can generate a development build without a local server, unlike Parcel and others.
This particular feature saved me when I was debugging React in a VSCode extension. Loading data from localhost didn’t work properly for a Webview; I had to build to a local file and read the contents.
With source maps enabled and dev mode turned on, I could easily see the exact line where the error occurred in the TS code. Unlike with Parcel, where all I got was a minified build.
Of course, setting up a Webpack config can be complex and more involved – which is why CRA came around in the first place. You must configure various options to get everything working perfectly.
But once you’re set-up, you’ll have a heavily personalized build process for your project. It’s a trade-off that may or may not be worth it for you.
Frameworks to replace Create React App
Need React’s state and UI capabilities without extras? The tools we’ve seen are great.
Want high-performance apps with advanced features like SSR? Then consider frameworks with built-in routing, data fetching, etc.
Frameworks like:
Next.js
Many of us already know Next.js with advanced features like server-side rendering and static website generation.
Server-side rendering renders pages on the server and sends them to the client, greatly boosting performance, user experience, and SEO scores.
With intuitive file-based routing and built-in image optimization, Next.js is a smart option for building high-flying web apps with speed.
Remix
Another SSR-enable framework with powerful data features like:
- Intelligent network error handling
- Parallel fetching of CSS, JavaScript, and other assets to save time
- Automatically ensuring the UI data is in sync with the server data after a user action.
One stand-out Remix feature is nested routes, which makes it possible to associate a specific section of a page with a particular route segment so that only that section updates when the route segment changes. This accelerates page transitions as no time is wasted re-rendering the entire page.
Gatsby
Gatsby is another awesome one – for scalable & fast-loading static sites.
There are a variety of starter kits and plugins to easily extend your site’s functionality and build a blog, e-commerce site, or portfolio site in no time at all.
With Gatsby, it’s effortless to power up your app with data from a CMS, especially with the GraphQL data layer for rapid integration with various APIs and services.
Final thoughts
CRA was a popular tool.
But it had its issues. It was bulky, outdated, and had limited customization.
Adaptation is crucial in the dynamic landscape of web development. By embracing modern tools, such as Vite, and Parcel, and in-depth frameworks like Next.js, Remix, and Gatsby, we can build faster and more efficient React apps.