javascript

How to Use a Button as a Link in Vue

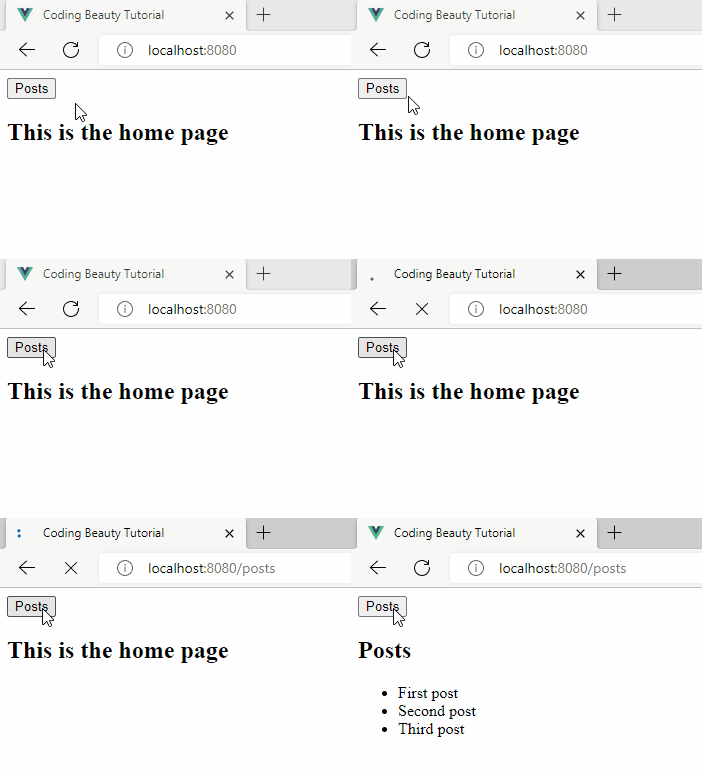
To use a button as a link in Vue, you can wrap the button in an anchor (<a>) element. Clicking a link button makes the browser navigate to the specified URL.

<template>
  <div>
    <a href="/posts">
      <button>Posts</button>
    </a>
  </div>
</template>
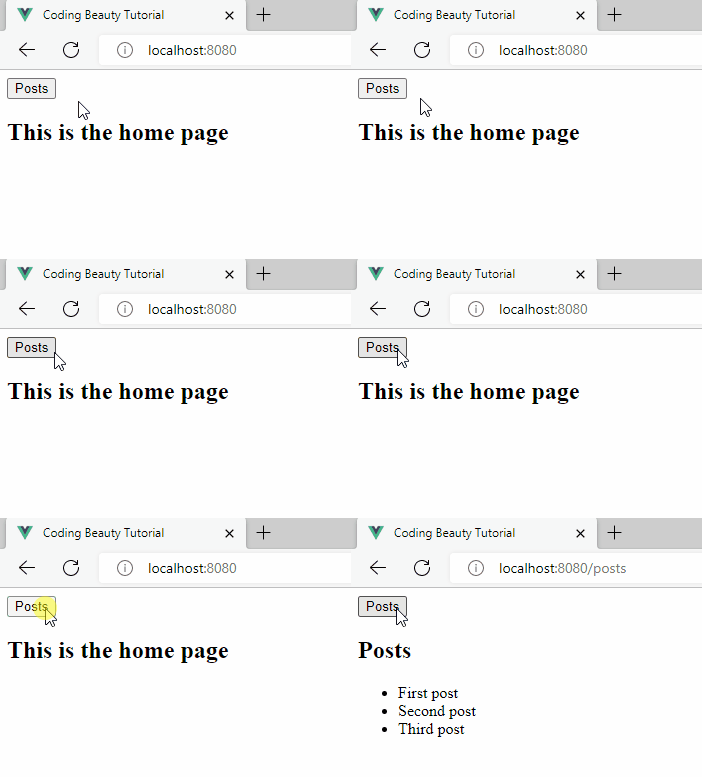
Clicking the link button to navigate to another page.

When working with Vue Router, you can make a button serve as a router link using the navigate function provided by the router-link default slot.

<template>
  <div>
    <router-link
      to="/posts"
      custom
      v-slot="{ navigate }"
    >
      <button
        @click="navigate"
        role="link"
      >
        Posts
      </button>
    </router-link>
  </div>
</template>
Navigating to the "/posts" route without refreshing the page.
Navigating to the /posts route without refreshing the page.

We use navigate as a handler for the click event, so it is called when the button is clicked, making the browser navigate to the specified route without refreshing the page.

The above method only works for Vue 3.x though. If working with Vue 2.x, you can use a button as a router link by setting the tag prop to the name of the button component, and setting the to prop to the specific route.

<template>
  <div>
    <router-link to="/posts" tag="button">Posts</router-link>
  </div>
</template>

The $router.push() method

Alternatively, we can use a button as a Vue router link by calling the push() method on the $router variable made available by Vue Router.

<template>
  <div>
    <button @click="$router.push('/posts')">Posts</button>
  </div>
</template>

The $router variable represents the router instance, and can be used for programmatic navigation.

When working with the Vuetify framework, we can use the button component as a link by setting the v-btn href prop.

<template>
  <div>
    <v-btn
      href="/posts"
      color="primary"
      dark
    >
      Posts
    </v-btn>
  </div>
</template>

When using Vue Router with Vuetify, we can use the button component as a router link by setting the v-btn to prop.

<template>
  <div>
    <v-btn
      to="/posts"
      color="primary"
      dark
    >
      Posts
    </v-btn>
  </div>
</template>

If you’re working with the Vue Bootstrap framework, you can use the href to turn the button component into a link.

<template>
  <div>
    <b-button
      href="/posts"
      variant="primary"
    >
      Posts
    </b-button>
  </div>
</template>

We can set the b-button to prop to use the Vue Bootstrap button component as a Vue Router link.

<template>
  <div>
    <b-button
      to="/posts"
      variant="success"
    >
      Posts
    </b-button>
  </div>
</template>

How to Fix the “Cannot redeclare block-scoped variable” Error in TypeScript

Are you experiencing the “Cannot redeclare block-scoped variable” error in TypeScript? This error can occur for two reasons:

  1. Using variable names that clash with TypeScript global typings.
  2. Redeclaring a variable in the same block scope.
The "cannot redeclare block-scoped variable" TypeScript error occuring in VS Code.
The “cannot redeclare block-scoped variable” error occurring in VS Code.

We’ll look at solutions for these possible causes in this article.

Fix for: using variable names that clash with TypeScript global typings

The “Cannot redeclare block-scoped variable” error occurs if you declare a variable with a name that clashes with one declared in TypeScript global typings.

index.ts

// ❌ Cannot re-declare block-scoped variable "name".
const name = 'Coding Beauty';

console.log(name);

To fix the error in this case, convert your file to an ES module, like this:

index.ts

// ✅ variable declared successfully
const name = 'Coding Beauty';

console.log(name); // Coding Beauty

export {};

The export {} statement indicates that the file is an ES module. In TypeScript, any file containing a top-level import or export is considered to be a module.

Without top-level import or export declarations, the file gets treated as a script whose contents are available in the global scope (and to other modules). This is what causes the name clash between our name variable and the name variable declared in TypeScript global typings.

Another way to fix this is to use another name to declare the variable that does not clash with the global typings.

index.ts

// ✅ variable declared successfully
const theName = 'Coding Beauty';

console.log(theName); // Coding Beauty

export {};

Fix for: redeclaring a variable in the same block scope

The “cannot redeclare block-scoped variable” error will also occur if you try to declare a variable using a name previously used in the same block scope.

const language = 'JavaScript';

// ❌ Cannot redeclare block-scoped variable 'language'.
const language = 'PHP';

You can easily fix the error in the case by using a different name for the new variable.

const language = 'JavaScript';

// ✅ variable declared successfully
const language2 = 'PHP';

If you intended to assign a new value to the variable, the proper way to do this is to declare the variable with the let keyword, and change its value without redeclaring it.

// declare with "let" keyword
let language = 'JavaScript';

// reassign without redeclaring
language = 'PHP';

console.log(language); // PHP

Note

Unlike const or let, the var keyword doesn’t complain about redeclared variables.

var language = 'JavaScript';

// No error thrown
var language = 'PHP';

Redeclaring variables can cause tricky bugs in your code, and this is one reason to avoid using the var keyword.

You can declare a variable with the same name in a nested block. The variable in the nested block is separate from the one declared in the outer scope.

let color = 'red';

if (true) {
  let color = 'yellow';

  console.log(color); // yellow
}

console.log(color); // red

Note

If you use var keyword to do this, it will override the value of the variable in the outer scope.

var color = 'red';

if (true) {
  var color = 'yellow';

  console.log(color); // yellow
}

console.log(color); // yellow

Another reason to avoid using var.

It doesn’t have to be an if block, we can do this in any nested block designated with curly braces ({ and }).

let color = 'red';

{
  let color = 'yellow';

  console.log(color); // yellow
}

console.log(color); // red

Fix: use an IIFE

Another way to fix the error is to wrap the code containing the variable with an immediately invoked function expression (IIFE). IIFEs are functions that run as soon as they are defined, and they can help to avoid name clashes that cause this error.

const fruit = 'Apple';

(() => {
  const fruit = 'Banana';

  // ✅ variable declared successfully
  console.log(fruit); // Banana
})();

console.log(fruit); // Apple

This fix also solves the issue of TypeScript global typing clashes we looked at earlier.

index.ts

(() => {
  const name = 'Coding Beauty';

  console.log(name); // Coding Beauty
})();

How to Convert JSON to CSV in JavaScript

You can use the json2csv library to quickly convert JSON to CSV in JavaScript. It is a robust utility that converts JSON to CSV with column titles and proper line endings, and is available as an NPM package.

import { parse } from 'json2csv';

const obj = [
  { firstName: 'Russell', lastName: 'Castillo', age: 23 },
  { firstName: 'Christy', lastName: 'Harper', age: 35 },
  { firstName: 'Eleanor', lastName: 'Mark', age: 26 },
];

const csv = parse(obj);

console.log(csv);

This code will have the following output:

"firstName","lastName","age"
"Russell","Castillo",23
"Christy","Harper",35
"Eleanor","Mark",26

What are JSON and CSV?

Let’s quickly go through these terms in case you’re not familiar with them.

JSON (JavaScript Object Notation) is a text format used to store and transport data based on JavaScript object syntax, and is commonly used to build RESTful APIs.

CSV (Comma-Separated Values) is a method of storing tabular data as text using comma-separated values (hence the name). Each record is stored as a new line, and each field in the record is separated with a character that’s usually a , (comma).

Install json2csv

Before using json2csv, we’ll need to install it in our project. We can do with the NPM or Yarn CLI.

npm i json2csv

# Yarn
yarn add json2csv

After installation, we’ll be able to import it into a JavaScript module, like this:

import { parse } from 'json2csv';

// CommonJS module
const { parse } = require('json2csv');

The parse() function

The parse() function is a convenience method provided by json2csv, and it has two parameters. The first is the JSON string to convert to CSV, and the second is an object.

const csv = parse(obj, { delimiter: ' ', header: false });

[Update] json2csv is now legacy

The json2csv library has now been split into smaller libraries that are now published to NPM independently. json2csv is still available on NPM, but the newer way to use its functionality is through the @json2csv/plainjs module.

So instead of this:

import { parse } from 'json2csv';

// ...

const csv = parse(obj, { delimiter: '|' });

You’ll install @json2csv/plainjs and write this:

import { Parser } from '@json2csv/plainjs';

// ...

const parser = new Parser({ delimiter: '|' });

const csv = parser.parse(obj);


Customize conversion of JSON to CSV

The object specifies various options that customize the conversion.

One such option is delimeter, which indicates the character used to separate the columns in the CSV string. A comma is used if delimeter is not set.

For example, this:

import { parse } from 'json2csv';

const obj = [
  { firstName: 'Russell', lastName: 'Castillo', age: 23 },
  { firstName: 'Christy', lastName: 'Harper', age: 35 },
  { firstName: 'Eleanor', lastName: 'Mark', age: 26 },
];

const csv = parse(obj, { delimiter: '|' });

console.log(csv);

produces the following CSV string:

"firstName"|"lastName"|"age"
"Russell"|"Castillo"|23
"Christy"|"Harper"|35
"Eleanor"|"Mark"|26

We also have header, which determines whether or not the CSV string will contain a title row. It’s true by default.

const csv = parse(obj, { delimiter: '|', header: false });

CSV output:

"Russell"|"Castillo"|23
"Christy"|"Harper"|35
"Eleanor"|"Mark"|26

There’s also the quote option, which sets the quote used around column names. It’s " (double quote) by default, we can remove quotes by passing an ('') empty string to quote:

const csv = parse(obj, { quote: '' });
firstName,lastName,age
Russell,Castillo,23
Christy,Harper,35
Eleanor,Mark,26

Native conversion of JSON to CSV in JavaScript

Here’s how we can easily convert JSON to CSV in JavaScript:

function jsonToCsv(items) {
  const header = Object.keys(items[0]);

  const headerString = header.join(',');

  // handle null or undefined values here
  const replacer = (key, value) => value ?? '';

  const rowItems = items.map((row) =>
    header
      .map((fieldName) => JSON.stringify(row[fieldName], replacer))
      .join(',')
  );

  // join header and body, and break into separate lines
  const csv = [headerString, ...rowItems].join('\r\n');

  return csv;
}

const obj = [
  { color: 'red', maxSpeed: 120, age: 2 },
  { color: 'blue', maxSpeed: 100, age: 3 },
  { color: 'green', maxSpeed: 130, age: 2 },
];

const csv = jsonToCsv(obj);

console.log(csv);

This will be the CSV output:

color,maxSpeed,age
"red",120,2
"blue",100,3
"green",130,2

How it works

We created a reusable jsonToCsv() function to let us convert multiple JSON strings to CSV. It takes an array that contains objects. Each object will take up one row in the CSV output.

The first we do in this function is to get all the keys that will be used for the CSV header. We expect all objects in the array to have the same keys, so we use the Object.keys() method to extract the keys from the first object item into an array.

const obj = [
  { color: 'red', maxSpeed: 120, age: 2 },
  { color: 'blue', maxSpeed: 100, age: 3 },
  { color: 'green', maxSpeed: 130, age: 2 },
];

// { color: 'red', maxSpeed: 120, age: 2 }
console.log(obj[0]);

// [ 'color', 'maxSpeed', 'age' ]
console.log(Object.keys(obj[0]));

After getting the keys, we call the join() method on the array to concatenate all the elements into a CSV header string.

const header = ['color', 'maxSpeed', 'age'];

const headerString = arr.join(',');

console.log(headerString); // color,maxSpeed,age

Next, we create a function that will be passed as a callback to the replacer parameter of the JSON.stringify() function. This function will handle undefined or null property values of the objects in the JSON array.

const obj = { prop1: 'Earth', prop2: undefined };

// replace undefined property values with empty string ('')
const replacer = (key, value) => value ?? '';

const str = JSON.stringify(obj, replacer);

// {"prop1":"Earth","prop2":""}
console.log(str);

We then use the Array map() method to get the property values from each object. map() takes a callback function that is called on each array element to return a transformation.

This callback uses the header array to get all the keys of each object. With another call to map(), it goes through each key, gets the corresponding value for that key in the object, and converts it to a string using JSON.stringify().

This inner call to map() eventually results in an array of all the stringified property values of the current object in the array.

const header = ['color', 'maxSpeed', 'age'];

const row = { color: 'red', maxSpeed: 120, age: 2 };

const replacer = (key, value) => value ?? '';

const rowItem = header.map((fieldName) =>
  JSON.stringify(row[fieldName], replacer)
);

// array of stringified property values
console.log(rowItem); // [ '"red"', '120', '2' ]

After the object has been transformed into a property value array, join() is then used to convert the array to a CSV row.

['"red"', '120', '2'].join(',') // -> "red",120,2

So this transformation happens for every object in the JSON array to generate a list of CSV rows, stored in the rowItems variable in our original example.

To generate the final CSV output, we combine the headerString and the rowItems into one array, making use of the spread syntax (...).

const headerString = ['color', 'maxSpeed', 'age'];

const rowItems = ['"red",120,2', '"blue",100,3', '"green",130,2'];

[headerString, ...rowItems];
/*
Output ->
[
  [ 'color', 'maxSpeed', 'age' ],
  '"red",120,2',
  '"blue",100,3',
  '"green",130,2'
]
 */

Then we call join() on this array with the '\r\n' string as a separator, to create a string with the CSV header and each CSV row in a separate line.

const headerString = ['color', 'maxSpeed', 'age'];

const rowItems = ['"red",120,2', '"blue",100,3', '"green",130,2'];

console.log([headerString, ...rowItems].join('\r\n'));
/*
color,maxSpeed,age
"red",120,2
"blue",100,3
"green",130,2
 */
How to Add an Item to an Array in Vue

Add Item to Array With push() Method

To add an item to an array in Vue, call the push() method in the array with the item as an argument. The push() method will add the item to the end of the array.

For example:

<template>
  <div id="app">
    <button @click="addFruit">Add fruit</button>
    <ul>
      <h2
        v-for="(fruit, i) in fruits"
        :key="i"
      >
        {{ fruit }}
      </h2>
    </ul>
  </div>
</template>

<script>
export default {
  data() {
    return {
      fruits: ['Orange', 'Apple'],
    };
  },
  methods: {
    addFruit() {
      this.fruits.push('Banana');
    },
  },
};
</script>
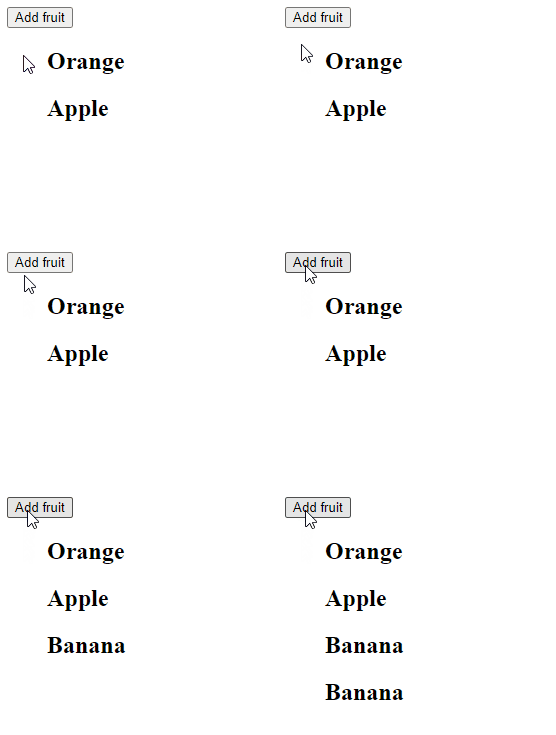
Clicking the button adds a new fruit item.

The Array push() method adds one or more items to the end of an array and returns the length of the array.

We use the v-for Vue directive to display the items in the array. These rendered items are automatically updated in the view when the array is modified with push().

Add Object Item to Array in Vue

We can use the same approach to add an object to an array and display more complex data. We just have to make sure that we render the properties of each object in the array, not the object itself.

<template>
  <div id="app">
    <button @click="addFruit">Add fruit</button>
    <ul>
      <h2
        v-for="(fruit, i) in fruits"
        :key="i"
      >
        <!-- Render "name" and "amount" properties -->
        {{ fruit.name }} ({{ fruit.amount }})
      </h2>
    </ul>
  </div>
</template>

<script>
export default {
  data() {
    return {
      fruits: [
        { name: 'Orange', amount: 3 },
        { name: 'Apple', amount: 5 },
      ],
    };
  },
  methods: {
    addFruit() {
      // Add object item to array
      this.fruits.push({ name: 'Banana', amount: 4 });
    },
  },
};
</script>
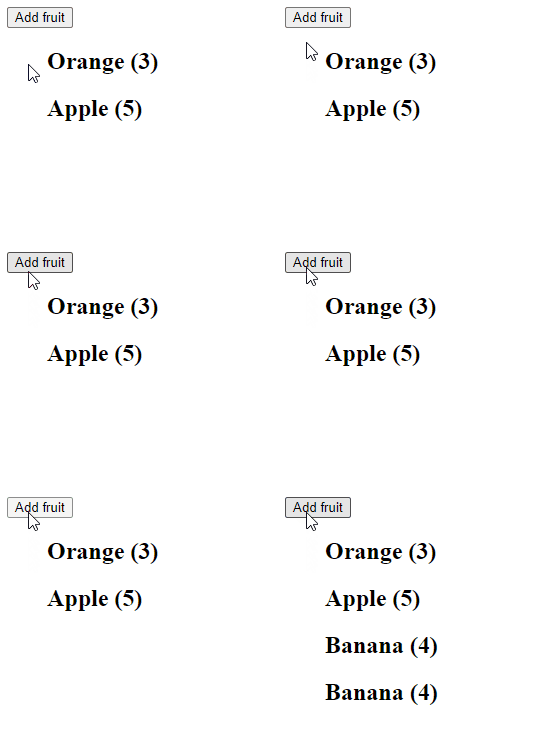
Clicking the button adds a new fruit item with a certain amount.

Like before, the list automatically updates in the view when a new object item is added to the array.

How to Subtract Hours From a Date in JavaScript

Let’s learn how to easily subtract any number of hours from a Date object in JavaScript.

1. Date setHours and getHours() Methods

To subtract hours from a Date:

  1. Call the getHours() method on the Date to get the number of hours.
  2. Subtract the hours.
  3. Pass the result of the subtraction to the setHours() method.
function subtractHours(date, hours) {
  date.setHours(date.getHours() - hours);

  return date;
}

// 8 AM on June 20, 2022
const date = new Date('2022-06-20T08:00:00.000Z');

const newDate = subtractHours(date, 2);

// 6 AM on June 20, 2022
console.log(date); // 2022-06-20T06:00:00.000Z

Our subtractHours() function takes a Date object and the number of hours to subtract as arguments. It returns the same Date object with the hours subtracted.

The Date getHours() method returns a number between 0 and 23 that represents the hours of a particular Date.

The Date setHours() method sets the hours of a Date to a specified number.

If the hours we subtract would decrease the day, month, or year of the Date, setHours() automatically updates the Date information to reflect this.

// 12 AM on June 20, 2022
const date = new Date('2022-06-20T00:00:00.000Z');

date.setHours(date.getHours() - 3);

// 9 PM on June 19, 2022 (previous day)
console.log(date); // 2022-06-19T21:00:00.000Z

In this example, decreasing the hours of the Date by 3 decreases the day by 1 and sets the hours to 21.

Avoiding Side Effects

The setHours() method mutates the Date object it is called on. This introduces a side effect into our subtractHours() function. To avoid modifying the passed date and create a pure function, make a copy of the date and call setHours() on this copy, instead of the original:

function subtractHours(date, hours) {
  const dateCopy = new Date(date);

  dateCopy.setHours(dateCopy.getHours() - hours);

  return date;
}

// 8 AM on June 20, 2022
const date = new Date('2022-06-20T08:00:00.000Z');

const newDate = subtractHours(date, 2);

// 6 AM on June 20, 2022
console.log(date); // 2022-06-20T06:00:00.000Z

// Original not modified
console.log(newDate); // 2022-06-20T08:00:00.000Z

Tip: Functions that don’t modify external state (i.e., pure functions) tend to be more predictable and easier to reason about. This makes it a good practice to limit the number of side effects in your code.

2. date-fns subHours() Function

Alternatively, we can use the subHours() function from the date-fns NPM package to quickly subtract hours from a Date. It works similarly to our pure subtractHours() function.

import { subHours } from 'date-fns';

// 8 AM on June 20, 2022
const date = new Date('2022-06-20T08:00:00.000Z');

const newDate = subHours(date, 2);

// 6 AM on June 20, 2022
console.log(date); // 2022-06-20T06:00:00.000Z

// Original not modified
console.log(newDate); // 2022-06-20T08:00:00.000Z

How to Fix the “Cannot read Property ‘push’ of Undefined Error in JavaScript

The “cannot read property ‘push’ of undefined” error in JavaScript occurs when you try to call the push() method on a variable intended to contain an array, but actually contains a value of undefined.

An example of the cannot read property 'push' of undefined error occurring in JavaScript.

This could be caused by calling the push() method on:

  1. a variable without first initializing it with an array.
  2. an array element instead of the array itself.
  3. an object property that does not exist or has a value of undefined.

We’ll explore practical solutions for all these possible causes in this article.

1. Calling push() on an uninitialized variable

To fix the “cannot read property ‘push’ of undefined” error, ensure that the variable has been initialized with an array before calling the push() method on it.

let doubles;

let nums = [1, 2, 3, 4, 5];

for (const num of nums) {
  let double = num * 2;

  // ❌ TypeError: cannot read properties of undefined (reading 'push')
  doubles.push(double);
}

console.log(doubles);

In the example above, we called the push() method on the doubles variable without first initializing it.

let doubles;

console.log(doubles); // undefined

Because an uninitialized variable has a default value of undefined in JavaScript, calling push() causes an error to be thrown.

To fix the error, all we have to do is to assign the doubles variable to an array (empty for our use case):

// ✅ "doubles" initialized before use
let doubles = [];

let nums = [1, 2, 3, 4, 5];

for (const num of nums) {
  let double = num * 2;

  // ✅ push() called - no error thrown
  doubles.push(double);
}

console.log(doubles); // [ 2, 4, 6, 8, 10 ]

2. Calling push() on an Array object

To fix the “cannot read property ‘push’ of undefined” error, ensure that you didn’t access an element from the array variable before calling push(), but instead called push() on the actual array variable.

const array = [];

// ❌ TypeError: Cannot read properties of undefined (reading 'push')
array[0].push('html');
array[0].push('css');
array[0].push('javascript');

console.log(array);

Accessing the 0 property with bracket indexing gives us the element at index 0 of the array. The array has no element, so arr[0] evaluates to undefined and calling push() on it causes the error.

To fix this, we need to call the push on the array variable, not one of its elements.

const array = [];

// ✅ Call push() on "array" variable, not "array[0]"
array.push('html');
array.push('css');
array.push('javascript');

console.log(array); // [ 'html', 'css', 'javascript' ]

3. Calling push() on an object’s property that is undefined

To fix the “cannot read property ‘push’ of undefined” error in JavaScript, ensure that the object property that you are calling the push() method on exists and is not undefined.

const students = [
  { name: 'Mac', scores: [80, 85] },
  { name: 'Robert' },
  { name: 'Michael', scores: [90, 70] },
];

// ❌ TypeError: Cannot read properties of undefined (reading 'push')
students[1].scores.push(50);

In this case, the error came about because the object element at the index 1 doesn’t have a scores property.

const obj = {};

console.log(obj.prop); // undefined

Accessing a non-existent property from an object doesn’t throw an error in JavaScript, but rather gives you a value of undefined. It’s if you try to call a method like push() on that non-existent property that you will encounter an error.

In this case, we can fix the error by setting the score property of the second array element to a defined value.

const students = [
  { name: 'Mac', scores: [80, 85] },
  // ✅ Fixed: "scores" set to a defined value
  { name: 'Robert', scores: [] },
  { name: 'Michael', scores: [90, 70] },
];

// ✅ "scores" property exists, "push()" works - no error thrown
students[1].scores.push(50);

How to Remove All Vowels From a String in JavaScript

To remove all vowels from a string in JavaScript, call the replace() method on the string with this regular expression: /[aeiou]/gi, i.e., str.replace(/[aeiou]/gi, ''). replace() will return a new string where all the vowels in the original string have been replaced with an empty string.

For example:

const str = 'coding beauty';

const noVowels = str.replace(/[aeiou]/gi, '');

console.log(noVowels); // cdng bty

The String replace() Method

The String replace() method takes two arguments:

  1. pattern – a pattern to search for in the given string. We used a regular expression for this, but it can also be a string.
  2. replacement – the string used to replace the matches of the specified pattern in the string. By passing an empty string (''), we remove all occurrences of this pattern in the given string.

Note: replace() does not modify the original string, but returns a new string. Strings are immutable in JavaScript.

Regular Expression Explained

We use the two forward slashes (/ /) to specify the start and end of the regular expression.

The [] characters are used to specify a pattern that matches any of a specific group of characters. For example, the pattern [abc] will match 'a', 'b', or 'c'. In the same way, the [aeiou] pattern will match any of the 5 vowel characters in the English alphabet.

The g (global) regex flag is used to match all occurrences of the regex pattern. Without this flag, only the first pattern match would be removed after calling replace().

const str = 'coding beauty';

// "g" regex flag not set
const noVowels = str.replace(/[aeiou]/i, '');

// Only first vowel removed
console.log(noVowels); // cding beauty

The i (ignore case) flag is used to perform a case-insensitive search for a regex match in the given string. This ensures that all vowels are removed from the string whether they are uppercased or not.

const str = 'cOding bEaUty';

// "i" regex flag NOT set
const noVowels1 = str.replace(/[aeiou]/g, '');

// Only lowercased vowels removed
console.log(noVowels1); // cOdng bEUty

// "i" regex flag set
const noVowels2 = str.replace(/[aeiou]/gi, '');

// All vowels removed
console.log(noVowels2); // cdng bty

For a comprehensive guide to regex patterns in JavaScript, check out this regular expression syntax cheat sheet from the MDN docs.

How to Get the Previous Page URL in JavaScript

We can get the previous page URL in JavaScript with the document.referrer property.

For example:

const previousPageUrl = document.referrer;

console.log(`Previously visited page URL: ${previousPageUrl}`);

document.referrer is a readonly property that returns the URL of the page used to navigate to the current page.

Here’s a more practical example:

index.html

<!DOCTYPE html>
<html lang="en">
  <head>
    <title>Coding Beauty Tutorial</title>
  </head>
  <body>
    <a href="get-last-page.html">Link</a>
  </body>
</html>

get-last-page.html

<!DOCTYPE html>
<html lang="en">
  <head>
    <title>Coding Beauty Tutorial</title>
  </head>
  <body>
    You visited this page from: <span id="previous-page"></span>
    <script src="get-last-page.js"></script>
  </body>
</html>

get-last-page.js

const previousPage = document.getElementById('previous-page');

previousPage.textContent = document.referrer;
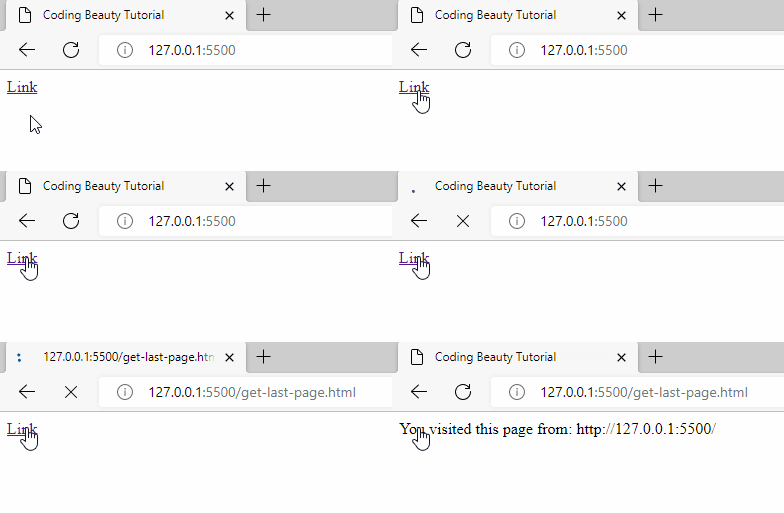
Showing the previous page URL on the visited page.
Displaying the previous page URL on the visited page.

Limitations of document.referrer

The document.referrer property doesn’t always work though. It typically gives the correct value in cases where the user clicked a link on the previous page to navigate to the current page.

But if the user visited the URL directly by typing into the address bar or using a bookmark, document.referrer will have no value.

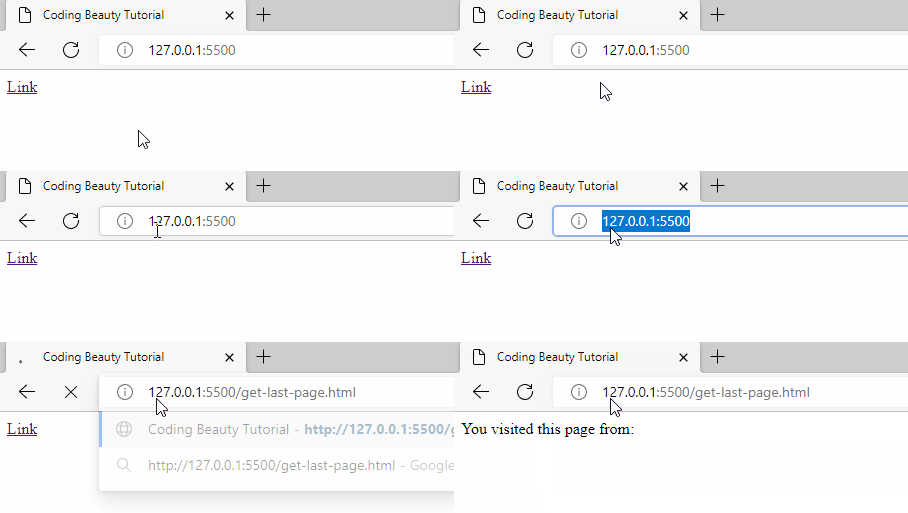
The previous page URL can't be displayed for a direct visit.
The previous page URL can’t be displayed for a direct visit.

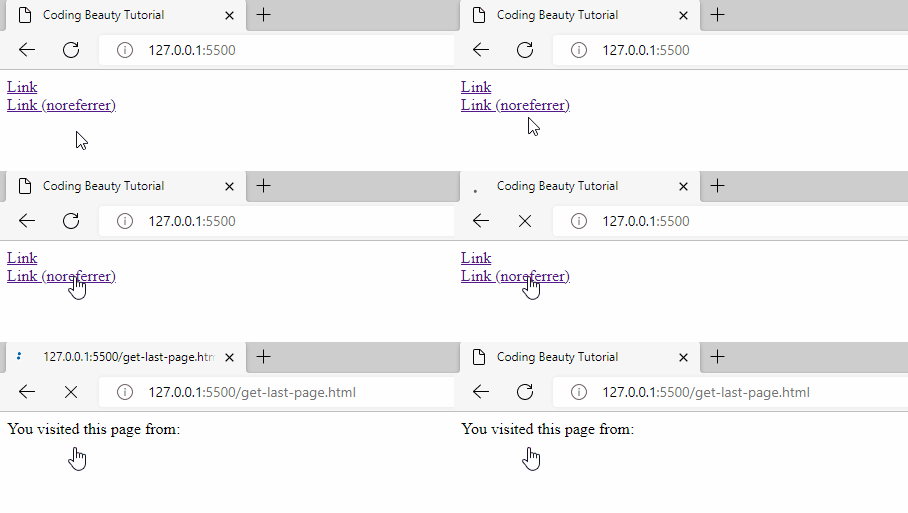
document.referrer also won’t have a value if the clicked link was marked with the rel="noreferrer" attribute. Setting rel to noreferrer specifically prevents referral information from being passed to the webpage being linked to.

index.html

<!DOCTYPE html>
<html lang="en">
  <head>
    <title>Coding Beauty Tutorial</title>
  </head>
  <body>
    <a href="get-last-page.html">Link</a>
    <a href="get-last-page" rel="noreferrer">Link (noreferrer)</a>
  </body>
</html>
"rel=noreferrer" prevents access to referral information
“rel=noreferrer” prevents access to referral information.

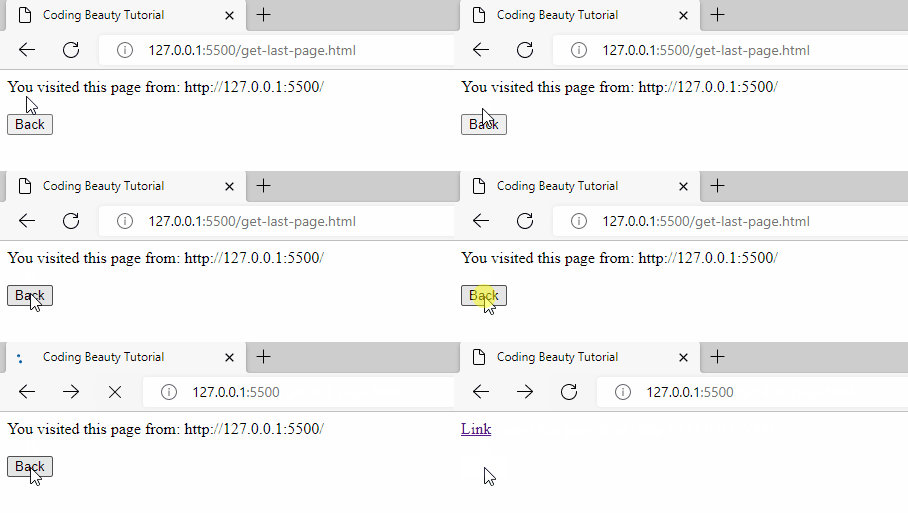
Perhaps you would like to get the previous page URL so that you can navigate to that page. You can do this easily with the history.back() method.

get-last-page.js

...
const backButton = document.getElementById('back');

backButton.onclick = () => {
  history.back();
};

get-last-page.html

<!DOCTYPE html>
<html lang="en">
  <head>
    <title>Coding Beauty Tutorial</title>
  </head>
  <body>
    You visited this page from: <span id="last-page"></span> <br />
    <br />
    <button id="back">Back</button>
    <script src="get-last-page.js"></script>
  </body>
</html>
Navigating to the previous page.

How to Get the URL of the Last Visited Page in JavaScript

We can get the last page URL in JavaScript with the document.referrer property.

For example:

const lastPageUrl = document.referrer;

console.log(`Last visited page URL: ${lastPageUrl}`);

document.referrer is a readonly property that returns the URL of the page used to navigate to the current page.

Here’s a more practical example:

index.html

<!DOCTYPE html>
<html lang="en">
  <head>
    <title>Coding Beauty Tutorial</title>
  </head>
  <body>
    <a href="get-last-page.html">Link</a>
  </body>
</html>

get-last-page.html

<!DOCTYPE html>
<html lang="en">
  <head>
    <title>Coding Beauty Tutorial</title>
  </head>
  <body>
    You visited this page from: <span id="last-page"></span>
    <script src="get-last-page.js"></script>
  </body>
</html>

get-last-page.js

const lastPage = document.getElementById('last-page');

lastPage.textContent = document.referrer;
Showing the last page URL on the visited page.
Displaying the last page URL on the visited page.

Limitations of document.referrer

The document.referrer property doesn’t always work though. It typically gives the correct value in cases where the user clicks a link on the last page to navigate to the current page.

But if the user visited the URL directly by typing into the address bar or using a bookmark, document.referrer will have no value.

The last page URL can't be displayed for a direct visit.
The last page URL can’t be displayed for a direct visit.

document.referrer also won’t have a value if the clicked link was marked with the rel="noreferrer" attribute. Setting rel to noreferrer specifically prevents referral information from being passed to the webpage being linked to.

index.html

<!DOCTYPE html>
<html lang="en">
  <head>
    <title>Coding Beauty Tutorial</title>
  </head>
  <body>
    <a href="get-last-page.html">Link</a>
    <a href="get-last-page" rel="noreferrer">Link (noreferrer)</a>
  </body>
</html>
"rel=noreferrer" prevents access to referral information
“rel=noreferrer” prevents access to referral information.

Perhaps you would like to get the last page URL so that you can navigate to that page. You can do this easily with the history.back() method.

get-last-page.js

...
const backButton = document.getElementById('back');

backButton.onclick = () => {
  history.back();
};

get-last-page.html

<!DOCTYPE html>
<html lang="en">
  <head>
    <title>Coding Beauty Tutorial</title>
  </head>
  <body>
    You visited this page from: <span id="last-page"></span> <br />
    <br />
    <button id="back">Back</button>
    <script src="get-last-page.js"></script>
  </body>
</html>
Navigating to the last visited page.

How to Use an Async Function in the React useEffect() Hook

In this article, we’ll look at different ways to easily call an async function inside the React useEffect() hook, along with pitfalls to avoid when working with async/await.

Call async Functions With then/catch in useEffect()

async functions perform an asynchronous operation in JavaScript. To wait for the Promise the async function returns to be settled (fulfilled or rejected) in the React useEffect() hook, we could use its then() and catch() methods:

In the following example, we call the fetchBooks() async method to fetch and display stored books in a sample reading app:

export default function App() {
  const [books, setBooks] = useState([]);

  useEffect(() => {
    // await async "fetchBooks()" function
    fetchBooks()
      .then((books) => {
        setBooks(books);
      })
      .catch(() => {
        console.log('Error occured when fetching books');
      });
  }, []);

  return (
    <div>
      {books.map((book) => (
        <div>
          <h2>{book.title}</h2>
        </div>
      ))}
    </div>
  );
}

async/await Problem: async Callbacks Can’t Be Passed to useEffect()

Perhaps you would prefer to use the async/await syntax in place of then/catch. You might try doing this by making the callback passed to useEffect() async.

This isn’t a good idea though, and if you’re using a linter it will inform you of this right away.

// ❌ Your linter: don't do this!
useEffect(async () => {
  try {
    const books = await fetchBooks();
    setBooks(books);
  } catch {
    console.log('Error occured when fetching books');
  }
}, []);

Your linter complains because the first argument of useEffect() is supposed to be a function that either returns nothing or returns a function to clean up side effects. But async functions always return a Promise (implicitly or explicitly), and Promise objects can’t be called as functions. This could cause real issues in your React app, such as memory leaks.

useEffect(async () => {
  const observer = () => {
    // do stuff
  };

  await fetchData();

  observable.subscribe(observer);

  // Memory leak!
  return () => {
    observable.unsubscribe(observer);
  };
}, []);

In this example, because the callback function is async, it doesn’t actually return the defined clean-up function, but rather a Promise object that is resolved with the clean-up function. Hence, this clean-up function is never called, and the observer is never unsubscribed from the observable, resulting in a memory leak.

So how can we fix this? How can we use the await operator with an async function in the useEffect() hook?

async/await Solution 1: Call async Function in IIFE

One straightforward wait to solve this problem is to await the async function in an immediately invoked function expression (IIFE):

const [books, setBooks] = useState([]);

useEffect(() => {
  (async () => {
    try {
      const books = await fetchBooks();
      setBooks(books);
    } catch (err) {
      console.log('Error occured when fetching books');
    }
  })();
}, []);

As the name suggests, an IIFE is a function that runs as soon as it is defined. They are used to avoid polluting the global namespace and in scenarios where trying an await call could cause problems in the scope containing the IIFE (e.g., in the useEffect() hook, or in the top-level scope for pre-ES13 JavaScript).

async/await Solution 2: Call async Function in Named Function

Alternatively, you can await the async function inside a named function:

useEffect(() => {

  // Named function "getBooks"
  async function getBooks() {
    try {
      const books = await fetchBooks();
      setBooks(books);
    } catch (err) {
      console.log('Error occured when fetching books');
    }
  }

  // Call named function
  getBooks();
}, []);

Remember the example using the observable pattern? Here’s how we can use a named async function to prevent the memory leak that occurred:

// ✅ Callback is not async
useEffect(() => {
  const observer = () => {
    // do stuff
  };

  // Named function "fetchDataAndSubscribe"
  async function fetchDataAndSubscribe() {
    await fetchData();
    observable.subscribe(observer);
  }

  fetchDataAndSubscribe();

  // ✅ No memory leak
  return () => {
    observable.unsubscribe(observer);
  };
}, []);

async/await Solution 3: Create Custom Hook

We can also create a custom hook that behaves similarly to useEffect() and can accept an async callback without causing any issues.

The custom hook could be defined this way:

export function useEffectAsync(effect, inputs) {
  useEffect(() => {
    return effect();
  }, inputs);
}

And we’ll be able to call it from multiple places in our code like this:

const [books, setBooks] = useState([]);

useEffectAsync(async () => {
  try {
    const books = await fetchBooks();
    setBooks(books);
  } catch (err) {
    console.log('Error occured when fetching books');
  }
});

With these three approaches, we can now easily use the await operator with async functions in the useEffect() hook.

Define Async Function Outside useEffect()

To define a named async function outside the useEffect() hook, you can wrap the function with the useCallback() hook:

const getBooks = useCallback(async () => {
  try {
    const books = await fetchBooks();
    setBooks(books);
  } catch (err) {
    console.log('Error occured when fetching books');
  }
}, []);

useEffect(() => {
  getBooks();
}, [getBooks]);

Without useCallback(), the getBooks() function will be re-created on every re-render, triggering useEffect() and causing performance problems.