The secret code Google uses to monitor everything you do online
Google now has at least 3 ways to track your search clicks and visits that they hide from you.
Have you ever tried to copy a URL directly from Google Search?
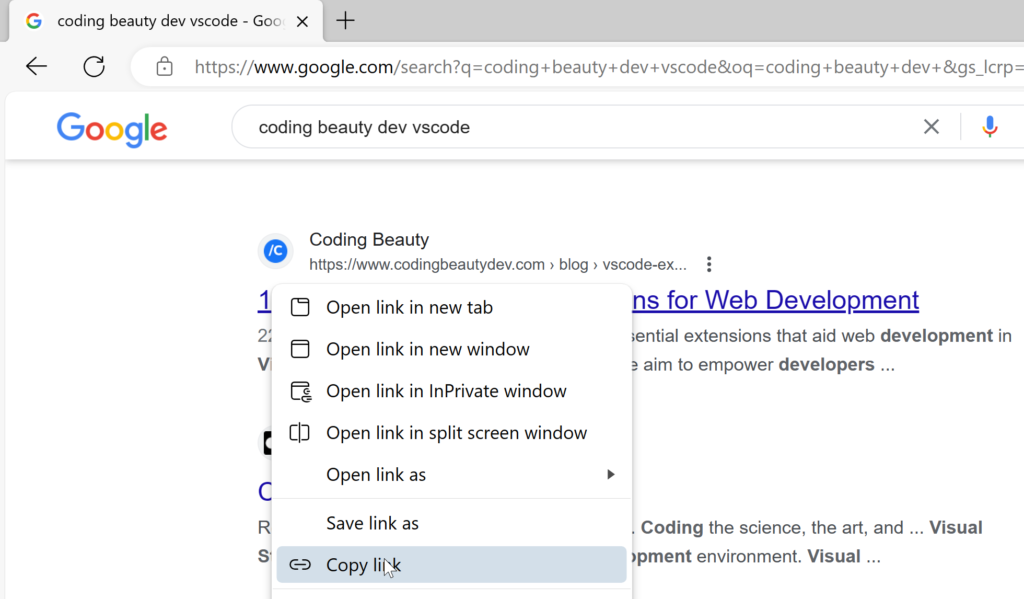
When I did that a few months ago, I unexpectedly got something like this from my clipboard.
https://www.google.com/url?sa=t&rct=j&q=&esrc=s&source=web&cd=&cad=rja&uact=8&ved=2ahUKEwjUmK2Tk-eCAxXtV0EAHX3jCyoQFnoECAkQAQ&url=https%3A%2F%2Fcodingbeautydev.com%2Fblog%2Fvscode-tips-tricks&usg=AOvVaw0xw4tT2wWNUxkHWf90XadI&opi=89978449I curiously visited the page and guess what? It took me straight to the original URL.
This cryptic URL turned out to be a middleman that would redirect you to the actual page.
But what for?
After some investigation, I discovered that this was how Google Search had been recording our clicks and tracking every single visited page.
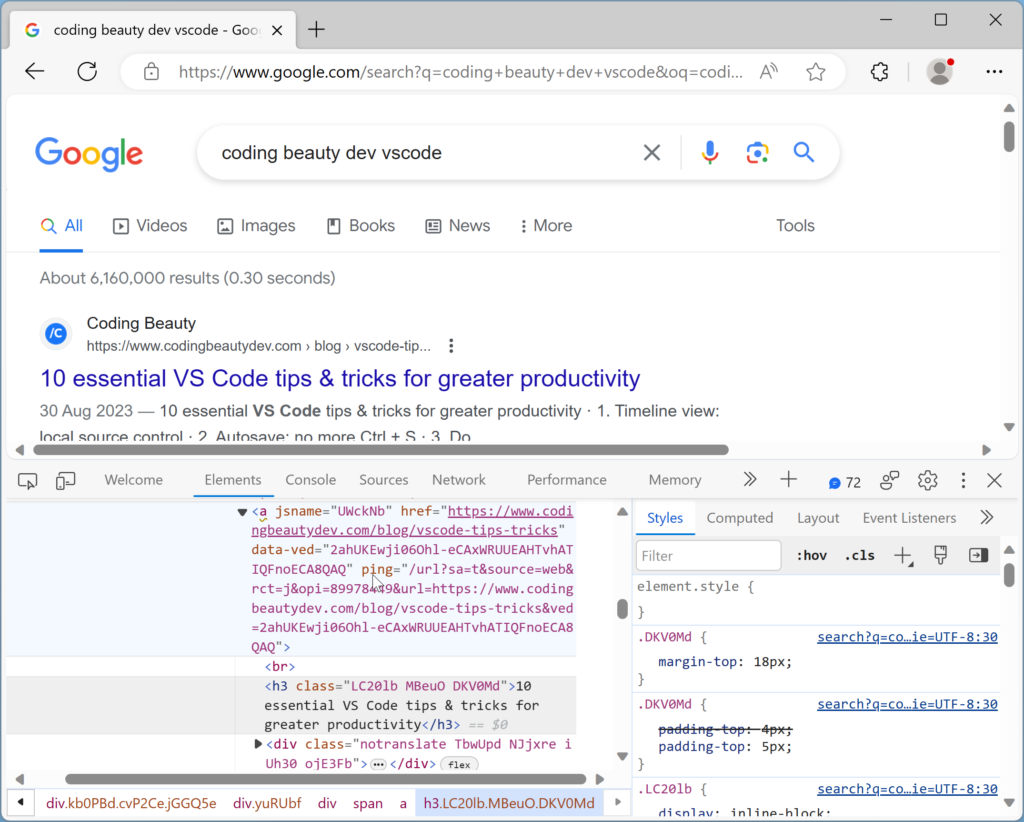
They set custom data- attributes and a mousedown event on each link in the search results page:
<a jsname="UWckNb"
   href="https://codingbeautydev.com/blog/vscode-tips-tricks"
   data-jsarwt="1"
   data-usg="AOvVaw0xw4tT2wWNUxkHWf90XadI"
   data-ved="2ahUKEwjUmK2Tk-eCAxXtV0EAHX3jCyoQFnoECAkQAQ">
</a>
A JavaScript function would change the href to a new URL with several parameters including the original URL, as soon as you start clicking on it.
import express from 'express';

const app = express();

app.get('/url', (req, res) => {
  // Record click and stuff...
  res.redirect(req.query);
});

app.listen(3000);
So even though the browser would show the actual URL at the bottom-left on hover, once you clicked on it to copy, the href would change instantly.
Why mousedown over click? Probably because there won’t be a click event when users open the link in a new tab, which is something that happens quite often.
And so after right-clicking to copy like I did, mousedown would fire and the href would change, which would even update that preview URL at the bottom-left.
The new www.google.com/url page would log the visit and move out of the way so fast you’d barely notice it — unless your internet moves at snail speed.
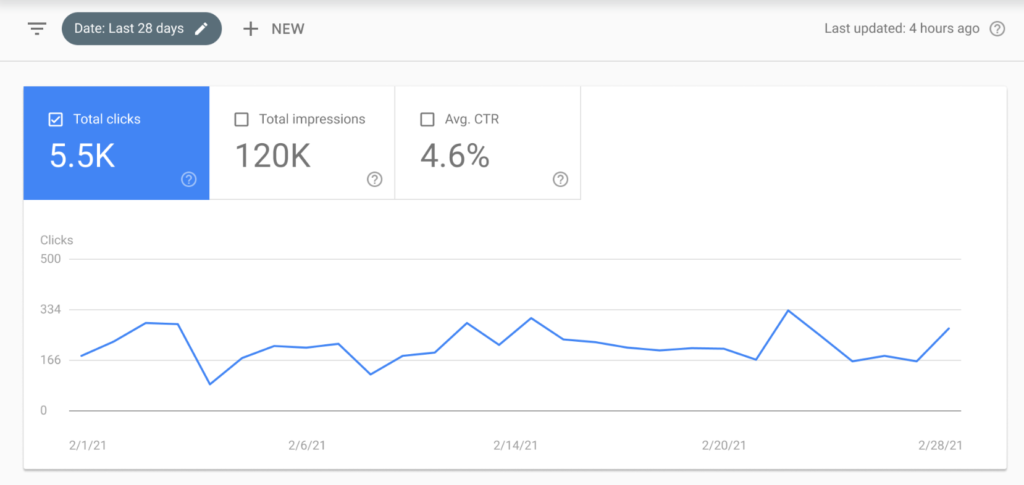
They use this data for tools like Google Analytics and Search Console so site owners can improve the quality of their search results and pages by analyzing click-rate — something probably also using as a Search ranking factor. Not to mention recording clicks on Search ads to rake all the billions of yearly ad revenue.
But Google got smarter.
They realized this URL tracking method had a serious issue for a certain group. For their users with slower internet speeds, the annoying redirect technique added a non-trivial amount of delay to the request and increased bounce rate.
So they did something new.
Now, instead of that cryptic www.google.com/url stuff, you get… the same exact URL?
With the <a> ping attribute, they have now successfully moved their tracking behind the scenes.
The ping attribute specifies one or more URLs that will be notified when the user visits the link. When a user opens the link, the browser asynchronously sends a short HTTP POST request to the URLs in ping.
The keyword here is asynchronously — www.google.com/url quietly records the click in the background without ever notifying the user, avoiding the redirect and keeping the user experience clean.
Browsers don’t visually indicate the ping attribute in any way to the user — a specification violation.
When the
HTML Standard (whatwg.org)pingattribute is present, user agents should clearly indicate to the user that following the hyperlink will also cause secondary requests to be sent in the background, possibly including listing the actual target URLs.
Not to mention a privacy concern, which is why browsers like Firefox refuse to enable this feature by default.
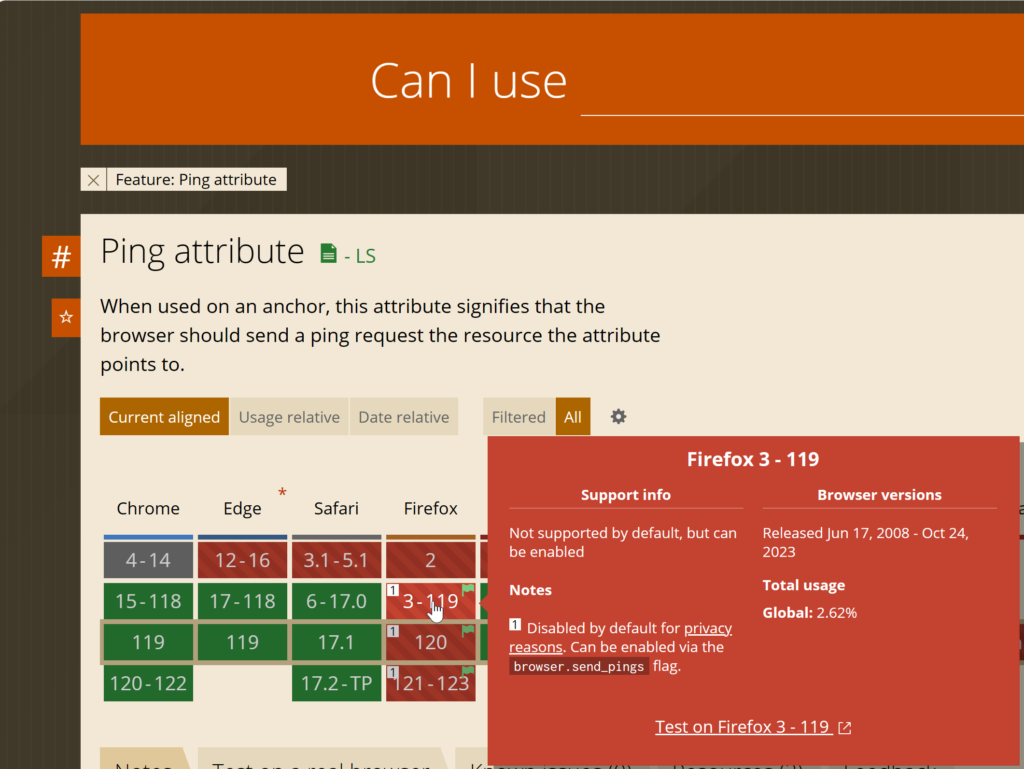
In Firefox Google sticks with the mousedown event approach:
There are many reasons not to disable JavaScript in 2023, but even if you do, Google will simply replace the href with a direct link to www.google.com/url.
<a href="/url?sa=t&source=web&rct=j&url=https://codingbeautydev.com/blog/vscode-tips-tricks...">
  10 essential VS Code tips and tricks for greater productivity
</a>
So, there’s really no built-in way to avoid this mostly invisible tracking.
Even the analytics are highly beneficial for Google and site owners in improving result relevancy and site quality, as users we should be aware of the existence and implications of these tracking methods.
As technology becomes more integrated into our lives, we will increasingly have to choose between privacy and convenience and ask ourselves whether the trade-offs are worth it.