Cursor 2.0 is incredible — 5 amazing new features
Wow this is huge.
Cursor just dropped several massive upgrades to their IDE to make AI coding even more powerful.
Cursor 2.0 comes with a whole new philosophy for developing with AI…
1. Revolutionary new multi-agent feature
Now you don’t just have a single agent making changes from your prompts…
Now you can run several AI agents in parallel to each try a different approach to the same coding task — working in separate sandboxes to avoid overwriting each other’s work.

When they’re done you get a combined diff view where you can see and merge the best results.
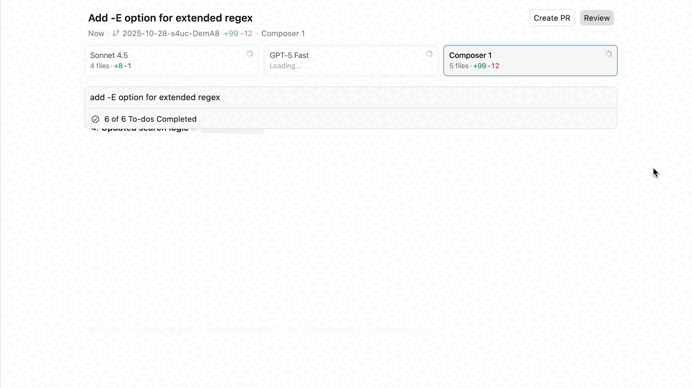
The day of frantically switching between models to see which one can do best are over.
Instantly unleash the entire army of state-of-the-art models on any task.
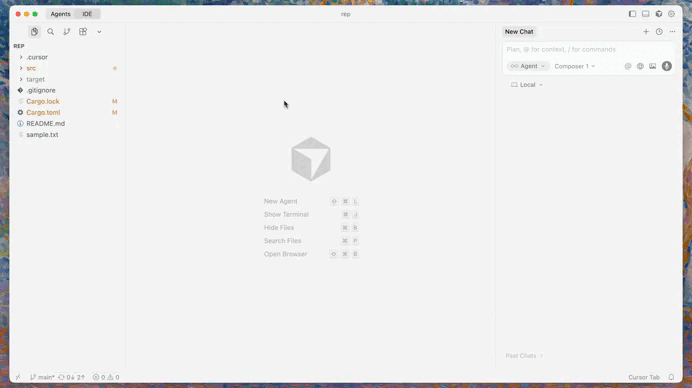
2. Dedicated new Agent View
This leads to having the new dedicated Agent View mode to show you what each agent is “seeing” and trying to do.
You get a live, transparent panel of their suggestions, reasoning, and file edits before anything lands in your codebase
Approve, merge, or discard with a click — turning AI from a mysterious black box into a controllable teammate you can supervise in real time.
And you still have this view when you use only one agent.
3. Composer?
And now we have a new in-house model too — built from the ground up to code.
They’re calling it Composer — not to be confused with the agent itself, that has been in the IDE since late 2024.
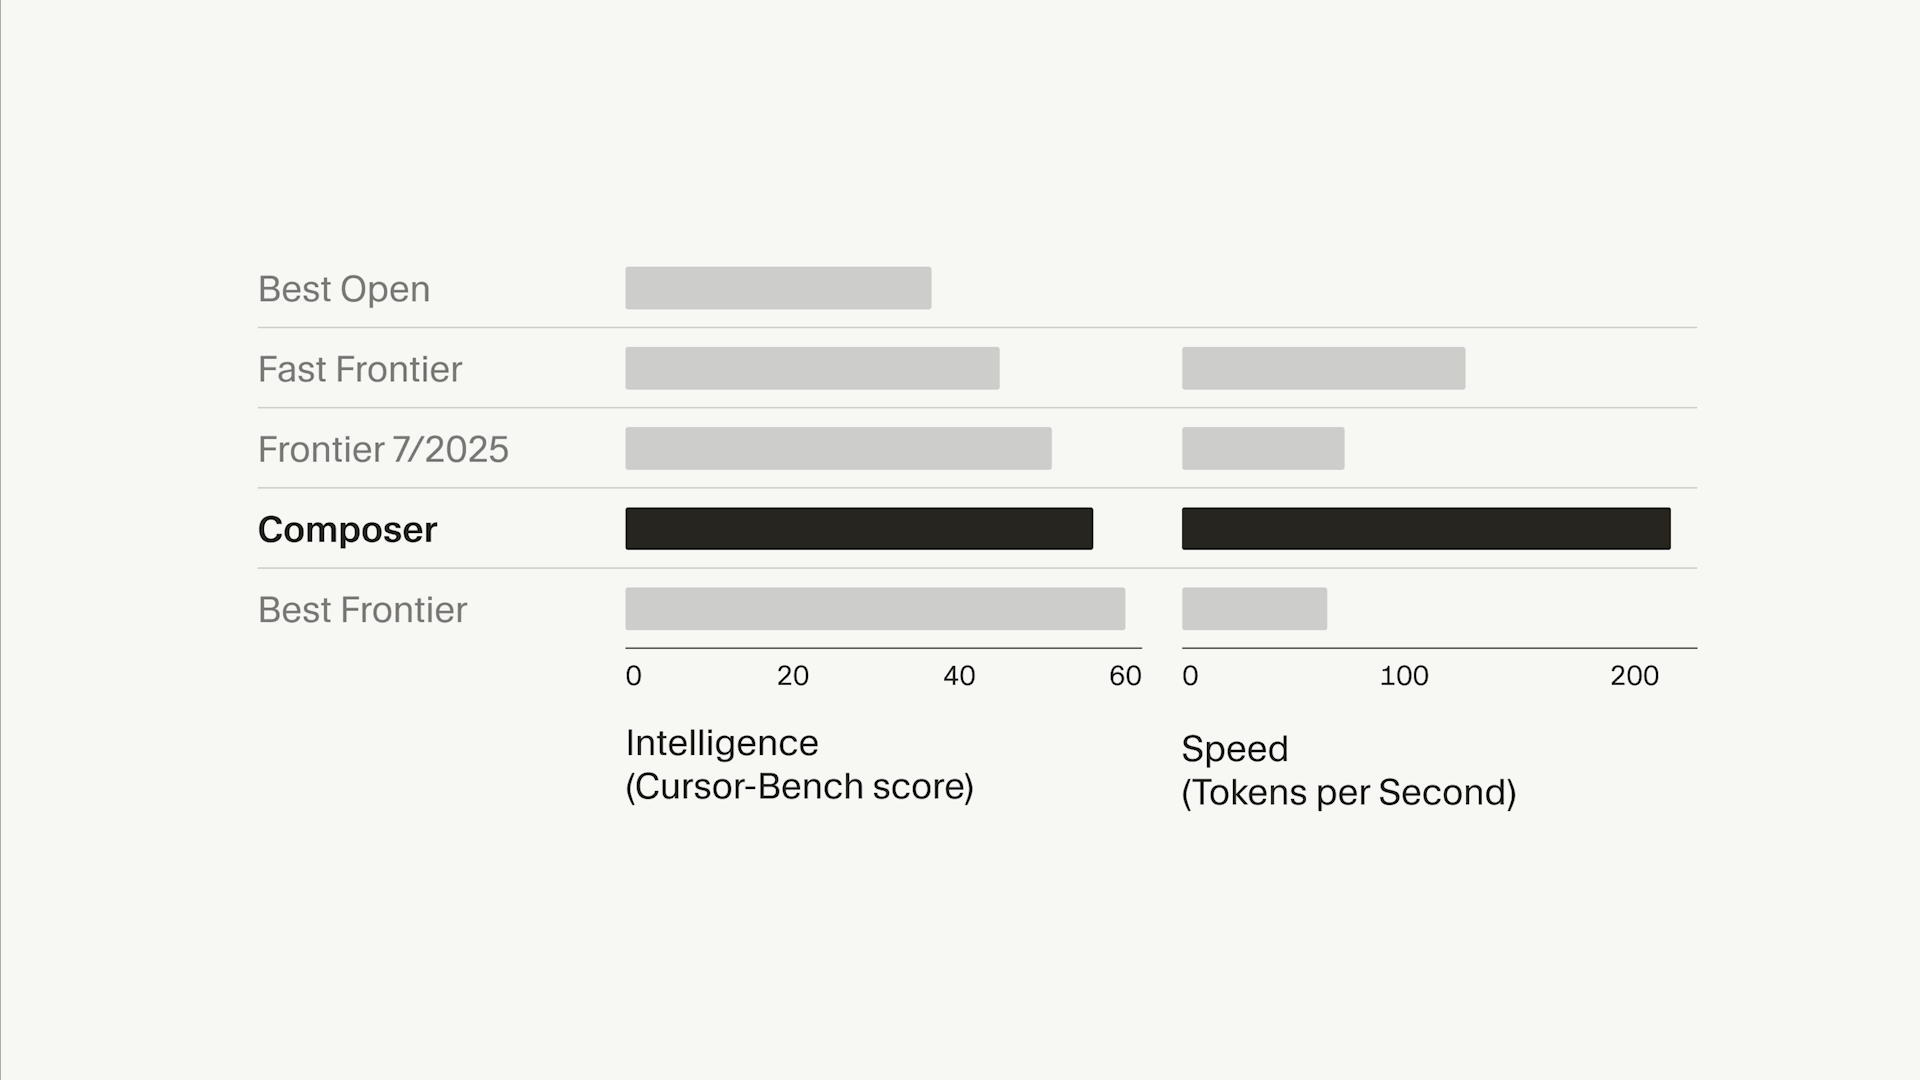
This new Composer model is designed to be:
- Fast — up to four times quicker than comparable models.
- Context-aware — it understands big projects and multiple files.
- Flexible — you can mix and match models: use a “heavy thinker” for planning, then let Composer quickly build and refactor.
This move makes Cursor less dependent on external APIs and gives them tighter control over performance and privacy.
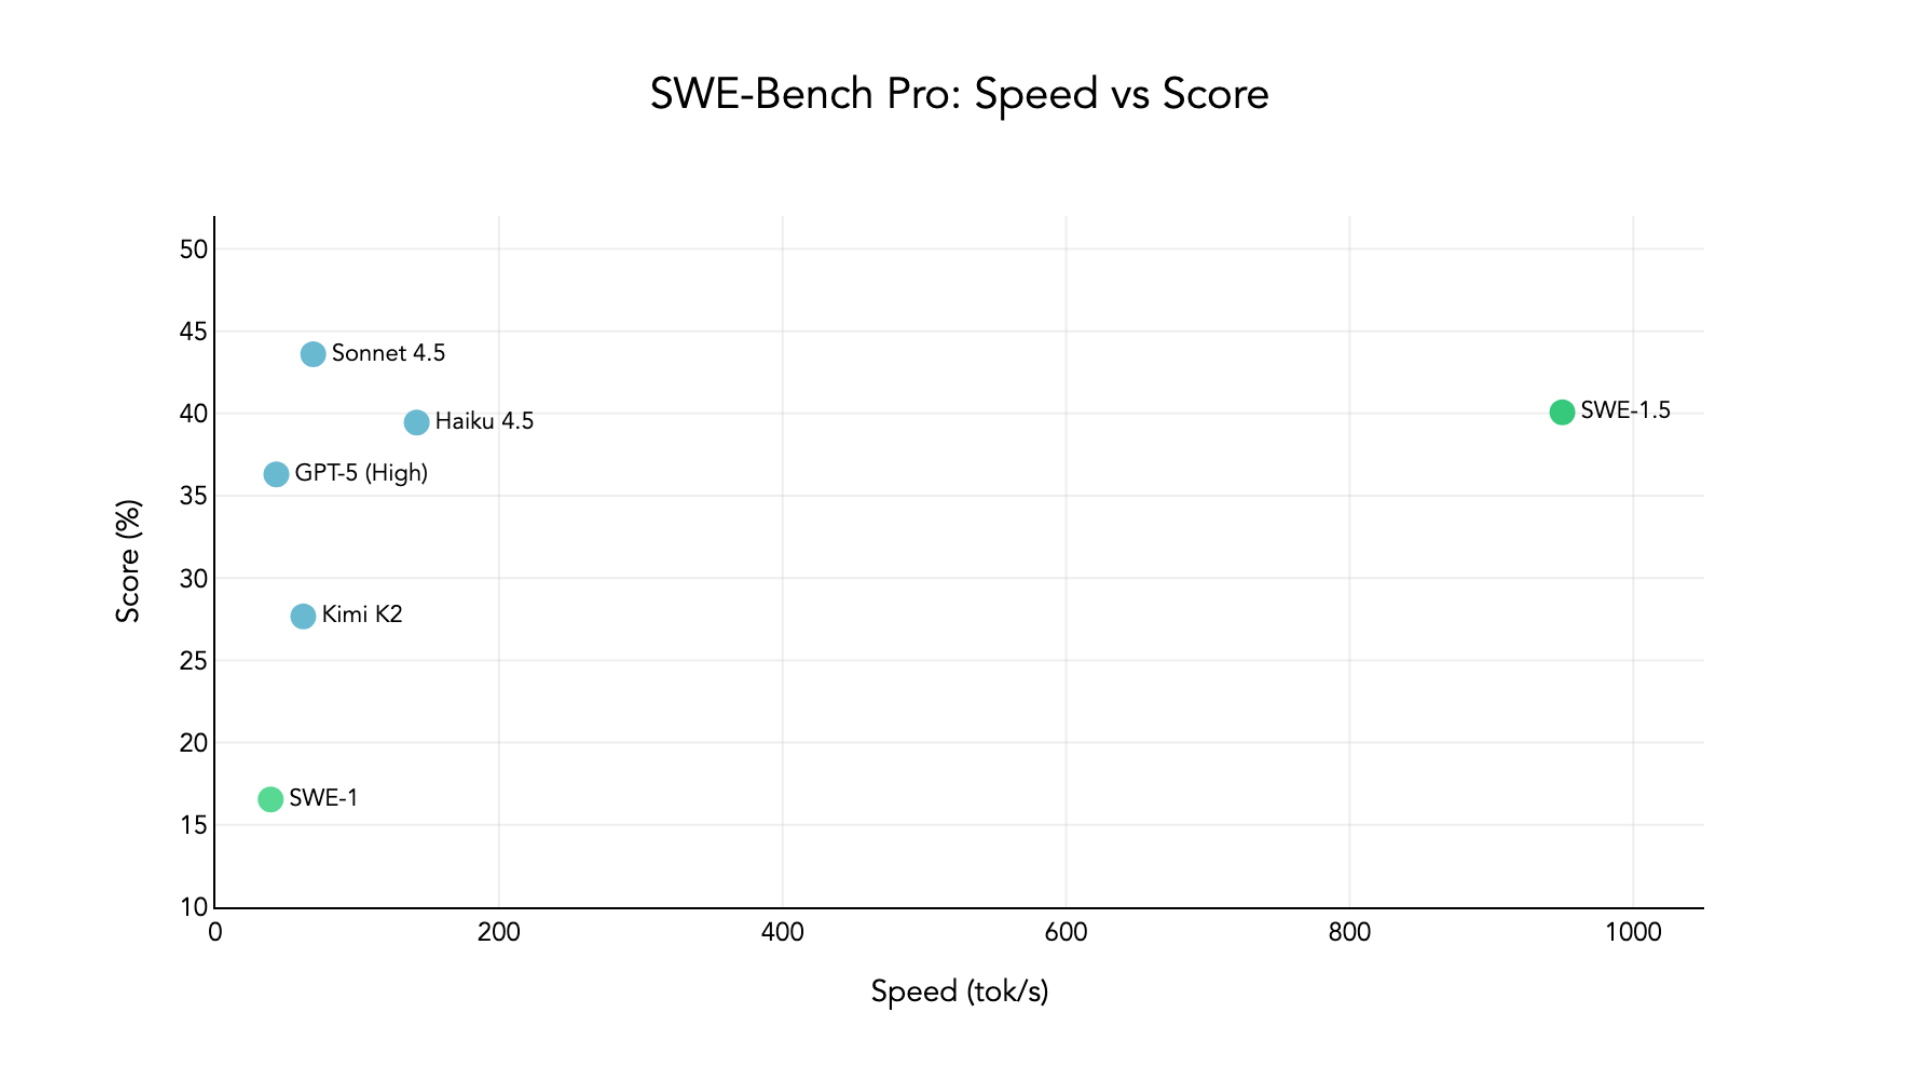
So now we see a growing trend of these IDEs creating their own in-house models — the other day I was talking about how Windsurf also just doubled down on their in-house SWE coding model with major new speed upgrades in version 1.5.
I can definitely see why this is happening.
I mean you already have millions of active users — why keep burning money on models you have no control over — when you have the resources to make one — that could be much cheaper in the long run?
And will give you far more control and predictability.
And not just that — they also have the advantage of being able to train these in-house models on real data coming from their IDEs — and I don’t mean just code.
Models like GPT-5 and Gemini can only train on static code — but in-house IDE models can train on the entire real-time flow of actions that happen throughout development.
Which makes they way better for features like autocomplete and Tab to Jump.
They see how devs jump within and across the different types files and the changes they make in different scenarios — something that regular models can never give you.
4. Native browser & DOM Inspector
Cursor now ships with a native browser and DOM inspector wired directly into the IDE — so agents can see what’s actually happening in your app instead of hallucinating around it.
They can click through flows, inspect live elements, read network responses, and propose fixes or UI tweaks against the real DOM — all without leaving your editor or juggling external windows.
5. Voice input for devs
Personally I’ll always prefer typing.
But you may prefer using your melodious voice instead of typing in mountains of paragraphs.
Voice input lets you explain problems the way you would to a coworker at the whiteboard:
“Scan this service and repo, find where we handle Stripe webhooks, and suggest a safer retry flow.”
Cursor turns that into precise actions and edits, so your thinking speed isn’t capped by your typing speed.
Together these make Cursor a more practical tool for real-world development — not just a playground for AI code generation.
Cursor 2.0 isn’t trying to replace developers — it’s trying to multiply them. By letting AI agents safely explore, propose, and test changes, it takes us closer to a world where coding feels less like typing and more like designing systems together.