Tari Ibaba

Tari Ibaba is a software developer with years of experience building websites and apps. He has written extensively on a wide range of programming topics and has created dozens of apps and open-source libraries.

Don’t waste your time reading docs

I was hopelessly pouring through coding books hoping for the knowledge to stick to my brain.

Reading and re-reading C++ books so I wouldn’t “forget” important string functions.

Memorizing huge swaths of random C# classes and methods (like seriously?)

But eventually I realized what a stupid waste of time this was.

I should never have paid so much attention to these random APIs and docs.

I should have focused on action.

I should have focused on general essential concepts instead of obsessing with specifics of ever-changing languages and frameworks.

Why waste so much time on API specifics when you can easily look it up on Google?

Most of the knowledge docs give only matter on a need-to-know basis.

When I need it, I will search for it and be on my way.

And eventually it will stick to my brain after I search and use it enough times — which is why action is so important — you’ll have far greater efficiency and retention when you learn by doing rather than memorizing random facts.

Look, I don’t really need to know how to loop through an array in PHP or JavaScript or whatever beforehand.

But I need to understand iteration as a coding construct and how I can use it to solve problems.

Problem solving. Isn’t that what computing is all about?

If you’re new to coding and learning say Python, your goal is NOT to become a Python expert.

Your goal is to learn how to think like a computer.

This isn’t about Python.

You learned about Python variables so you can use data storage to solve problems.

You’ll learn about Python arrays and dictionaries so you can structure data effectively to solve problems.

You’ll learn about if statements so you can make dynamic decisions for all the different scenarios a problem may bring.

So you see you learn the tool not for the tool’s sake but for why it exists in the first place.
Now you can effortlessly swap out one tool for another.
New languages can be learned on the fly: Dart, PHP, C#, whatever.

Even “weird” languages like Lisp only take a bit of familiarization to figure out:

I’m sure you can tell what this does if you’ve been coding for a while

When you look at a new problem your mind computerizes it easily.

What are the inputs and outputs? And what’s the best to represent them for efficient storage and retrieval?

What sequence of transformations are needed to act on the data and inputs to get our desired result?

What are the conditions that alter the pathways through the sequence?

How do we break the data and the transformations into more manageable units at different levels of abstraction?

All this you can do without even writing a single line of code.

And that’s the thing — coding isn’t the typing. The typing is actually more of a passive activity.

The real coding was the thinking you did by asking all the questions the above to design the solution.

Once the solution has been fleshed out, implementation is a no-brainer, whether it’s C++, PHP, Dart or JavaScript.

Stop writing code comments

Most comments are actually a sign of bad code.

In the vast majority of cases developers use comments to explain terribly written code desperately in need of refactor.

But good code should explain itself. It should tell the full story.

❌ Before:

You did too much in one go and you know it — so you drop in a bad comment to explain yourself:

JavaScript
// Check if user can watch video if ( !user.isBanned && user.pricing === 'premium' && user.isSubscribedTo(channel) ) { console.log('Playing video'); } // codingbeautydev.com

✅ After:

Now you take things step-by-step, creating a clear and descriptive variable before using it:

Comment gone.

JavaScript
const canUserWatchVideo = !user.isBanned && user.pricing === 'premium' && user.isSubscribedTo(channel); if (canUserWatchVideo) { console.log('Playing video'); } // codingbeautydev.com

You see now the variable is here mainly for readability purposes rather than storing data. It’s a cosmetic variable rather than a functional one.

✅ Or even better, you abstract the logic away into a function:

JavaScript
if (canUserWatchVideo(user, channel)) { console.log('Playing video'); } function canUserWatchVideo(user, channel) { return ( !user.isBanned && user.pricing === 'premium' && user.isSubscribedTo(channel) ); } // codingbeautydev.com

Or maybe it could have been in the class itself:

JavaScript
if (user.canWatchVideo(channel)) { console.log('Playing video'); } class User { canWatchVideo(channel) { return ( !this.isBanned && this.pricing === 'premium' && isSubscribedTo(channel) ); } } // codingbeautydev.com

Whichever one you choose, they all have one thing in common: breaking down complex code into descriptive, nameable, self-explanatory steps eradicating the need for comments.

When you write comments you defeat the point of having expressive, high-level languages. There is almost always a better way.

You give yourself something more to think about; you must update the comment whenever you update the code. You must make sure the comment and the code it refers to stay with each other throughout the lifetime of the codebase.

And what happens when you forget to do these? You bring unnecessary confusion to your future self and fellow developers.

Why not just let the code do all the talking? Let code be the single source of truth.

Your var names are terrible

❌ Before: Lazy variable naming so now you’re using comments to cover it up:

JavaScript
// Calculate volume using length, width, and height function calculate(x, y, z) { return x * y * z; } calculate(10, 20, 30); // codingbeautydev.com

✅ After: Self-explanatory variables:

JavaScript
function calculate(length, width, height) { return length * width * height; } calculate(10, 20, 30); // codingbeautydev.com

✅ Even better, you rename the function too:

JavaScript
function calculateVolume(length, width, height) { return length * width * height; } calculateVolume(10, 20, 30); // codingbeautydev.com

✅ And yet another upgrade: Named arguments

JavaScript
function calculateVolume({ length, width, height }) { return length * width * height; } calculateVolume({ length: 10, width: 20, height: 30 }); // codingbeautydev.com

Do you see how we’ve completely exterminated comments?

Like just imagine if the comment was still there:

JavaScript
// Calculate volume using length, width, and height function calculateVolume({ length, width, height }) { return length * width * height; }

You can see how pointless this comment is now?

Oh but yet again, we have developers writing tons of redundant comments just like that.

I think beginners are especially prone to this, as they’re still forming the “mental model” needed to intuitively understand raw code.

So they comment practically everything, giving us pseudocoded code:

JavaScript
// Initialize num to 1 let num = 1; // Print value of num to the console console.log(`num is ${num})`;

But after coding for a bit, the redundancy of this becomes clear and laughable, worthy of r/ProgrammerHumor.

Delete commented out code

They’re ugly and wishy-washy.

I can’t STAND them!

You did it because you were scared you’ll need it in the future and have to start all over from scratch.

You should have used Git.

Okay you’re already using Git — well you shouldn’t have written such terrible commit messages. You should have committed regularly.

You knew that if you deleted the code, it’ll be hell to go through your vaguely written commits to find where it last existed in the codebase.

Comments worth writing?

1. TODO comments

Perfect for code tasks in highly specific part of the codebase.

Instead of creating a project task saying: “come up with something better than the for loop in counter/index.js line 2”

You just add a TODO comment there — all the context is already there

2. Public APIs

One reason people love Flutter is the amazingly extensive documentation — both online and offline:

These all came from the massive amount of comments in the codebase:

3. Why did I do this?

Sometimes you need to explain why code is a certain way from a bigger-picture perspective.

Like a warning:

JavaScript
// Keep it at 10 or else the server will crash in v18.6.0 const param = 10;

Or check out this from React’s source code:

Yeah it’s pretty damn tough to put that gigantic explanation into code form. Here comments do make sense.

Final thoughts

Always look for ways to show intent directly in code before pulling out those forward slashes.

Comments give you something else to think about and in most cases you actually need a refactoring.

Let code lead.

Why does [] == ![] return TRUE in JavaScript?

It’s hard to believe.

How can an Array not be an Array?

It makes no sense — [] is truthy and ![] should be false.

So how can [] equal false?

And this somehow doesn’t happen for other types like strings and numbers:

Are JavaScript arrays broken?

What happened here

Dump all the blame on the dangerous == operator.

This is just another instance of why we always tell new JavaScript devs to NEVER use it (ever).

Especially if they’ve already been coding with stubbornly strict languages like C#.

At first glance, it doesn’t seem like there’s anything wrong with ==:

Plain text
// C# int num = 2; Console.WriteLine(num == 10); // false Console.WriteLine(num == 2); // true
JavaScript
// JS let num = 2; console.log(num == 10); // false console.log(num == 2); // true

But now look what happens here:

Plain text
// C# int num = 2; // ❌ Error: can't compare int and string Console.WriteLine(num == "2"); // false

But look what happens in JavaScript:

JavaScript
// JS let num = 2; console.log(num == "2"); // true?

JavaScript auto-casts the string into a number!

This is one of the many frustrations people have with JavaScript that made TypeScript come along.

Instead of just failing and stopping us from doing dumb stuff, it just goes “Mhmm okay, if you say so…”

JavaScript
// Huh? console.log(null == undefined); // true // Converts array to string console.log([1,2,3] == "1,2,3"); // true (seriously?)

So what do you think REALLY happens in [] == ![], behind the scenes?

First of all, empty arrays are truthy in JavaScript, so ! acts on it to make it false

JavaScript
[] == false

So now surprise surprise, we suddenly find ourselves comparing an Array to Boolean. Obviously not gonna end well.

As we now know, JS doesn’t care so it just goes ahead — this time casting the Boolean to the equivalent number

JavaScript
[] == Number(false) [] == 0

Next, thanks to some garbage rules that you don’t need to ever know, [] turns into… an empty string?

JavaScript
// don't ask "" == 0

And now finally it converts "" into… a Number:

JavaScript
0 == 0 // true

So what’s the solution to avoid this nonsense?

Always use the strict equality operator === (and I mean always).

JavaScript
// font ligatures make triple equal look nicer console.log(2 == '2'); // ❌ true console.log(2 === '2'); // ✅ false console.log([] == ![]); // ❌ true console.log([] === ![]); // ✅ false

There is no scenario imaginable in the universe where == can be used that === can’t be

And now with ===, your lovely VS Code editor suddenly comes alive to stop us from doing something like this:

It still compiles though — unless you use TypeScript

But before it was asleep:

But what about [] == []?

Okay this makes sense, but what then could possibly explain this:

Surely the == can’t be blamed here. They have the same type, don’t they?

Yes they do.

The problem is that JavaScript compares arrays by reference. Not by value.

They may have exactly the same value, but as long they don’t refer the same object in memory, they will never be equal in the eyes of == and ===

JavaScript
// these are creating new array objects // on the fly, stored at different locations console.log([] == []); // false console.log([] === []); // false // store new object this time const arr = []; // reuse it const tari = arr; // both vars refer to the same object in memory console.log(arr == tari); // true console.log(arr === tari); // true

And this is how it is for objects in general too:

JavaScript
console.log({} === {}); // false const person1 = { name: 'tari ibaba' }; const person2 = { name: 'tari ibaba' }; const person3 = person1; // Only person1 and person3 point to the same object console.log(person1 === person2); // false console.log(person1 === person3); // true console.log(person2 === person3); // false

But of course, this isn’t the case for our core primitive values — strings, numbers, and booleans:

JavaScript
console.log('tari ibaba' === 'tari ibaba'); // As we saw previously console.log(2 === 2);

So what do you do when you want to compare arrays by their element values?

If it’s sorted you can use JSON.stringify():

JavaScript
function arraysEqual(array1, array2) { return JSON.stringify(array1) === JSON.stringify(array2); }

Otherwise, you go for the more generic length and every() combo:

JavaScript
function arraysEqual(array1, array2) { return ( array1.length === array2.length && array1.every((value, index) => value === array2[index]) ); }

Final thoughts

== is just one example of JavaScript’s looseness making it do things that make no sense in the real world.

Moral lesson: Always use strict equality, use TypeScript, and prioritize modern features.

How do computers actually understand the code you write?

How do computers actually understand the code we write?

It’s interesting how some people code for several years without ever learning these essentials. And often take it for granted.

How can a simple text command somehow control millions of screen pixels in a specific area with such incredible precision?

We take it for granted, but how does this soulless machine “know” that a random “console.log()” text means it should change the specific pixels at that point in the screen to match the string in the brackets?

How can text trigger interactions with systems and servers thousands of miles away in the blink of an eye, using raw electricity?

Let’s dive into a fundamental overview of how it all works.

Why coding matters

You see at their core, computers are nothing but a gigantic network of complex interconnected circuits.

Everything your computer does comes from having electric current flow through the circuit.

The core of computing is using these currents as vessels for real-world data.

In digital computing, there are only two states of current: On (1) or Off (0). Just like in a light switch.

We use these two states to pass messages (instructions) to the complex circuit (processor/CPU).

Because of the brilliant way we design the circuit, passing different instructions to the processor makes it “do” different things (a whole other subject on its own)

In a 1-bit processor, you only have 2 possible instructions — 1 or 0 (binary).

But to make a full-fledged computer we need room for much more than two instructions.

That’s why in practice, we use batches of 1s and 0s to represent as many instructions as we need.

Plain text
Possible instructions 1-bit processor: 1 and 0 2-bit processor: 11, 10, 01, 00 n-bit processor: 2^n possible instructions

We can represent them with a string of 1s and 0s. Or with hexadecimal numbers. Or with more human-friendly notation.

Plain text
// They're all the same instruction // These represent batches of electric signals in the real-world 1011100000000001000000000000000000000000 // Hex form B8 01 00 00 00 // Human-friendly -- Assembly language MOV EAX, 1

An instruction is like the smallest indivisible unit of any abstract action your computer can take — an atomic action.

On their own, they do incredibly basic things — adding binary numbers, moving current state from one part of the circuit to another, etc.

But the real power of computing comes when processors execute a massive amount of instructions together (millions and billions).

Luckily this isn’t a problem today as we have household processors of up to 3 GHz today — processing 3 billion instructions in a second (!).

When we code, we combine these instructions in unique ways to make amazing things happen.

Text to 1s and 0s

You could write a program by passing the electric currents directly to the processor as instructions.

You wouldn’t need any operating system or input device.

But unfortunately, you’d need sequences of thousands and millions of instructions to do anything meaningful with your computer.

It will take you several weeks and months to do something as simple as displaying a bunch of characters on the screen (like this).

That’s why we created expressive languages that could do in one line what takes dozens or hundreds of machine instructions.

Then we created programs to convert from those expressive languages to Assembly language and eventually to the machine instructions (a whole other subject on its own)

Programs that we call compilers.

Unlike our normal human languages, these expressive languages are incredibly precise with zero room for ambiguity.

So with compilers, we go from [C++] code like this:

JavaScript
int a = 2; int b = 3; int sum = a + b;

To Assembly code like this:

JavaScript
a: .long 2 b: .long 3 sum: .zero 4 __static_initialization_and_destruction_0(): push rbp mov rbp, rsp mov edx, DWORD PTR a[rip] mov eax, DWORD PTR b[rip] add eax, edx mov DWORD PTR sum[rip], eax nop pop rbp ret _GLOBAL__sub_I_a: push rbp mov rbp, rsp call __static_initialization_and_destruction_0() pop rbp ret

And eventually to the set of machine instructions — what we all call programs or apps.

But the CPU doesn’t run this machine code directly.

The generated machine code is different for every operating system — that’s why .exe files can only run on Windows, and .apk can only run on Android.

When the program runs, it’s the OS that sends the actual low-level instructions for the specific processor, according to whatever is in the program.

When you connect this processor to external devices like network adapters, speakers, monitors, and more, these instructions can transmit specialized signals to these peripherals, and incredible things happen.

Final thoughts

The magic lies in the unseen dance of circuits and logic.

Each line we write sparks a journey from human intent to digital action, as electricity interprets our commands through the language of 1s and 0s.

This profound synergy transforms our abstract ideas into a tangible, interactive digital realm, revealing the intricate beauty of computing’s core.

The 5 most transformative JavaScript features from ES12

ES12 was truly an amazing upgrade.

Packed with valuable features that completely transformed the way we write JavaScript.

Code became cleaner, shorter, and easier to write.

Let’s check them out and see the ones you missed.

1. Promise.any()

Before ES12, we already had Promise.all() and Promise.allSettled() to wait for an entire group of Promises.

There were several times when we’d have several Promises but only be interested in whichever one resolved first.

So Promise.any() had to come into the picture:

JavaScript
async function getHelpQuickly() { const response = await Promise.any([ cautiousHelper(), kindHelper(), wickedHelper(), ]); console.log(response); // Of course! } async function cautiousHelper() { await new Promise((resolve) => { setTimeout(() => { resolve('Uum, oohkaay?'); }, 2000); }); } async function kindHelper() { return 'Of course!'; } function wickedHelper() { return Promise.reject('Never, ha ha ha!!!'); } // codingbeautydev.com

One interesting thing to note: even though any() resolves immediately, the app doesn’t end until all the Promises have resolved.

2. replaceAll()

Yes we already had replace() for quickly replace a substring within a string.

JavaScript
const str = 'JavaScript is so terrible, it is unbelievably terrible!!'; const result = str.replace('terrible', 'wonderful'); console.log(result); // JavaScript is so wonderful, it is unbelievably terrible!! // Huh? // codingbeautydev.com

But it only did so for the first occurrence of the substring unless you use a regex.

So ES12 gave us now we have replaceAll() to replace every single instance of that substring.

JavaScript
const str = 'JavaScript is so terrible, it is unbelievably terrible.'; const result = str.replaceAll('terrible', 'wonderful'); console.log(result); // JavaScript is wonderful, it is unbelievably wonderful. // Now you're making sense! // codingbeautydev.com

3. WeakRefs

As from ES12, a JavaScript variable can either be a strong reference or a weak reference.

What are these?

The Strong Refs are our normal everyday variables. But the Weak Refs need to be explicitly created with WeakRef():

JavaScript
const strongRef = { name: 'Tari Ibaba' } const weakRef = new WeakRef(strongRef); // codingbeautydev.com

JS variables are just references to the actual object in memory.

That’s why we can have multiple references to the same object.

JavaScript
const person = { name: 'Tari Ibaba' }; const me = person; // modifies the actual object that `me` points to person.site = 'codingbeautydev.com'; console.log(me.site); // codingbeautydev.com

But what’s the difference between a strong ref and a weak ref?

Well in programming we have something garbage collection, which is when unneeded objects are removed from memory to save resources.

In JavaScript, objects are automatically marked for garbage collected when all the strong ref variables pointing to it have become unreachable — out of scope:

The object person and me both point to is put on the destruction queue once func() runs.

JavaScript
func(); // 💡`person` and `me` are unreachable here function func() { // 💡this object will be marked for garbage collection // after this function runs const person = { name: 'Tari Ibaba' }; const me = person; person.site = 'codingbeautydev.com'; console.log(me.site); // codingbeautydev.com }

But look what happens here:

Even person went out of scope after func() finished, we still had me, a global strong reference.

JavaScript
let me; func(); // 💡one strong reference (`me`) is still reachable // ✅ Can always access object console.log(me.site); function func() { // 💡this object will NOT be garbage collected // after this function runs const person = { name: 'Tari Ibaba' }; me = person; person.site = 'codingbeautydev.com'; console.log(me.site); // codingbeautydev.com }

But what if me was a weak reference?

Now after func() executes, person would be the only strong reference to the object.

So the object will be marked for garbage collection:

JavaScript
let me; func(); // No strong references reachable // ❌ Bad idea: object may not exist console.log(me.deref().site); function func() { // 💡this object will be marked for garbage collection const person = { name: 'Tari Ibaba' }; me = new WeakRef(person); person.site = 'codingbeautydev.com'; console.log(me.deref().site); // codingbeautydev.com }

So why do we need weak references?

The biggest use case for them is caching.

Look what happens here: processData() runs and we have a new object stored in our cache.

Even though data becomes unreachable, the object will never be garbage collected because it has a strong reference in the cache.

JavaScript
let cache = new Map(); processData(); function processData() { const url = 'api.tariibaba.com'; const data = fetchData(url); // process data for app... } async function fetchData(url) { // check cache const saved = cache.get(url); if (!saved) { const data = await (await fetch(url)).json(); cache.set(url, data); } return saved; }

But what if I want the object to be freed up after processData() exits?

I would use a WeakRef as the Map values instead:

JavaScript
let cache = new Map(); processData(); function processData() { const url = 'api.tariibaba.com'; const data = fetchData(url); // process data for app... // 💡the object will only exist in cache // in this function } async function fetchData(url) { // deref weak ref const saved = cache.get(url).deref(); if (!saved) { const data = await (await fetch(url)).json(); // ✅ Use a WeakRef instead cache.set(url, new WeakRef(data)); } return saved; }

4. Logical assignment operators

Lovely syntactic sugar from ES12.

We use them like this:

JavaScript
left ??= right; left ||= right; left &&= right; // codingbeautydev.com

Exactly the same as:

JavaScript
left = (left ?? right); left = (left || right); left = (left && right); // codingbeautydev.com

??=. Quickly assign a value to a variable *if* it is null or undefined (“nullish”).

JavaScript
user.preferredName ??= generateDumbUserName();

||=. Like ??=, but assigns the value for any falsy value (0undefinednull''NaN, or false).

JavaScript
user.profilePicture ||= "/angry-stranger.png";

And then &&=. Something like the reverse; only assigns when the value is truthy (not falsy).

JavaScript
user.favoriteLanguage = await setFavoriteLanguage(input.value); user.favoriteLanguage &&= 'Assembly'; // You're lying! It's Assembly!

5. Numeric separators

Tiny but impactful new addition that made big number literals more readable and human-friendly:

JavaScript
const isItPi = 3.1_415_926_535; const isItAvagadro = 602_214_076_000_000_000_000_000; const isItPlanck = 6.626_070_15e-34; const isItG = 6.674_30e-11; // Works for other number bases too... // codingbeautydev.com

The compiler completely ignores those pesky underscores — they’re all for you, the human!

Final thoughts

These are the juicy new JavaScript features that arrived in the ES12.

Use them to boost your productivity as a developer and write cleaner code with greater conciseness, expressiveness and clarity.

Promise.all() vs Promise.allSettled() in JS: The little-known difference

I can’t believe some developers think they are interchangeable.

They are not.

all() and allSettled() are much more different than you think.

So let’s say I decided to singlehandedly create my own ambitious new music app to finally take down Spotify.

I’ve worked tirelessly to make several music deals and have all the backend data ready.

Now I’m creating the app’s homepage: a shameless carbon copy of Spotify showing off daily mixes, recently played, now playing, and much more.

All this data will come from different API URLs.

Of course I wouldn’t be naive enough to fetch from all the URLs serially and create a terrible user experience (or would I?)

JavaScript
async function loadHomePage() { const apiUrl = 'music.tariibaba.com/api'; const dailyMixesUrl = `${apiUrl}/daily`; const nowPlayingUrl = `${apiUrl}/nowPlaying`; // ❌ Serial loading const dailyMixes = await ( await fetch(dailyMixesUrl) ).json(); const nowPlaying = await ( await fetch(nowPlayingUrl) ).json(); return { dailyMixes, nowPlaying }; }

No I wouldn’t.

So instead I use use Promise.all() to fetch from all these URLs at once:

Much better, right?

JavaScript
async function loadHomePage() { const apiUrl = 'music.tariibaba.com/api'; const dailyMixesUrl = `${apiUrl}/daily`; const nowPlayingUrl = `${apiUrl}/nowPlaying`; // Promise.all() ?? await Promise.all([ fetch(dailyMixesUrl), fetch(nowPlayingUrl), ]); return { dailyMixes, nowPlaying }; }

Wrong.

I just made the classic developer error of forgetting to handle the error state.

Let me tell you something: When Promise.all() fails, it fails:

JavaScript
async function loadHomePage() { const apiUrl = 'music.tariibaba.com/api'; const dailyMixesUrl = `${apiUrl}/daily`; const nowPlayingUrl = `${apiUrl}/nowPlaying`; // Promise.all() ?? try { await Promise.all([ fetch(dailyMixesUrl), fetch(nowPlayingUrl), ]); } catch (err) { // ❌ Which failed & which succeeded? We have no idea console.log(`error: ${err}`); } return { dailyMixes, nowPlaying }; }

What do you when one of those requests fail? Am I just going to leave that UI section blank and not try again?

But look what Promise.allSettled() would have done for us:

JavaScript
async function loadHomePage() { const apiUrl = 'music.tariibaba.com/api'; const dailyMixesUrl = `${apiUrl}/daily`; const nowPlayingUrl = `${apiUrl}/nowPlaying`; // ... // Promise.all() ?? try { const promises = await Promise.allSettled([ fetch(dailyMixesUrl), fetch(nowPlayingUrl), // ... ]); const succeeded = promises.filter( (promise) => promise.status === 'fulfilled' ); const failed = promises.filter( (promise) => promise.status === 'rejected' ); // ✅ now retry failed API requests until succeeded } catch (err) { // We don't need this anymore! console.log(`error: ${err}`); } return { dailyMixes, nowPlaying }; }

Now I could easily set up a clever system to tirelessly retry all the failed requests until they all work.

JavaScript
async function loadHomePage() { const apiUrl = 'music.tariibaba.com/api'; const dailyMixesUrl = `${apiUrl}/daily`; const nowPlayingUrl = `${apiUrl}/nowPlaying`; // Promise.all() ?? const pending = [ () => fetch(dailyMixesUrl), () => fetch(nowPlayingUrl), ]; while (pending.length > 0) { const promises = await Promise.allSettled( pending.map((pending) => pending()) ); const newPending = []; promises.forEach((promise, index) => { if (promise.status === 'rejected') { newPending.push(pending[index]); } }); pending = newPending; } return { dailyMixes, nowPlaying }; }

When all() is better

This is great, but I need to update a lot of data when a user plays a song.

The song’s stream count, the user’s history, recently played…

But the database I’m using is horrible and doesn’t have support for transactions / batched writes.

I need to find a way to make sure I can update all the data in their separate locations at the exact same time.

Luckily, Promise.all() is useful this time.

It’s all or nothing.

JavaScript
async function runTransaction(updates) { // updates are a list of DB actions try { // store db state, somehow... await Promise.all(updates); } catch (err) { // intelligently revert to previous state, somehow... } }

With all() I’m confident that if a single updates fails, it’s over.

And now I can even bring my smart auto-retry system here, but this time everything is getting retried, after this reversal.

Final thoughts

Promise.all() — If one of us fails, we all fail.

Promise.allSettled() — You are all on your own.

10 essential VS Code tips & tricks for greater productivity

73%.

Did you know that 73% of developers worldwide rely on the same code editor?

Yes, the 2023 Stack Overflow Developer Survey results are in, and yet again, Visual Studio Code was by far the most used development environment.

73% of
“Visual Studio Code remains the preferred IDE across all developers, increasing its use among those learning to code compared to professional developers”, survey.stackoverflow.co/2023

And we all know why: it’s awesome.

But are we fully exploring its potential? In this article, we unfold some compelling VS Code features that enhance productivity with local source control, animated typing, and rapid line deletion, amongst others. Let us start using them to achieve our coding goals faster than ever.

1. Timeline view: local source control

The Timeline view gives us local source control.

Many of us know how useful Git and other source control tools are, helping us easily track file changes and revert back to a previous point when needed.

So the Timeline view in VS Code provides an automatically updated timeline of important events related to a file, such as Git commits, file saves, and test runs.

The Visual Studio Code Timeline view is available by default in the Explorer pane.

Expand this view to see a list of snapshot of events related to the current file. Here it’s file saves, but also Git commits where the file was staged.

The Timeline view shows a list of snapshot of events related to the current file.

Hover over the snapshot item to view the date and time when VS Code made the snapshot.

Hover over the snapshot item to view the date and time when VS Code made the snapshot.

Select a snapshot item to see a diff view showing the changes between the file at the snapshot time and the file presently.

Select a snapshot item to see a diff view showing the changes between the file at the snapshot time and the file presently.

2. Autosave: no more Ctrl + S

Can you count how many times you’ve used this shortcut? You probably do it unconsciously now.

The Autosave feature automatically saves files as we work on them, removing the need for manual saving. With autosave, we eliminate Ctrl + S fatigue, save time, and gain certainty of always working with the latest changes to the files.

It’s not perfect though, and it’s up to you to weigh the pros and cons – which we comprehensively cover here.

Visual Studio Code without autosave.
No autosave.
Visual Studio Code with autosave.
Autosave enabled – the unsaved indicator no longer shows.

Use File > Auto Save to enable the feature easily.

File > Autosave enables autosave in VS Code.

3. Do anything with Command Palette

Almost anything you do in VS Code apart from typing is a “Command”.

Commands let us accomplish tasks within the editor, and they include file-related commands, navigation commands, editing commands, and terminal commands, each optimally designed to enhance different aspects of your editing experience.

So with Command Palette we simply search for a command and select to perform the associated action.

To open the Command Palette, use this keyboard shortcut:

  • Windows/Linux: Ctrl + Shift + P
  • Mac: Shift + Command+ P
The VS Code Command Palette.

As you guessed correctly, those keyboard shortcuts to the right are a faster way to run the commands with the keyboard.

The key benefit of the Command Palette over shortcuts is when there’s a command without a shortcut, or you’re looking for a command you’re not sure exists.

4. Go to file quickly

The mouse is too slow.

Yes, you can click on the file in the Explorer pane, but for a much faster alternative use Ctrl + P to search for and open a specific file in your project.

Use Ctrl + P to search for an open a specific file in a VS Code project.

Hold Ctrl and press Tab to cycle through the list of files currently open in an editor instance.

Hold Ctrl and press Tab to cycle through the list of files currently open in an editor instance.

You can even use Alt + Left and Alt + Right to quickly navigate between these open files.

All these are much faster ways to get to a file than using the cursor.

5. Go to line quickly

Jump, don’t scroll.

Quickly navigating to a line is invaluable during debugging when you need to encounter errors at specific line numbers. By jumping to those lines, you can examine the code in that particular context, evaluate variables, and troubleshoot the issue.

Use the Ctrl + G keyboard shortcut for this.

Use the Ctrl + G keyboard shortcut to quickly navigate to a particular line in Visual Studio Code.

6. Delete line quickly

You’ve got to the line now, what if you want to delete it?

Will you drag and drag to highlight and then press Delete? Will you tirelessly press Backspace until every character is gone?

Or, will you use the Ctrl + Shift + K shortcut to rapidly delete that and dozens more lines in a matter of seconds?

Use the Ctrl + Shift + K keyboard shortcut to quickly delete a line.

7. Enjoy typing with smooth cursor

VS Code has this smooth cursor feature that animates the cursor as it moves, like in MS Word. This makes typing feel more fluid and polished, as well as giving us a smoother and more natural feel as we navigate through the lines of code and place the cursor at different points.

Smooth scrolling in Visual Studio Code.

To turn it on, opens Settings UI in the Command Palette and search for “smoot caret”.

We are looking for Editor: Cursor Smooth Caret Animation setting, which has 3 possible options:

The "Editor: Cursor Smooth Caret Animation" setting enables smooth caret animation in Visual Studio Code.
  1. off: No smooth cursor animation
  2. explicit: Only animates the cursor when we explicitly place it somewhere in the code.
  3. on: Smooth cursor animation is always enabled – including when typing.

Set it to on to get the full visual experience.

8. Format code rapidly

Formatting is all about improving code readability by organizing it in a structured and consistent manner.

And if you’ve been doing this manually, you need to know that there’s a better way.

Yes, you need to start formatting code automatically with the Format Document command, easily accessible in the Command Palette. Depending on the current file’s language, a particular “default” formatter will be used to format the code using various rules of indentation, line length, braces and brackets, etc.

The "Format Document" command in the VS Code Command Palette.

While there’s a pretty decent built-in JS/TS formatter, for a more robust solution, I highly recommend the Prettier extension.

Format On Save in action in Visual Studio Code.
The Prettier formatter for VS Code.

After installing, you’ll set it as your default formatter.

When you use manual over autosave, there’s a feature you should enable to make formatting a bit easier:

Enabling the "Editor: Format On Save" setting in VS Code.
  • Editor: Format On Save: “Format a file on save. A formatter must be available, the file must not be saved after delay, and the editor must be shutting down”. It is disabled by default.

So with this setting on, VS Code will automatically format your code with the current default formatter when you save the file with Ctrl + S, as you saw in the above demo.

Format On Save in action in Visual Studio Code.

When you do autosave, it can get tedious to continuously open the Command Palette when you’re formatting every now and then. And that’s what keyboard shortcuts are for:

  • Windows: Shift + Alt + F
  • Mac: Shift + Option + F
  • Linux: Ctrl + Shift + I

I’m on Windows and personally, I don’t like this default keyboard shortcut; autosave makes me format every now and then, and Shift + Alt + F got agonizing after a while.

So I changed it to Ctrl + D, Ctrl + D – a keyboard shortcut chord that’s much easier to press and remember, and has no conflicting keybinding. I recommend you do the same.

9. Save time with multi-cursor editing

One of the wow moments in my earliest VS Code days, the multi-cursor editing lets you place multiple cursors at different points, and delete or insert the same text multiple times. This speeds up editing time and boosts productivity greatly, as we get repetitive tasks done efficiently with rapid code creation.

Of course, when editing, there’s always at least one cursor. Use Alt + Click to add more.

Add multiple cursors with Alt + Click in VS Code.

You can also easily add a cursor directly above or below the current line, with Ctrl + Alt + Down or Ctrl + Alt + Up.

Add a cursor below in Visual Studio Code with the Ctrl + Alt + Down keyboard shortcut.

These shortcuts call the Add Cursor Below and Add Cursor Above commands respectively.

10. Create new folder / file quickly

There’s no serious project where we don’t create new folders and files, and if there was a way to accelerate file/folder creation, all the time saved would add up to give us a significant productivity enhancement.

If you’ve been creating new files and folders in VS Code with the new file and new folder button, then yes, there is a way.

Creating a new file/folder in VS Code with the buttons take time.
Yeah, don’t do this.

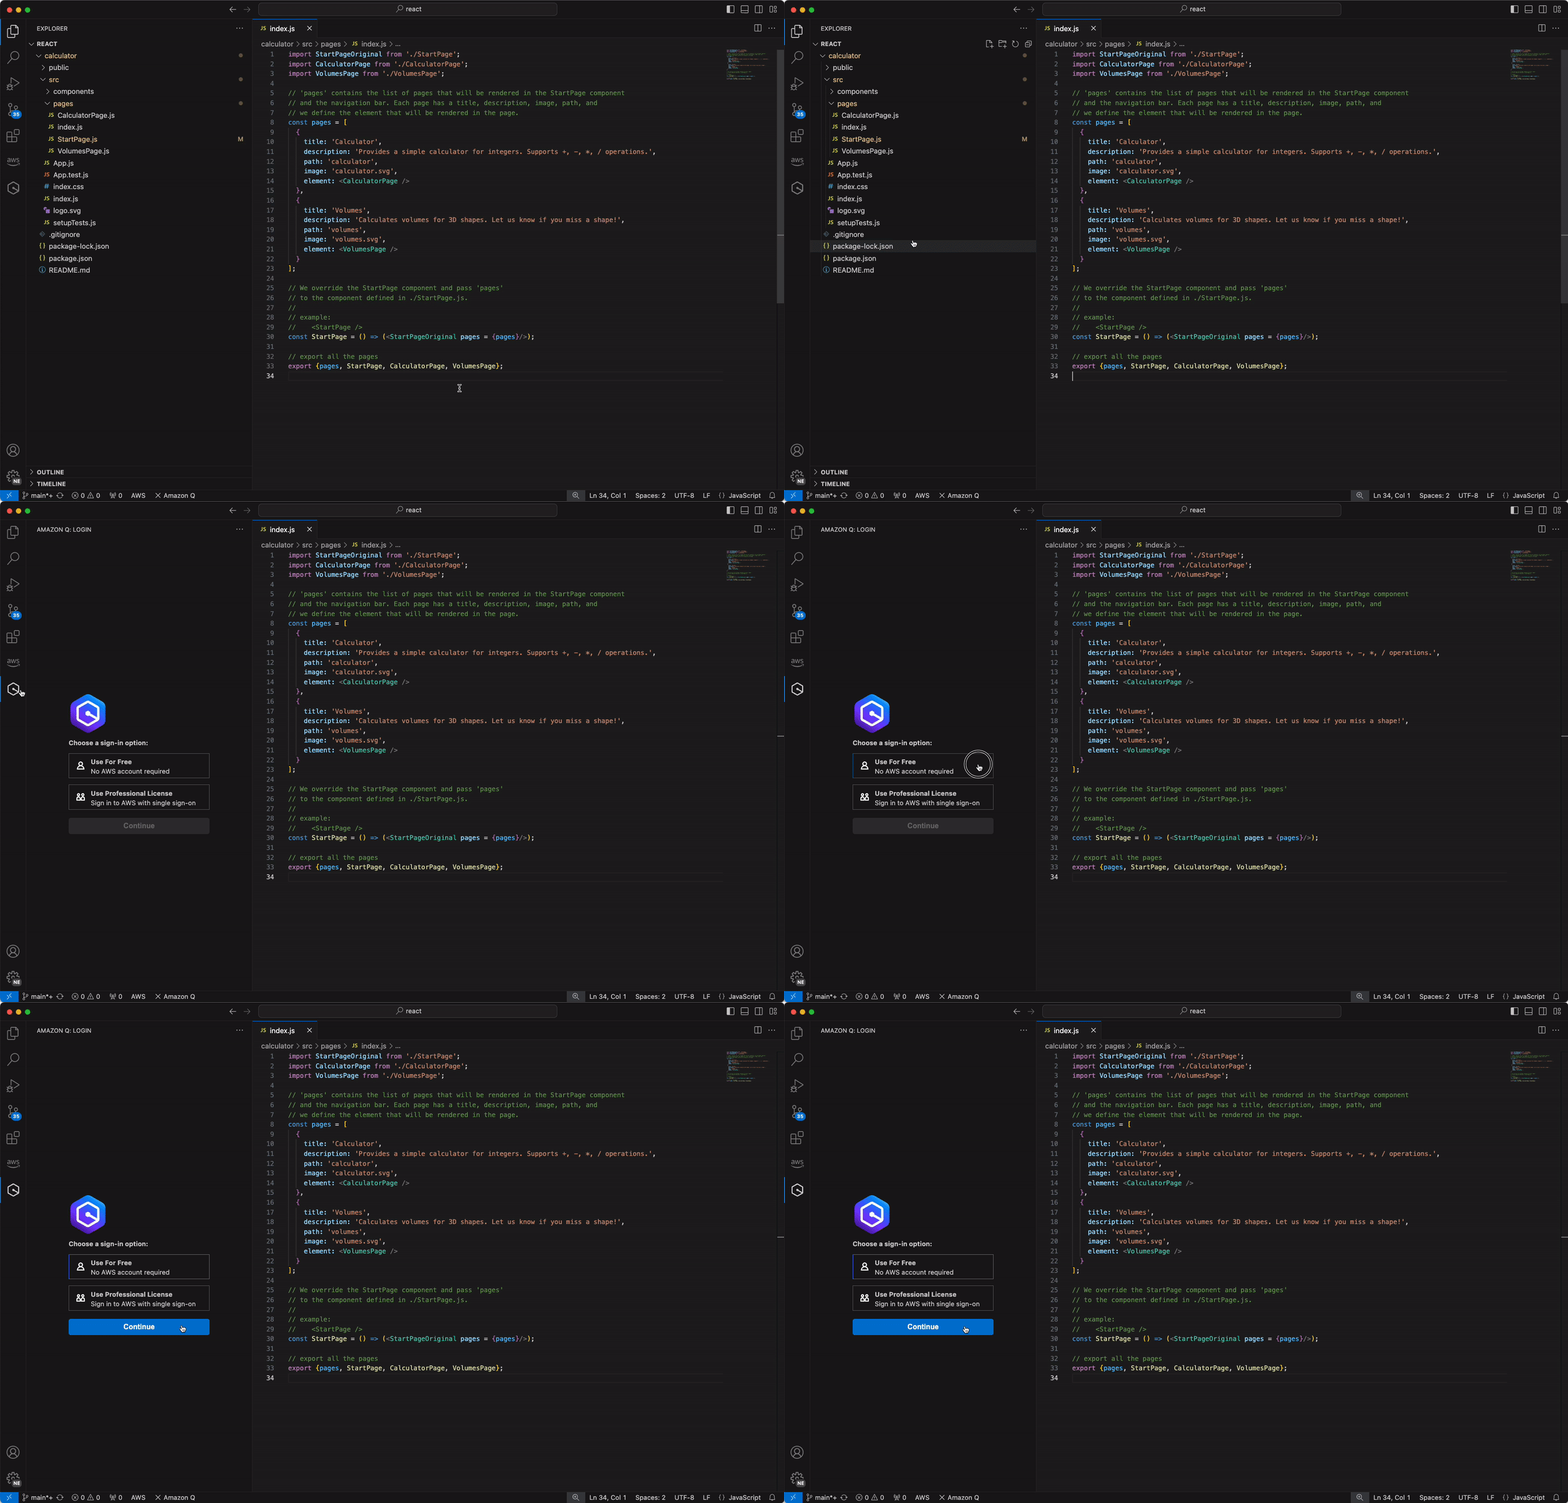
Instead of constantly moving your mouse to locate those small buttons, did you know you can just double-click on the Explorer panel to create a new file?

Double-clicking to create a new file in Visual Studio Code.

How about a new folder? Well, folders are nothing without files, and when you’re creating a new file, you can easily use the / character to indicate a hierarchy and create new folders and sub-folders to contain that file.

Using the forward-slash (/) to indicate a hierarchy and create new folders and sub-folders to contain that file
The utils folder is created to contain index.js.

It would be even more efficient to use keyboard shortcuts, which is what I did.

As a former Atom fan, I had quickly gotten used to the A and Shift + A shortcuts for creating new files and folder respectively; I knew what I had to do.

Creating a new file/folder in VS Code with keyboard shortcuts.
Create shortcuts to create a new file/folder in VS Code.

Since A and Shift + A are obviously keys used to code, I included the when values here to make sure they only create a new file/folder when the Explorer pane has focus and there’s no active cursor in the current editor.

So to use these shortcuts when typing, you’ll have to focus on the explorer pane first; click on it, or use Ctrl/Command + Shift + E.

Key takeaways

  • Enable local source control with Timeline view; available in Explorer pane by default.
  • Autosave files with File > Autosave.
  • Run commands in Command Palette with Ctrl + Shift + P or Shift + Command + P.
  • Go to a file with Ctrl + P, navigate between open files with Alt + Left/Right or Ctrl + Tab.
  • Go to a line with Ctrl + G.
  • Delete a line with Ctrl + Shift + K
  • Enable smooth typing with Editor: Cursor Smooth Caret Animation setting.
  • Format code with Format Document command, use Prettier, change shortcut to Ctrl + D, Ctrl + D
  • Use multiple cursors at once with Alt + Click, Ctrl + Alt + Up/Down adds one above/below
  • Move a line up or down with Alt/Option + Up/Down in Windows/Mac
  • Create a new file by double-clicking the Explorer pane or set a custom keyboard shortcut. Create a new file in a new folder with “folder/file.ext

Check out the VS Code Key Bindings docs to learn more about keyboard shortcuts and how to customize them. It includes a complete list of all the default VS Code shortcuts in your operating system.

Final thoughts

Visual Studio Code is more than just a text editor—it’s a powerful tool that, when mastered, can significantly boost your productivity and streamline your coding workflow. The ten tips and tricks we’ve explored are just the tip of the iceberg. As you continue to navigate through VS Code, you will discover a myriad of other features and shortcuts that will further enhance your coding experience. So, keep exploring, keep learning, and remember: the key to efficient coding lies not just in the code itself, but also in the tools you use to write it.

Wow, Google’s new robot can play table tennis now

I saw this incredible demonstration recently and was seriously impressed.

It’s powerful AI from none other than Google DeepMind, the geniuses behind that god-level chess-playing program, AlphaZero.

They’ve conquered the mental realm of chess and Go (unfortunately), so now they’re trying to conquer the physical realm of sports.

(And by the way, they’ve been working on AlphaCode, to destroy all programming jobs — should we be worried?)

And they’re already well on their way: The robot destroyed every single player it faced, at the beginner level.

55% of every intermediate-level player it played against.

For a sport like tennis, not only does the AI need sophisticated algorithms for intelligent decision-making.

It also needs physical components for quick reactions and precise movements to adequately make those decisions in the real world.

So this is the biggest problem that makes it impossible for an expert system or classical algorithm to have any chance:

How can we track this tiny, rapidly moving ball, predict its trajectory, and respond quickly and accurately according to the rules of the game?

Well, like in every problem in Computer Science and programming, it all comes back to input, processing, output.

Inputs

We only need visual input here.

And of course, you know the standard way computers receive visual input.

So the robot has multiple high-speed cameras to constantly capture images at an impressive rate of 125 images per second.

All these images are rapidly fed into a neural network that tracks the ball’s position in real time.

With this position, it can calculate key variables like speed and trajectory.

Processing

For processing the robot has two levels of control.

First there are the low-level controllers, a bunch of specialized neural networks trained to execute specific table tennis skills: backhand drives, forehand topspin… basically anything you could normally do with the ball as a human.

Then we have the high-level controller for more abstract decision-making. It processes the inputs to decide which atomic skill to perform.

I think it’s just like how our brains have regions for higher-level processing like the prefrontal cortex, and then other regions like the motor cortex for lower-level for planning and executing motion.

Output

All that processing would be useless if it couldn’t do anything in the real world; It needs to move.

That’s why the robot has a powerful IRB 1100 robotic arm, allowing it to easily reach almost any part of the table to quickly strike the ball.

In a way you could say the low-level controllers are the output of the high-level one’s processing, but they also do their own processing.

It can be better

It beat all the beginners and much of the intermediates.

But how many advanced players did it beat?

Zero.

It was just too slow for those masters.

One reason for this is that it takes quite some time for the sensors to read input, and also for the actuators to carry out the output in the real world.

It also seems to have issues with balls that are too low/high, or have too much spin.

Early beginnings thought, and overall it’s a great system showing off serious progress being made in AI and robotics.

I hacked Firebase with Redux to get free Web socket hosting (bye Pusher)

I was planning a powerful real-time app so Web Sockets was essential.

Unfortunately, all the Web Socket hosting options I found were too costly or complex to set up.

So, I hacked Firebase to get Web Sockets for free with an innovative trick from Redux.

Web sockets great cause unlike our classic HTTP request-response style, the web socket server can send several messages to multiple connected clients in real time without any need for a request.

Firebase Firestore is free and has this powerful real-time ability by default, but there was a major problem.

Firestore is data-centric and client-centric

But Web Sockets are action-centric and server-centric.

As a client in Web Sockets, you send event messages through channels and the server uses them to decide what to do with the data.

It has complete control, and there’s no room for malicious manipulation from any user.

JavaScript
// channel to listen for events in server channel.bind('sendChatMessage', () => { // modify remote database // client doesn't know what's happening });

But in Firestore, you dump the data in the DB and you’re done. The client can store whatever they want. Anyone can access anything in your DB once they have the URL.

JavaScript
// client can do anything const handleSendChatMessage = ({ content, senderId }) => { const messagesRef = collection( `users/${userId}/messages` ); addDoc(messagesRef, { content: 'whatever I want', senderId: 'whoever I want', timestamp: new Date(), }); };

Sure, you can add “security rules” to protect certain data paths:

But it’s woefully inadequate compared to the flexibility and remote control that real Web Socket servers like Pusher provide.

And yes there was Pusher, but it only allowed a measly amount of free concurrent connections, and in this app, all my users needed to be permanently connected to the server, including when they closed the app.

My delusions of grandeur told me I’d be paying quite a lot when thousands and millions of people start using the app.

But what if I could make Firebase Firestore act like a real server and have complete control of the data?

I’d enjoy the generous free limits and have 1 million concurrent connections.

What I did

I needed to transform Firestore from data-centric to action-centric.

But how exactly could I do this? How could I bring channels to Firestore and create some sort of “server” with full power to regulate the data?

The answer: Redux.

But how? How does Redux have anything to do with Firebase?

Well, it was Redux that helped transform vanilla React from data-centric:

JavaScript
const handleSendChatMessage = (content, senderId) => { // sets messages directly setMessages((prev) => [...prev, { content, senderId }]); };

To action-centric:

JavaScript
const handleSendChatMessage = (content, senderId) => { const action = { type: 'sendChatMessage', payload: { content, senderId }, }; dispatch(action); };

Now the responsibility for modifying the data is in the hands of the reducers, just like in a Web Socket or HTTP server.

  • Actions: Sending a real-time message in a channel from client to server
  • Reducer: Handling the message and modifying the data in the Web Socket server

So I needed to bring actions and reducers to Firestore somehow. And eventually, I saw that it all came down to the schema.

Actions

To replicate actions and action dispatching I created a Firestore collection of channels for different topics.

Every channel is a Firestore document with its own subcollections for each user to receive real-time messages from them.

To send an event through the channel, the client simply adds it to its own subcollection in the channel.

JavaScript
const handleSendChatMessage = async ({ content }) => { const channel = 'chat1'; const actionsRef = collection( getFirestore(), `channels/${channel}/${userId}` ); await addDoc(actionsRef, { channel: 'sendChatMessage', payload: { content, }, }); };

We can abstract this into a function to make it easier to reuse:

JavaScript
const handleSendChatMessage = async ({ content }) => { send('sendChatMessage', { content }); };
JavaScript
async function send(channel, data) { const actionsRef = collection( getFirestore(), `channels/${channel}/${userId}` ); await addDoc(actionsRef, { channel: channel, payload: data, }); }

Reducers

Now I needed to add the action handling to modify the data.

I did this by creating a Firebase Function triggered anytime a client adds a new action to the collection stream:

JavaScript
exports.handleEvent = onDocumentCreated( 'channels/{channelId}/{userId}/{eventId}', (snap, context) => { const event = snap.data(); const { payload: { content }, } = event; const { channelId, userId } = context.params; switch (event.type) { case 'sendChatMessage': // 👇 actual data modification db.collection(`chats/${channelId}/messages`).add({ content, senderId: userId, timestamp: FieldValue.serverTimestamp() }); } } );

So the data would live side-by-side with the action stream collection in the same Firestore DB:

No user will ever be able to access this data directly; Our security rules will only ever them to send messages through their subcollection in the channels collection.

Receiving real-time messages from the server

I create a special subcollection within every channel, exclusively for events from server to clients.

Here I relay the new message to other users in the chat after storing the data.

JavaScript
exports.handleEvent = onDocumentCreated( 'channels/{channelId}/{userId}/{eventId}', async (snap, context) => { // ... switch (channel) { case 'sendChatMessage': // ... const channelRef = db.doc(`channels/${channelId}`); const otherUserIds = (await channelRef.get()) .data() .userIds.filter((id) => id != senderId); const serverEventsRef = db.collection( `channels/${channelId}/server` ); serverEventsRef.add({ type: 'sendChatMessage', targetIds: otherUserIds, }); } } );

Now just like I added Cloud Function triggers in the server, I add client-side Firestore listeners for the server sub-collection:

One key difference is the filtering by targetIds to only get the messages meant for this client:

JavaScript
useEffect(() => { onSnapshot( query( collection(`channels/${chatId}/server`), // ✅ filter by targetId where('targetIds', 'array-contains', userId) ), (snapshot) => { snapshot.docs.forEach((doc) => { const action = doc.data(); switch (action.type) { case 'sendChatMessage': // add message to list } }); } ); }, []);

And I could also abstract this logic into a function to use it several times:

JavaScript
useEffect(() => { listen('sendChatMessage', (data) => { console.log(data); }); }, []);
JavaScript
function listen(channel, callback) { onSnapshot( query( collection(`channels/${channel}/server`), where('targetIds', 'array-contains', userId), // ✅ filter by type where('type', '==', channel) ), (snapshot) => { snapshot.docs.forEach((doc) => { const event = doc.data(); callback(event); }); } ); }

So with this, I’d fully replicated real-time server-centric Web Socket functionality in Firebase without spending a dime.

Would work perfectly in Realtime Database too.

bind() vs call() vs apply() in JavaScript: The little-known difference

Every developer should fully understand how they work and be able to discern the subtle differences between them.

So you know, JS functions are first-class citizens.

Which means: they’re all just object values — all instances of the Function class, with methods and properties.

So bind(), apply(), and call() are 3 essential methods every JavaScript function has.

Were you with me in the painful early days of React; when we still did this? 👇

This was just one of the multiple applications of bind() — a seriously underrated JavaScript method.

JavaScript
// damn class components are such a chore to write now import React from 'react'; class MyComponent extends React.Component { constructor(props) { super(props); } greet() { alert(`Hi, I'm ${this.props.name}!`); } // remember render()? render() { return ( <button onClick={this.greet.bind(this)}>Click me</button> ); } } export default MyComponent;

sayName() would be a mess without bind() — the alert() would never work.

Because internally React is doing something fishy with this method that completely screws up what this means inside it.

Before sayName would have had absolutely no problems showing the alert — just like in this other class:

JavaScript
class Person { props = { name: 'Tari' }; greet() { console.log(`Hi, I'm ${this.props.name}!`); } } const person = new Person(); person.greet();

But guess what React does to the greet event handler method behind the scenes?

It reassigns it to another variable:

JavaScript
class Person { props = { name: 'Tari' }; greet() { console.log(`Hi, I'm ${this.props.name}!`); } } // reassign to another variable: const greet = Person.prototype.greet; // ❌ bad idea greet();

So guess what happens to this — it’s nowhere to be found:

This is where bind comes to the rescue — it changes this to any instance object you choose:

So we’ve binded the function to the object — the bind target.

(I know it’s “bound” but let’s say binded just like how we say “indexes” for “index” instead of “indices”).

It’s immutable — it returns the binded function without changing anything about the original one.

And this lets us use it as many times as possible:

vs call()

There’s only a tiny difference between call and bind

bind creates the binded function for you to use as many times as you like.

But call? It creates a temporary binded function on the fly and calls it immediately:

JavaScript
class Person { constructor(props) { this.props = props; } greet() { console.log(`Hi, I'm ${this.props.name}`); } } const person = new Person({ name: 'Tari' }); const greet = Person.prototype.greet; greet.bind(person)(); greet.call(person);

So call() is basically bind() + a call.

But what about when the function has arguments? What do we do then?

No problem at all — just pass them as more arguments to call:

JavaScript
class Person { constructor(props) { this.props = props; } greet(name, favColor) { console.log( `Hi ${name}, I'm ${this.props.name} and I love ${favColor}` ); } } const person = new Person({ name: 'Tari' }); const greet = Person.prototype.greet; // bind(): normal argument passing to binded function greet.bind(person)('Mike', 'blue🔵'); // call(): pass as more arguments greet.call(person, 'Mike', 'blue🔵');

And you can actually do the same with bind():

JavaScript
// the same thing greet.bind(person)('Mike', 'blue🔵'); greet.bind(person, 'Mike', 'blue🔵')();

vs apply()

At first you may think apply() does the exact same thing as call():

JavaScript
class Person { constructor(props) { this.props = props; } greet() { console.log(`Hi, I'm ${this.props.name}`); } } const person = new Person({ name: 'Tari' }); const greet = Person.prototype.greet; greet.call(person); // Hi, I'm Tari greet.apply(person); // Hi, I'm Tari

But just like bind() vs call() there’s a subtle difference to be aware of:

Arguments passing:

JavaScript
class Person { constructor(props) { this.props = props; } greet(name, favColor) { console.log( `Hi ${name}, I'm ${this.props.name} and I love ${favColor}` ); } } const person = new Person({ name: 'Tari' }); const greet = Person.prototype.greet; //💡call() -- pass arguments with comma separated greet.call(person, 'Mike', 'blue🔵'); // Hi, I'm Tari //💡apply() -- pass arguments with array greet.apply(person, ['Mike', 'blue🔵']); // Hi, I'm Tari

One mnemonic trick I use to remember the difference:

  • call() is for commas
  • apply() is for arrays

Recap

  • bind() — bind to this and return a new function, reusable
  • call() — bind + call function, pass arguments with commas
  • apply() — bind + call function, pass arguments with array