javascript

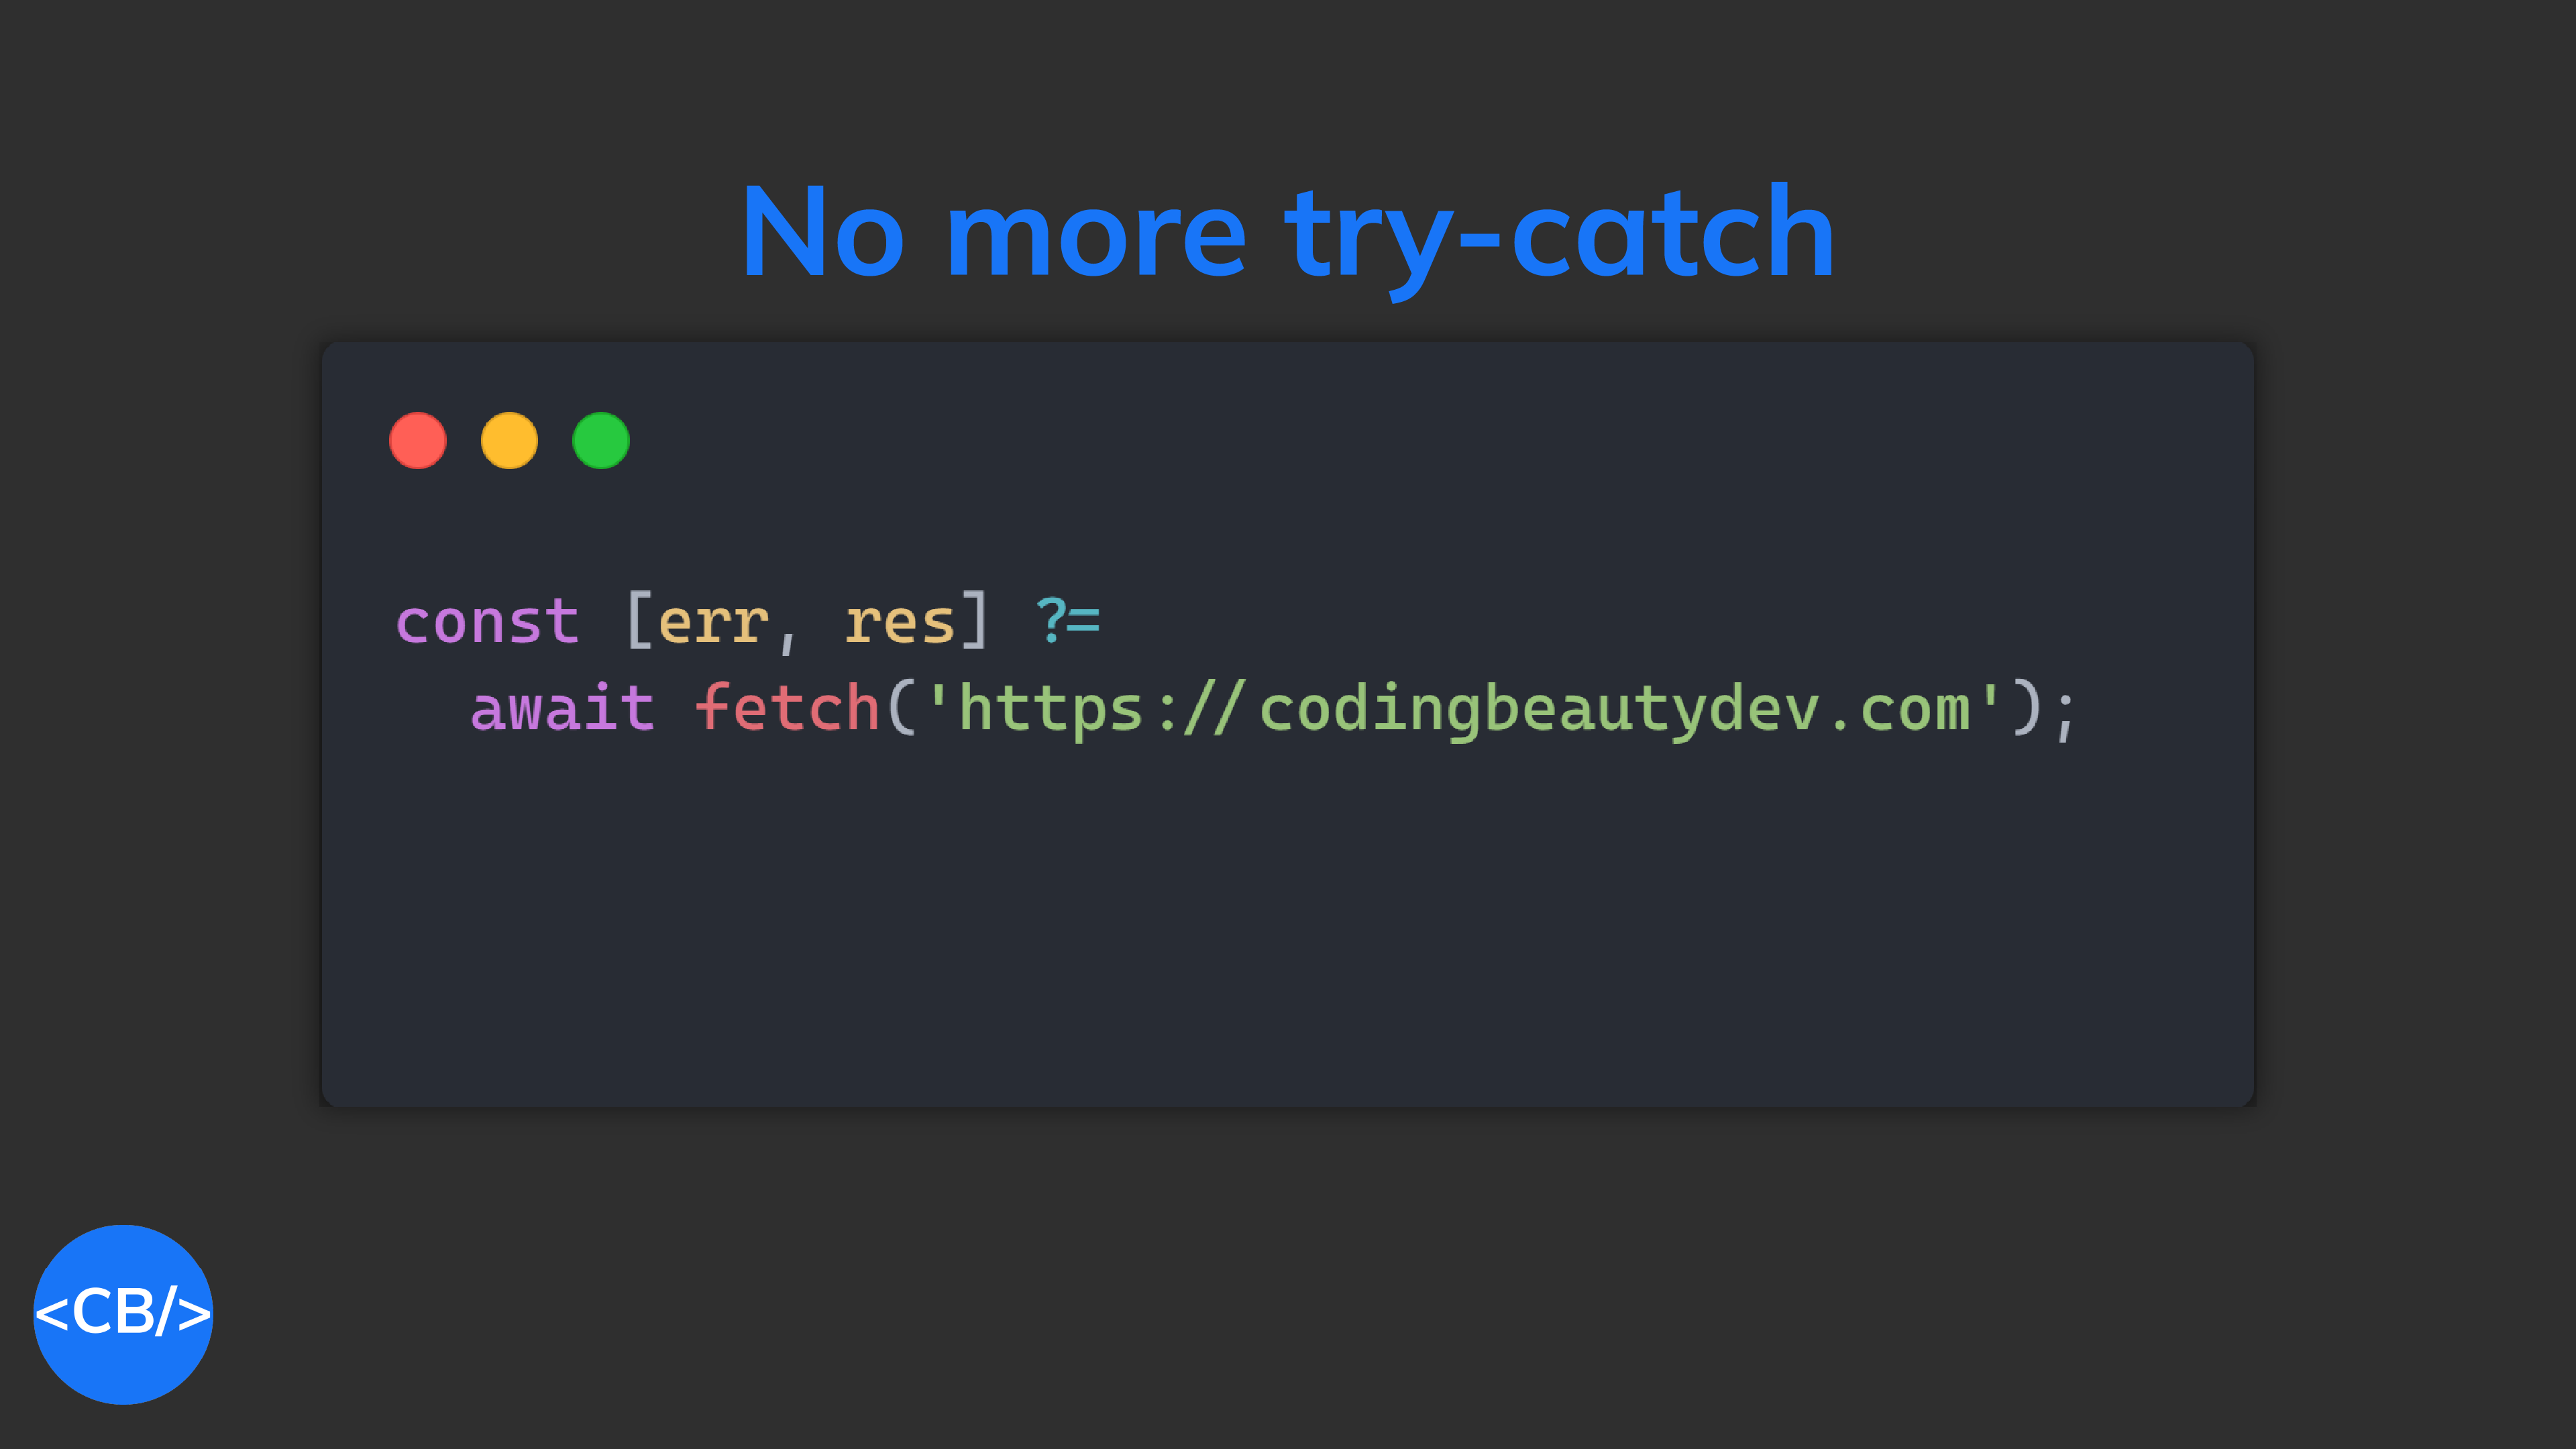
This new JavaScript operator is an absolute game changer

With the new safe assignment ?= operator you’ll stop writing code like this:

JavaScript
// ❌ Before: // ❌ Deep nesting of try-catch for different errors async function fetchData() { try { const response = await fetch('https://api.codingbeautydev.com/docs'); try { const data = await response.json(); return data; } catch (parseError) { console.error(parseError); } } catch (networkError) { console.error(networkError); } }

And start writing code like this:

JavaScript
// ✅ After: async function fetchData() { const [networkError, response] ?= await fetch('https://codingbeautydev.com'); if (networkError) return console.error(networkError); const [parseError, data] ?= await response.json(); if (parseError) return console.error(parseError); return data; }

We’ve completely eradicated the deep nesting. The code is far more readable and cleaner.

Instead of getting the error in the clunky catch block:

JavaScript
async function doStuff() { try { const data = await func('codingbeautydev.com'); } catch (error) { console.error(error); } }

Now we do everything in just one line.

Instead of failing loudly and proudly, ?= tells the error to shut up and let us decide what do with it.

JavaScript
// ✅ if there's error: `err` has value, `data` is null // ✅ no error: `err` is null, `data has value async function doStuff() { const [err, data] ?= await func('codingbeautydev.com'); }

We can tell it to get lost:

JavaScript
async function doStuff() { // 👇 it's as good as gone here const [, data] ?= await func('codingbeautydev.com'); // ... }

We can announce it to the world and keep things moving:

JavaScript
async function doStuff() { const [err, data] ?= await func('codingbeautydev.com'); if (err) { console.error(err); } // ... }

Or we can stop immediately:

JavaScript
// `err` is null if there's no error async function doStuff() { const [err, data] ?= await func('codingbeautydev.com'); if (err) return; }

Which makes it such a powerful tool for creating guard clauses:

JavaScript
// ✅ avoid nested try-catch // ✅ avoid nested ifs function processFile() { const filename = 'codingbeautydev.com.txt'; const [err, jsonStr] ?= fs.readFileSync(filename, 'utf-8'); if (readErr) { return; } const [jsonErr, json] ?= JSON.parse(jsonStr); if (jsonErr) { return; } const awards = json.awards.length; console.log(`🏅Total awards: ${awards}`); }

And here’s one of the very best things about this new operator.

There are several instances where we want a value that depends on whether or not there’s an exception.

Normally you’ll use a mutable var outside the scope for error-free access:

JavaScript
function writeTransactionsToFile(transactions) { // ❌ mutable var let writeStatus; try { fs.writeFileSync( 'codingbeautydev.com.txt', transactions ); writeStatus = 'success'; } catch (error) { writeStatus = 'error'; } // do something with writeStatus... }

But this can be frustrating, especially when you’re trying to have immutable code and the var was already const before the time came to add try-catch.

You’d have to wrap it try, then remove the const, then make a let declaration outside the try, then re-assign again in the catch

But now with ?=:

JavaScript
function writeTransactionsToFile(transactions) { const [err, data] ?= fs.writeFileSync( 'codingbeautydev.com.txt', transactions ) const writeStatus = err ? 'error' : 'success' // // do something with writeStatus... }

We maintain our immutability and the code is now much more intuitive. Once again we’ve eradicated all nesting.

How does it work?

The new ?= operator calls the Symbol.result method internally.

So when we do this:

JavaScript
const [err, result] ?= func('codingbeautydev.com');

This is what’s actually happening:

JavaScript
// it's an assignment now const [err, result] = func[Symbol.result]( 'codingbeautydev.com' );

So you know what this means right?

It means we can make this work with ANY object that implements Symbol.result:

JavaScript
function doStuff() { return { [Symbol.result]() { return [new Error("Nope"), null]; }, }; } const [error, result] ?= doStuff();

But of course you can throw as always:

JavaScript
function doStuff() { throw new Error('Nope'); } const [error, result] ?= doStuff();

And one cool thing it does: if result has its own Symbol.result method, then ?= drills down recursively:

JavaScript
function doStuff() { return { [Symbol.result](str) { console.log(str); return [ null, { [Symbol.result]() { return [new Error('WTH happened?'), null]; } } ]; } } } const [error, result] ?= doStuff('codingbeautydev.com');

You can also use the object directly instead of returning from a function:

JavaScript
const obj = { [Symbol.result]() { return [new Error('Nope'), null]; }, }; const [error, result] ?= obj;

Although, where would this make any sense in practice?

As we saw earlier, ?= is versatile enough to fit in seamlessly with both normal and awaited functions.

JavaScript
const [error, data] ?= fs.readFileSync('file.txt', 'utf8'); const [error, data] ?= await fs.readFile('file.txt', 'utf8');

using

?= also works with the using keyboard to automatically clean up resources after use.

❌ Before:

JavaScript
try { using resource = getResource(); } catch (err) { // ... }

✅ After:

JavaScript
using [err, resource] ?= getResource();

How to use it now

While we wait for ?= to become natively integrated into JavaScript, we can start it now with this polyfill:

But you can’t use it directly — you’ll need Symbol.result:

JavaScript
import 'polyfill.js'; const [error, data] = fs .readFileSync('codingbeautydev.com.txt', 'utf-8') [Symbol.result]();

Final thoughts

JavaScript error handling just got much more readable and intuitive with the new safe assignment operator (?=).

Use it to write cleaner and more predictable code.
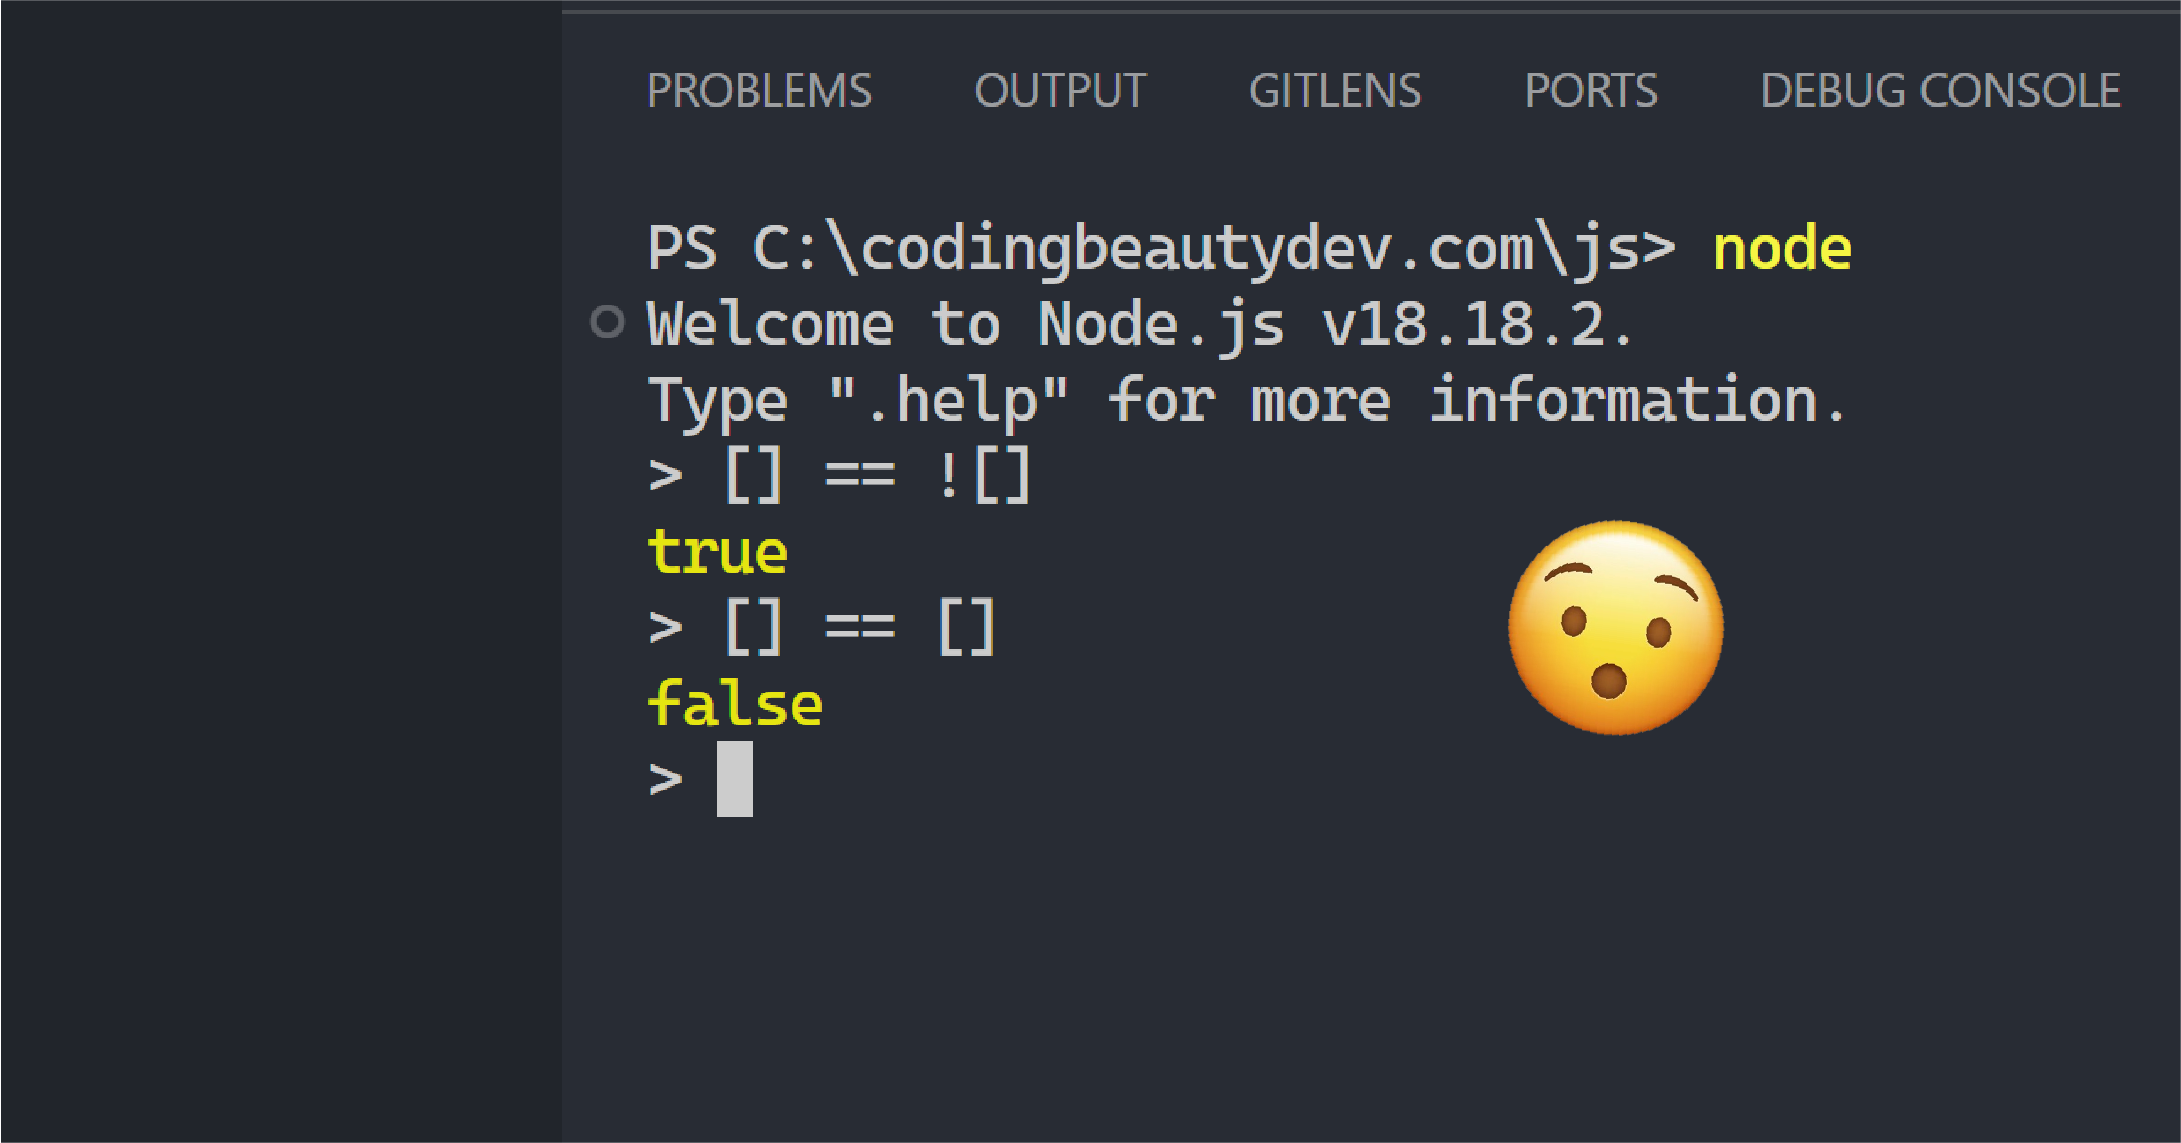
Why does [] == ![] return TRUE in JavaScript?

It’s hard to believe.

How can an Array not be an Array?

It makes no sense — [] is truthy and ![] should be false.

So how can [] equal false?

And this somehow doesn’t happen for other types like strings and numbers:

Are JavaScript arrays broken?

What happened here

Dump all the blame on the dangerous == operator.

This is just another instance of why we always tell new JavaScript devs to NEVER use it (ever).

Especially if they’ve already been coding with stubbornly strict languages like C#.

At first glance, it doesn’t seem like there’s anything wrong with ==:

Plain text
// C# int num = 2; Console.WriteLine(num == 10); // false Console.WriteLine(num == 2); // true
JavaScript
// JS let num = 2; console.log(num == 10); // false console.log(num == 2); // true

But now look what happens here:

Plain text
// C# int num = 2; // ❌ Error: can't compare int and string Console.WriteLine(num == "2"); // false

But look what happens in JavaScript:

JavaScript
// JS let num = 2; console.log(num == "2"); // true?

JavaScript auto-casts the string into a number!

This is one of the many frustrations people have with JavaScript that made TypeScript come along.

Instead of just failing and stopping us from doing dumb stuff, it just goes “Mhmm okay, if you say so…”

JavaScript
// Huh? console.log(null == undefined); // true // Converts array to string console.log([1,2,3] == "1,2,3"); // true (seriously?)

So what do you think REALLY happens in [] == ![], behind the scenes?

First of all, empty arrays are truthy in JavaScript, so ! acts on it to make it false

JavaScript
[] == false

So now surprise surprise, we suddenly find ourselves comparing an Array to Boolean. Obviously not gonna end well.

As we now know, JS doesn’t care so it just goes ahead — this time casting the Boolean to the equivalent number

JavaScript
[] == Number(false) [] == 0

Next, thanks to some garbage rules that you don’t need to ever know, [] turns into… an empty string?

JavaScript
// don't ask "" == 0

And now finally it converts "" into… a Number:

JavaScript
0 == 0 // true

So what’s the solution to avoid this nonsense?

Always use the strict equality operator === (and I mean always).

JavaScript
// font ligatures make triple equal look nicer console.log(2 == '2'); // ❌ true console.log(2 === '2'); // ✅ false console.log([] == ![]); // ❌ true console.log([] === ![]); // ✅ false

There is no scenario imaginable in the universe where == can be used that === can’t be

And now with ===, your lovely VS Code editor suddenly comes alive to stop us from doing something like this:

It still compiles though — unless you use TypeScript

But before it was asleep:

But what about [] == []?

Okay this makes sense, but what then could possibly explain this:

Surely the == can’t be blamed here. They have the same type, don’t they?

Yes they do.

The problem is that JavaScript compares arrays by reference. Not by value.

They may have exactly the same value, but as long they don’t refer the same object in memory, they will never be equal in the eyes of == and ===

JavaScript
// these are creating new array objects // on the fly, stored at different locations console.log([] == []); // false console.log([] === []); // false // store new object this time const arr = []; // reuse it const tari = arr; // both vars refer to the same object in memory console.log(arr == tari); // true console.log(arr === tari); // true

And this is how it is for objects in general too:

JavaScript
console.log({} === {}); // false const person1 = { name: 'tari ibaba' }; const person2 = { name: 'tari ibaba' }; const person3 = person1; // Only person1 and person3 point to the same object console.log(person1 === person2); // false console.log(person1 === person3); // true console.log(person2 === person3); // false

But of course, this isn’t the case for our core primitive values — strings, numbers, and booleans:

JavaScript
console.log('tari ibaba' === 'tari ibaba'); // As we saw previously console.log(2 === 2);

So what do you do when you want to compare arrays by their element values?

If it’s sorted you can use JSON.stringify():

JavaScript
function arraysEqual(array1, array2) { return JSON.stringify(array1) === JSON.stringify(array2); }

Otherwise, you go for the more generic length and every() combo:

JavaScript
function arraysEqual(array1, array2) { return ( array1.length === array2.length && array1.every((value, index) => value === array2[index]) ); }

Final thoughts

== is just one example of JavaScript’s looseness making it do things that make no sense in the real world.

Moral lesson: Always use strict equality, use TypeScript, and prioritize modern features.

The 5 most transformative JavaScript features from ES12

ES12 was truly an amazing upgrade.

Packed with valuable features that completely transformed the way we write JavaScript.

Code became cleaner, shorter, and easier to write.

Let’s check them out and see the ones you missed.

1. Promise.any()

Before ES12, we already had Promise.all() and Promise.allSettled() to wait for an entire group of Promises.

There were several times when we’d have several Promises but only be interested in whichever one resolved first.

So Promise.any() had to come into the picture:

JavaScript
async function getHelpQuickly() { const response = await Promise.any([ cautiousHelper(), kindHelper(), wickedHelper(), ]); console.log(response); // Of course! } async function cautiousHelper() { await new Promise((resolve) => { setTimeout(() => { resolve('Uum, oohkaay?'); }, 2000); }); } async function kindHelper() { return 'Of course!'; } function wickedHelper() { return Promise.reject('Never, ha ha ha!!!'); } // codingbeautydev.com

One interesting thing to note: even though any() resolves immediately, the app doesn’t end until all the Promises have resolved.

2. replaceAll()

Yes we already had replace() for quickly replace a substring within a string.

JavaScript
const str = 'JavaScript is so terrible, it is unbelievably terrible!!'; const result = str.replace('terrible', 'wonderful'); console.log(result); // JavaScript is so wonderful, it is unbelievably terrible!! // Huh? // codingbeautydev.com

But it only did so for the first occurrence of the substring unless you use a regex.

So ES12 gave us now we have replaceAll() to replace every single instance of that substring.

JavaScript
const str = 'JavaScript is so terrible, it is unbelievably terrible.'; const result = str.replaceAll('terrible', 'wonderful'); console.log(result); // JavaScript is wonderful, it is unbelievably wonderful. // Now you're making sense! // codingbeautydev.com

3. WeakRefs

As from ES12, a JavaScript variable can either be a strong reference or a weak reference.

What are these?

The Strong Refs are our normal everyday variables. But the Weak Refs need to be explicitly created with WeakRef():

JavaScript
const strongRef = { name: 'Tari Ibaba' } const weakRef = new WeakRef(strongRef); // codingbeautydev.com

JS variables are just references to the actual object in memory.

That’s why we can have multiple references to the same object.

JavaScript
const person = { name: 'Tari Ibaba' }; const me = person; // modifies the actual object that `me` points to person.site = 'codingbeautydev.com'; console.log(me.site); // codingbeautydev.com

But what’s the difference between a strong ref and a weak ref?

Well in programming we have something garbage collection, which is when unneeded objects are removed from memory to save resources.

In JavaScript, objects are automatically marked for garbage collected when all the strong ref variables pointing to it have become unreachable — out of scope:

The object person and me both point to is put on the destruction queue once func() runs.

JavaScript
func(); // 💡`person` and `me` are unreachable here function func() { // 💡this object will be marked for garbage collection // after this function runs const person = { name: 'Tari Ibaba' }; const me = person; person.site = 'codingbeautydev.com'; console.log(me.site); // codingbeautydev.com }

But look what happens here:

Even person went out of scope after func() finished, we still had me, a global strong reference.

JavaScript
let me; func(); // 💡one strong reference (`me`) is still reachable // ✅ Can always access object console.log(me.site); function func() { // 💡this object will NOT be garbage collected // after this function runs const person = { name: 'Tari Ibaba' }; me = person; person.site = 'codingbeautydev.com'; console.log(me.site); // codingbeautydev.com }

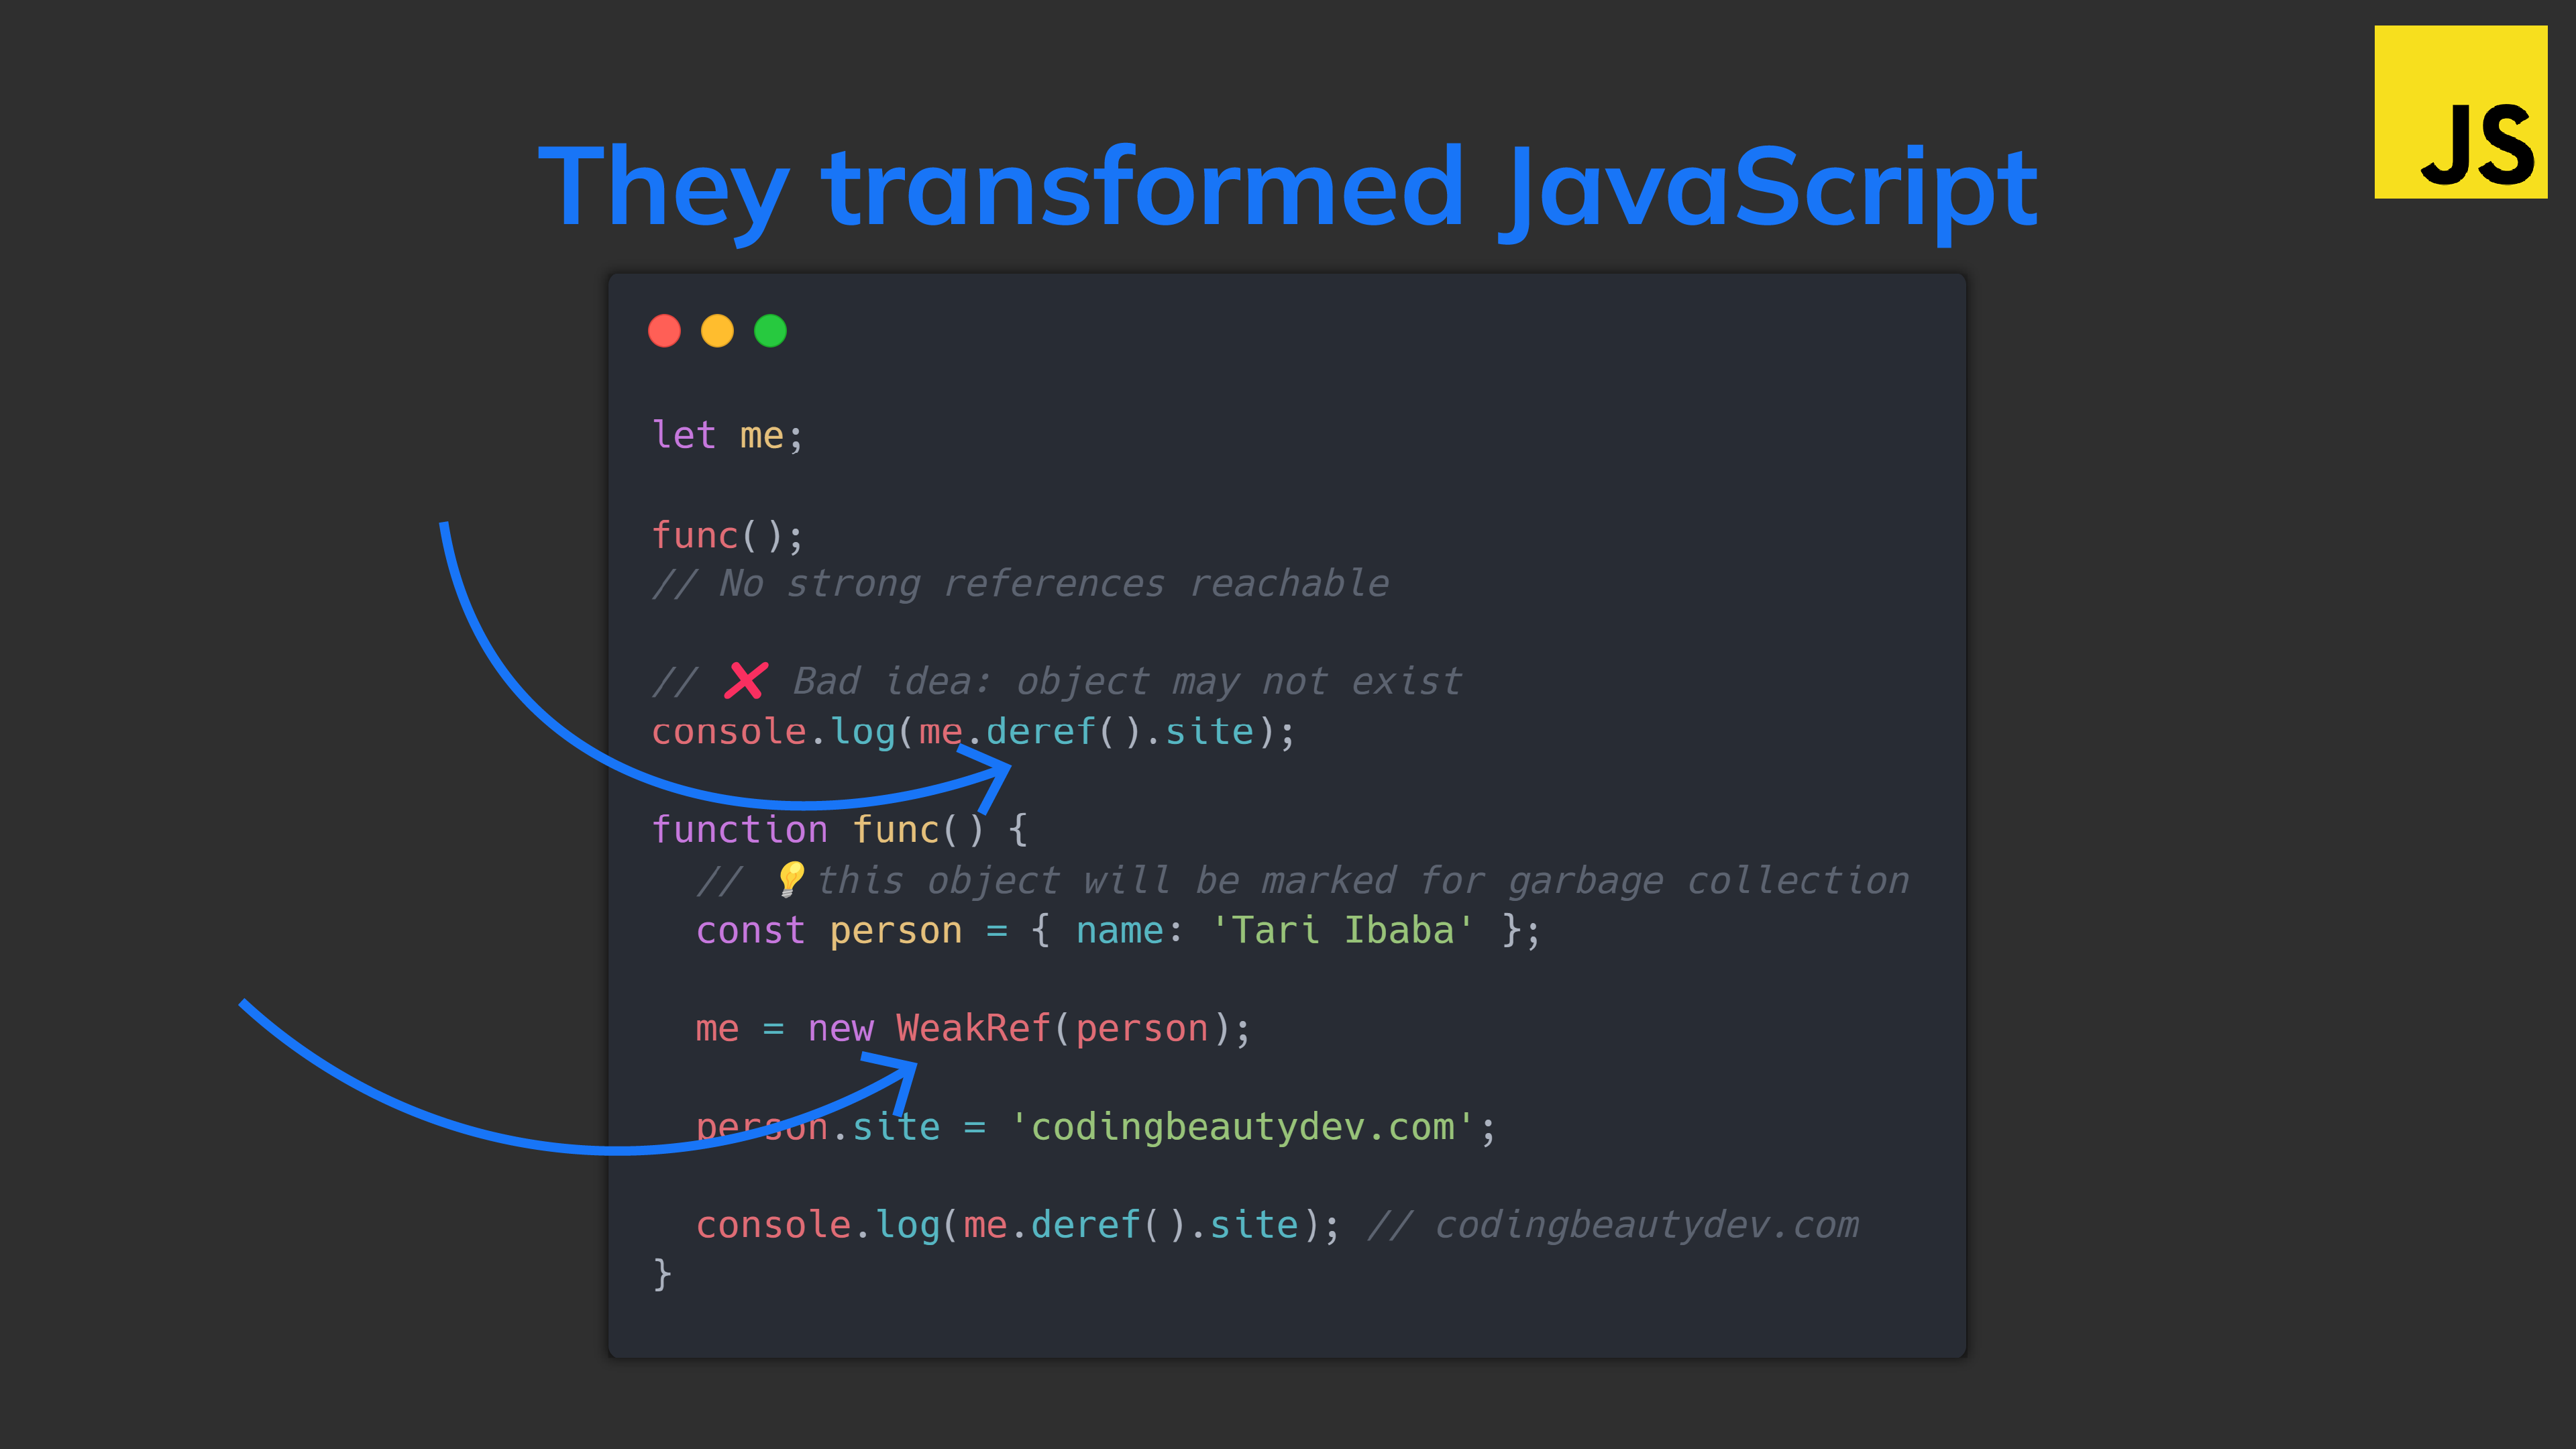
But what if me was a weak reference?

Now after func() executes, person would be the only strong reference to the object.

So the object will be marked for garbage collection:

JavaScript
let me; func(); // No strong references reachable // ❌ Bad idea: object may not exist console.log(me.deref().site); function func() { // 💡this object will be marked for garbage collection const person = { name: 'Tari Ibaba' }; me = new WeakRef(person); person.site = 'codingbeautydev.com'; console.log(me.deref().site); // codingbeautydev.com }

So why do we need weak references?

The biggest use case for them is caching.

Look what happens here: processData() runs and we have a new object stored in our cache.

Even though data becomes unreachable, the object will never be garbage collected because it has a strong reference in the cache.

JavaScript
let cache = new Map(); processData(); function processData() { const url = 'api.tariibaba.com'; const data = fetchData(url); // process data for app... } async function fetchData(url) { // check cache const saved = cache.get(url); if (!saved) { const data = await (await fetch(url)).json(); cache.set(url, data); } return saved; }

But what if I want the object to be freed up after processData() exits?

I would use a WeakRef as the Map values instead:

JavaScript
let cache = new Map(); processData(); function processData() { const url = 'api.tariibaba.com'; const data = fetchData(url); // process data for app... // 💡the object will only exist in cache // in this function } async function fetchData(url) { // deref weak ref const saved = cache.get(url).deref(); if (!saved) { const data = await (await fetch(url)).json(); // ✅ Use a WeakRef instead cache.set(url, new WeakRef(data)); } return saved; }

4. Logical assignment operators

Lovely syntactic sugar from ES12.

We use them like this:

JavaScript
left ??= right; left ||= right; left &&= right; // codingbeautydev.com

Exactly the same as:

JavaScript
left = (left ?? right); left = (left || right); left = (left && right); // codingbeautydev.com

??=. Quickly assign a value to a variable *if* it is null or undefined (“nullish”).

JavaScript
user.preferredName ??= generateDumbUserName();

||=. Like ??=, but assigns the value for any falsy value (0undefinednull''NaN, or false).

JavaScript
user.profilePicture ||= "/angry-stranger.png";

And then &&=. Something like the reverse; only assigns when the value is truthy (not falsy).

JavaScript
user.favoriteLanguage = await setFavoriteLanguage(input.value); user.favoriteLanguage &&= 'Assembly'; // You're lying! It's Assembly!

5. Numeric separators

Tiny but impactful new addition that made big number literals more readable and human-friendly:

JavaScript
const isItPi = 3.1_415_926_535; const isItAvagadro = 602_214_076_000_000_000_000_000; const isItPlanck = 6.626_070_15e-34; const isItG = 6.674_30e-11; // Works for other number bases too... // codingbeautydev.com

The compiler completely ignores those pesky underscores — they’re all for you, the human!

Final thoughts

These are the juicy new JavaScript features that arrived in the ES12.

Use them to boost your productivity as a developer and write cleaner code with greater conciseness, expressiveness and clarity.

Promise.all() vs Promise.allSettled() in JS: The little-known difference

I can’t believe some developers think they are interchangeable.

They are not.

all() and allSettled() are much more different than you think.

So let’s say I decided to singlehandedly create my own ambitious new music app to finally take down Spotify.

I’ve worked tirelessly to make several music deals and have all the backend data ready.

Now I’m creating the app’s homepage: a shameless carbon copy of Spotify showing off daily mixes, recently played, now playing, and much more.

All this data will come from different API URLs.

Of course I wouldn’t be naive enough to fetch from all the URLs serially and create a terrible user experience (or would I?)

JavaScript
async function loadHomePage() { const apiUrl = 'music.tariibaba.com/api'; const dailyMixesUrl = `${apiUrl}/daily`; const nowPlayingUrl = `${apiUrl}/nowPlaying`; // ❌ Serial loading const dailyMixes = await ( await fetch(dailyMixesUrl) ).json(); const nowPlaying = await ( await fetch(nowPlayingUrl) ).json(); return { dailyMixes, nowPlaying }; }

No I wouldn’t.

So instead I use use Promise.all() to fetch from all these URLs at once:

Much better, right?

JavaScript
async function loadHomePage() { const apiUrl = 'music.tariibaba.com/api'; const dailyMixesUrl = `${apiUrl}/daily`; const nowPlayingUrl = `${apiUrl}/nowPlaying`; // Promise.all() ?? await Promise.all([ fetch(dailyMixesUrl), fetch(nowPlayingUrl), ]); return { dailyMixes, nowPlaying }; }

Wrong.

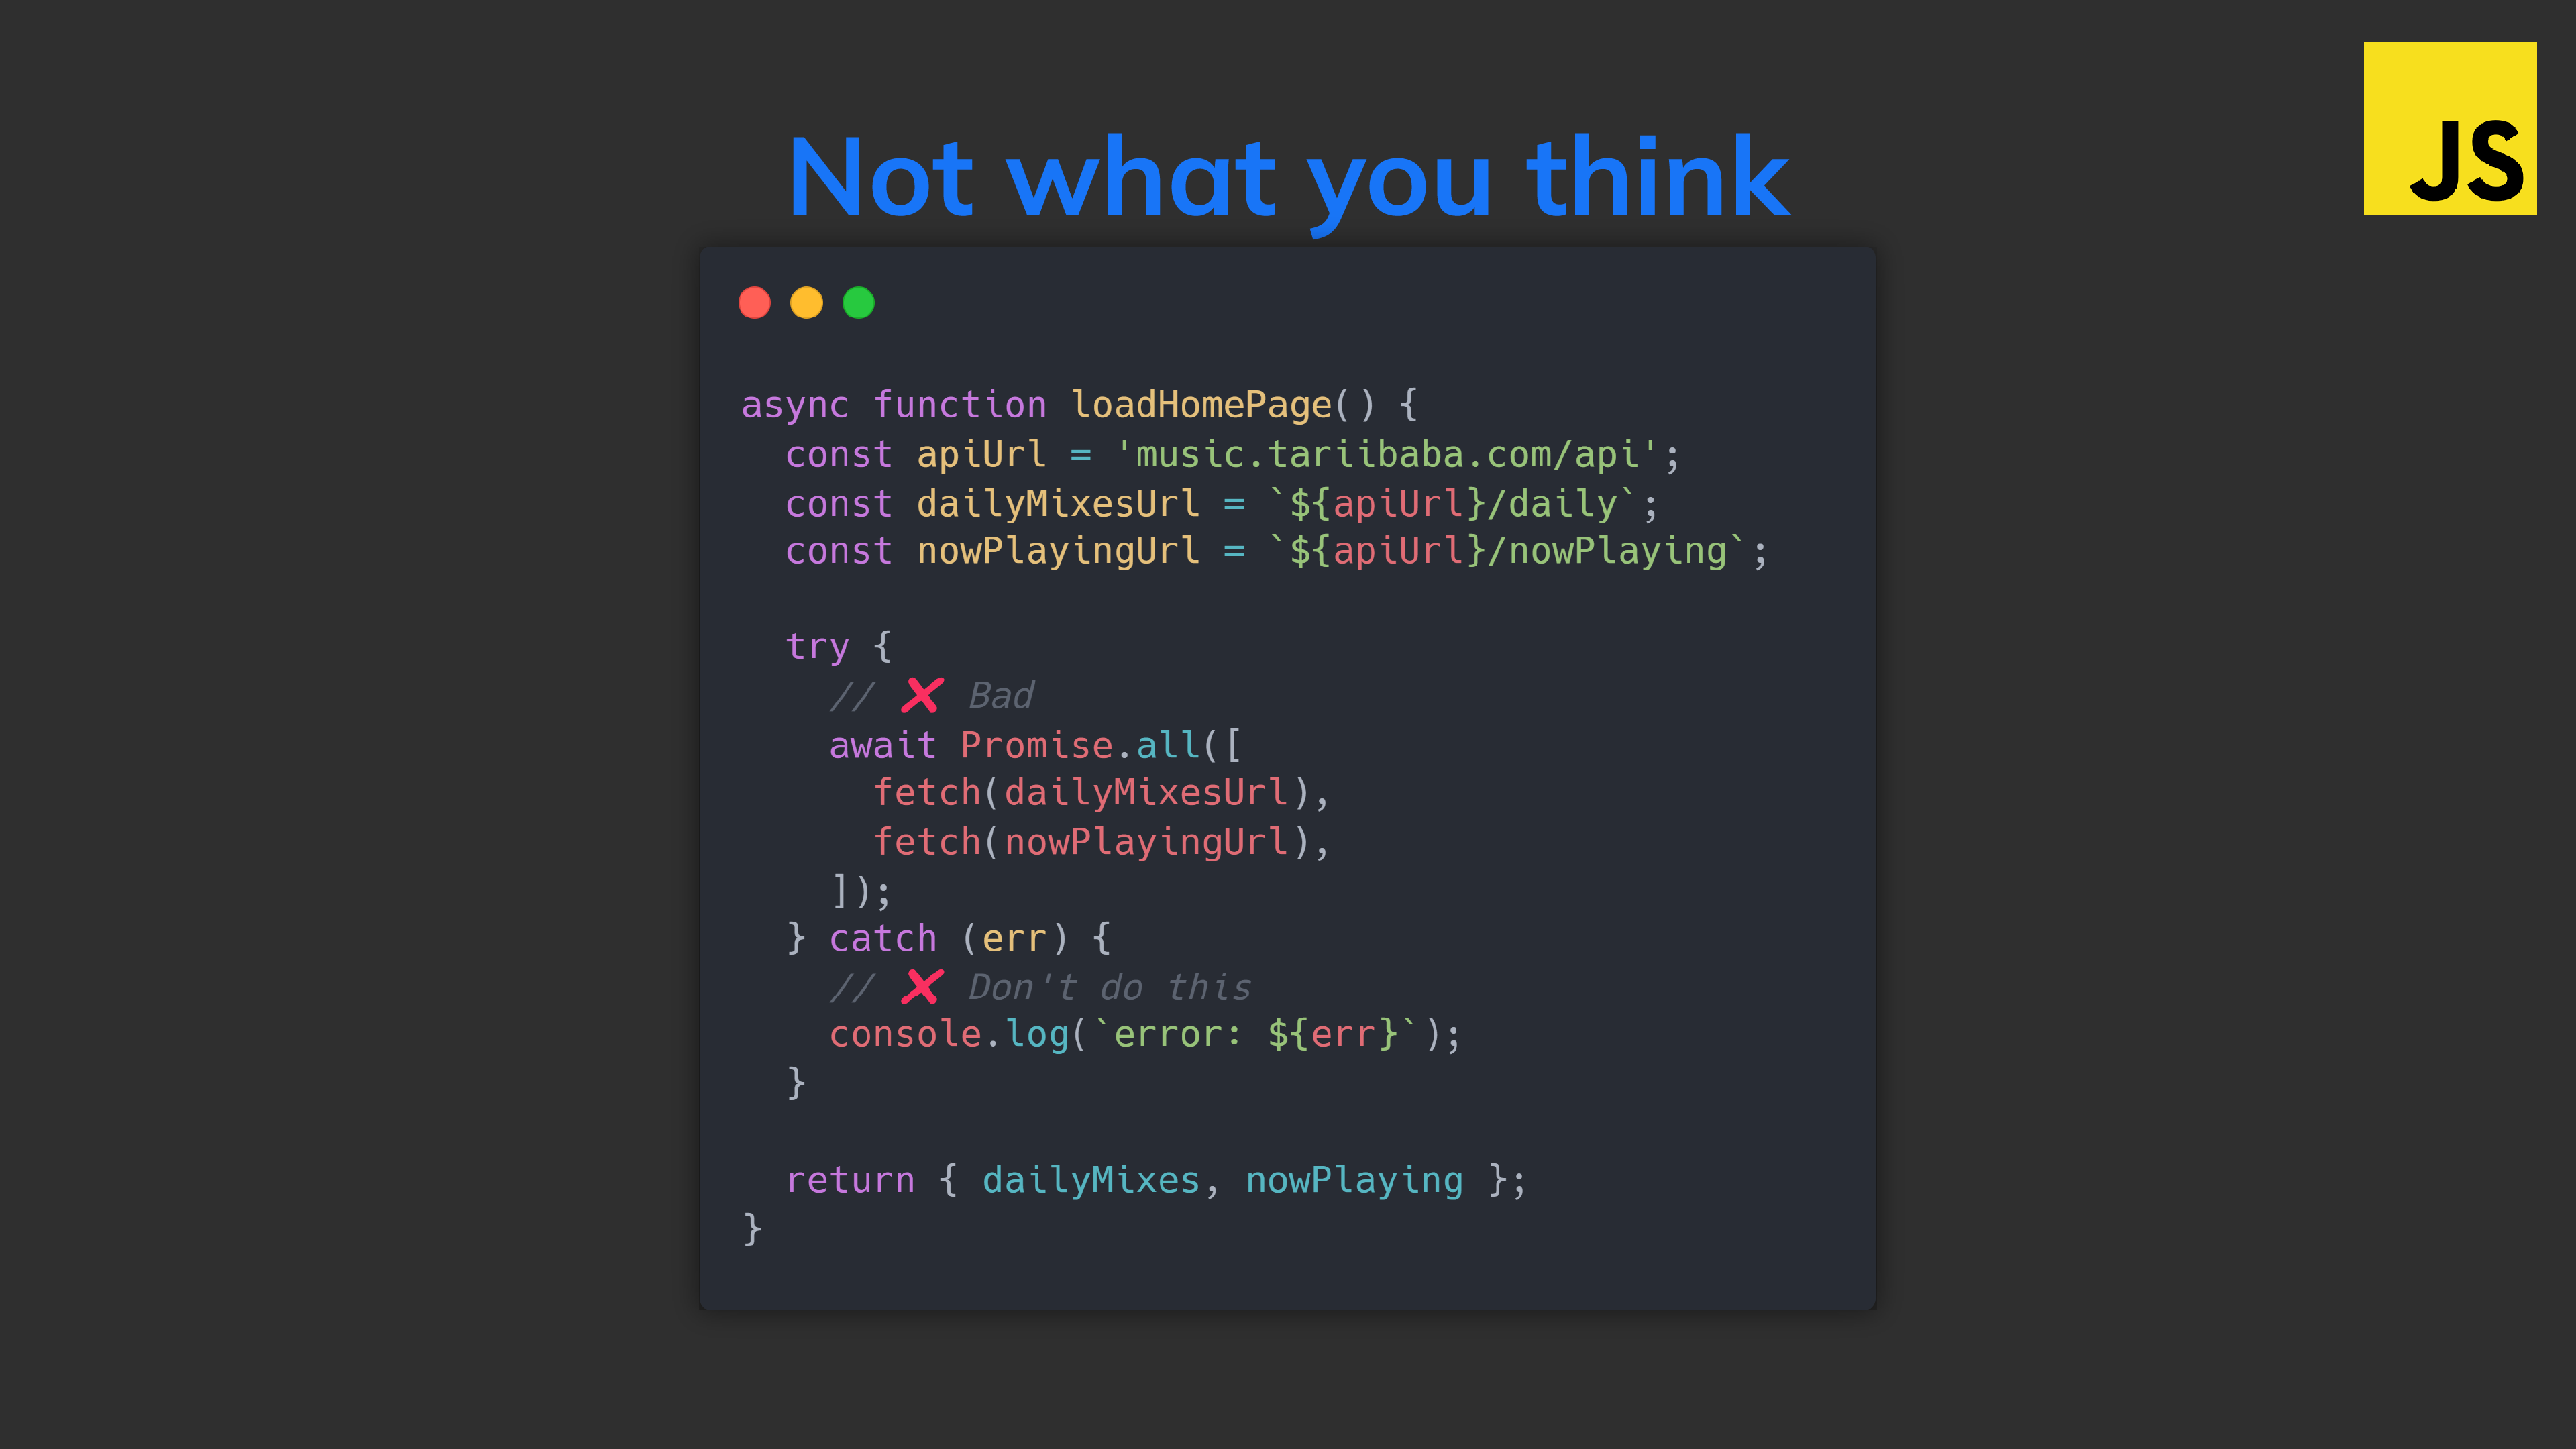
I just made the classic developer error of forgetting to handle the error state.

Let me tell you something: When Promise.all() fails, it fails:

JavaScript
async function loadHomePage() { const apiUrl = 'music.tariibaba.com/api'; const dailyMixesUrl = `${apiUrl}/daily`; const nowPlayingUrl = `${apiUrl}/nowPlaying`; // Promise.all() ?? try { await Promise.all([ fetch(dailyMixesUrl), fetch(nowPlayingUrl), ]); } catch (err) { // ❌ Which failed & which succeeded? We have no idea console.log(`error: ${err}`); } return { dailyMixes, nowPlaying }; }

What do you when one of those requests fail? Am I just going to leave that UI section blank and not try again?

But look what Promise.allSettled() would have done for us:

JavaScript
async function loadHomePage() { const apiUrl = 'music.tariibaba.com/api'; const dailyMixesUrl = `${apiUrl}/daily`; const nowPlayingUrl = `${apiUrl}/nowPlaying`; // ... // Promise.all() ?? try { const promises = await Promise.allSettled([ fetch(dailyMixesUrl), fetch(nowPlayingUrl), // ... ]); const succeeded = promises.filter( (promise) => promise.status === 'fulfilled' ); const failed = promises.filter( (promise) => promise.status === 'rejected' ); // ✅ now retry failed API requests until succeeded } catch (err) { // We don't need this anymore! console.log(`error: ${err}`); } return { dailyMixes, nowPlaying }; }

Now I could easily set up a clever system to tirelessly retry all the failed requests until they all work.

JavaScript
async function loadHomePage() { const apiUrl = 'music.tariibaba.com/api'; const dailyMixesUrl = `${apiUrl}/daily`; const nowPlayingUrl = `${apiUrl}/nowPlaying`; // Promise.all() ?? const pending = [ () => fetch(dailyMixesUrl), () => fetch(nowPlayingUrl), ]; while (pending.length > 0) { const promises = await Promise.allSettled( pending.map((pending) => pending()) ); const newPending = []; promises.forEach((promise, index) => { if (promise.status === 'rejected') { newPending.push(pending[index]); } }); pending = newPending; } return { dailyMixes, nowPlaying }; }

When all() is better

This is great, but I need to update a lot of data when a user plays a song.

The song’s stream count, the user’s history, recently played…

But the database I’m using is horrible and doesn’t have support for transactions / batched writes.

I need to find a way to make sure I can update all the data in their separate locations at the exact same time.

Luckily, Promise.all() is useful this time.

It’s all or nothing.

JavaScript
async function runTransaction(updates) { // updates are a list of DB actions try { // store db state, somehow... await Promise.all(updates); } catch (err) { // intelligently revert to previous state, somehow... } }

With all() I’m confident that if a single updates fails, it’s over.

And now I can even bring my smart auto-retry system here, but this time everything is getting retried, after this reversal.

Final thoughts

Promise.all() — If one of us fails, we all fail.

Promise.allSettled() — You are all on your own.

bind() vs call() vs apply() in JavaScript: The little-known difference

Every developer should fully understand how they work and be able to discern the subtle differences between them.

So you know, JS functions are first-class citizens.

Which means: they’re all just object values — all instances of the Function class, with methods and properties.

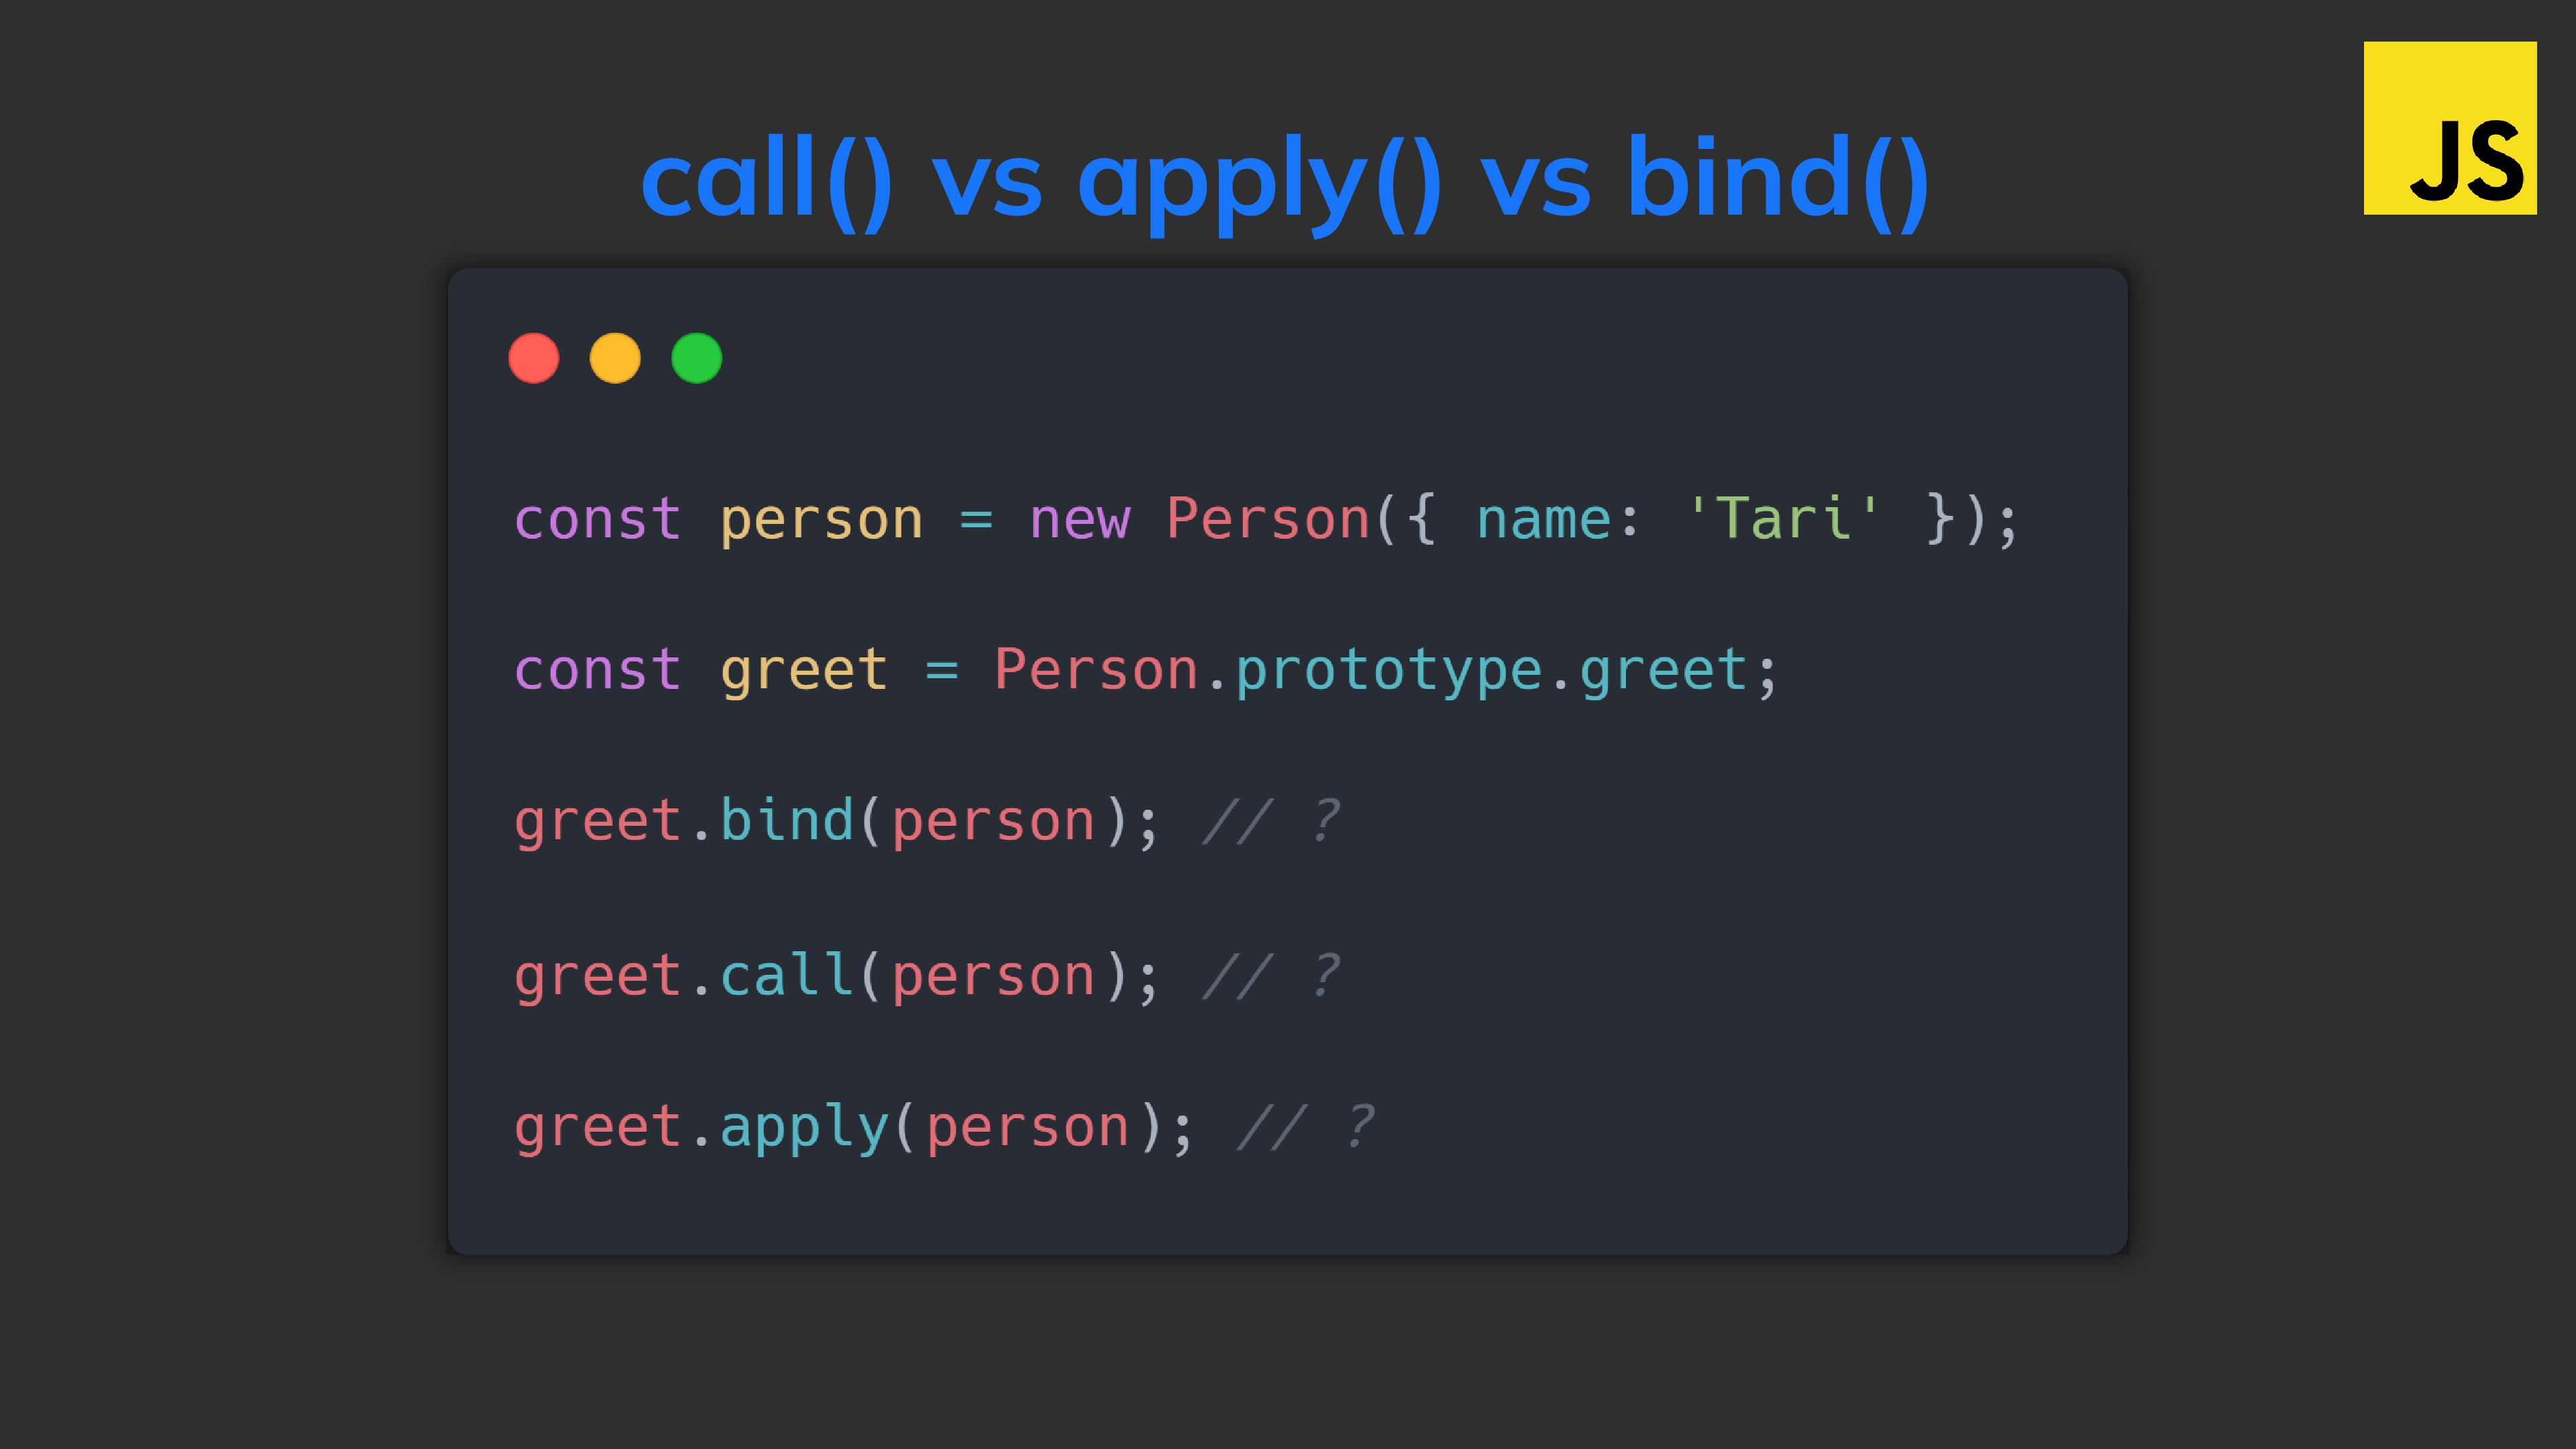
So bind(), apply(), and call() are 3 essential methods every JavaScript function has.

Were you with me in the painful early days of React; when we still did this? 👇

This was just one of the multiple applications of bind() — a seriously underrated JavaScript method.

JavaScript
// damn class components are such a chore to write now import React from 'react'; class MyComponent extends React.Component { constructor(props) { super(props); } greet() { alert(`Hi, I'm ${this.props.name}!`); } // remember render()? render() { return ( <button onClick={this.greet.bind(this)}>Click me</button> ); } } export default MyComponent;

sayName() would be a mess without bind() — the alert() would never work.

Because internally React is doing something fishy with this method that completely screws up what this means inside it.

Before sayName would have had absolutely no problems showing the alert — just like in this other class:

JavaScript
class Person { props = { name: 'Tari' }; greet() { console.log(`Hi, I'm ${this.props.name}!`); } } const person = new Person(); person.greet();

But guess what React does to the greet event handler method behind the scenes?

It reassigns it to another variable:

JavaScript
class Person { props = { name: 'Tari' }; greet() { console.log(`Hi, I'm ${this.props.name}!`); } } // reassign to another variable: const greet = Person.prototype.greet; // ❌ bad idea greet();

So guess what happens to this — it’s nowhere to be found:

This is where bind comes to the rescue — it changes this to any instance object you choose:

So we’ve binded the function to the object — the bind target.

(I know it’s “bound” but let’s say binded just like how we say “indexes” for “index” instead of “indices”).

It’s immutable — it returns the binded function without changing anything about the original one.

And this lets us use it as many times as possible:

vs call()

There’s only a tiny difference between call and bind

bind creates the binded function for you to use as many times as you like.

But call? It creates a temporary binded function on the fly and calls it immediately:

JavaScript
class Person { constructor(props) { this.props = props; } greet() { console.log(`Hi, I'm ${this.props.name}`); } } const person = new Person({ name: 'Tari' }); const greet = Person.prototype.greet; greet.bind(person)(); greet.call(person);

So call() is basically bind() + a call.

But what about when the function has arguments? What do we do then?

No problem at all — just pass them as more arguments to call:

JavaScript
class Person { constructor(props) { this.props = props; } greet(name, favColor) { console.log( `Hi ${name}, I'm ${this.props.name} and I love ${favColor}` ); } } const person = new Person({ name: 'Tari' }); const greet = Person.prototype.greet; // bind(): normal argument passing to binded function greet.bind(person)('Mike', 'blue🔵'); // call(): pass as more arguments greet.call(person, 'Mike', 'blue🔵');

And you can actually do the same with bind():

JavaScript
// the same thing greet.bind(person)('Mike', 'blue🔵'); greet.bind(person, 'Mike', 'blue🔵')();

vs apply()

At first you may think apply() does the exact same thing as call():

JavaScript
class Person { constructor(props) { this.props = props; } greet() { console.log(`Hi, I'm ${this.props.name}`); } } const person = new Person({ name: 'Tari' }); const greet = Person.prototype.greet; greet.call(person); // Hi, I'm Tari greet.apply(person); // Hi, I'm Tari

But just like bind() vs call() there’s a subtle difference to be aware of:

Arguments passing:

JavaScript
class Person { constructor(props) { this.props = props; } greet(name, favColor) { console.log( `Hi ${name}, I'm ${this.props.name} and I love ${favColor}` ); } } const person = new Person({ name: 'Tari' }); const greet = Person.prototype.greet; //💡call() -- pass arguments with comma separated greet.call(person, 'Mike', 'blue🔵'); // Hi, I'm Tari //💡apply() -- pass arguments with array greet.apply(person, ['Mike', 'blue🔵']); // Hi, I'm Tari

One mnemonic trick I use to remember the difference:

  • call() is for commas
  • apply() is for arrays

Recap

  • bind() — bind to this and return a new function, reusable
  • call() — bind + call function, pass arguments with commas
  • apply() — bind + call function, pass arguments with array

NEW: Built-in TypeScript support in Node.js – Finally

Exciting news today as native TypeScript support finally comes to Node.js!

Yes you can now use types natively in Node.js.

So throw typescript and ts-node in the garbage.

❌Before now:

Node.js only ever cared for JavaScript files.

This would never have run:

Try it and you’d get this unpleasant error:

Our best bet was to install TypeScript and compile with tsc.

And millions of developers agreed it was a pretty good option:

But this was painful — having to install the same old package and type out the same command over and over again.

Extra compilation step to JS and having to deal with TypeScript configurations and stuff.

Pretty frustrating — especially when we’re just doing a bit of testing.

That was why ts-node arrived to try to save the day — but it still wasn’t enough.

We could now run the TypeScript files directly:

We could even start an interactive session on the fly like we’d do with the standalone node command:

And everyone loved it:

But it was still an extra dependency, and we still had to install typescript.

We still had more subtle intricacies to be aware of, like how to use ts-node for ES modules with the --esm flag:

✅Now:

All this changes now with all the brand-new upgrades now in Node:

  • Native built-in TypeScript support.
  • Zero dependencies
  • Zero intermediate files and module configurations

Now all our favorite JS tools like Prettier, Next.js, and Webpack can have safer and intellisense-friendly config files.

Okay almost no one has Webpack in their favorite tools list but still…

Look we already have pull requests like this to support prettier.config.ts in Prettier — and they’re going to be taking big steps forward thanks to this new development.

How does it work behind the scenes?

Support for TypeScript will be gradual, so right now it only supports types — you can’t use more TypeScript-y features like enums (although who uses enums these days).

It uses the @swc/wasm-typescript tool to internally strip the TypeScript file of all its types.

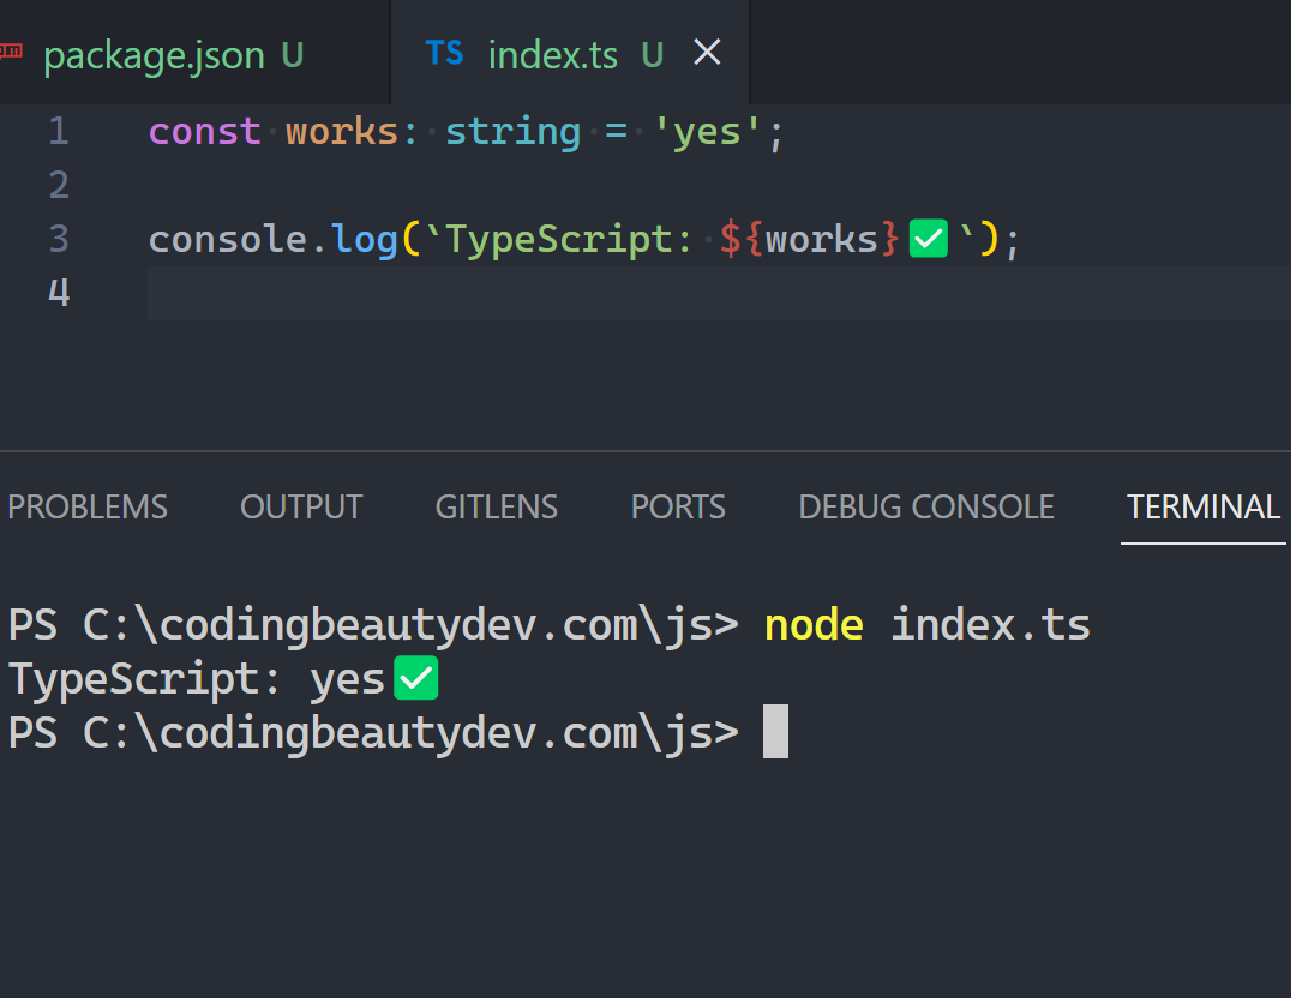
So this:

JavaScript
const url: string = 'codingbeautydev.com'; const capitalized: string = url.toUpperCase(); console.log(`Capitalized: ${capitalized}`);

Turns into this:

JavaScript
const url = 'codingbeautydev.com'; const capitalized = url.toUpperCase(); console.log(`Capitalized: ${capitalized}`);

How to start using TypeScript in Node.js

Early beginnings like I said, so it’s still experimental and for now you’ll need the --experimental-strip-types flag:

JavaScript
node --experimental-strip-types my-file

This will be in an upcoming release.

Final thoughts

Built-in TypeScript is a serious power move to make Node.js a much more enjoyable platform for JS devs. I’ll definitely be using this.

Even though the support is not yet as seamless as in Bun or Deno, it makes a far-reaching impact on the entire JavaScript ecosystem as Node is still the most popular JS backend framework by light years.

10 must-have VS Code extensions for web development

Visual Studio Code has thousands of extensions you can install to ramp up your developer productivity and save you from mundane tasks.

They are all available in the Visual Studio marketplace and the vast majority of them are completely free.

Let’s have a detailed look at 10 powerful extensions that significantly improve the web development experience.

1. TODO Tree

Powerful extension for creating location-specific reminders of JavaScript code tasks you’ll need to get back to later:

Just use // TODO:

2. Prettier

Prettier is a pretty😏 useful tool that automatically formats your code using opinionated and customizable rules.

It ensures that all your code has a consistent format and can help enforce a specific styling convention in a collaborative project involving multiple developers.

The Prettier extension for Visual Studio Code.

The Prettier extension for Visual Studio Code brings about a seamless integration between the code editor and Prettier, allowing you to easily format code using a keyboard shortcut, or immediately after saving the file.

Watch Prettier in action:

Pretter instantly formats the code after the file is saved.

3. ESLint

ESLint is a tool that finds and fixes problems in your JavaScript code.

It deals with both code quality and coding style issues, helping to identify programming patterns that are likely to produce tricky bugs.

The ESLint extension for Visual Studio Code.

The ESLint extension for Visual Studio Code enables integration between ESLint and the code editor. This integration allows ESLint to notify you of problems right in the editor.

For instance, it can use a red wavy line to notify of errors:

ESLint uses a red wavy line to notify of errors.

We can view details on the error by hovering over the red line:

Viewing error details by hovering over the red wavy line.

We can also use the Problems tab to view all errors in every file in the current VS Code workspace.

Using the "Problems" tab to view all errors in every file in the VS Code workspace.

4. GitLens

GitLens is another powerful extension that helps you take full advantage of Git source control in Visual Studio Code.

GitLens displays views containing essential repository data and information on the current file, such as file history, commits, branches and remotes.

The GitLens extension displaying essential repository data.

Place the cursor on any line in the editor and GitLens will display info on the latest commit where the line was changed:

5. Live Server

The Live Server extension for VS Code starts a local server that serves pages using the contents of files in the workspace. The server will automatically reload when an associated file is changed.

The Live Server extension for Visual Studio Code.

In the demo below, a new server is launched quickly to display the contents of the index.html file. Modifying index.html and saving the file reloads the server instantly. This saves you from having to manually reload the page in the browser every time you make a change.

A demo of how to use the Live Server Extension for Visual Studio Code

As you saw in the demo, you can easily launch a new server using the Open with Live Server item in the right-click context menu for a file in the VS Code Explorer.

Launcing a new server with the "Open with Live Server" item in the right-click context menu for a file in the VS Code Explorer.

6. AI assistant extensions

GenAI has booming recently and now we have extensions that give you intelligent AI code completions as you type.

And IDE-integration chatbots, some of which use context from your codebase.

Great ones you can try:

  1. GitHub Copilot: paid, $10/month
  2. Coding Beauty Assistant: free, $10 per month for more features
  3. Tabnine: has free version, $12 per month

7. CSS classname intellisense extensions

Powerful bunch of extensions for working with CSS classes.

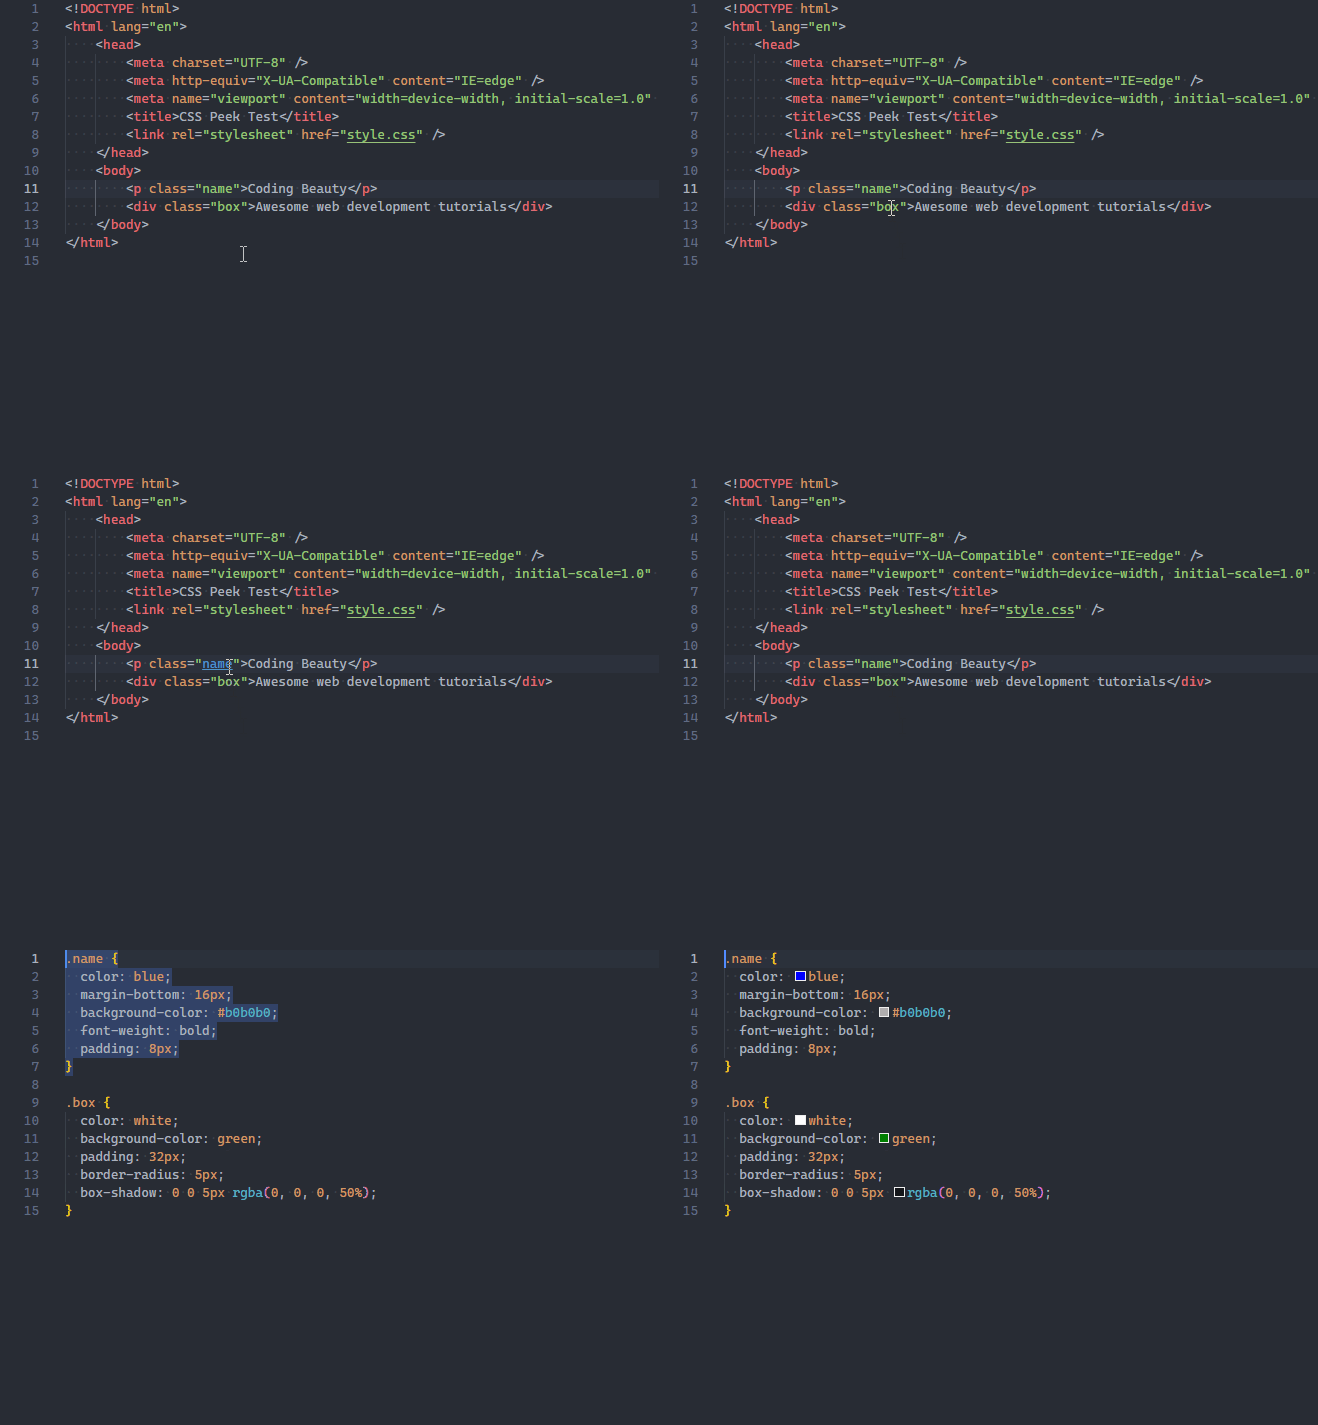
CSS Peek lets you quickly view the CSS style definitions for various class names and IDs assigned in HTML.

The CSS Peek extension for Visual Studio Code.

Just hold down Ctrl and hover over a class name or ID to quickly peek at its definition:

A demo of the three ways to use CSS Peek.

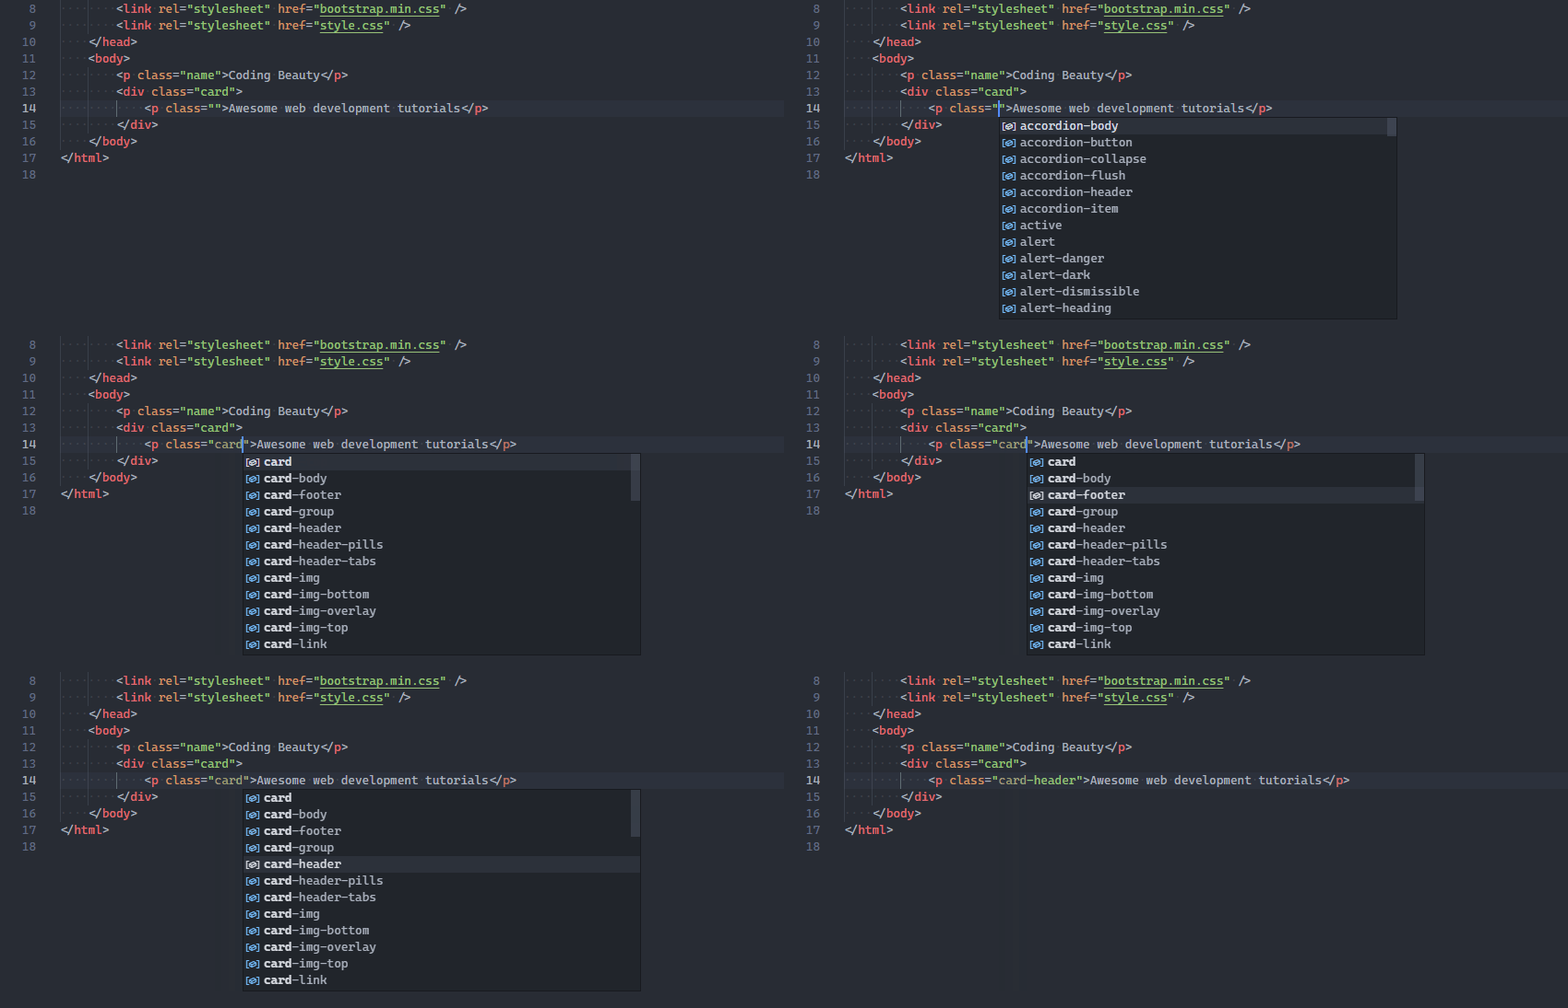
Intellisense for CSS Class Names in HTML works hand-in-hand with CSS Peek.

To provide code completion for the HTML class attribute from existing CSS definitions found in the current workspace.

You’ll appreciate the benefits of this extension when using third-party CSS libraries containing hundreds of classes.

And when you install Tailwind CSS IntelliSense, you get the power of CSS classname peek and auto-completion in Tailwind:

8. JavaScript (ES6) Code Snippets

As the name suggests, this is an extension that comes fully loaded with heaps of time-saving code snippets for JavaScript, in ES6 syntax.

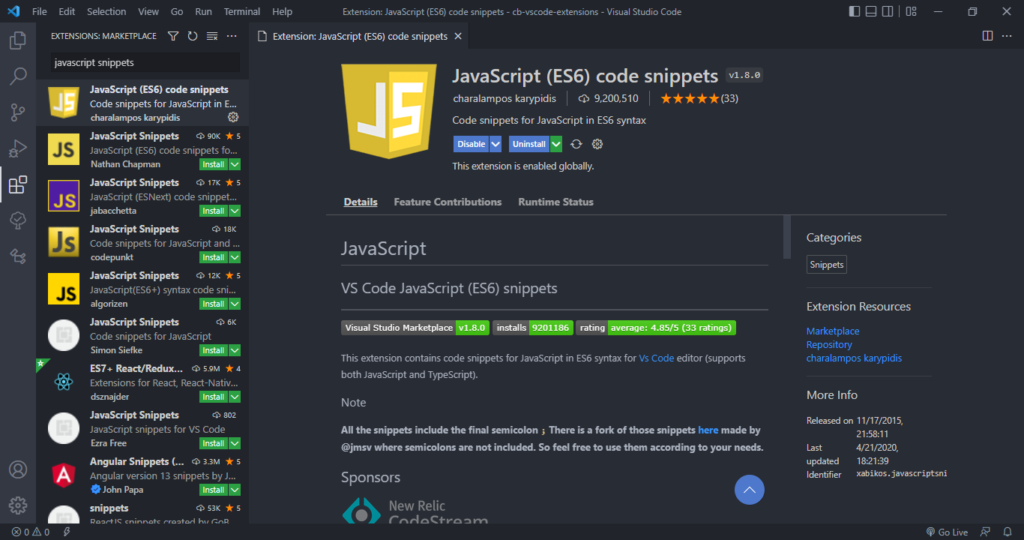
JavaScript (ES6) Code Snippets Extension for Visual Studio Code.

Here’s a demo where the imp and imd snippets from this extension are used to quickly import two modules with ES6 syntax.

A demo of how to use the JavaScript (ES6) Code Snippets extension.

9. Visual Studio Intellicode

IntelliCode is another powerful AI tool that produces smart code completion recommendations that make sense in the current code context.

It does this using an AI model that has been trained on thousands of popular open-source projects on GitHub.

The Visual Studio Intellicode extension for Visual Studio Code.

When you type the . character to access an object method or fields, IntelliCode will suggest a list of members that are likely to be used in the present scenario. The items in the list are denoted using a star symbol, as shown in the following demo.

IntelliCode is available for JavaScript, TypeScript, Python, and several other languages.

10. VSCode Icons

Icon packs are available to customize the look of files of different types in Visual Studio Code. They enhance the look of the application and make it easier to identify and distinguish files of various sorts.

VSCode Icons is one the most popular icon pack extensions, boasting a highly comprehensive set of icons and over 11 million downloads.

vscode-icons extension for Visual Studio Code.

It goes beyond file extension differentiation, to provide distinct icons for files and folders with specific names, including package.json, node_modules and .prettierrc.

A select list of the icons provided by vscode-icons.

Final thoughts

These are 10 essential extensions that aid web development in Visual Studio Code. Install them now to boost your developer productivity and raise your quality of life as a web developer.

Stop using double negatives or nobody will understand your code

This is a big mistake many developers make that makes code cryptic and unreadable.

Don’t do this:

JavaScript
// ❌ Bad: negative name const isNotVisible = doStuff(); const isDisabled = doStuff(); const isNotActive = doStuff(); const hasNoAccess = doStuff(); // ❌ Double negation console.log(!isNotVisible); console.log(!isDisabled); console.log(!isNotActive); console.log(!hasNoAccess);

Double negatives like this makes it much harder to think about the logic and conditionals in your code.

It’s much better to name them positively:

JavaScript
// ✅ Good: positive name const isVisible = doStuff(); const isEnabled = doStuff(); const isActive = doStuff(); const hasAccess = doStuff(); // ✅ Clear and readable console.log(isVisible); console.log(isEnabled); console.log(isActive); console.log(hasAccess);

There is no indirection and your brain takes zero time to parse this.

Just imagine the pain of trying to understand this:

I didn’t not forget about not being unable to use the account.

Lol I couldn’t even understand it myself even though I made it up.

Compare to the far more natural way you’d expect from a sensible human:

I remembered that I could use the account.

Control flow negation

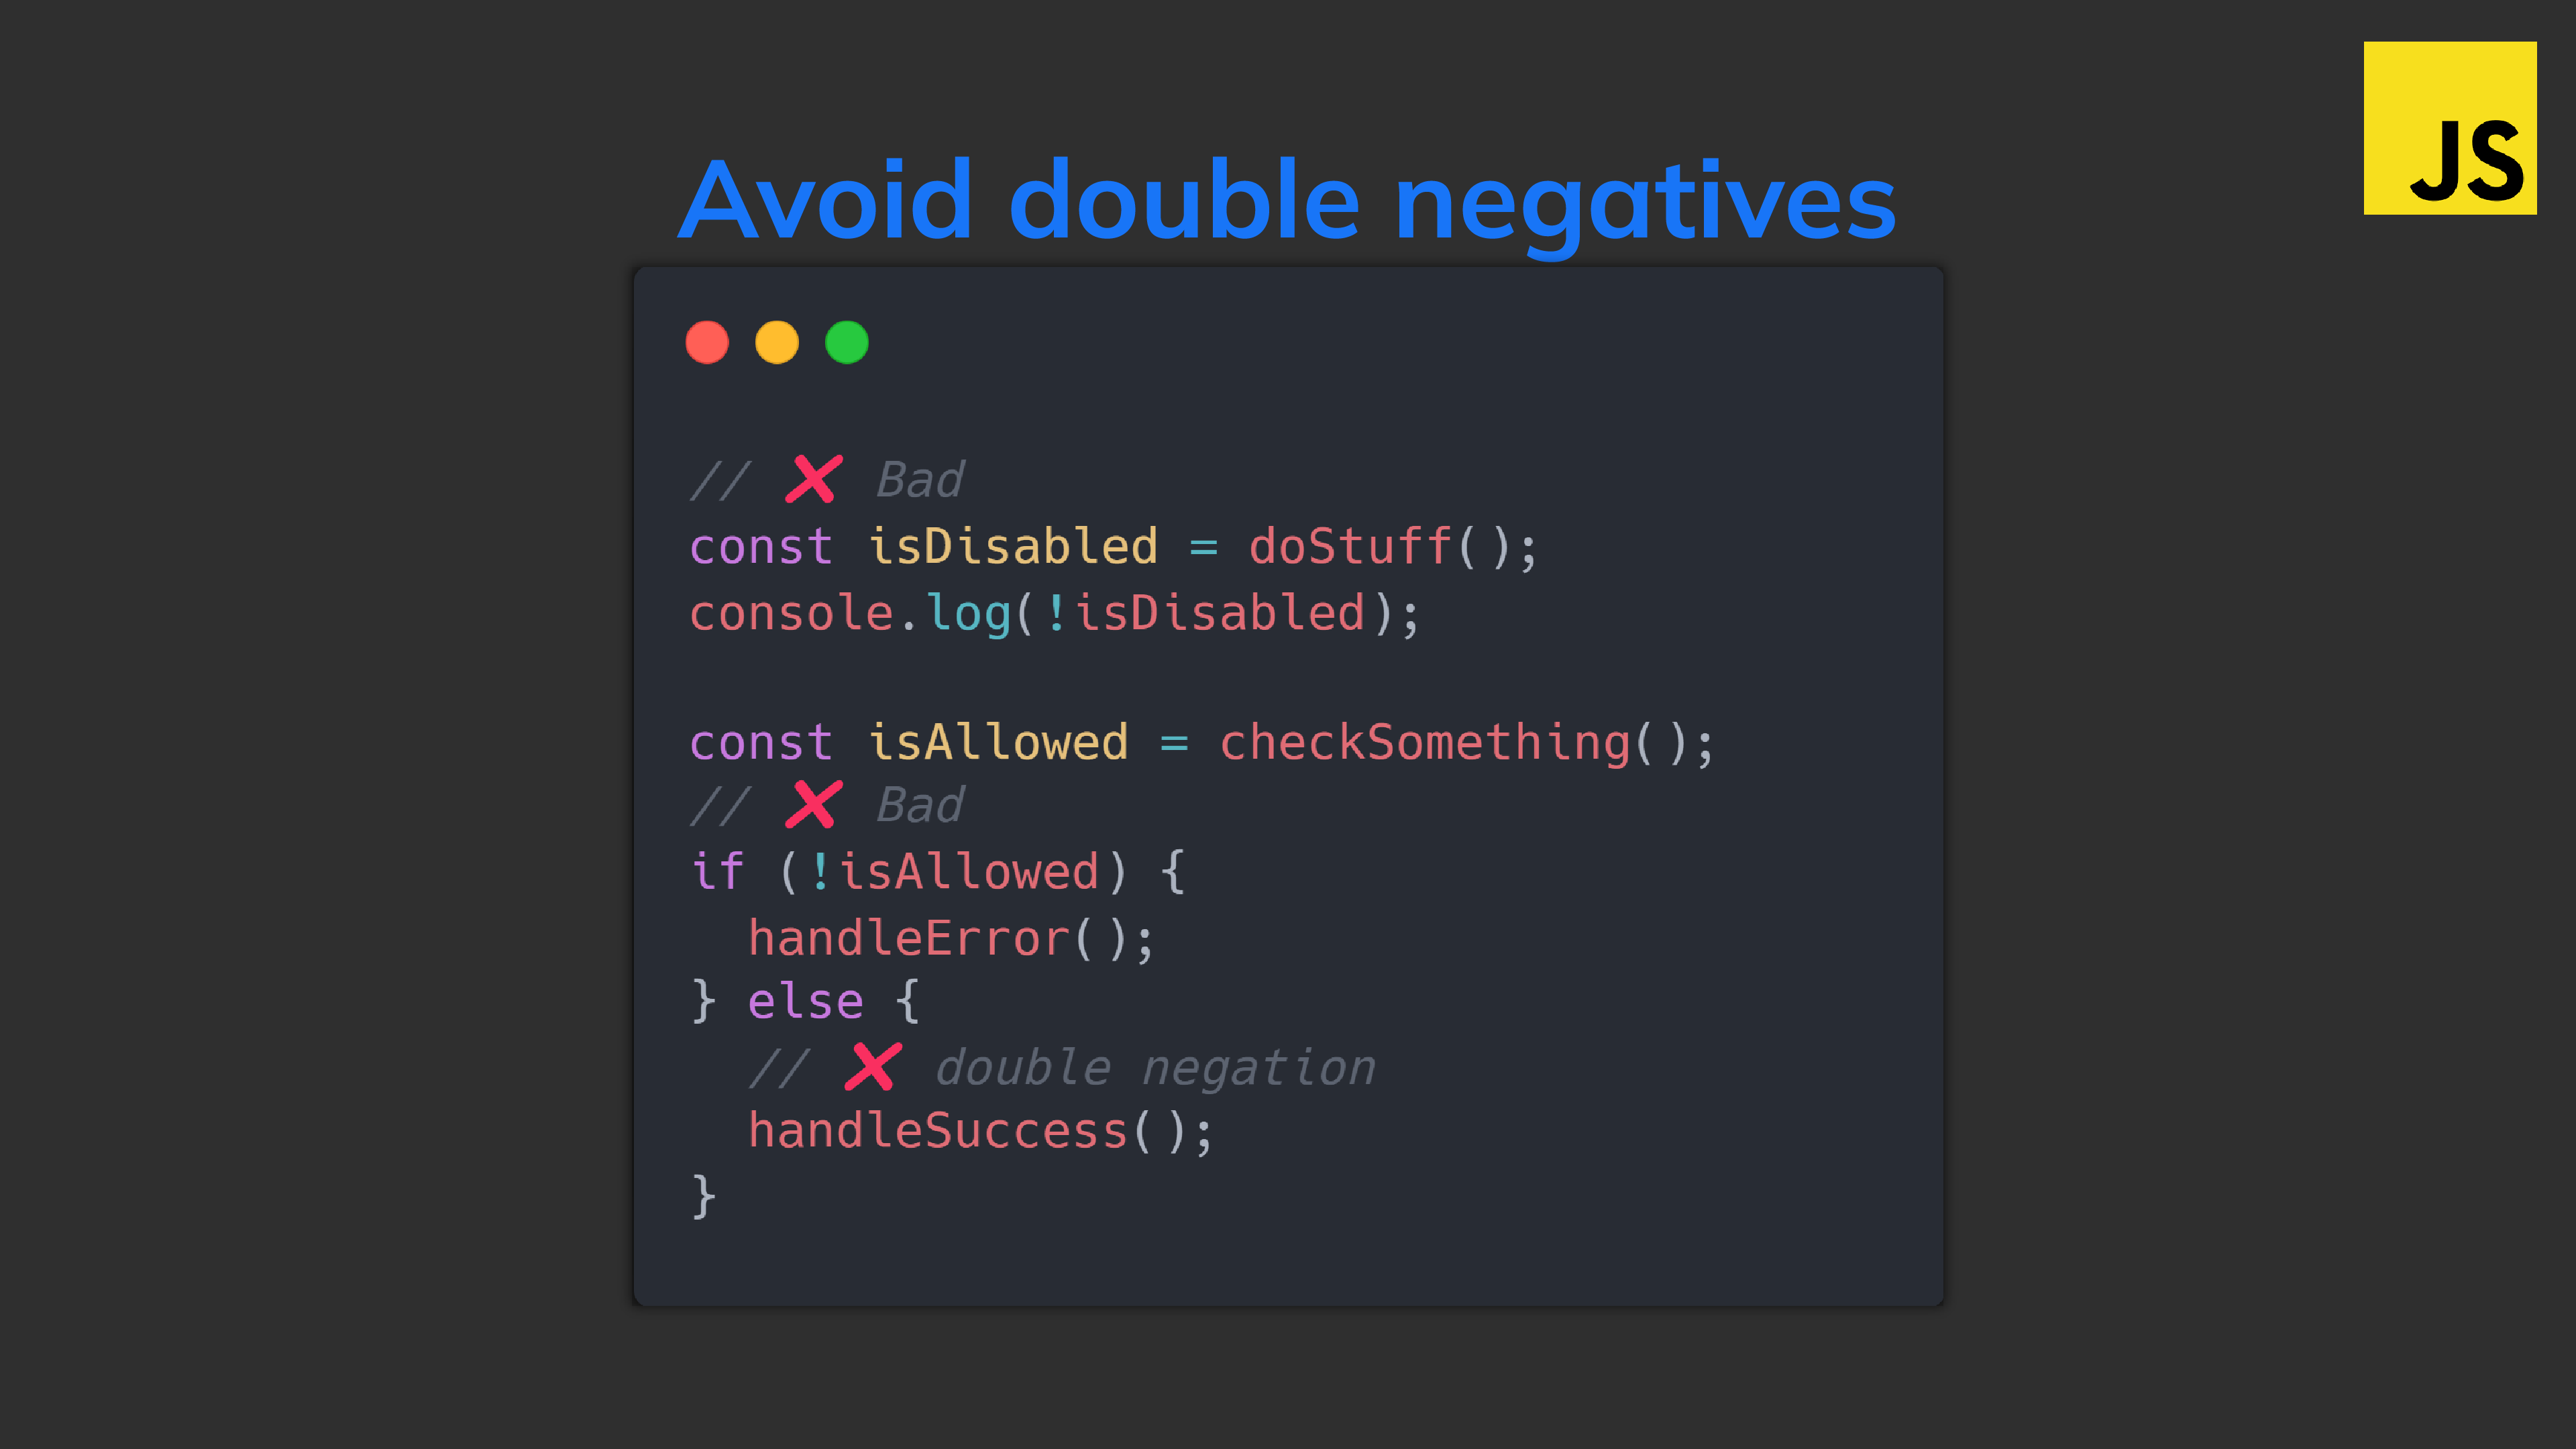
This is a more delicate form of double negation you need to know about:

JavaScript
const isAllowed = checkSomething(); // ❌ Bad if (!isAllowed) { handleError(); } else { // ❌ double negation! handleSuccess(); }

It’s double negation because we’re checking for the negative first.

So the else clause becomes a not of this negative.

Better:

JavaScript
const isAllowed = checkSomething(); // ✅ Fix: invert the if if (isAllowed) { handleSuccess() } else { handleError(); }

The same thing for equality checks:

JavaScript
// ❌ Double negation if (value !== 0) { doError(); } else { doSuccess(); } // ✅ Better if (value === 0) { doSuccess(); } else { doError(); }

Even when there’s no positive condition you can leave it blank — to keep the negative part in the else:

JavaScript
const hasAlreadyFetched = false; if (hasAlreadyFetched) { // nothing to do } else { doSomething(); }

This is great for expressions that are awkward to negate, like instanceof:

JavaScript
// ❌ Bad if (!(obj instanceof Person)) { doSomething(); } // ✅ if (obj instanceof Person) { } else { doSomething(); }

Exception: guard clauses

In guard clauses we deliberately deal with all the negatives first before the positive.

So we return early and avoid deeply nested ifs:

❌ Instead of this:

JavaScript
function sendMoney(account, amount) { if (account.balance > amount) { if (amount > 0) { if (account.sender === 'user-token') { account.balance -= amount; console.log('Transfer completed'); } else { console.log('Forbidden user'); } } else { console.log('Invalid transfer amount'); } } else { console.log('Insufficient funds'); } }

✅ We do this:

JavaScript
// ✅ Much cleaner function sendMoney(account, amount) { if (account.balance < amount) { console.log('Insufficient funds'); return; } if (amount <= 0) { console.log('Invalid transfer amount'); return; } if (account.sender !== 'user-token') { console.log('Forbidden user'); return; } account.balance -= amount; console.log('Transfer completed'); }

See, there’s no hard and fast rule. The end goal is readability: to make code as easy to understand in as little time as possible.

Flags always start out as false

Flags are boolean variables that control program flow.

A classic use case is running an action as long as the flag has a particular value:

JavaScript
let val = false; while (true); // do something that changes val if (val) { break; } }

In cases like this, always initialize the flag to false and wait for true.

Flags should always start out as false.

JavaScript
// ❌ waiting for true -> false let isRunning = true; while (true) { // processing... if (!isRunning) { break; } } // ✅ waiting for false -> true let hasStopped = false; while (true) { // processing... if (hasStopped) { break; } }

This makes so much sense when you understand flags to be a signal — that something is there.

Compound conditions

Negation also makes complex boolean expressions much harder to understand.

❌ Before:

JavaScript
if (!sleepy && !hungry) { console.log('time for gym👟'); } else { console.log('what to do now...'); // ❌ hard to understand when this runs }

This is where De Morgan’s Laws come in:

A powerful rule set for smoothly simplifying complex booleans and removing excessive negation:

JavaScript
let a: boolean; let b: boolean; !(a && b) === !a || !b; !(a || b) === !a && !b;

✅ So now:

JavaScript
if (!(sleepy || hungry)) { console.log('time for gym👟'); } else { console.log('what to do now...'); }

Now we can easily invert the logic as we did before:

JavaScript
if (sleepy || hungry) { console.log('what to do now...'); } else { console.log('time for gym👟'); }

It’s also structurally similar to the English in this way:

The first version was like:

(!a && !b)

It’s time for gym cause I’m not sleepy and I’m not hungry

After the refactor:

!(a || b):

It’s time for gym cause I’m not sleepy or hungry.

That’s how we’d typically say it.

Key points

  • Boolean variable names should be in the positive form. Exception: flags
  • Always check the positive case first in if-else statements. Exception: Guard clauses
  • Use De Morgan’s Laws to simplify negation in compound conditions.

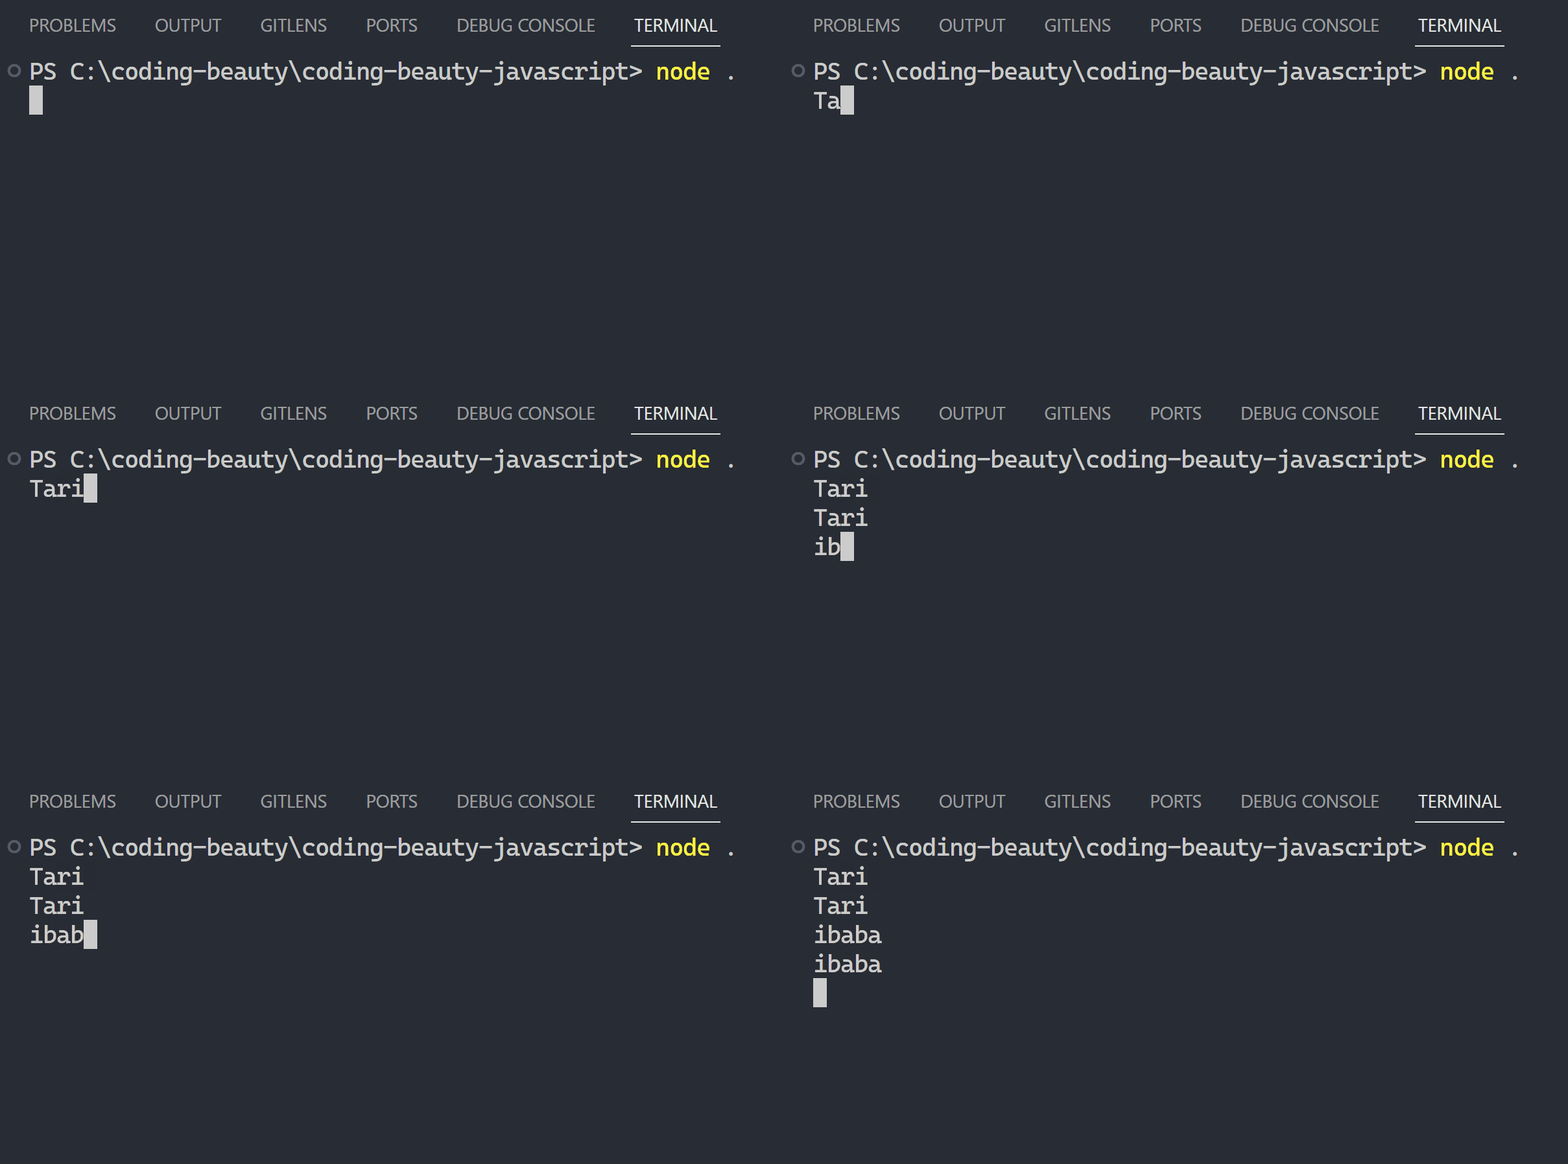
How to console.log WITHOUT newlines in JavaScript

This is a little-known way to console log without newline that many developers have never used.

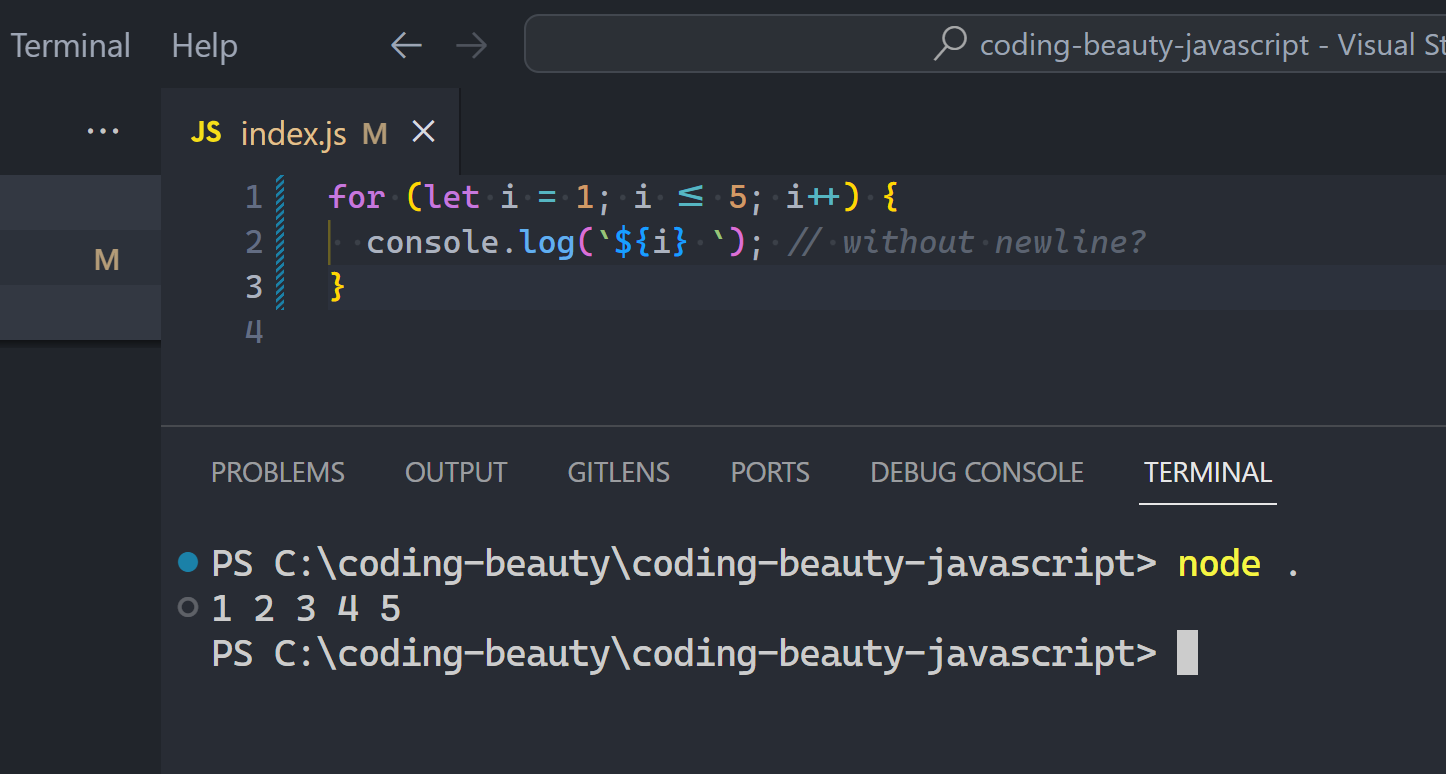
Let’s say we need to log in a loop like this:

JavaScript
for (let i = 1; i <= 5; i++) { // print number without newline } // Output: 1 2 3 4 5

❌ Unfortunately the normal way fails us:

So what do we do?

What we do: is process.stdout.write:

JavaScript
for (let i = 1; i <= 5; i++) { process.stdout.write(`${i} `); } // Output: 1 2 3 4 5

How is process.stdout.write different from console.log?

Well first of all, console.log IS process.stdout.write!

stdout is the fundamental way every CLI program logs output to the console.

That’s what it uses at its core:

JavaScript
Console.prototype.log = function() { this._stdout.write(util.format.apply(this, arguments) + '\n'); };

But this extra processing makes it so much better for formatting:

  • I can easily inspect objects with console.log without JSON.stringify:

But process.stdout.write fails miserably — it only accepts strings and Buffers:

But there’s something incredible only process.stdout.write can do:

Data streaming:

process.stdout is actually, a stream.

Streams represent data flow in Node.

  • Read streams — data coming from
  • Write streams — data going into
  • Duplex streams — both

Data’s flowing from the file read stream into the stdout stream.

It’s the same as this:

JavaScript
import fs from 'fs'; fs.createReadStream('codingbeautydev.txt').on( 'data', (chunk) => { process.stdout.write(chunk); } );

But pipe is much more natural for stream-to-stream data flow:

Letting you create powerful transformation pipelines like this:

JavaScript
import fs from 'fs'; import { Transform } from 'stream'; // ✅ duplex stream const uppercase = new Transform({ transform(chunk, encoding, callback) { callback(null, chunk.toString().toUpperCase()); }, }); fs.createReadStream('codingbeautydev.txt') .pipe(uppercase) .pipe(process.stdout);

process.stdin

process.stdin is the process.stdout‘s input counterpart — a readable stream for user input.

So see how with a single line I create a pipeline to reflect all my input to me:

JavaScript
process.stdin.pipe(process.stdout);

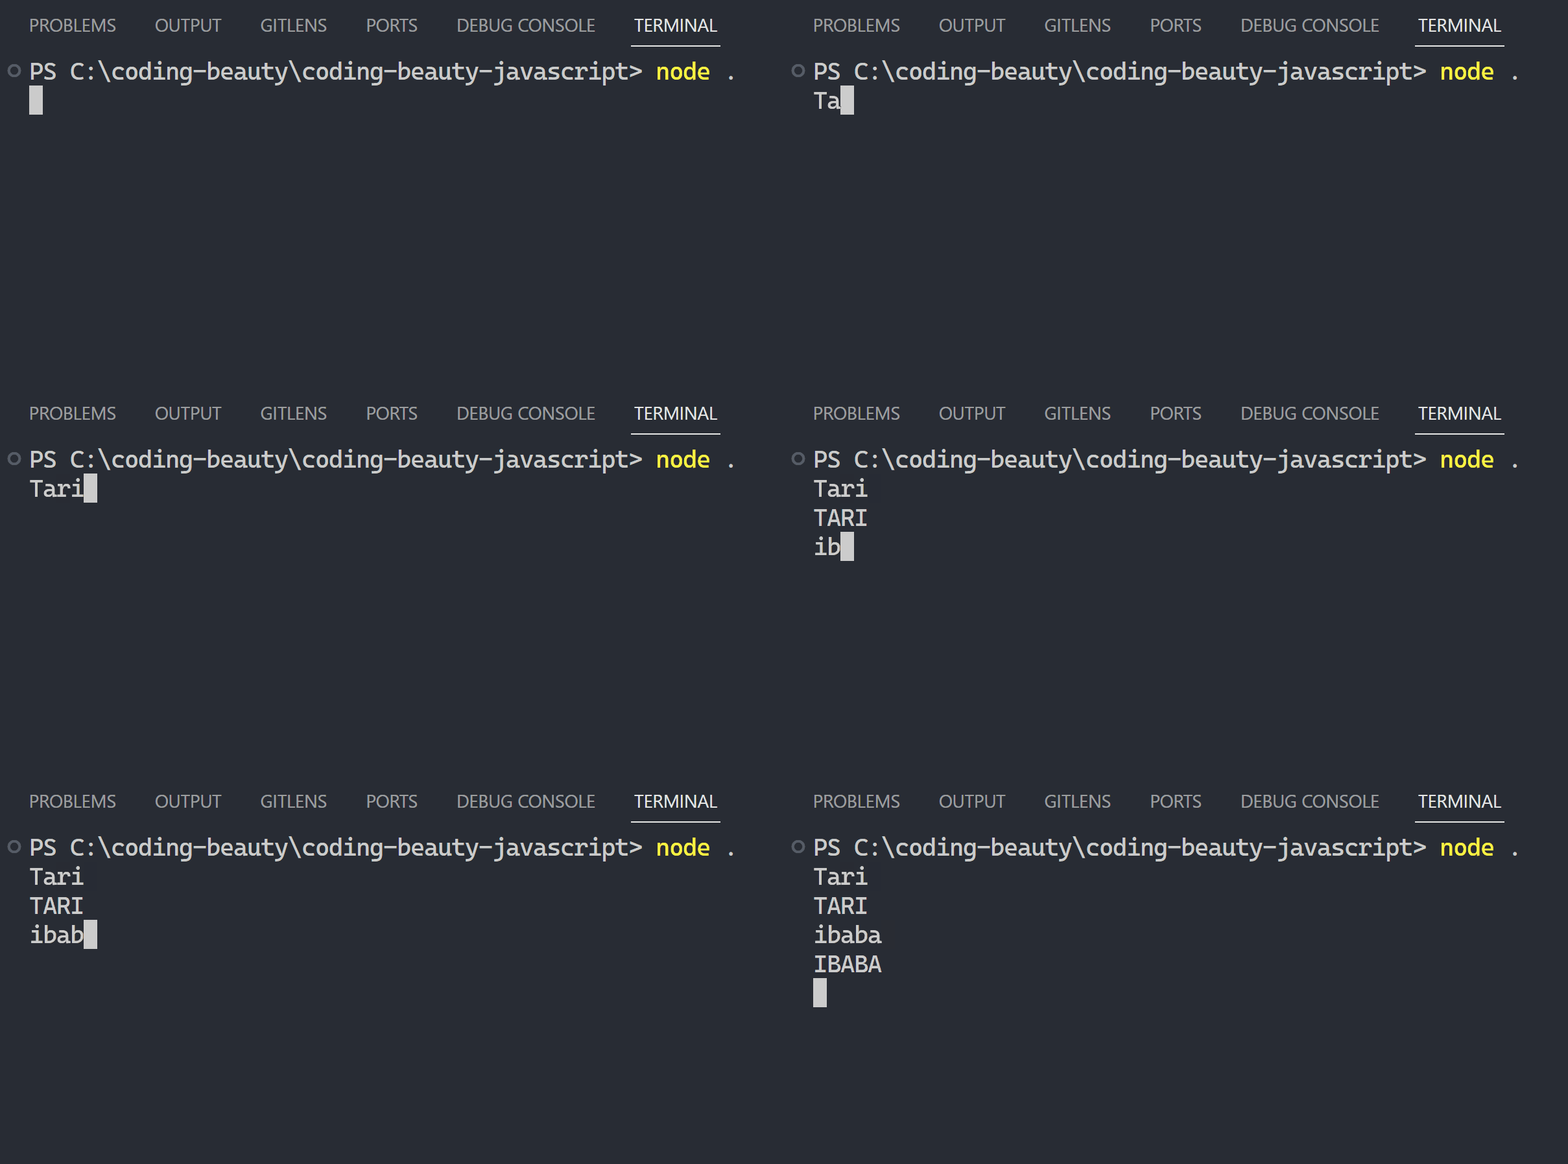
And when I insert the uppercase transformation into the pipeline:

JavaScript
import fs from 'fs'; import { Transform } from 'stream'; // ✅ duplex stream const uppercase = new Transform({ transform(chunk, encoding, callback) { callback(null, chunk.toString().toUpperCase()); }, }); process.stdin.pipe(uppercase).pipe(process.stdout);

process.stderr

Here to complete the standard stream trio.

  • console.logprocess.stdin
  • console.errorprocess.stderr

Probably also defined this way in Node:

JavaScript
Console.prototype.error = function() { this._stderr.write(util.format.apply(this, arguments) + '\n'); };
JavaScript
console.log('A normal log message'); console.error('An error message');

You can see the difference in the browser:

Although not much difference on Node:

These are 3 powerful streams that let you input, process, and output data creatively and intuitively.

10 one-liners that change how you think about JavaScript

Here’s something most JavaScript developers don’t know:

You can shorten any piece of code into a single line.

With one-liners I went from 17 imperative lines:

JavaScript
// ❌ 17 lines function extractRedirects(str) { let lines = str.split('\n'); let sourceDestinationList = []; for (let line of lines) { let sourceDestination = line.split(' '); let source = sourceDestination[2]; let destination = sourceDestination[3]; let redirectObj = { source: source, destination: destination, permanent: true, }; sourceDestinationList.push(redirectObj); } return sourceDestinationList; }

To a single functional statement:

JavaScript
// ✅ 1 line -- formatted const extractRedirects = (str) => str .split('\n') .map((line) => line.split(' ')) .map(([, , source, destination]) => ({ source, destination, permanent: true, }));

The second is so much cleaner and elegant — you can clearly see how the data beautifully flows from input to output with no breaks.

Let’s look at 10 unconventional JS one-liners that push you to the limits of what’s possible with JavaScript.

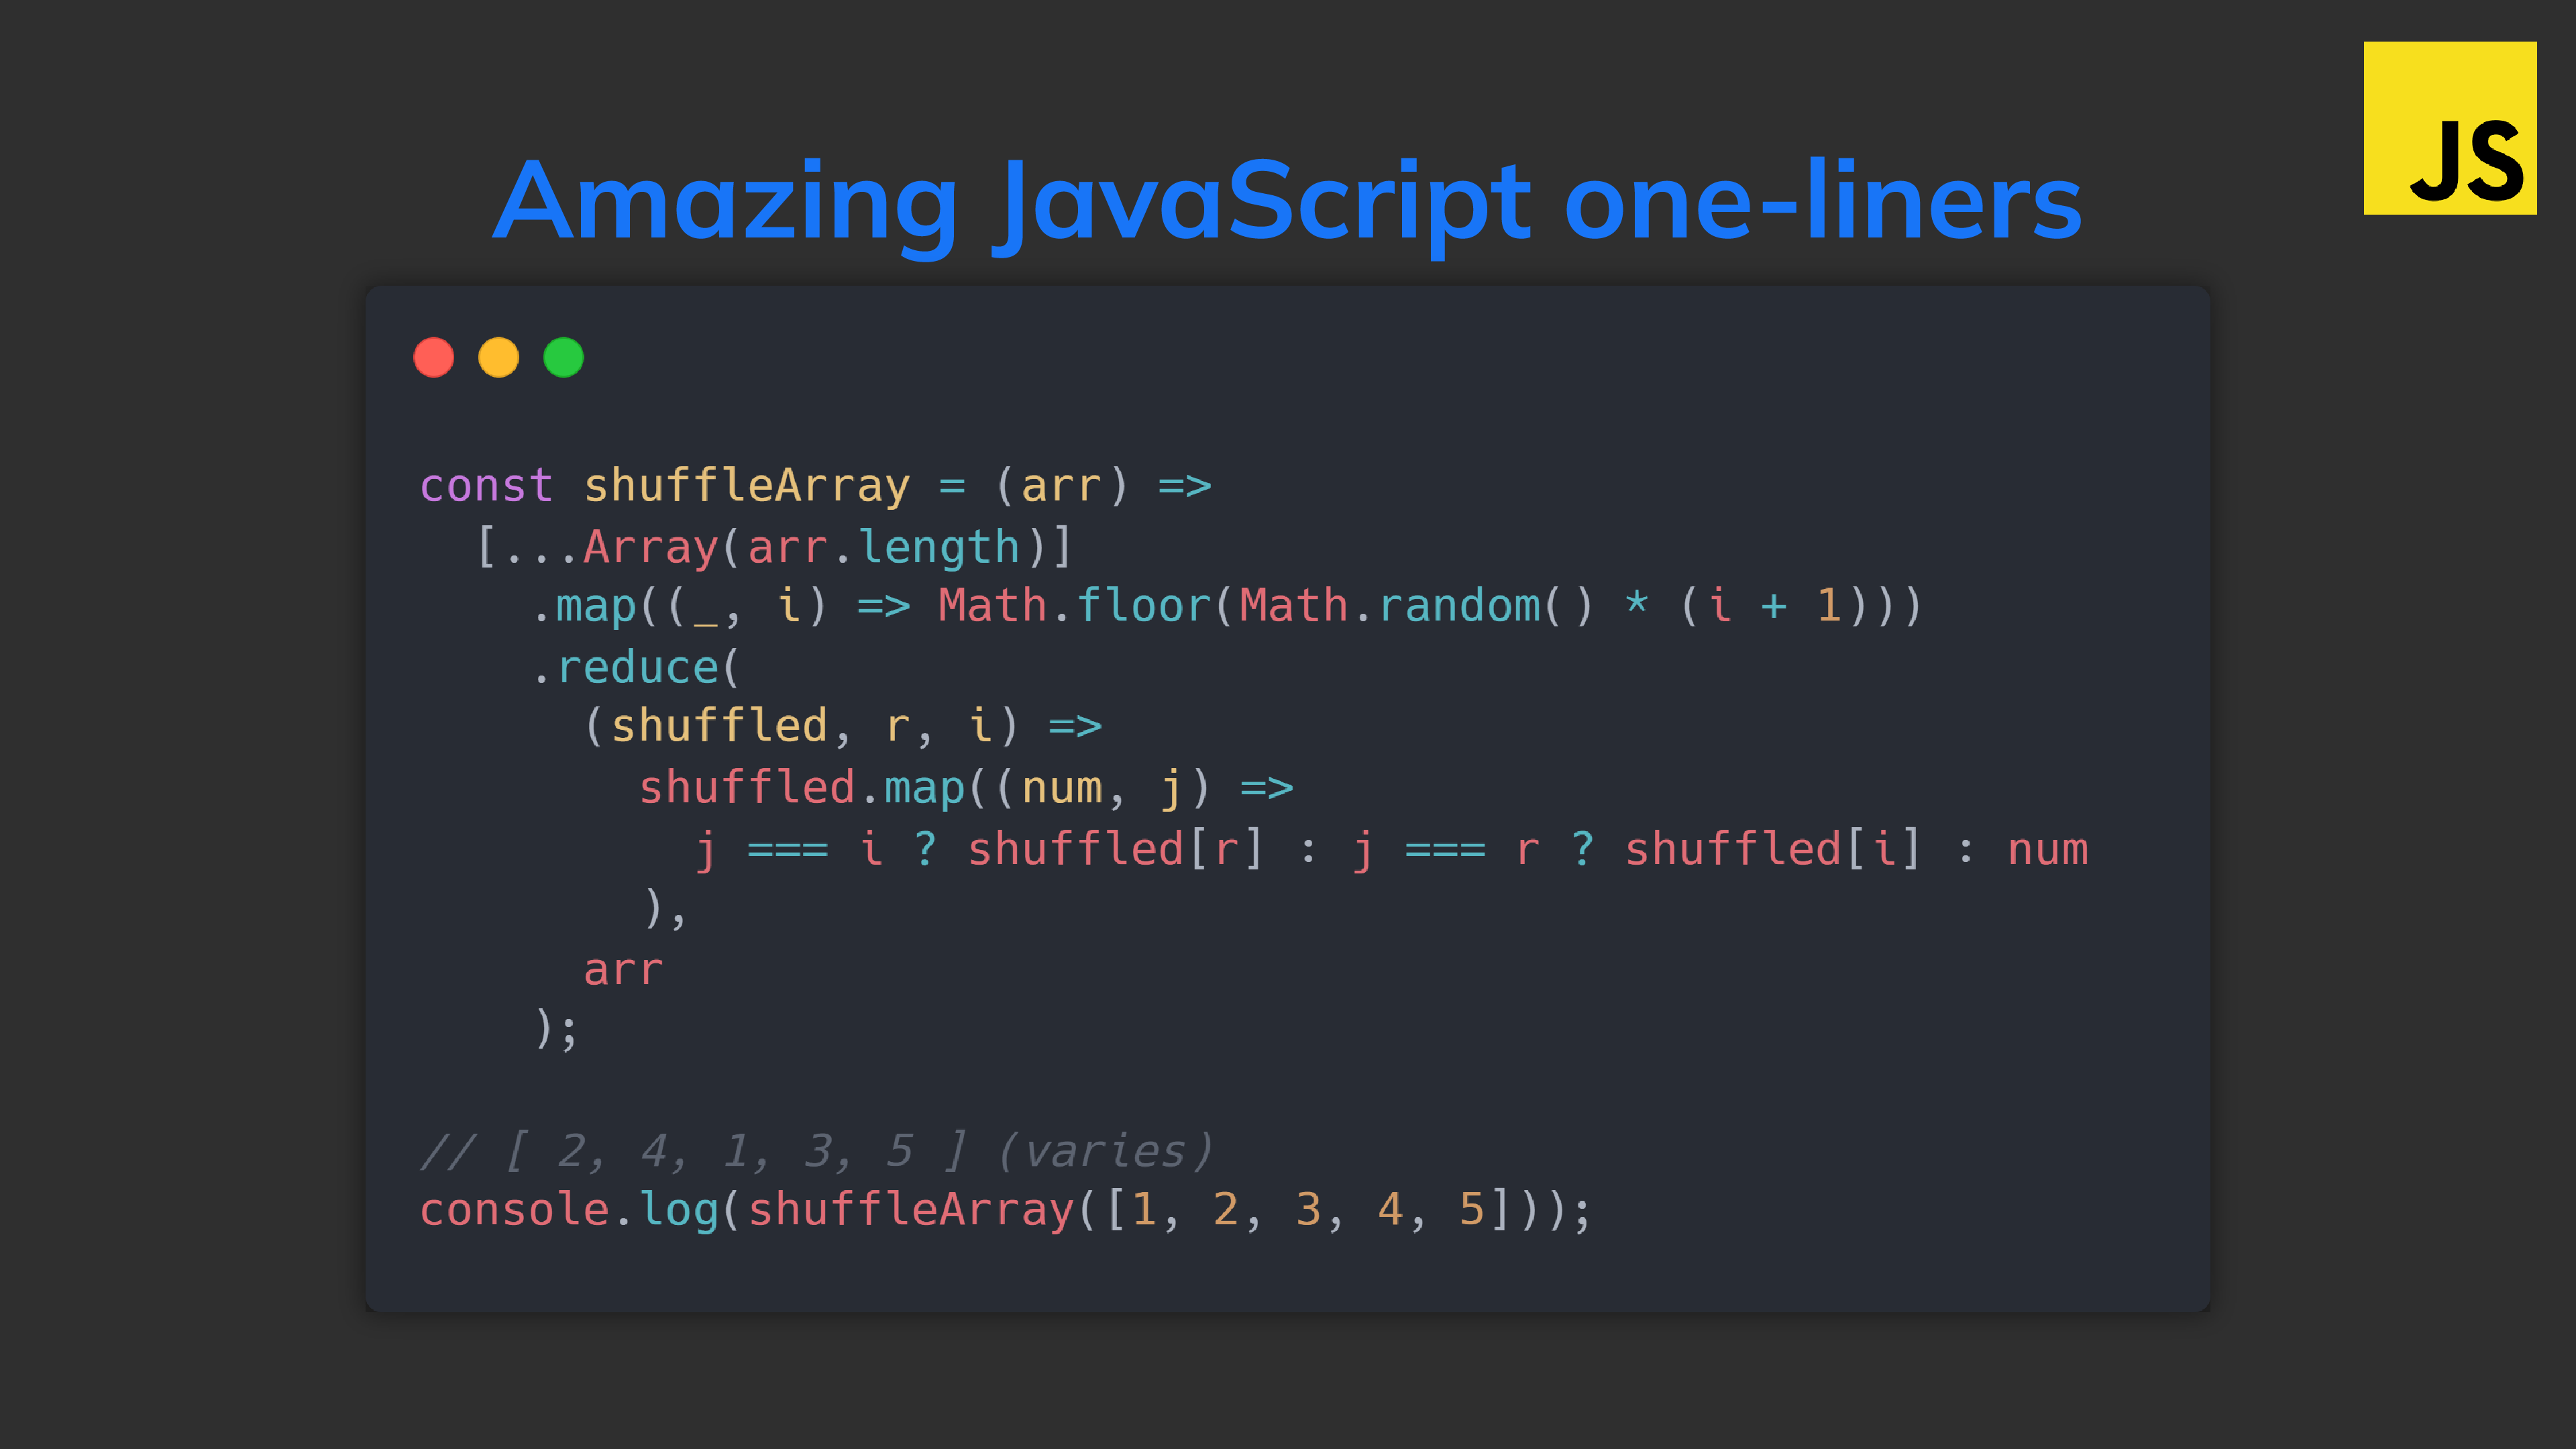
1. Shuffle array

What do you make of this:

JavaScript
// ✅ Standard Fisher-Yates shuffle, functional version const shuffleArray = (arr) => [...Array(arr.length)] .map((_, i) => Math.floor(Math.random() * (i + 1))) .reduce( (shuffled, r, i) => shuffled.map((num, j) => j === i ? shuffled[r] : j === r ? shuffled[i] : num ), arr ); // [ 2, 4, 1, 3, 5 ] (varies) console.log(shuffleArray([1, 2, 3, 4, 5]));

The most complex thing for me was figuring out the immutable no-variable version of the swap — and reduce() has a way of making your head spin.

Then there’s this too:

JavaScript
const shuffleArray = (arr) => arr.sort(() => Math.random() - 0.5); const arr = [1, 2, 3, 4, 5]; console.log(shuffleArray(arr));

I see it everywhere but it’s terrible for getting a truly uniform distribution.

2. Reverse string

❌ 8 lines:

JavaScript
const reverseString = (str) => { let reversed = ''; for (let i = str.length - 1; i >= 0; i--) { const ch = str[i]; reversed += ch; } return reversed; }; const reverse = reverseString('Indestructible!'); console.log(reverse); // !elbitcurtsednI

✅ 1 line:

JavaScript
const reverseString = (str) => str.split('').reverse().join(''); const reverse = reverseString('Indestructible!'); console.log(reverse); // !elbitcurtsednI

3. Group array by ID

Grouping arrays by a specific object property:

JavaScript
const groupBy = (arr, groupFn) => arr.reduce( (grouped, obj) => ({ ...grouped, [groupFn(obj)]: [ ...(grouped[groupFn(obj)] || []), obj, ], }), {} ); const fruits = [ { name: 'pineapple🍍', color: '🟡' }, { name: 'apple🍎', color: '🔴' }, { name: 'banana🍌', color: '🟡' }, { name: 'strawberry🍓', color: '🔴' }, ]; const groupedByNameLength = groupBy( fruits, (fruit) => fruit.color ); console.log(groupedByNameLength);

4. Generate random UUID

So many language concepts working together here:

JavaScript
const generateRandomUUID = (a) => a ? (a ^ ((Math.random() * 16) >> (a / 4))).toString(16) : ([1e7] + -1e3 + -4e3 + -8e3 + -1e11).replace( /[018]/g, generateRandomUUID ); console.log(generateRandomUUID()); // f138f635-acbd-4f78-9be5-ca3198c4cf34 console.log(generateRandomUUID()); // 8935bb0d-6503-441f-bb25-7bc685b5b5bc

There’s basic arithmetic, powers, random values, methods, bit-shifting, regexes, callback functions, recursion, exponentiation… it’s perfection.

5. Generate random hex color

1 line to generate a random hex color:

JavaScript
const randomHexColor = () => `#${Math.random().toString(16).slice(2, 8).padEnd(6, '0')}`; console.log(randomHexColor()); // #7a10ba (varies) console.log(randomHexColor()); // #65abdc (varies)

6. Array equality

Check array equality with a one-liner…

❌ 11 lines:

JavaScript
const areEqual = (arr1, arr2) => { if (arr1.length === arr2.length) { for (const num of arr1) { if (!arr2.includes(num)) { return false; } } return true; } return false; };

✅ 1 line:

JavaScript
const areEqual = (arr1, arr2) => arr1.sort().join(',') === arr2.sort().join(',');

Or✅:

JavaScript
// For more complex objects // and sort() will probably have a defined callback const areEqual = (arr1, arr2) => JSON.stringify(arr1.sort()) === JSON.stringify(arr2.sort());

7. Remove duplicates from array

Shortest way to remove duplicates from an array?

❌ 9 lines:

JavaScript
const removeDuplicates = (arr) => { const result = []; for (const num of arr) { if (!result.includes(num)) { result.push(num); } } return result; }; const arr = [1, 2, 3, 4, 5, 3, 1, 2, 5]; const distinct = removeDuplicates(arr); console.log(distinct); // [1, 2, 3, 4, 5]

✅ 1 line:

JavaScript
const arr = [1, 2, 3, 4, 5, 3, 1, 2, 5]; const distinct = [...new Set(arr)]; console.log(distinct); // [1, 2, 3, 4, 5]

This used to be like the only reason anyone ever cared for Sets — until we got these 7 amazing new methods.

8. Validate email

Email validation one-liners are all about that regex:

JavaScript
const isValidEmail = (email) => /^[\w-]+(\.[\w-]+)*@([\w-]+\.)+[a-zA-Z]{2,7}$/.test( email ); console.log(isValidEmail('[email protected]')); // true console.log(isValidEmail('[email protected]')); // false console.log(isValidEmail('codingbeautydev.com')); // false console.log(isValidEmail('hi@')); // false console.log(isValidEmail('hi@codingbeautydev&12')); // false

But I’ve seen monstrosities like this (more comprehensive):

JavaScript
const isValidEmail = (email) => /^(([^<>()[\]\\.,;:\s@\"]+(\.[^<>()[\]\\.,;:\s@\"]+)*)|(\".+\"))@((\[[0-9]{1,3}\.[0-9]{1,3}\.[0-9]{1,3}\.[0-9]{1,3}\])|(([a-zA-Z\-0-9]+\.)+[a-zA-Z]{2,}))$/.test( email ); console.log(isValidEmail('[email protected]')); // true console.log(isValidEmail('[email protected]')); // false console.log(isValidEmail('codingbeautydev.com')); // false console.log(isValidEmail('hi@')); // false console.log(isValidEmail('hi@codingbeautydev&12')); // false

And even these (most comprehensive) — can you even see it:

JavaScript
const isValidEmail = (email) => /(?:[a-z0-9!#$%&'*+/=?^_`{|}~-]+(?:\.[a-z0-9!#$%&'*+/=?^_`{|}~-]+)*|"(?:[\x01-\x08\x0b\x0c\x0e-\x1f\x21\x23-\x5b\x5d-\x7f]|\\[\x01-\x09\x0b\x0c\x0e-\x7f])*")@(?:(?:[a-z0-9](?:[a-z0-9-]*[a-z0-9])?\.)+[a-z0-9](?:[a-z0-9-]*[a-z0-9])?|\[(?:(?:25[0-5]|2[0-4][0-9]|[01]?[0-9][0-9]?)\.){3}(?:25[0-5]|2[0-4][0-9]|[01]?[0-9][0-9]?|[a-z0-9-]*[a-z0-9]:(?:[\x01-\x08\x0b\x0c\x0e-\x1f\x21-\x5a\x53-\x7f]|\\[\x01-\x09\x0b\x0c\x0e-\x7f])+)\])/.test( email ); console.log(isValidEmail('[email protected]')); // true console.log(isValidEmail('[email protected]')); // false console.log(isValidEmail('codingbeautydev.com')); // false console.log(isValidEmail('hi@')); // false console.log(isValidEmail('hi@codingbeautydev&12')); // false

It’s probably about being as thorough as possible – let’s say the 1st one catches like 95% of wrong emails, then the 2nd like 99%.

The last one here is actually the official RFC 2822 standard for validating emails – so we’re looking at 100% coverage.

9. Convert JSON to Maps

JavaScript
const jsonToMap = (json) => new Map(Object.entries(JSON.parse(json))); const json = '{"user1":"John","user2":"Kate","user3":"Peter"}'; const map = jsonToMap(json); // Kate console.log(map.get('user2')); // Map(3) { 'user1' => 'John', 'user2' => 'Kate', 'user3' => 'Peter' } console.log(map);

10. Convert snake to camel case

Easily convert from snake casing to camel casing with zero temporary variables.

JavaScript
const snakeToCamelCase = (s) => s .toLowerCase() .replace(/(_\w)/g, (w) => w.toUpperCase().substr(1)); const str1 = 'passion_growth'; const str2 = 'coding_beauty'; console.log(snakeToCamelCase(str1)); // passionGrowth console.log(snakeToCamelCase(str2)); // codingBeauty

Final thoughts

Countless operations jam-packed into a single statement; A race from input start to output finish with no breaks, a free flow of high-level processing. A testament of coding ability and mastery.

This is the power and beauty of JavaScript one-liners.